
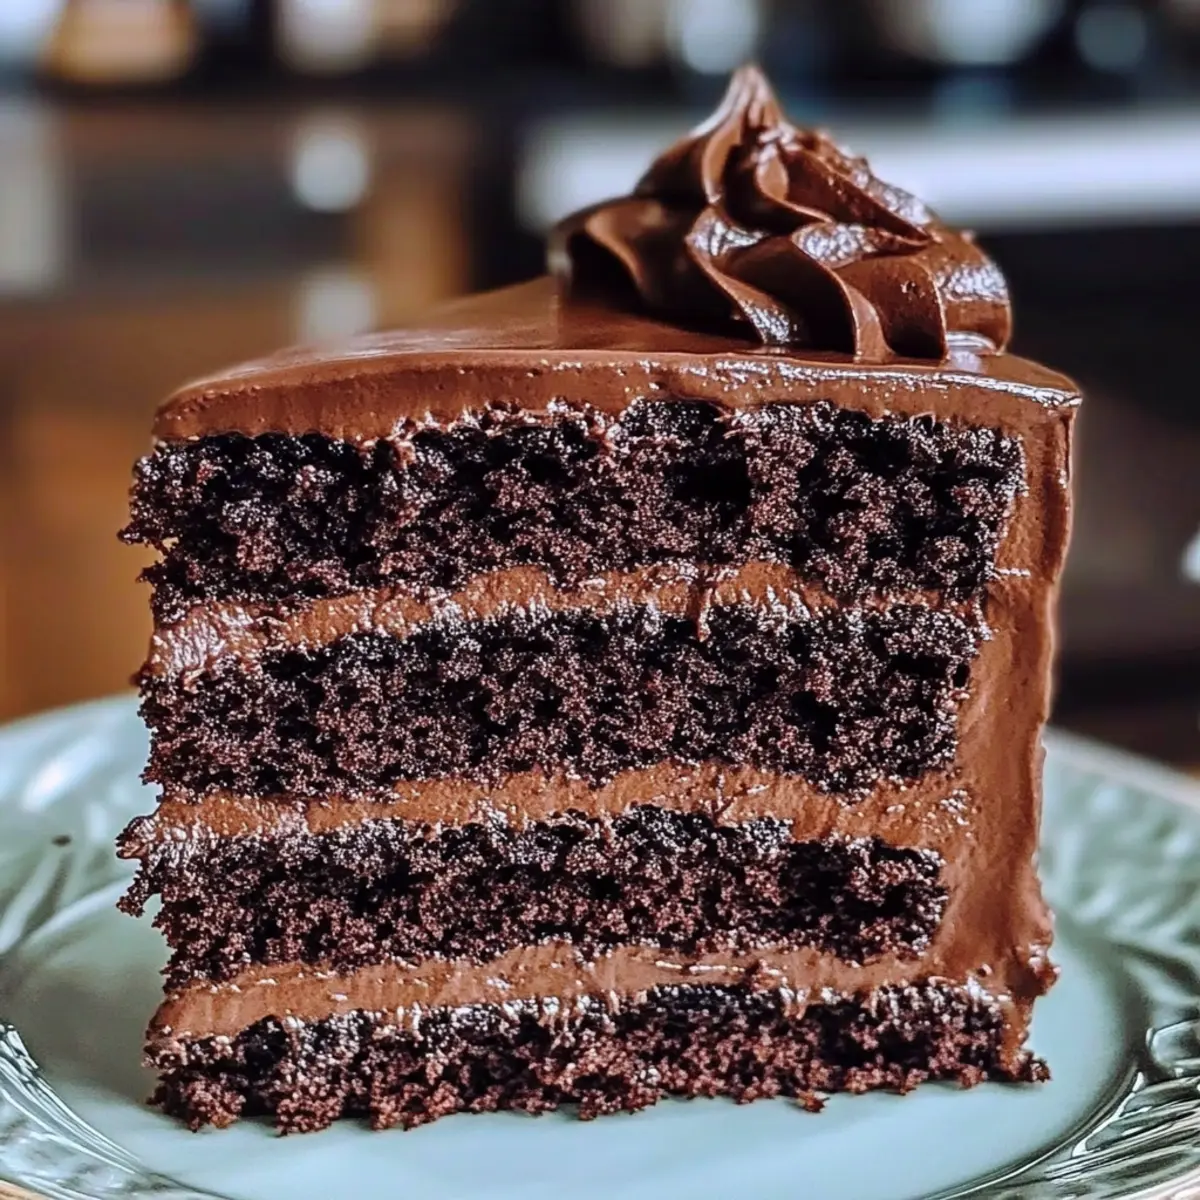
There’s something magical about savoring a slice of cake that transports you straight into the heart of a whimsical story, and my Decadent Matilda Chocolate Cake does just that. Inspired by the iconic film, this recipe delivers ultra-moist richness with each bite, blending dark chocolate and cocoa for a deep, satisfying flavor. Whether you’re planning a birthday celebration or a cozy movie night, this cake is the ultimate crowd-pleaser, sure to enchant anyone who loves velvety sweets. Plus, with a simple preparation process, you’ll find it a breeze to whip up this indulgent dessert. Are you ready to uncover the secret to a chocolate cake that feels like a hug in every slice?
Why Is This Cake So Irresistible?
Decadent Experience: The Matilda Chocolate Cake transforms your dessert spread into a truly cinematic moment, reflecting the joy of a classic film.
Ultimate Chocolate Fix: With layers of rich dark chocolate and semi-sweet chips, you’ll satisfy every chocolate craving with each delicious forkful.
Effortlessly Simple: It requires no advanced baking techniques—perfect for home bakers of all skill levels, making it accessible for those yearning to escape the fast-food routine.
Endless Versatility: Serve it plain or elevate it with fresh berries or whipped cream for a delightful contrast, ensuring everyone leaves with a smile.
Crowd-Pleasing Delight: Whether it’s a birthday party or a cozy night in, this cake promises to impress friends and family alike, making every occasion feel special.
Matilda Chocolate Cake Ingredients
• Perfect for your next baking adventure!
For the Cake
- Dark chocolate – Use high-quality chocolate (60-70% cocoa) for optimal rich flavor and moisture.
- Dutch-processed cocoa powder – Sift before use to enhance dark color and flavor depth.
- All-purpose flour – Forms the cake structure; no substitutions unless gluten-free is preferred.
- Granulated sugar – Sweetens the cake and helps achieve a beautiful golden-brown crust.
- Light brown sugar – Adds moisture and a hint of caramel flavor; light brown is best, but dark can substitute.
- Unsalted butter – Provides richness; use at room temperature for a smooth batter.
- Large eggs – Essential for structure and moisture; ensure they are at room temperature for easy mixing.
- Buttermilk – Contributes to a moist texture; regular milk with a tablespoon of vinegar can be a quick substitute.
- Baking soda and baking powder – Ensure they are fresh for proper leavening and a light cake texture.
- Espresso powder (optional) – A little boosts the chocolate flavor; omit if you prefer a simpler taste.
- Pure vanilla extract – Enhances the overall flavor; opt for pure over imitation for best results.
- Salt – Balances sweetness and elevates flavor profiles.
- Semi-sweet chocolate chips – Fold in for extra richness and delightful texture throughout the cake.
For the Ganache
- Heavy cream – Creates a luscious and silky chocolate frosting; can use half-and-half for a lighter option.
- Corn syrup (optional) – Adds a glossy finish to the ganache; skip if you prefer a matte look.
- Unsalted butter – Ensures a smooth consistency and complements the chocolate flavor.
- Vanilla extract – A touch adds a lovely aroma and depth to the ganache.
This Matilda Chocolate Cake is not just a dessert; it’s an experience waiting to be savored in every delicious bite!
Step‑by‑Step Instructions for Matilda Chocolate Cake
Step 1: Preheat and Prepare Pans
Start by preheating your oven to 350°F (175°C). While it’s heating, prepare two 9-inch round cake pans by lining the bottoms with parchment paper. This ensures an easy release of your Matilda Chocolate Cake once baked. Grease the sides lightly with butter or cooking spray to prevent sticking.
Step 2: Melt Chocolate
In a microwave-safe bowl, gently melt the dark chocolate in the microwave at 30-second intervals, stirring in between, until smooth. Alternatively, you can use a double boiler on medium heat. Once melted, set the chocolate aside to cool slightly while you prepare the cake batter.
Step 3: Cream the Butters and Sugars
In a large mixing bowl, beat the room temperature unsalted butter with granulated and light brown sugars using an electric mixer on medium speed. Mix until the batter is light and fluffy, which should take about 3-4 minutes. This step is crucial for adding air to your Matilda Chocolate Cake, ensuring a lovely rise during baking.
Step 4: Add Eggs and Vanilla
Add the large eggs to the creamed mixture, one at a time, blending well after each addition. Next, mix in pure vanilla extract until fully incorporated. The mixture should appear smooth and creamy, giving the cake a rich base and enhancing the overall flavor.
Step 5: Incorporate Melted Chocolate
Carefully add the slightly cooled melted dark chocolate to the wet mixture, mixing on low speed until well combined. This rich chocolate component will be the heart of your Matilda Chocolate Cake, providing a deep, fudgy flavor throughout the batter.
Step 6: Whisk Dry Ingredients
In a separate bowl, whisk together the all-purpose flour, Dutch-processed cocoa powder, baking soda, baking powder, optional espresso powder, and salt. Sifting these ingredients adds air, ensuring your cake rises beautifully and has a soft texture.
Step 7: Combine Wet and Dry Mixtures
Gradually add the dry ingredient mixture to the wet ingredients, alternating with the buttermilk. Start and end with the dry ingredients, mixing on low speed until just combined. Be cautious not to over-mix, as that can result in a dense Matilda Chocolate Cake.
Step 8: Fold in Chocolate Chips
Using a spatula, gently fold in the semi-sweet chocolate chips into the batter. This step adds delightful pockets of chocolate throughout your cake, which will melt beautifully as it bakes, enhancing that indulgent chocolate experience.
Step 9: Bake the Cakes
Divide the cake batter evenly between the prepared pans and smooth the tops with a spatula. Bake in the preheated oven for 30-35 minutes, or until a toothpick inserted into the center comes out clean. Let the cakes rise until they’re beautifully domed and the edges lightly pull away from the pans.
Step 10: Cool the Cakes
Once baked, remove the cakes from the oven and let them cool in the pans for about 10 minutes. Carefully run a knife around the edges to loosen them, then invert the cakes onto wire racks to cool completely. This step is crucial for achieving the correct texture before frosting.
Step 11: Make the Ganache
For the ganache, heat the heavy cream in a saucepan until just boiling. Remove from heat and pour it over chopped chocolate in a mixing bowl. Let it sit for a few minutes, then stir until smooth. Add unsalted butter, vanilla extract and corn syrup (if using) until fully blended to create a luscious frosting.
Step 12: Assemble the Cake
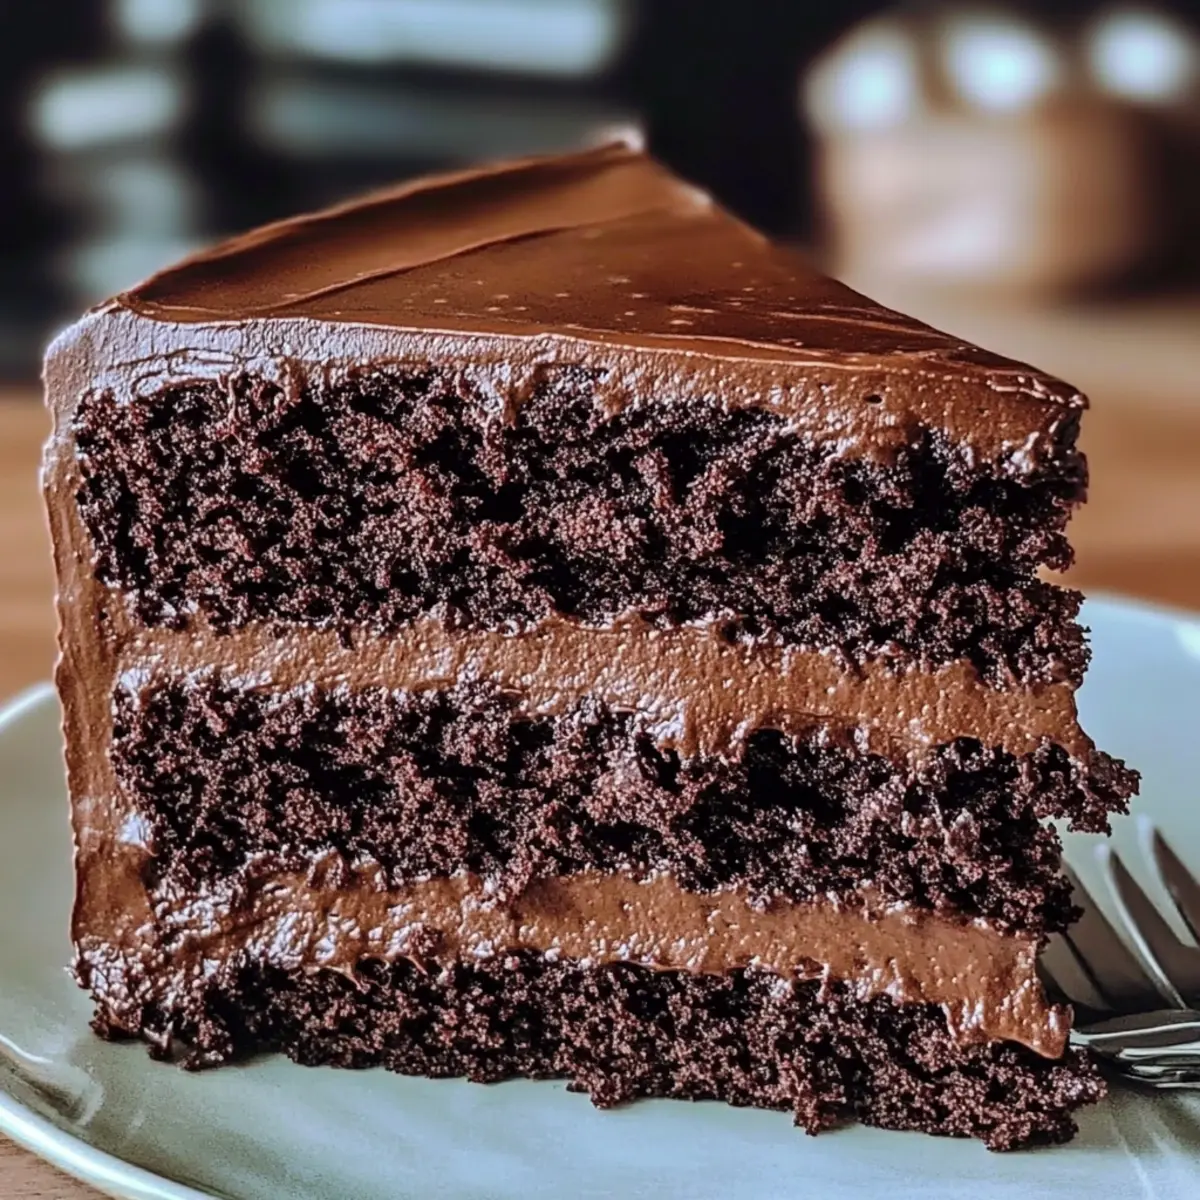
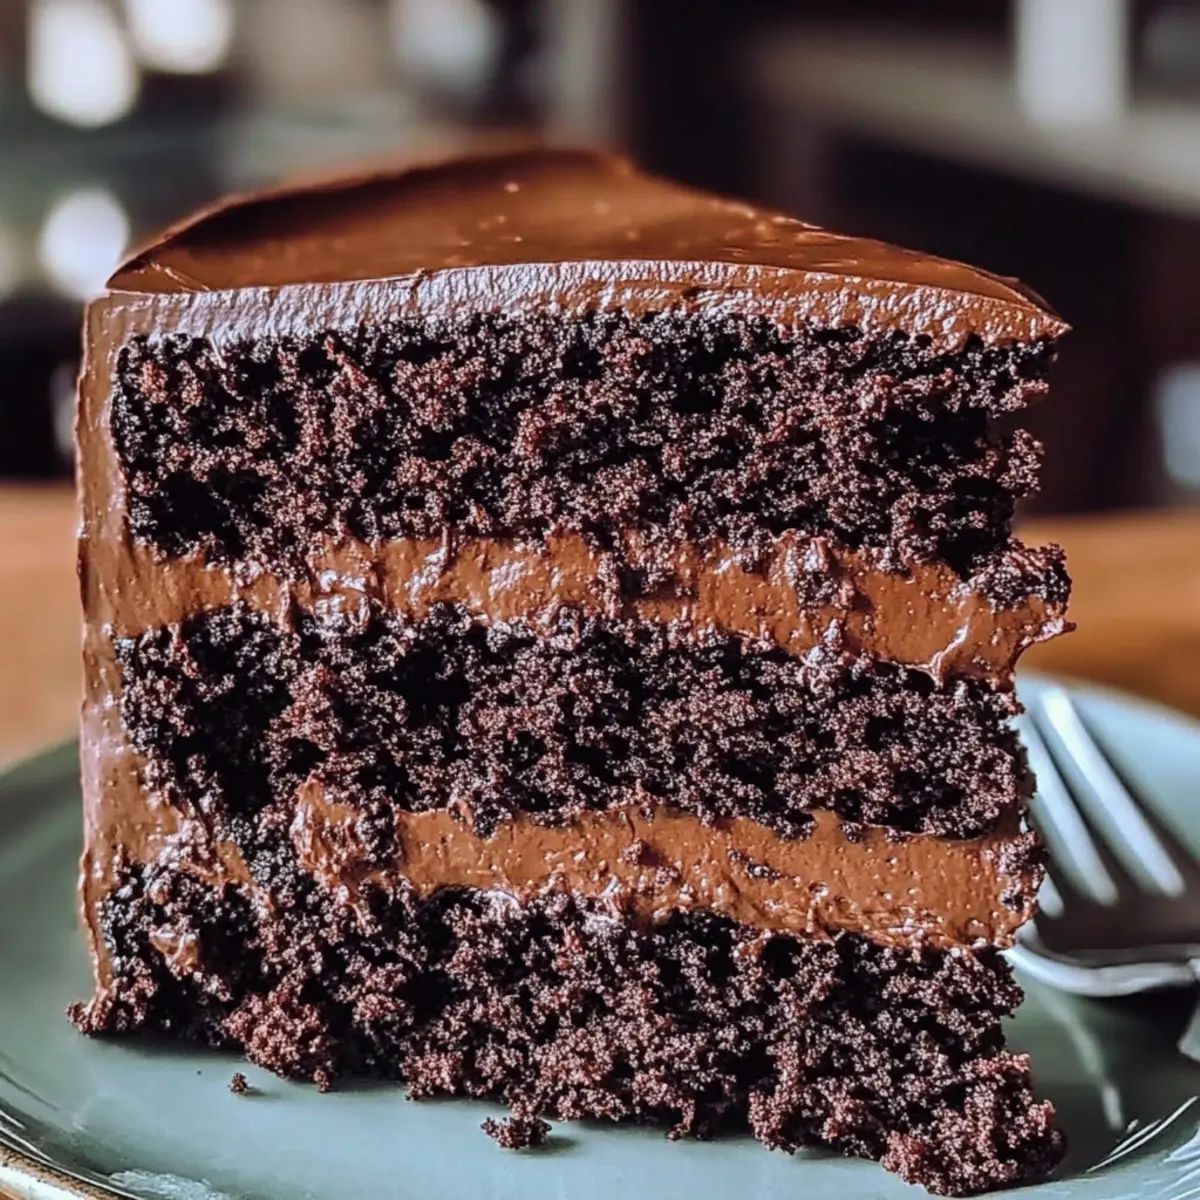
Once the cakes are completely cool, layer them with ganache spread between each layer. Pour the remaining ganache over the top, allowing it to drip down the sides for a stunning presentation. Your Matilda Chocolate Cake is now ready to serve!
How to Store and Freeze Matilda Chocolate Cake
-
Room Temperature: Store in an airtight container for up to 3 days to maintain optimal freshness. Ensure it is completely cooled before sealing to avoid moisture buildup.
-
Fridge: To extend freshness, refrigerate in a covered container for up to 1 week. This helps retain the cake’s moisture and flavor without compromising its fudgy texture.
-
Freezer: For longer storage, wrap individual slices or the whole cake tightly in plastic wrap and then foil. It can be frozen for up to 3 months, preserving the rich taste of the Matilda Chocolate Cake.
-
Reheating: Thaw frozen slices in the fridge overnight or at room temperature for a few hours. Gently warm them in the microwave for about 10-15 seconds if desired—perfect for a cozy treat!
Make Ahead Options
Preparing the Matilda Chocolate Cake ahead of time is a fantastic way to save precious moments, especially during busy celebrations! You can bake the cake layers up to 2 days in advance; simply wrap them tightly in plastic wrap once they are completely cool to ensure they stay moist. For the ganache, prepare it up to 24 hours ahead and store it in an airtight container in the fridge. Just reheat it gently before using to maintain that silky texture. When you’re ready to serve, layer the cooled cake with the ganache and let it set for a few minutes; this ensures you’ll delight in a decadent, homemade dessert that’s just as delicious and impressive as if it were freshly made!
What to Serve with Matilda Chocolate Cake?
Enhance your chocolate indulgence by pairing delectable sides and treats that complement the cake’s delightful richness.
-
Fresh Berries: The tartness of berries like raspberries or strawberries contrasts beautifully with the sweet, rich cake, providing a refreshing balance. A vibrant mix not only looks stunning but adds a burst of refreshing flavor.
-
Whipped Cream: A dollop of light and fluffy whipped cream adds a creamy texture that pairs perfectly with the fudgy layers of the cake, softening the chocolate’s intensity.
-
Ice Cream: Serve with a scoop of vanilla or chocolate ice cream for an extra indulgent dessert experience. The cold creaminess enhances the warm cake and can transform each bite into a luxurious treat.
-
Espresso: A rich cup of espresso is an excellent choice, as the coffee notes elevate the chocolate flavor, creating a match made in dessert heaven.
-
Chocolate Sauce: Drizzle homemade or store-bought chocolate sauce over each slice for those who crave an extra layer of chocolate bliss. It turns each piece into a decadent masterpiece.
-
Chocolate-Covered Strawberries: These add a lovely visual and flavorful touch, bridging the cake’s richness with fresh, juicy strawberries for extra sweetness and sophistication.
-
Sparkling Wine: A light sparkling wine or champagne can bring a delightful effervescence to the meal, cleansing the palate between each luscious bite.
-
Nutty Biscotti: For a little crunch, a few pieces of nutty biscotti provide a delightful texture and flavor contrast, perfect for dipping in your coffee or enjoying alongside the cake.
Each pairing amplifies the experience of enjoying your Matilda Chocolate Cake, turning your dessert into a celebration of flavors and textures!
Matilda Chocolate Cake Variations
Feel free to explore these delightful twists to make the Matilda Chocolate Cake your own!
-
Sweeter Delight: Substitute dark chocolate with a mix of milk and semi-sweet chocolate for a cake that’s sweeter yet just as indulgent.
-
Gluten-Free Option: Use gluten-free flour instead of all-purpose flour to ensure everyone can enjoy this delicious dessert without worry.
-
Dairy-Free Choice: Replace buttermilk with almond milk mixed with vinegar for a dairy-free alternative that maintains the cake’s moistness.
-
Flavor Twist: Add a teaspoon of orange zest for a subtle citrus note that beautifully complements the rich chocolate flavor. It adds a refreshing brightness to each bite.
-
Nutty Crunch: Mix in some finely chopped walnuts or pecans to the batter for a delightful crunch and a nutty flavor that elevates the overall experience.
-
Spiced Up: Incorporate a pinch of cinnamon or a sprinkle of nutmeg into the dry ingredients for a warmly spiced cake, reminiscent of a cozy dessert from the past.
-
Less Sweet: For those who prefer a less sweet cake, reduce the amount of granulated sugar by a quarter and increase the cocoa powder for a more intense chocolate taste.
-
Layered Indulgence: Create a multi-layered cake by baking in three 8-inch round pans and adding flavored whipped cream between layers or use our delectable Churro Maple Chocolate ganache for an extra layer of sweetness.
Explore these variations and find your perfect interpretation of the Matilda Chocolate Cake!
Expert Tips for Matilda Chocolate Cake
-
Room Temperature Ingredients: Always use room temperature eggs and butter to ensure a well-emulsified batter, resulting in a light cake.
-
Sifting Dry Ingredients: Sift your cocoa powder and flour to avoid clumps and incorporate air, enhancing the texture of your Matilda Chocolate Cake.
-
Proper Oven Temperature: Invest in an oven thermometer to verify the temperature, as an incorrect setting can lead to uneven baking.
-
Don’t Over-Mix: When combining wet and dry ingredients, mix just until incorporated to avoid a dense cake; overworking the batter can lead to dryness.
-
Fresh Leavening Agents: Always check the freshness of your baking soda and powder. Expired leavening agents can prevent your cake from rising properly.
-
Cooling Rack Use: Allow the cakes to cool completely on a wire rack before frosting; this prevents melting and ensures a perfect ganache layer on your Matilda Chocolate Cake.

Matilda Chocolate Cake Recipe FAQs
What type of dark chocolate should I use for the cake?
Always opt for high-quality dark chocolate with 60-70% cocoa content. This choice not only ensures a rich flavor but also contributes to the moisture that makes the Matilda Chocolate Cake so decadent.
How should I store leftover cake?
Store your Matilda Chocolate Cake in an airtight container at room temperature for up to 3 days. If you wish to keep it fresher for longer, refrigerate it in a covered container, which will maintain its fudgy texture for up to a week.
Can I freeze the cake?
Absolutely! For freezing, wrap the cooled cake tightly in plastic wrap, followed by a layer of aluminum foil to prevent freezer burn. You can freeze the entire cake or individual slices up to 3 months. To enjoy, simply thaw in the fridge overnight or at room temperature for a couple of hours.
Why did my cake turn out dense?
There are a few reasons this could happen! Make sure to use room temperature ingredients, as cold butter or eggs can lead to a denser texture. Additionally, be cautious not to over-mix your batter, particularly when combining wet and dry ingredients; just mix until incorporated to ensure a light, fluffy result.
Is this cake suitable for anyone with allergies?
This Matilda Chocolate Cake contains common allergens like gluten, dairy, and eggs. If you’re baking for someone with dietary restrictions, consider using gluten-free flour, a dairy-free milk alternative with vinegar for buttermilk, and replacing eggs with a suitable substitute like flaxseed meal or applesauce. Always check your specific ingredients for additional allergens.
Indulge in the Ultimate Matilda Chocolate Cake Experience
Ingredients
Equipment
Method
- Preheat your oven to 350°F (175°C) and prepare two 9-inch round cake pans by lining with parchment paper and greasing the sides.
- Melt the dark chocolate in a microwave-safe bowl in 30-second intervals, then set aside to cool slightly.
- Cream unsalted butter with granulated and light brown sugars using an electric mixer until light and fluffy, about 3-4 minutes.
- Add large eggs one at a time, integrating them along with pure vanilla extract until smooth.
- Incorporate the slightly cooled melted dark chocolate into the wet mixture, mixing on low speed.
- Whisk together flour, cocoa powder, baking soda, baking powder, espresso powder, and salt in a separate bowl.
- Gradually mix dry ingredients into the wet mixture, alternating with buttermilk, starting and ending with dry ingredients.
- Gently fold in the semi-sweet chocolate chips into the batter using a spatula.
- Divide the batter between prepared pans and bake for 30-35 minutes until a toothpick comes out clean.
- Cool the cakes in their pans for 10 minutes before inverting onto wire racks to cool completely.
- For the ganache, heat heavy cream until boiling and pour over chopped chocolate; let it sit before stirring in butter and vanilla.
- Once cooled, layer cakes with ganache between layers and pour remaining ganache over the top.
Leave a Reply