
As I sifted through my pantry searching for a sweet fix, I couldn’t ignore the allure of red velvet cookies calling my name. These soft and chewy delights take the essence of classic red velvet cake and transform it into a delightful treat that’s impossibly easy to whip up—no chilling required! Imagine serving these vibrant cookies at your next gathering or enjoying them as a cozy snack with your favorite cup of tea. With options for a gluten-free twist or a rich addition of chocolate chips or cream cheese frosting, these Red Velvet Cookies are bound to be a hit. Why not indulge in a batch today and experience the joy that comes with every delicious bite?
Why are These Red Velvet Cookies Irresistible?
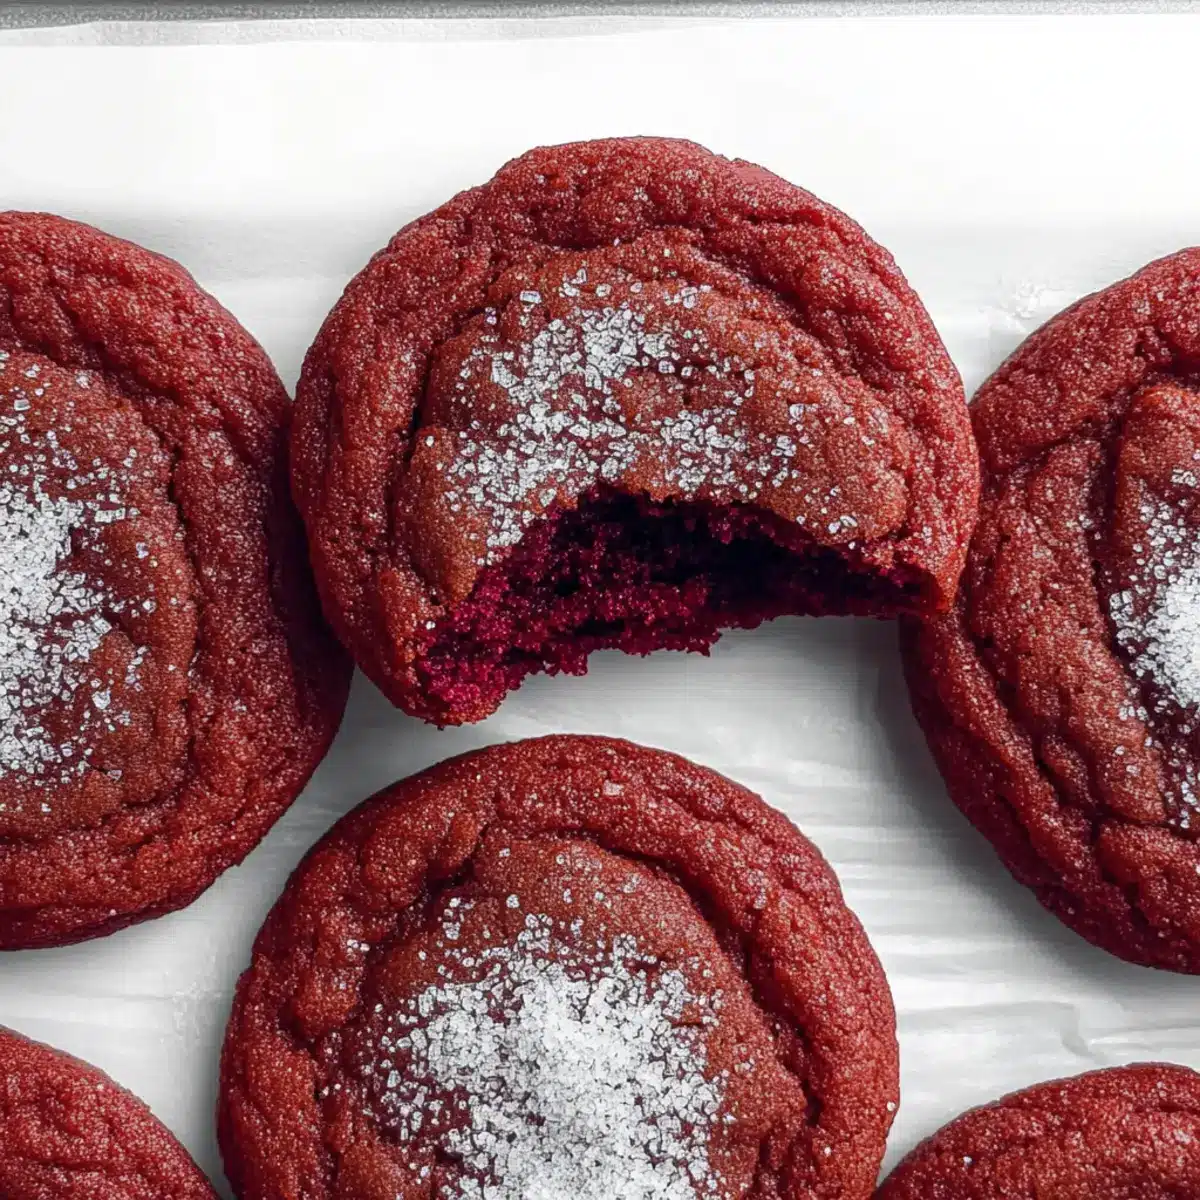
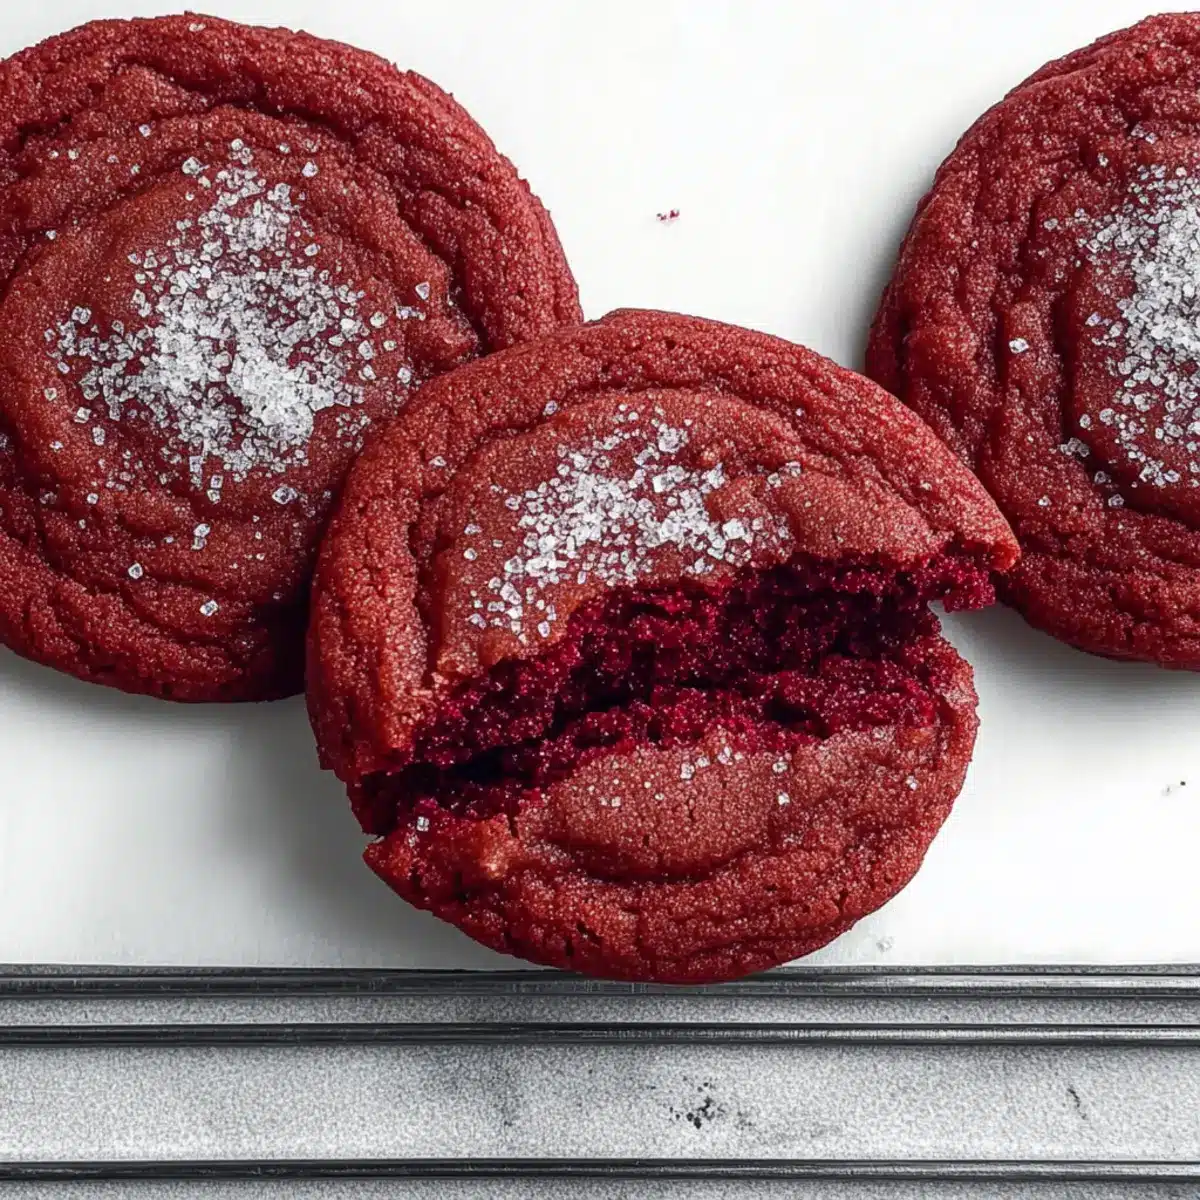
Soft and Chewy: Experience the perfect texture—these cookies are delightfully soft and chewy, making each bite a memorable treat!
Vibrant Color: The striking red hue adds a festive flair to any occasion, turning ordinary moments into celebrations.
Quick and Easy: With no chilling required, you can whip them up in no time, making it ideal for those spontaneous cravings.
Versatile Flavor: Customize your cookies by adding chocolate chips or whipping up some cream cheese frosting for a decadent touch.
Gluten-Free Option: Everyone can join the fun! Use a gluten-free flour blend to accommodate all dietary preferences.
Crowd-Pleasing Delight: These cookies are sure to impress friends and family—perfect for holiday gatherings or cozy nights in with a glass of milk!
Red Velvet Cookies Ingredients
• Discover the magical components of Red Velvet Cookies that make them so irresistible!
For the Batter
- Unsalted Butter – Provides moisture and richness; substitute with margarine for a dairy-free alternative.
- Granulated Sugar – Adds sweetness and contributes to texture; can replace with brown sugar for a deeper flavor.
- Brown Sugar – Infuses moisture and a hint of caramel, enhancing the overall richness.
- Egg – Binds the ingredients together and aids in leavening to create a tender cookie.
- Vanilla Extract – Elevates the flavor profile with a warm, sweet note.
- Red Gel Food Coloring – Gives the cookies their signature red hue; omit for chocolate cookies or swap with beet powder for a natural color.
- All-Purpose Flour – Forms the structure of the cookies; can substitute with a gluten-free blend for a gluten-free option.
- Cocoa Powder – Adds a subtle chocolate flavor that complements the red velvet essence.
- Baking Powder & Baking Soda – These leavening agents work together to create that soft, chewy texture.
- Salt – Balances out the sweetness, enhancing the cookies’ overall flavor.
For Topping
- Red Sanding Sugar – A decorative topping that adds a festive touch; regular granulated sugar can be used as a substitute.
Now that you have the ingredients, get ready to bake up a batch of these delightful Red Velvet Cookies that are sure to leave everyone wanting more!
Step‑by‑Step Instructions for Red Velvet Cookies
Step 1: Melt the Butter
Begin by melting 1 cup of unsalted butter in a medium saucepan over low heat. Stir the butter gently until completely melted, then transfer it to a shallow dish to cool slightly—about 8 minutes. This cooling step is essential for achieving the perfect texture in your Red Velvet Cookies.
Step 2: Combine Wet Ingredients
In a large mixing bowl, whisk together the cooled melted butter, 3/4 cup granulated sugar, and 3/4 cup brown sugar until well combined. Add in one large egg and 1 teaspoon of vanilla extract, mixing until fully blended. This rich mixture forms the flavorful base of your red velvet dough.
Step 3: Add Food Coloring
Next, stir in 2 tablespoons of red gel food coloring to the wet mixture, ensuring you mix thoroughly until the color is uniform throughout. This vibrant hue is what gives your Red Velvet Cookies that signature look, so don’t rush this step—make sure the color is beautifully distributed.
Step 4: Mix Dry Ingredients
In a separate bowl, whisk together 2 cups of all-purpose flour, 1/4 cup cocoa powder, 1 teaspoon baking powder, 1 teaspoon baking soda, and 1/2 teaspoon salt. This combination of dry ingredients is critical for providing structure and flavor to the cookies—ensure they are well-mixed before incorporating them into the wet ingredients.
Step 5: Combine Mixtures
Gently fold the dry ingredients into the wet mixture using a spatula, mixing until just combined. It’s important not to over-mix, as this can lead to tougher cookies. The resulting dough should be soft and cohesive, embodying the delightful essence of Red Velvet Cookies.
Step 6: Preheat Oven and Prepare Sheets
While the dough rests, preheat your oven to 350°F (175°C). Line two baking sheets with parchment paper to prevent sticking and make cleanup a breeze. This preparation allows you to bake your cookies evenly and efficiently once ready.
Step 7: Portion the Dough
Using a cookie scoop or tablespoon, portion the dough and roll each piece into a ball. Coat each dough ball in red sanding sugar for an attractive finish before placing them on the prepared baking sheets, ensuring there is enough space between each cookie for spreading.
Step 8: Bake the Cookies
Bake the cookies in the preheated oven for 9-10 minutes, or until the edges are just set but the centers remain slightly soft. Avoid overbaking, as this will result in less chewy cookies. As they cool, they will puff and settle to achieve that delightful red velvet texture.
Step 9: Cool and Transfer
Once baked, let the cookies cool on the baking sheets for 5-10 minutes. This cooling time is crucial because it allows them to firm up without becoming too hard. Then, carefully transfer them to wire racks to cool completely, preserving their soft and chewy nature.
Step 10: Store or Serve
Once cooled, enjoy your delicious Red Velvet Cookies right away or store them in an airtight container at room temperature for up to 5 days. Alternatively, they can be frozen for up to 3 months—just wrap them tightly in plastic and thaw at room temperature before indulging!
What to Serve with Soft and Chewy Red Velvet Cookies
These delightful treats are not only a feast for the eyes but also a luscious addition to any meal or gathering.
-
Creamy Vanilla Ice Cream: A scoop of creamy ice cream complements the rich, fudgy cookies, creating a timeless dessert experience. The coolness contrasts beautifully with the warmth of the freshly baked cookies, making each bite a joy.
-
Rich Hot Chocolate: A warm cup of hot chocolate pairs perfectly with the cookies, echoing their chocolatey notes while adding a comforting drink element. Enjoying them together will transport you to a cozy winter evening, making this a favorite for colder days.
-
Fresh Fruit Salad: Bright, juicy fruit adds a refreshing contrast to the sweet richness of the cookies. Think strawberries, blueberries, and a hint of mint—this pairing brings balance and a burst of flavor for a more rounded dessert spread.
-
Coffee or Espresso: The deep flavors of coffee enhance the mild chocolate notes of the cookies, providing a delightful pick-me-up. Pairing these treats with a rich cup of coffee makes for a sophisticated afternoon indulgence.
-
Chocolate Chip Cookie Dough Dip: Dive into a unique dessert experience by pairing the red velvet cookies with a sweet, chocolaty dip. It adds a contrasting texture and opens up a fun way to enjoy your cookies.
-
Cream Cheese Frosting: Elevate your cookies by topping them with a dollop of cream cheese frosting for an extra indulgence. This tangy addition echoes the classic red velvet cake flavor profile, leaving everyone craving more.
Expert Tips for Red Velvet Cookies
-
Don’t Overmix: Gently fold the dry ingredients into the wet mixture to maintain a soft and chewy cookie. Overmixing can lead to tough cookies.
-
Watch Your Bake Time: Bake until the edges are set, but keep the centers slightly soft. They’ll continue to cook as they cool, ensuring the perfect texture.
-
Customize the Color: If you prefer a natural alternative to red food coloring, consider using beet powder. It adds color without artificial dyes and pairs beautifully with rich flavors.
-
Chill the Dough: If you want to make these Red Velvet Cookies in advance, consider chilling the dough for 30 minutes to enhance the flavors and make it easier to handle.
-
Experiment with Add-ins: Don’t hesitate to add chocolate chips or nuts. This will give your cookies a delightful twist and extra texture!
-
Serve with Style: Elevate the cookie experience by pairing them with cream cheese frosting for an indulgent treat or simply enjoying with a glass of cold milk.
How to Store and Freeze Red Velvet Cookies
Room Temperature: Store cookies tightly covered at room temperature for up to 5 days to maintain their soft texture and flavor.
Freezer: For longer storage, freeze the cookies for up to 3 months. Wrap each cookie individually in plastic wrap, then place them in an airtight container or freezer bag.
Thawing: When ready to enjoy, thaw the Red Velvet Cookies at room temperature. They’ll be just as delightful as the day you baked them!
Reheating: If you prefer them warm, microwave each cookie for about 10-15 seconds, which will bring back their initial softness and fudginess.
Make Ahead Options
These Red Velvet Cookies are a fantastic option for meal prep enthusiasts! You can mix the dry ingredients (flour, cocoa powder, baking powder, baking soda, and salt) up to 3 days in advance and store them in an airtight container to maintain their freshness. Additionally, you can prepare the cookie dough and refrigerate it for up to 24 hours; this will enhance the flavors and ensure the cookies retain their delightful softness. When you’re ready to bake, simply scoop the dough, roll in sanding sugar, and bake them straight from the fridge, yielding warm, chewy cookies just as delicious as if baked fresh! Enjoy the ease of having your cookie-making tasks split over a busy week!
Red Velvet Cookies Variations
Feel free to get creative with your red velvet cookies—each twist brings a new experience of flavor and texture to your plate!
-
Chocolate Chip Boost: Add 3/4 cup of chocolate chips to the dough for a delightful chocolaty surprise. The mix of red velvet and melted chocolate creates a rich flavor explosion.
-
Cream Cheese Frosting: Top each cookie with a homemade cream cheese frosting for a luxurious finish. Imagine the creamy, tangy sweetness that complements the cookies’ fudginess perfectly!
-
Nutty Crunch: Fold in 1/2 cup of chopped nuts, like walnuts or pecans, for a satisfying crunch. The nuts add an earthy flavor and a pleasant texture that contrasts beautifully with the softness.
-
Gluten-Free Option: Swap the all-purpose flour for a 1:1 gluten-free flour blend for a delightful gluten-free treat. No one will ever know the difference with all that rich flavor!
-
Healthier Twist: Replace half of the butter with unsweetened applesauce for a lighter version. You’ll still get that yummy texture but with fewer calories—what a sweet trade-off!
-
Spicy Kick: Add 1 teaspoon of cinnamon or 1/2 teaspoon of cayenne pepper for a unique flavor profile. This unexpected heat amplifies the spices in the dough and creates an enjoyable surprise.
-
Colorful Sugar Coating: Use colorful sanding sugar to coat your cookies, perfect for festive occasions or holidays! It adds a fun pop of color that will brighten up any dessert table.
-
Caramel Swirl: Drizzle caramel sauce over cooled cookies for an added layer of decadence. The gooey caramel brings a warm richness that pairs beautifully with red velvet.
For even more delightful baking adventures, try your hand at these irresistible Red Velvet Oreo desserts or make some yummy Chocolate Chip Cookies that everyone loves!

Red Velvet Cookies Recipe FAQs
What type of butter should I use for these Red Velvet Cookies?
Absolutely use unsalted butter to provide moisture and richness. If you’re looking for a dairy-free alternative, margarine works well too!
How long can I store the cookies, and what’s the best way to store them?
Store your Red Velvet Cookies tightly covered at room temperature for up to 5 days to maintain their soft chewiness. Alternatively, for longer storage, freeze them for up to 3 months. Just wrap each cookie in plastic wrap and place them in an airtight container. Easy peasy!
Can I freeze these Red Velvet Cookies?
Yes, you can! To freeze, wrap each cookie individually in plastic wrap and place them in an airtight container or freezer bag. When you’re ready to enjoy them, thaw the cookies at room temperature. If you prefer them warm, pop them in the microwave for about 10-15 seconds.
What if my dough is too sticky?
If you find your dough is too sticky, it might be because of the humidity or the specific flour you used. Adding a tablespoon or two of additional flour can help achieve the right consistency. Remember, don’t overmix to maintain that soft and chewy texture!
Is there a gluten-free option for these cookies?
Very much! Substitute all-purpose flour with a gluten-free flour blend, preferably one that contains xanthan gum to maintain structure. This way, everyone can join in on the delicious fun without missing out!
Can I add extra ingredients to the batter?
The more the merrier! Feel free to add 3/4 cup of chocolate chips (dark or white) or even some chopped nuts for an extra crunch. This customization makes each batch unique and even more delightful!
Irresistibly Soft Red Velvet Cookies You'll Love to Bake
Ingredients
Equipment
Method
- Melt the butter in a medium saucepan over low heat. Stir gently until fully melted and let cool for about 8 minutes.
- Combine the cooled butter, granulated sugar, brown sugar, egg, and vanilla extract in a large mixing bowl. Whisk until blended.
- Stir in the red gel food coloring until evenly distributed.
- In a separate bowl, whisk together the flour, cocoa powder, baking powder, baking soda, and salt.
- Gently fold the dry ingredients into the wet mixture, mixing until just combined.
- Preheat your oven to 350°F (175°C) and line two baking sheets with parchment paper.
- Portion the dough using a cookie scoop, roll into balls, and coat in red sanding sugar. Place on the prepared baking sheets.
- Bake for 9-10 minutes, until edges are set but centers are soft. Do not overbake.
- Let cool on the baking sheets for 5-10 minutes before transferring to wire racks to cool completely.
- Enjoy immediately or store in an airtight container for up to 5 days.
Leave a Reply