
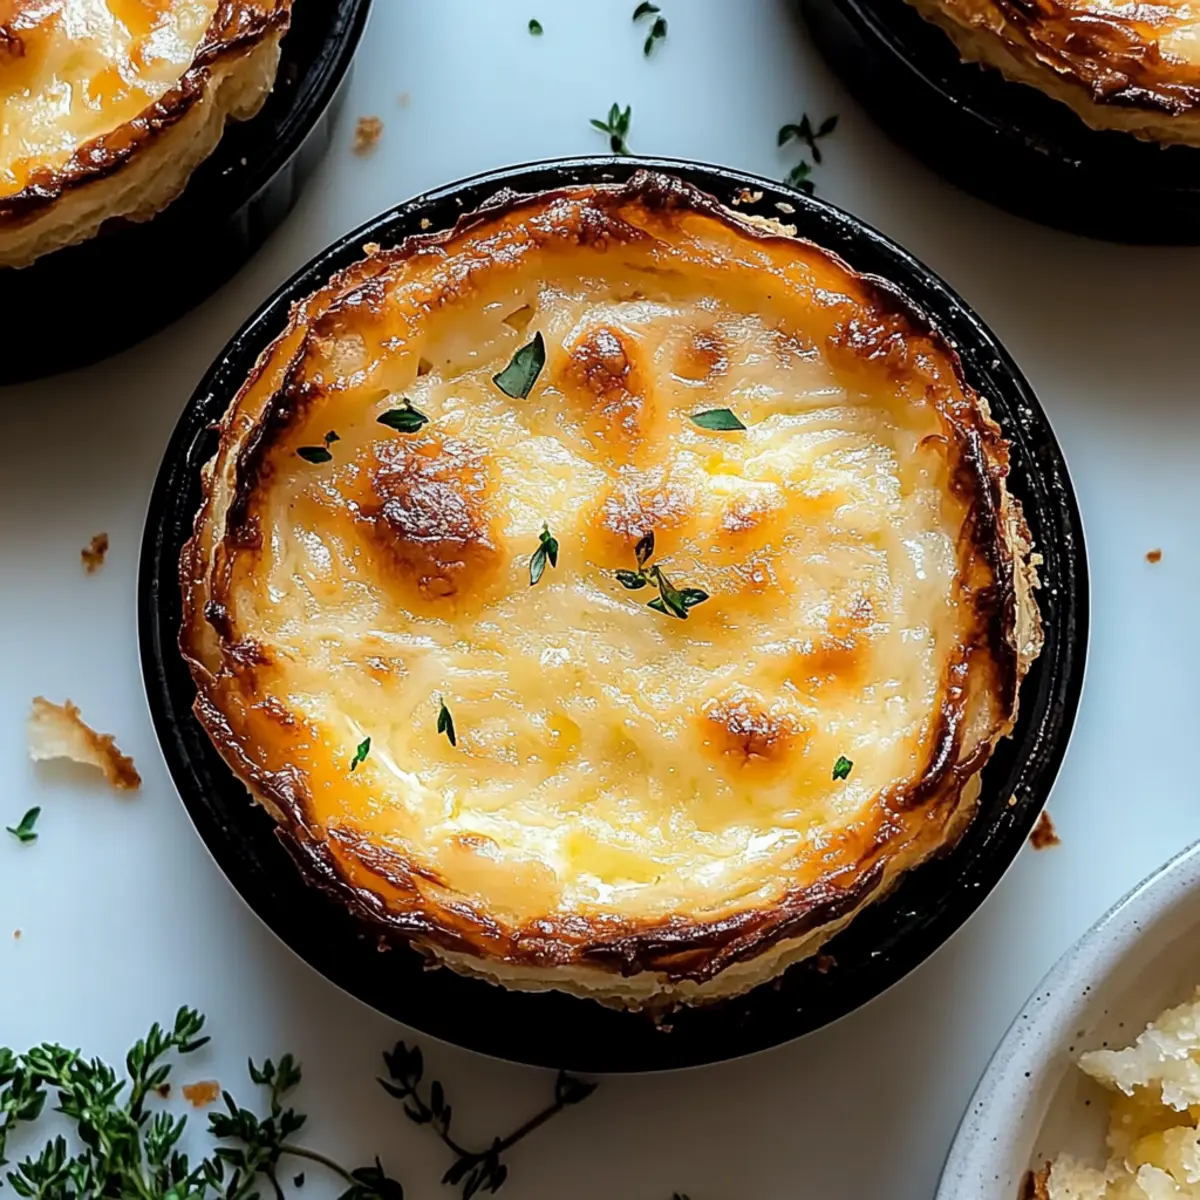
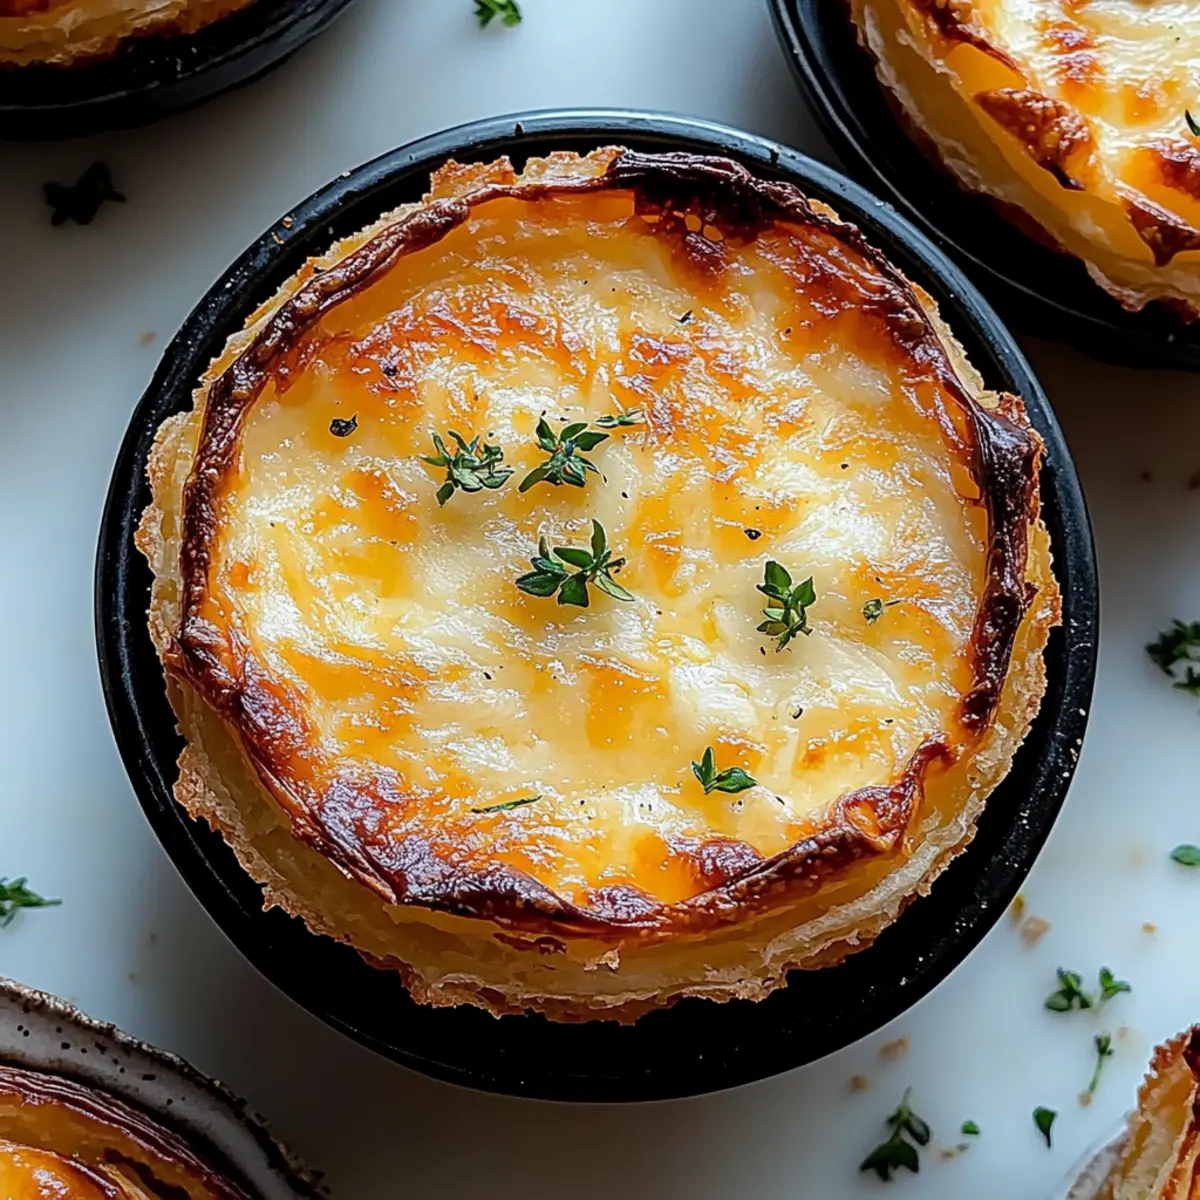
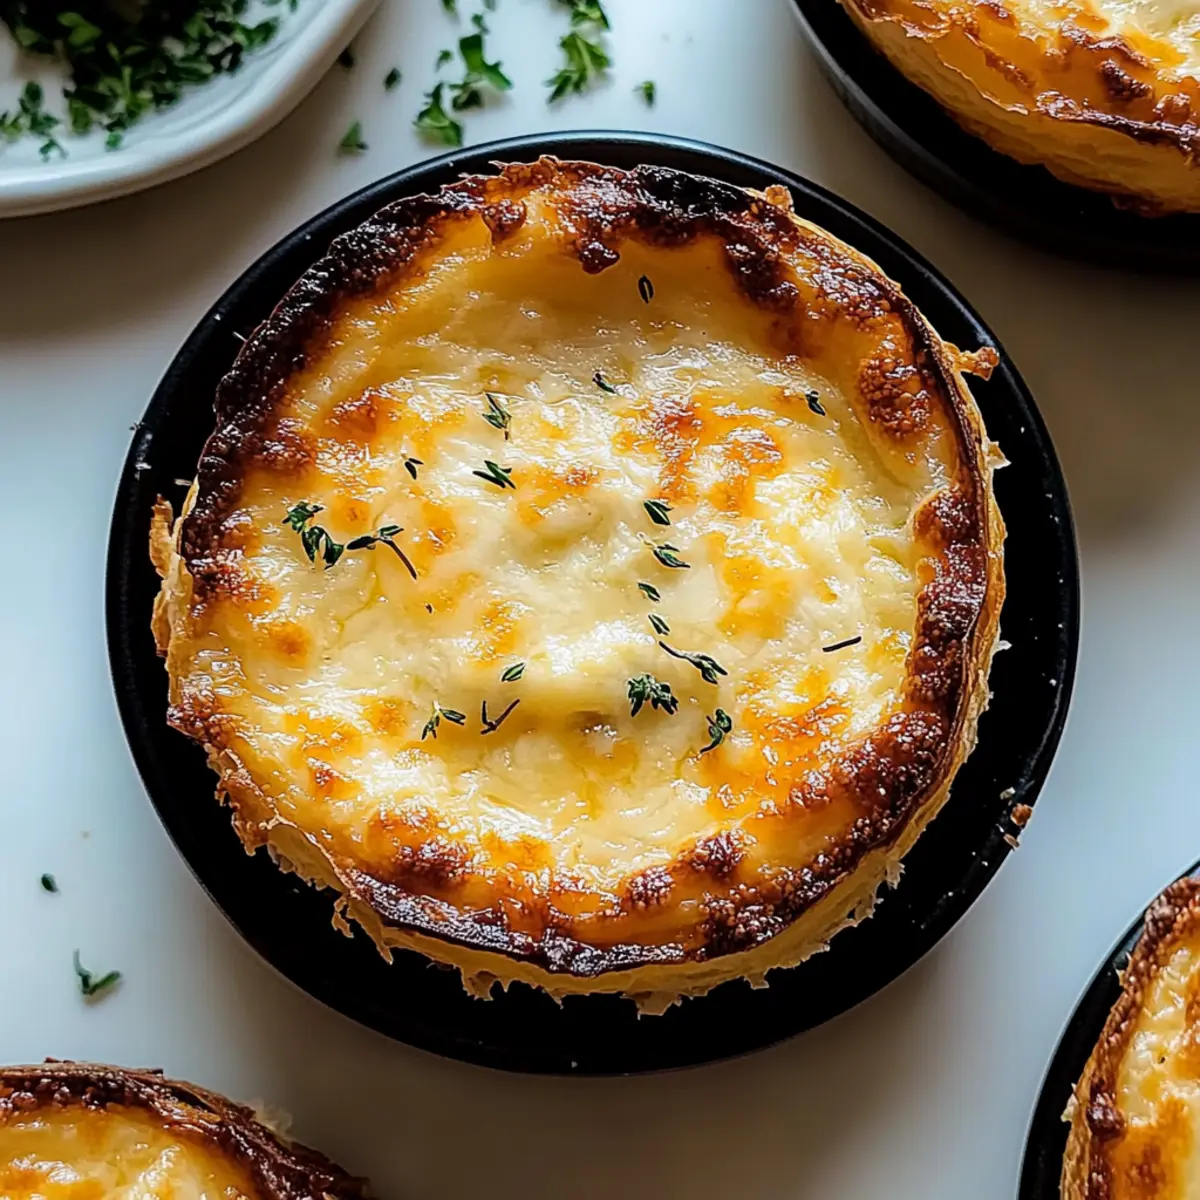
The first time I tasted a cheesy garlic cruffin, it felt like discovering a hidden treasure—flaky layers enveloping a melty, savory filling that danced with garlicky goodness. These delightful pastries are not only a comforting treat for your soul but also surprisingly easy to whip up at home, making them the perfect addition to your weekend baking repertoire. The Cheesy Garlic Cruffin strikes a lovely balance between impressive and approachable, perfect for those lazy mornings when you crave something truly indulgent without the hassle. Plus, they make for an excellent crowd-pleaser at brunch gatherings. Can you resist the aroma of these beauties while they bake? Let’s dive into the warm, gooey goodness together!
Why are Cheesy Garlic Cruffins irresistible?
Flaky Layers: Each cruffin boasts delicate, buttery layers that create a satisfying bite—perfect for indulging your senses.
Savory Goodness: The rich melding of mozzarella and Parmesan cheeses, paired with punchy garlic, makes every mouthful a burst of flavor.
Easy to Make: With simple ingredients and an accessible recipe, even novice bakers can impress friends and family.
Perfect for Gatherings: Their crowd-pleasing appeal makes them an excellent choice for brunches or casual get-togethers; who can resist a fresh batch?
Customizable: You can easily personalize your cruffins by adding chili flakes for a spicy twist or diced veggies for extra nutrition, just like my Garlic Parmesan Focaccia.
Time-Saving: With just a bit of patience while the dough rises, you can have these delightful gems baked and ready to enjoy in no time, making them perfect for busy weekends!
Cheesy Garlic Cruffin Ingredients
Elevate your baking with these essential ingredients!
For the Dough
- All-purpose flour – A sturdy base that gives structure; bread flour can offer a chewier texture.
- Granulated sugar – Enhances browning for a beautiful color and adds just a hint of sweetness.
- Salt – Balances flavors while also strengthening the dough’s structure.
- Instant yeast – Ensures the dough rises light and airy; always check for freshness before use.
- Warm milk – Adds delightful moisture and richness; almond or soy milk works as a dairy-free alternative.
- Unsalted butter (melted) – Infuses flavor and moisture, but can be swapped for olive oil if desired.
- Warm water – Activates the yeast, crucial for a good rise.
- Large egg – Binds all ingredients together, giving the cruffin its delightful shape. For a vegan option, a flaxseed egg can be used.
For the Filling
- Grated Parmesan cheese – Adds savory depth; Pecorino can be a sharper substitute.
- Shredded mozzarella cheese – Offers that melty goodness; feel free to mix in cheddar for a different flavor.
- Minced garlic – The star of the show, giving that distinct garlic flavor; sauté for a milder touch if preferred.
- Unsalted butter (softened) – Essential for achieving that rich garlic butter filling.
- Chopped fresh parsley – Brightens the filling and adds a touch of color.
These Cheesy Garlic Cruffin ingredients combine to create an irresistible pastry that keeps friends and family coming back for seconds!
Step‑by‑Step Instructions for Cheesy Garlic Cruffin
Step 1: Mix Dry Ingredients
In a large mixing bowl, combine 3 cups of all-purpose flour, 2 tablespoons of granulated sugar, 1 teaspoon of salt, and 2 teaspoons of instant yeast. Stir these dry ingredients together until well blended. This mixture forms the foundation of your Cheesy Garlic Cruffin, so ensure everything is evenly distributed to create a consistent dough.
Step 2: Add Wet Ingredients
Make a well in the center of the dry mixture and pour in 1 cup of warm milk, 4 tablespoons of melted unsalted butter, and 1/2 cup of warm water. Gently mix the ingredients until they start to come together, forming a shaggy dough. The warmth helps activate the yeast, which is essential for the perfect rise.
Step 3: Incorporate Egg
Crack 1 large egg into the dough mixture and mix vigorously until just combined. The egg acts as a binding agent, ensuring your Cheesy Garlic Cruffin achieves that delightful structure. Aim for a soft, slightly sticky dough that holds together well while you prepare to knead.
Step 4: Knead the Dough
Turn the dough onto a floured surface and knead for about 8-10 minutes until it becomes smooth and elastic. You’ll know it’s ready when it springs back lightly when pressed with your finger. This step is crucial for developing the gluten structure to support the flaky layers of your cruffin.
Step 5: First Rise
Form the kneaded dough into a ball and place it in a lightly greased bowl. Cover with a clean kitchen towel and let it rise in a warm place for about 1 hour, or until it has doubled in size. This crucial step allows the yeast to work its magic, giving your Cheesy Garlic Cruffin that perfect lightness.
Step 6: Prepare Filling
While the dough rises, mix together 4 tablespoons of softened unsalted butter, 3 cloves of minced garlic, and 2 tablespoons of chopped fresh parsley in a bowl. This aromatic filling will provide the bold, savory flavor in every bite of your Cheesy Garlic Cruffin, so blend until well combined and set aside.
Step 7: Preheat Oven and Prepare Tin
Preheat your oven to 375°F (190°C) and grease a standard muffin tin with butter or cooking spray. Preparing the tin beforehand ensures your cruffins won’t stick, achieving that beautiful flaky finish when baked. The oven’s heat will soon bring your cheesy garlic creation to life.
Step 8: Shape the Dough
Once the dough has risen, turn it out onto a floured surface and gently roll it into a rectangle, about 1/4 inch thick. Spread the garlic butter filling evenly over the surface of the dough, leaving a small border around the edges for easy rolling. This layering of flavors is key to a mouthwatering Cheesy Garlic Cruffin.
Step 9: Add Cheese and Roll
Sprinkle 1 cup of shredded mozzarella cheese and 1/2 cup of grated Parmesan over the filling. Roll the dough tightly into a log, starting from one of the long edges. Once rolled, slice the log into 12 equal pieces. This will create those delightful, flaky layers in your Cheesy Garlic Cruffin.
Step 10: Second Rise
Place the rolled pieces into the prepared muffin cups, cut side up. Cover with a kitchen towel and let them rise for another 20 minutes. This second rise allows the cruffins to expand and develop a beautiful structure, making them even more irresistible when baked.
Step 11: Bake the Cruffins
After the second rise, bake the cruffins in your preheated oven for about 20-25 minutes, or until they are golden brown on top. The aroma of garlic and melting cheese will fill your kitchen, tantalizing your taste buds and heralding the arrival of these delicious Cheesy Garlic Cruffins.
Step 12: Cool and Serve
Once baked, remove the cruffins from the oven and allow them to cool in the tin for 5 minutes before transferring to a wire rack. This slight cooling period will help them set up perfectly, giving you that ideal flaky texture. Serve warm and enjoy every cheesy, garlicky bite!

Cheesy Garlic Cruffin Variations
Feel free to twist and turn this delicious recipe to suit your taste buds and dietary needs.
-
Cheese Swap: Substitute mozzarella and Parmesan with a blend of cheddar and gouda for a unique flavor profile. Cheeses bring different personalities to the table, and a smoky gouda can elevate your cruffins to new heights.
-
Spicy Kick: Add chili flakes to the garlic butter mixture for an extra punch. This fiery twist will awaken your senses, making every bite an adventure.
-
Veggie Boost: Toss in chopped spinach or sun-dried tomatoes to your filling for a pop of color and nutrition. Enhancing flavors with veggies not only adds nutrition but a lovely texture as well.
-
Herb Variations: Experiment with herbs like thyme or rosemary instead of parsley for a fragrant touch. A sprinkle of these aromatic herbs can translate your cruffins into a Mediterranean delight.
-
Dairy-Free Delight: Use almond or soy milk and plant-based butter to make this a dairy-free treat without sacrificing flavor. Smooth and creamy substitutes can deliver an equally satisfying cruffin.
-
Garlic Lovers: Increase the amount of minced garlic for a bolder flavor, or sauté it for a softer, more mellow taste. Elevated garlic magic means you control the flavor intensity.
-
Gluten-Free Option: Replace all-purpose flour with a gluten-free blend to cater to those with dietary restrictions. Your cruffins can still delight with the comfort of cheese and garlic, regardless of dietary needs!
-
Herbed Cheese Filling: Mix in herbed cream cheese for an extra creamy filling. An unexpected richness infused with herbaceous notes can transform your cruffins into a savory sensation.
Thinking of a delightful pairing? Try your cruffins with a warm cup of creamy tomato soup or as a side to the irresistible Lemon Garlic Chicken for a tasty meal. Happy baking!
How to Store and Freeze Cheesy Garlic Cruffins
Airtight Container: Store leftover cruffins in an airtight container at room temperature for up to 2 days to keep them fresh and flavorful.
Freezer: For longer storage, wrap cruffins individually in plastic wrap and then place in a freezer bag. They can be frozen for up to 2 months without losing their lovely texture.
Reheating: When you’re ready to enjoy your cruffins again, simply reheat in a preheated oven at 350°F (175°C) for 5-10 minutes until warmed through and the cheese is melty.
Thawing: For best results, thaw frozen cruffins in the refrigerator overnight before reheating, ensuring the delightful cheesy garlic flavor is preserved.
Helpful Tricks for Cheesy Garlic Cruffin
- Check Your Yeast: Always verify that your instant yeast is fresh and active; expired yeast can lead to disappointing results.
- Temperature Matters: Ensure your dough rises in a warm place; too cold can slow yeast activity and affect the fluffiness of the cruffins.
- Layering Technique: Roll the dough to your desired thickness and spread the filling close to the edges, ensuring great flavor in every bite of your cheesy garlic cruffin.
- Proper Baking Time: Keep an eye on your cruffins as they bake; begin checking for doneness around 20 minutes to achieve golden-brown perfection without burning.
- Cool Before Serving: Allow the cruffins to cool for a few minutes in the tin before transferring to a rack, helping them maintain their flaky texture and avoiding a soggy bottom.
Make Ahead Options
These Cheesy Garlic Cruffins are perfect for meal prep enthusiasts looking to save time during busy mornings! You can prepare the dough up to 24 hours in advance; simply knead it, let it rise, and refrigerate in a covered bowl. When ready to bake, roll out the cold dough and proceed with adding the filling before allowing for the second rise at room temperature for about 30 minutes. If you’d like to make the filling earlier, mix the garlic butter and cheese up to 3 days in advance and store it in the fridge. Just remember to bring it to room temperature before spreading to ensure a smooth application. With these make-ahead tips, you’ll enjoy delicious, freshly baked Cheesy Garlic Cruffins with minimal effort on your busy mornings!
What to Serve with Cheesy Garlic Cruffins
Experience the ultimate flavor journey when you pair these cheesy delights with fresh, vibrant sides that truly elevate the meal.
- Zesty Salad: Tossed greens with a zesty lemon vinaigrette enhance the savory richness of the cruffins and provide a refreshing crunch.
- Creamy Tomato Soup: A warm bowl of creamy tomato soup perfectly complements the cheesy goodness, adding a comforting element to your meal.
- Garlic Butter Roasted Vegetables: Roasted seasonal veggies drizzled with garlic butter mirror the flavors of the cruffins, ensuring delightful harmony on your plate.
- Herbed Quinoa: Nutty quinoa tossed with fresh herbs and lemon creates a nutritious balance that contrasts beautifully with the fluffy cruffins.
- Spicy Marinara Dipping Sauce: Serve with a side of spicy marinara for dipping, introducing an exciting kick that pairs wonderfully with the cheesy layers.
- Chilled Sparkling Water: Enjoy a refreshing glass of sparkling water with a squeeze of lemon to cleanse your palate and enhance the flavors.
- Fruit Parfait: Finish with a light fruity dessert, such as a yogurt parfait with berries, providing a sweet, tangy touch to round out your meal.
Cheesy Garlic Cruffin Recipe FAQs
Which ingredients should I choose for the best flavor?
When selecting ingredients for your Cheesy Garlic Cruffins, opt for fresh garlic to maximize its flavor profile. Use high-quality cheeses like aged Parmesan and whole milk mozzarella for a rich, savory experience. For the flour, all-purpose is great, but if you desire a chewier texture, bread flour works wonderfully.
How should I store leftover cruffins?
Store any leftover Cheesy Garlic Cruffins in an airtight container at room temperature for up to 2 days. To maintain their flaky texture, avoid refrigerating them, as the cold can make them soggy. If you plan to enjoy them later, freezing is a great option.
Can I freeze the cruffins for later?
Absolutely! Wrap each Cheesy Garlic Cruffin individually in plastic wrap and place them in a freezer bag. They can be frozen for up to 2 months without losing their delectable texture. When you’re ready to enjoy them, thaw overnight in the refrigerator and reheat in the oven at 350°F (175°C) for about 5-10 minutes.
What should I do if my dough doesn’t rise?
If your dough doesn’t rise, the main culprit may be yeast that is no longer active. Always check the expiration date before use. If the environment is too cold, try placing the bowl in a warm spot, like an oven with just the light on, to encourage rising. A good rule of thumb is that your dough should double in size in about an hour.
Are these cruffins suitable for people with dairy allergies?
For those with dairy allergies, you can easily modify the Cheesy Garlic Cruffin recipe. Use almond or soy milk as a substitute for warm milk, and instead of butter, opt for olive oil. Replace the cheeses with dairy-free alternatives available in stores, ensuring everyone can indulge in this delightful treat!
How can I enhance the flavor?
To elevate your Cheesy Garlic Cruffin’s flavor, consider adding chopped spinach or sun-dried tomatoes into the filling. If you enjoy a spicy kick, mix in red chili flakes with the garlic butter. Personalizing your cruffins makes for an even more delightful experience, so feel free to get creative!
Cheesy Garlic Cruffin: Irresistibly Flaky Comfort Treat
Ingredients
Equipment
Method
- In a large mixing bowl, combine 3 cups of all-purpose flour, 2 tablespoons of granulated sugar, 1 teaspoon of salt, and 2 teaspoons of instant yeast. Stir together until well blended.
- Make a well in the center and pour in 1 cup of warm milk, 4 tablespoons of melted unsalted butter, and 1/2 cup of warm water. Mix gently until a shaggy dough forms.
- Crack 1 large egg into the mixture and mix vigorously until just combined. Aim for a soft, slightly sticky dough.
- Turn the dough onto a floured surface and knead for about 8-10 minutes until smooth and elastic.
- Form into a ball, place in a greased bowl, cover, and let rise for about 1 hour until doubled in size.
- While rising, mix together 4 tablespoons of softened unsalted butter, 3 cloves of minced garlic, and 2 tablespoons of chopped fresh parsley.
- Preheat your oven to 375°F (190°C) and grease a muffin tin.
- Once risen, roll the dough into a rectangle about 1/4 inch thick and spread the garlic butter filling evenly over it.
- Sprinkle 1 cup of shredded mozzarella and 1/2 cup of grated Parmesan over the filling. Roll tightly into a log and slice into 12 pieces.
- Place the pieces cut side up in the muffin cups, cover, and let rise for another 20 minutes.
- Bake for about 20-25 minutes until golden brown. Cool in the tin for 5 minutes before transferring to a wire rack.
Leave a Reply