
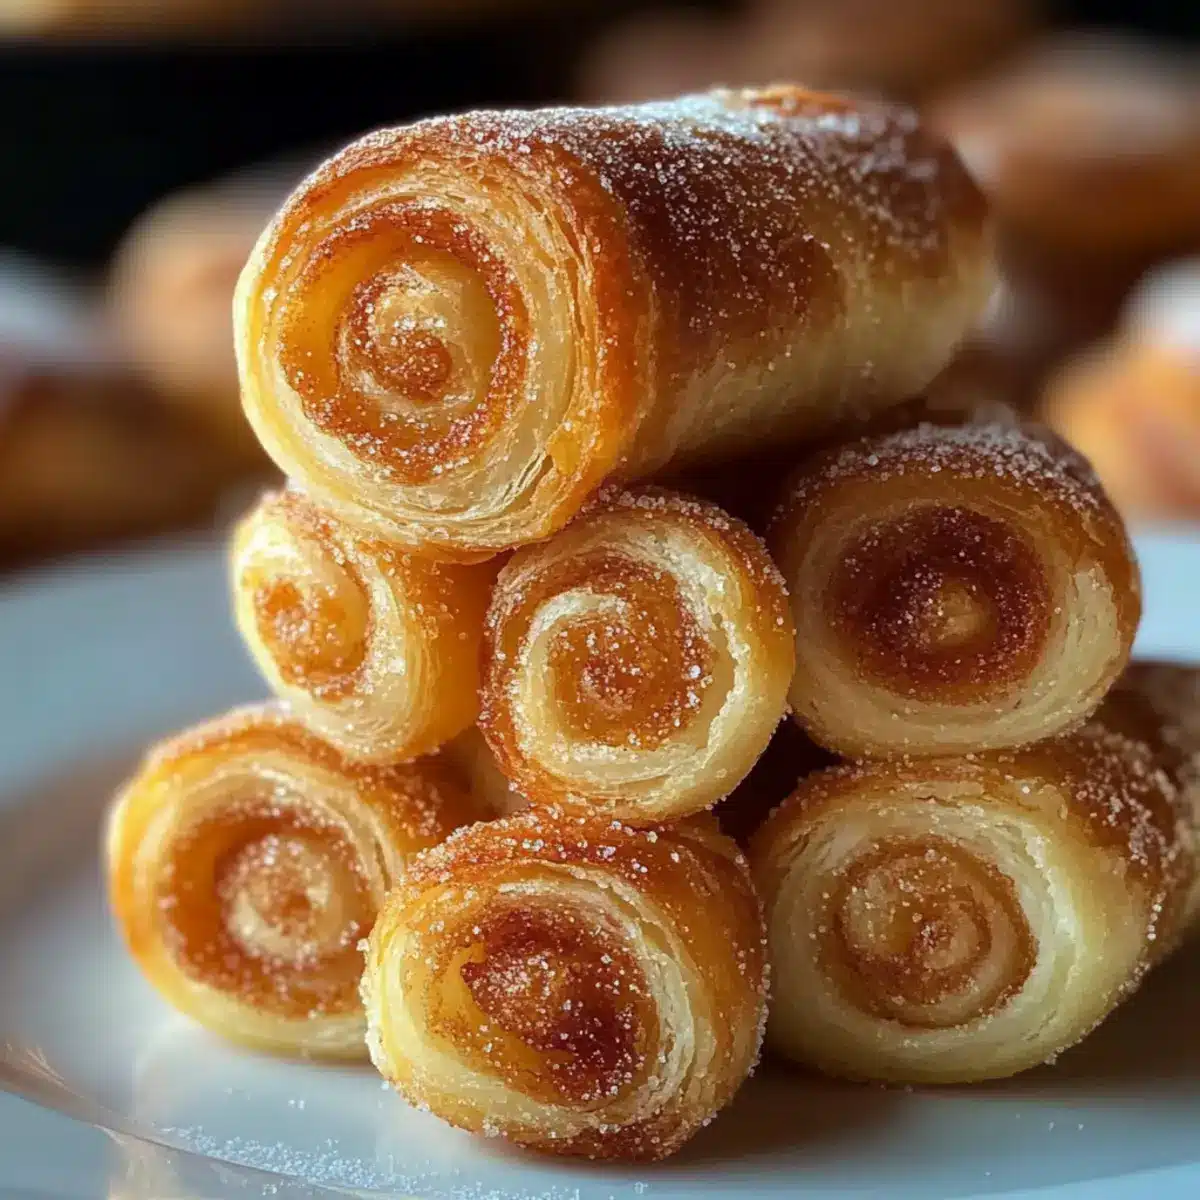
As I pulled the freshly baked Sugar Snails from the oven, the house filled with the most inviting scent of warm butter and sugar. These delightful spirals aren’t just pastries; they are a token of love and comfort, perfect for leisurely brunches or cozy afternoons. With their soft, melt-in-your-mouth texture, they become a go-to recipe for anyone wanting to indulge without the heaviness of traditional cinnamon rolls. Plus, they’re incredibly easy to make and can be customized with fun variations like vanilla, cinnamon, or even a zesty lemon twist. Each bite takes you back in time, evoking cherished memories while tantalizing your taste buds. Ready to whip up these heavenly treats and bring a touch of warmth to your kitchen?
Why are Sugar Snails irresistible?
Irresistible Flavors: These Sugar Snails pack a punch with their buttery, sweet essence, drawing you in with every bite.
Comforting Texture: Enjoy the soft, tender dough coupled with a light, flaky finish, making them a delightful alternative to heavier pastries.
Versatile Variations: From a hint of cinnamon to a zesty lemon twist, tailor them to suit every palate, ensuring there’s a version for everyone.
Quick and Easy: With straightforward instructions, you’ll become a baking pro in no time, perfect for both novice and seasoned bakers.
Crowd-Pleaser: Whether for brunch or a cozy gathering, these treats are sure to impress your guests and spark conversation. Don’t miss out on the chance to elevate your breakfast spread with these delicious delights!
Sugar Snails Ingredients
• Dive into baking with these simple yet delightful Sugar Snails!
For the Dough
- All-purpose flour – Provides the structure that keeps our snails soft; make sure to spoon and level to avoid over-measuring.
- Yeast – Active dry or instant works wonders; use fresh yeast for the best results and a lovely rise.
- Milk – Whole milk brings richness to the dough; warm it slightly to help activate the yeast, though 2% works as well.
- Unsalted butter – Essential for a tender, delicious filling; remember to use softened butter for easy spreading.
- Granulated sugar – The star ingredient that contributes to that iconic caramelized flavor you’ll love.
- Egg – Adds richness and helps bind the dough together.
- Salt – Balances the sweetness; don’t skip it!
For the Filling
- Softened butter – Ensures a luscious filling that’s easy to spread.
- Granulated sugar – Sprinkled over the butter to give that delightful sweetness; customize as you wish!
For Variations
- Vanilla extract – Add a splash to the filling for a warm, comforting flavor.
- Cinnamon – Sprinkle it with sugar for classic Cinnamon Sugar Snails.
- Lemon zest – Incorporate for a refreshing citrusy twist.
- Chopped nuts – Almonds or pecans can be a wonderful nutty addition.
- Powdered sugar – Drizzle a light glaze for an extra touch of sweetness.
When you’re ready to create these delightful Sugar Snails, stay tuned for the step-by-step instructions that will turn your kitchen into a cozy bakery!
Step‑by‑Step Instructions for Sugar Snails
Step 1: Prepare Dough
Warm 1 cup of milk in a small saucepan until just warm to the touch, about 100°F (37°C). Pour the warm milk into a mixing bowl, then sprinkle in 2 teaspoons of active dry yeast and 1 teaspoon of sugar. Let the mixture sit for 5–10 minutes until it becomes foamy, indicating that the yeast is activated and ready to make your Sugar Snails rise beautifully.
Step 2: Combine Ingredients
Once the yeast is frothy, add 1/4 cup granulated sugar, 1 beaten egg, and 1/4 cup melted unsalted butter to the bowl. Whisk gently until combined. Gradually mix in 3–4 cups of all-purpose flour along with 1/2 teaspoon of salt, stirring until a soft dough begins to form. This is the foundation of your delightful Sugar Snails, so blend well!
Step 3: Knead
Turn the dough out onto a lightly floured surface and begin kneading for 8–10 minutes. The dough should become smooth and elastic, slightly tacky to the touch but not sticky. This process is crucial for developing the gluten, which ensures your Sugar Snails have that lovely texture. Form the dough into a ball and prepare it for its first rise.
Step 4: First Rise
Place the kneaded dough in a greased bowl, turning to coat the surface lightly. Cover it with a clean kitchen towel or plastic wrap, then let it rise in a warm spot until it doubles in size, approximately 1 to 1.5 hours. Look for the dough to expand and puff up, indicating it’s ready for the next step in creating your exquisite Sugar Snails.
Step 5: Roll Out
Once the dough has risen, punch it down gently to release the air. Transfer it to a floured surface and roll it out into a rectangle about 1/4 inch thick. Make sure to maintain an even thickness, as this will help your Sugar Snails bake evenly. The dough should be smooth and pliable, ready to be transformed into sweet spirals.
Step 6: Add Filling
Spread a generous layer of softened butter over the rolled-out dough, leaving a small border around the edges. Then, sprinkle an even coating of granulated sugar on top of the butter. If desired, you can add a pinch of cinnamon for a warm spice flair. This sweet filling is what makes your Sugar Snails irresistibly delicious!
Step 7: Shape & Slice
Starting from the long end of the rectangle, carefully roll the dough tightly into a log. After rolling, pinch the seam to seal it well. Using a sharp knife or unflavored dental floss, slice the log into 1-inch pieces. Each slice will reveal the beautiful spirals of your Sugar Snails, just waiting to rise and bake!
Step 8: Second Rise
Arrange the sliced snails in a greased baking dish, spacing them about an inch apart for proper expansion. Cover them again with a towel and let them rise for another 30–45 minutes in a warm location until they are puffed and touching. You’ll know they’re ready when they look soft and billowy, promising a delightful bake ahead.
Step 9: Bake
Preheat your oven to 350°F (175°C) while the snails are rising. Once preheated, place the baking dish in the oven and let the Sugar Snails bake for 20–25 minutes, or until golden brown on top. The aroma will fill your kitchen, and they should be lightly browned with caramelized edges that signal they’re ready to come out!
Step 10: Cool
Remove the baking dish from the oven and allow your Sugar Snails to cool for about 10 minutes. This will help the sugar set slightly, making them easier to serve. As the warmth permeates through these sweet spirals, get ready to enjoy them while they’re deliciously soft and fresh!
Expert Tips for Sugar Snails
- Check Your Yeast: Make sure your yeast is fresh and active; if it doesn’t foam after 10 minutes, discard and start over for fluffy Sugar Snails.
- Measure Flour Correctly: Spoon and level your flour to avoid a dry dough; too much flour can make the snails tough rather than soft and tender.
- Rolling Technique: Roll the dough tightly but not too tight; this ensures even spirals and a soft texture once baked.
- Second Rise Matters: Don’t skip the second rise; allowing the snails to puff up before baking leads to a lighter, airier pastry.
- Cooling Time: Let the Sugar Snails cool for 10 minutes before serving; this helps the sugar set while keeping the pastry soft.
What to Serve with Irresistible Sugar Snails
Indulging in these sweet spirals not only warms your heart but also opens up a world of delicious pairings.
- Fresh Fruit Salad: A bowl brimming with vibrant berries and citrus adds freshness, balancing the sweetness of Sugar Snails perfectly.
- Creamy Mashed Potatoes: While unconventional, the creamy texture and savory flavor contrast beautifully with the sugary pastries for an unexpected brunch delight.
- Rich Coffee: A cup of strong java enhances the flavors of your pastries, creating a comforting marriage between savory and sweet.
- Herbal Tea: Opt for a soothing herbal blend like chamomile or mint, allowing each bite of your Sugar Snails to resonate with warmth and calm.
- Tropical Smoothie: A refreshing blend of pineapple and banana can brighten your palate, making your brunch feel like a sunny escape.
- Cheese Platter: Pairing your Sugar Snails with a mix of soft cheeses offers a delightful contrast of flavors, pleasing for a unique brunch experience.
- Glazed Carrots: Sweet glazed carrots add a colorful, savory touch that brings balance and a hint of earthiness to your spread.
- Ice Cream: For dessert, try vanilla ice cream; the creamy coldness paired with warm pastries is a match made in dessert heaven.
Sugar Snails Variations & Substitutions
Feel free to play with this recipe and make it your own—delight your senses with some of these fun twists!
-
Vanilla Sugar Snails: Add vanilla extract to the butter filling for an enchanting sweetness. This simple addition elevates the flavor and invites comfort into every bite.
-
Cinnamon Sugar Snails: Sprinkle cinnamon alongside the sugar for that all-time favorite twist. It brings warmth and nostalgia, perfect for cozy mornings with a cup of coffee.
-
Lemon Sugar Snails: Incorporate lemon zest into your filling for a refreshing, citrusy kick. The bright flavor pairs beautifully with the sweetness, making them feel light and summery.
-
Nutty Sugar Snails: Add chopped almonds or pecans to the filling for a delightful crunch. The contrast of textures adds an exciting element to each soft bite, making them even more irresistible.
-
Glazed Sugar Snails: Drizzle a light glaze made of powdered sugar mixed with a splash of milk. This extra layer of sweetness creates more decadence, transforming them into a true bakery-style treat.
-
Chocolate Chip Sugar Snails: Fold in mini chocolate chips with the sugar for an indulgent chocolate variation. The melted chocolate complements the buttery pastry, enchanting dessert lovers everywhere.
-
Dairy-Free Sugar Snails: Substitute almond or oat milk for the dairy and use dairy-free butter in the filling. You won’t miss the creaminess, and your vegan friends will thank you!
-
Spicy Sugar Snails: Add a touch of cayenne or chili powder to the sugar for a sweet heat surprise. This daring twist is bold and will intrigue those looking for something out of the ordinary.
Explore these exciting variations, and if you’re feeling adventurous, why not try creating a mix of flavors? The possibilities are endless, and it’s all part of the delightful journey of baking your very own Sugar Snails! For those who love bold flavors, consider pairing them with a sweet and tangy pineapple twist by checking out Brown Sugar Pineapple. Happy baking!
Storage Tips for Sugar Snails
Room Temperature: Store Sugar Snails in an airtight container at room temperature for up to 2 days for best flavor and texture.
Refrigerator: If you’d like to keep them longer, they can be refrigerated for up to 5 days; simply reheat them in the oven or microwave before enjoying.
Freezer: For even longer storage, freeze baked Sugar Snails for up to 2 months. Allow them to completely cool, wrap tightly, and thaw at room temperature before warming in the oven.
Reheating: To refresh your Sugar Snails, reheat in a 350°F (175°C) oven for about 10 minutes to restore their warm, soft texture.
Make Ahead Options
These Sugar Snails are perfect for meal prep enthusiasts looking to save time on busy mornings! You can shape the snails and refrigerate them up to 24 hours in advance. To do this, follow the steps until the second rise, then cover the baking dish tightly with plastic wrap and place it in the fridge. This slow rise helps maintain their texture, making them just as delicious when baked fresh. When you’re ready to enjoy your homemade pastries, simply remove the snails from the fridge and let them sit at room temperature for about 30 minutes before baking. This way, you’ll savor the warm, buttery goodness of your Sugar Snails with minimal effort!
Sugar Snails Recipe FAQs
What type of yeast should I use for Sugar Snails?
You can use either active dry yeast or instant yeast for this recipe. Just make sure that your yeast is fresh; if it doesn’t foam after mixing with warm milk and sugar, it’s best to start over to ensure your Sugar Snails rise perfectly.
How should I store leftover Sugar Snails?
To keep your Sugar Snails fresh, store them in an airtight container at room temperature for up to 2 days. If you need to keep them longer, they can be refrigerated for up to 5 days. Reheat gently in the oven or microwave before devouring to restore their delightful softness!
Can I freeze Sugar Snails?
Absolutely! After baking and cooling, wrap the Sugar Snails tightly in plastic wrap and then place them in a freezer-safe bag. They can be frozen for up to 2 months. When you’re ready to enjoy, simply thaw at room temperature for a few hours, then warm them in a preheated oven at 350°F (175°C) for about 10 minutes.
What if my dough doesn’t rise?
If your dough doesn’t rise, it could be due to inactive yeast, which is often caused by using milk that’s too hot or cold. Make sure you’re using warm milk, around 100°F (37°C), to activate the yeast properly. Also, ensure you give the dough enough time to rise in a warm place, about 1 to 1.5 hours.
Are Sugar Snails suitable for people with nut allergies?
Yes! The basic Sugar Snails recipe is nut-free, but be cautious with any variations that include chopped nuts. Always check all ingredients, especially for fillings or toppings, to ensure they’re nut-free and safe for anyone with allergies.
How can I customize my Sugar Snails?
The possibilities are endless! You can add vanilla extract for a warm flavor, sprinkle cinnamon with the sugar for the classic cinnamon twist, or even incorporate lemon zest for a refreshing touch. If you enjoy nuts, consider adding chopped almonds or pecans for some delightful crunch. Each variation brings a new twist to this comforting pastry!
Warm and Sweet Sugar Snails: Your New Favorite Pastry
Ingredients
Equipment
Method
- Warm 1 cup of milk in a small saucepan to about 100°F. Pour warm milk into a mixing bowl and sprinkle in 2 teaspoons of active dry yeast and 1 teaspoon of sugar. Let sit for 5-10 minutes until foamy.
- Once the yeast is frothy, mix in 1/4 cup granulated sugar, 1 beaten egg, and 1/4 cup melted unsalted butter. Gradually mix in 3-4 cups of all-purpose flour and 1/2 teaspoon salt to form a soft dough.
- Knead the dough on a floured surface for 8-10 minutes until smooth and elastic. Form into a ball.
- Place dough in a greased bowl, cover, and let rise in a warm spot until doubled, about 1-1.5 hours.
- Punch down the risen dough and roll out into a rectangle about 1/4 inch thick on a floured surface.
- Spread a layer of softened butter over the dough, sprinkle with granulated sugar, and optionally add cinnamon.
- Roll the dough tightly into a log from the long end, sealing the seam, and slice into 1-inch pieces.
- Arrange snails in a greased baking dish, cover, and let rise in a warm place for 30-45 minutes until puffed.
- Preheat oven to 350°F. Bake snails for 20-25 minutes until golden brown.
- Remove from oven and let cool for about 10 minutes before serving.
Leave a Reply