
There’s something truly magical about a dessert that requires no baking, especially when it transports your taste buds to the tropics! Welcome to my kitchen, where we’re whipping up No-Bake Dragon Fruit Mini Cheesecakes. The beauty of this recipe lies not only in its creamy, dreamy layers but also in the delightful explosion of color and flavor that dragon fruit brings to the table. Perfect for last-minute gatherings, these mini cheesecakes are not only a breezy way to impress but also a healthier alternative to heavier options. Each little bite promises a burst of sweetness and refreshment that will leave you—and your guests—smiling. Curious to see how easy it is to create these stunning treats? Let’s dive in!
Why choose No-Bake Dragon Fruit Cheesecakes?
Effortless Delight: No baking means less mess and more time to enjoy the process!
Vibrant Presentation: The stunning pink color of dragon fruit makes these mini cheesecakes a feast for the eyes.
Customizable Flavors: Mix in your favorite fruits or adjust sweetness to match your preference – the options are endless!
Perfect for Gatherings: These mini treats are ideal for summer parties or any occasion where you want to impress without the hassle.
Healthier Indulgence: With a light and creamy texture, these desserts are a refreshing break from heavier options.
Make Ahead Friendly: Prepare them a day in advance, ensuring you’re ready for impromptu guests or a delightful evening at home. Embrace the tropical vibes and let these cheesecakes be the star of your dessert table!
No-Bake Dragon Fruit Mini Cheesecakes Ingredients
For the Crust
• Graham Crackers – Crushed for the crust’s base; adds crunch and sweetness. Substitute with gluten-free crackers for a gluten-free option.
• Unsalted Butter – Melted to bind the crust; provides rich flavor. Substitute with coconut oil for a dairy-free option.
• Sugar – Sweetens the crust; can be replaced with brown sugar for a deeper flavor.
For the Filling
• Cream Cheese – Softened for the cheesecake filling; creates a rich, creamy texture. Use dairy-free cream cheese for a vegan variation.
• Heavy Cream – Chilled and whipped to enhance the filling’s lightness; for a lighter option, use coconut cream.
• Powdered Sugar – Sweetens the filling; can be reduced for less sweetness if desired.
• Vanilla Extract – Enhances flavor; consider using vanilla bean for added depth.
• Lemon Juice – Adds acidity to balance sweetness; use lime juice for a different citrus note.
For the Dragon Fruit Layer
• Dragon Fruit – Pureed for the top layer; provides color and tropical flavor. Can be substituted with mango or berries for different flavors.
• Gelatin/Agar-Agar – Helps set the dragon fruit layer; essential for firm texture. Omit for a softer layer but note the structural difference.
• Warm Water – Used to dissolve gelatin/agar-agar; no alternatives necessary.
For Garnishing
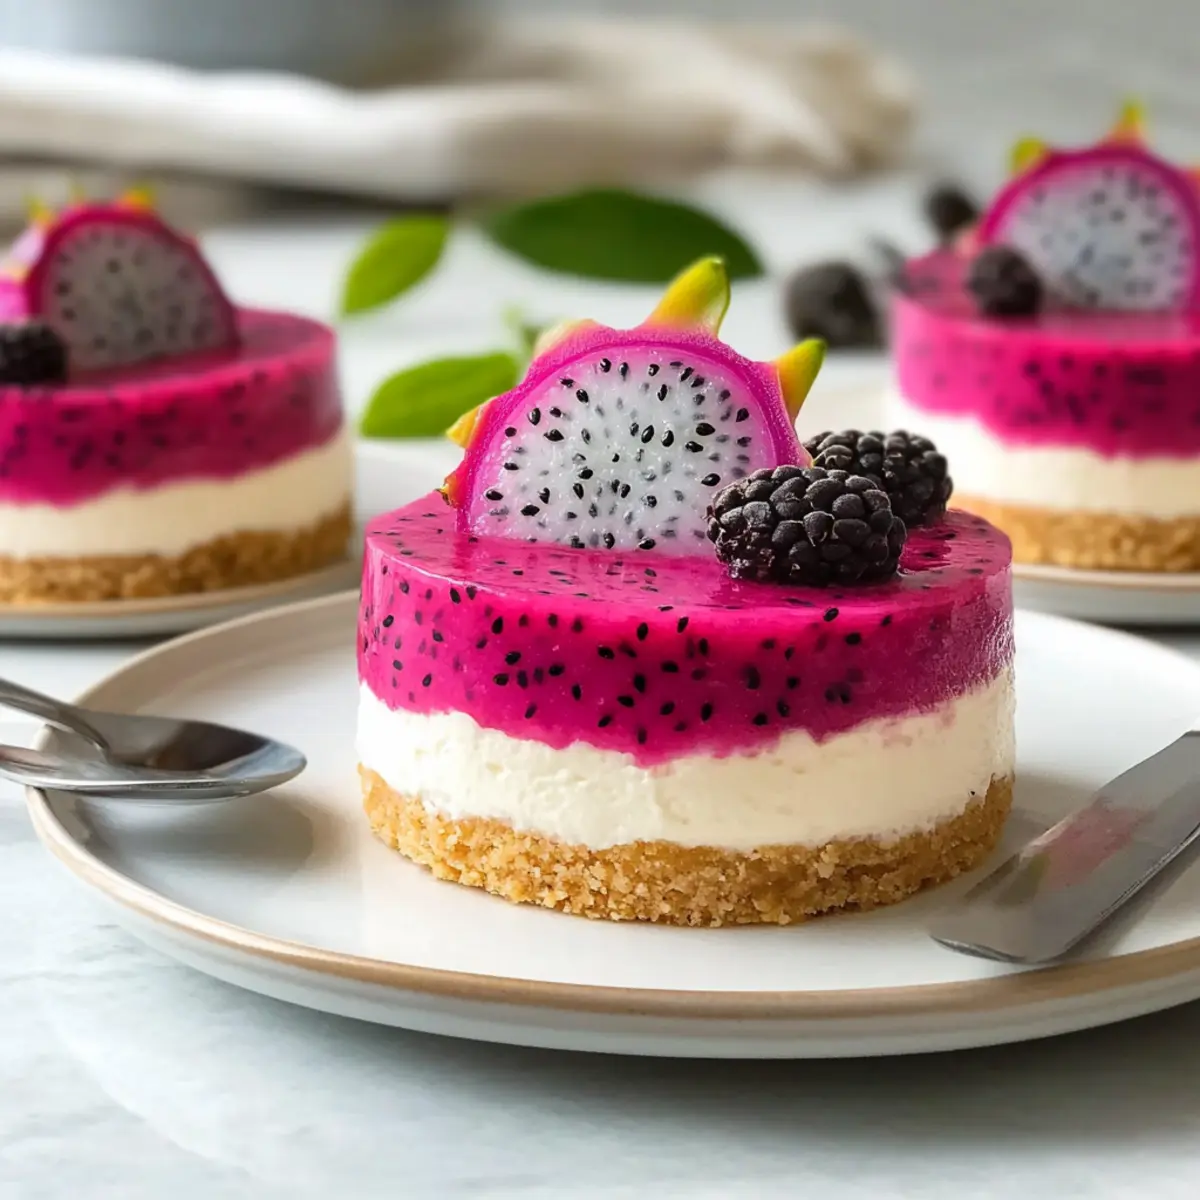
• Fresh Dragon Fruit Cubes – Adds texture and a pop of color; use seasonal fruit or edible flowers for alternative presentation.
• Mint Leaves – Provides a refreshing touch; adds an attractive garnish to your mini cheesecakes.
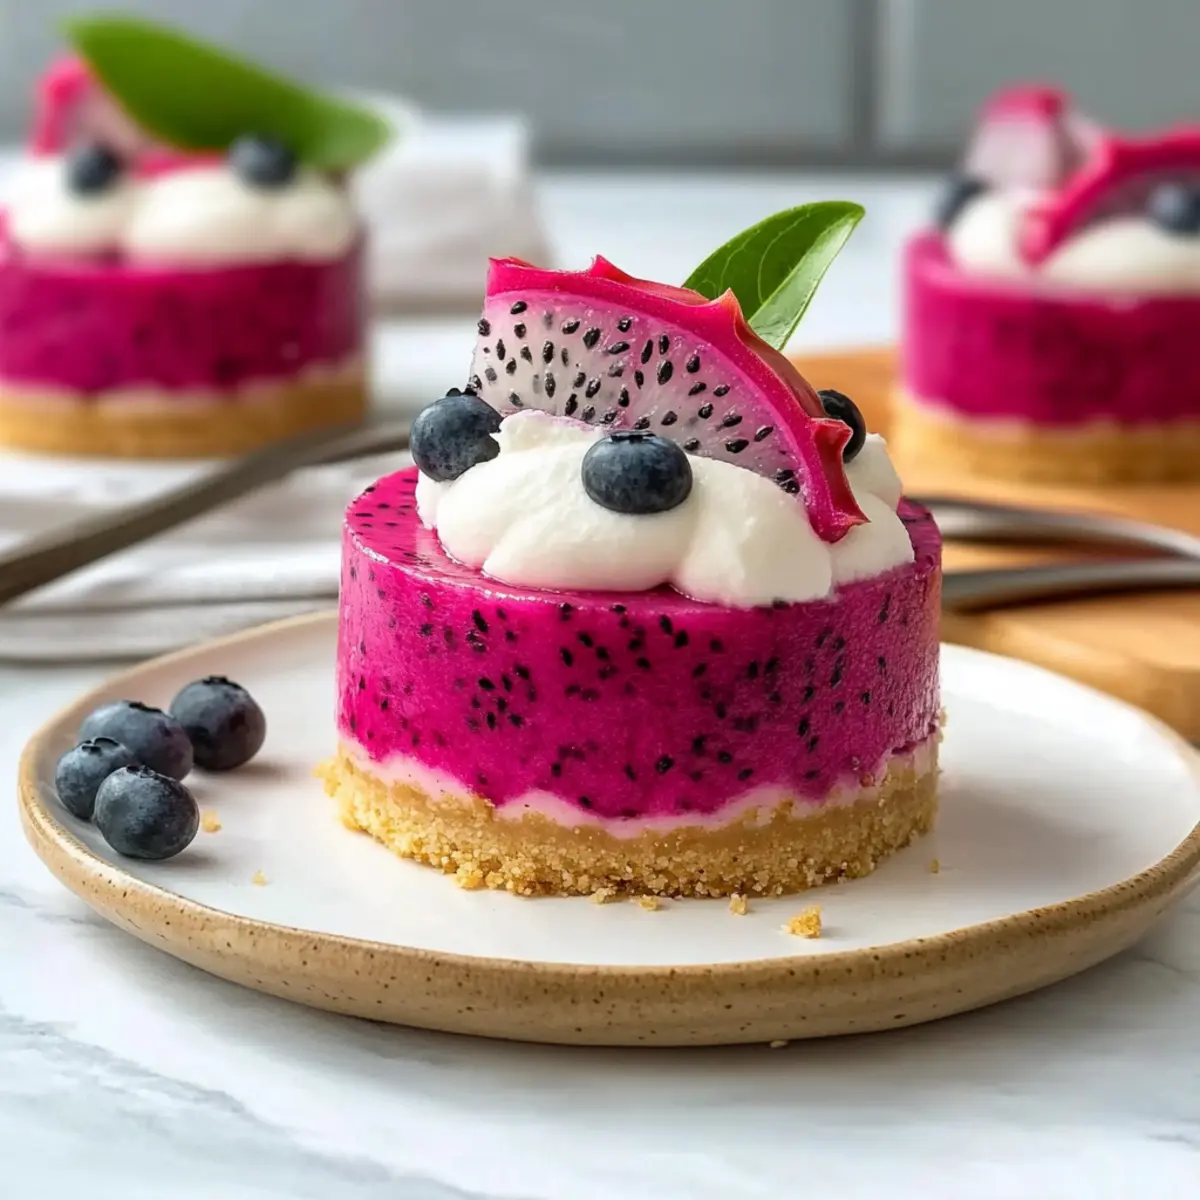
• Whipped Cream – For a creamy finishing touch; can be lightly sweetened for extra indulgence.
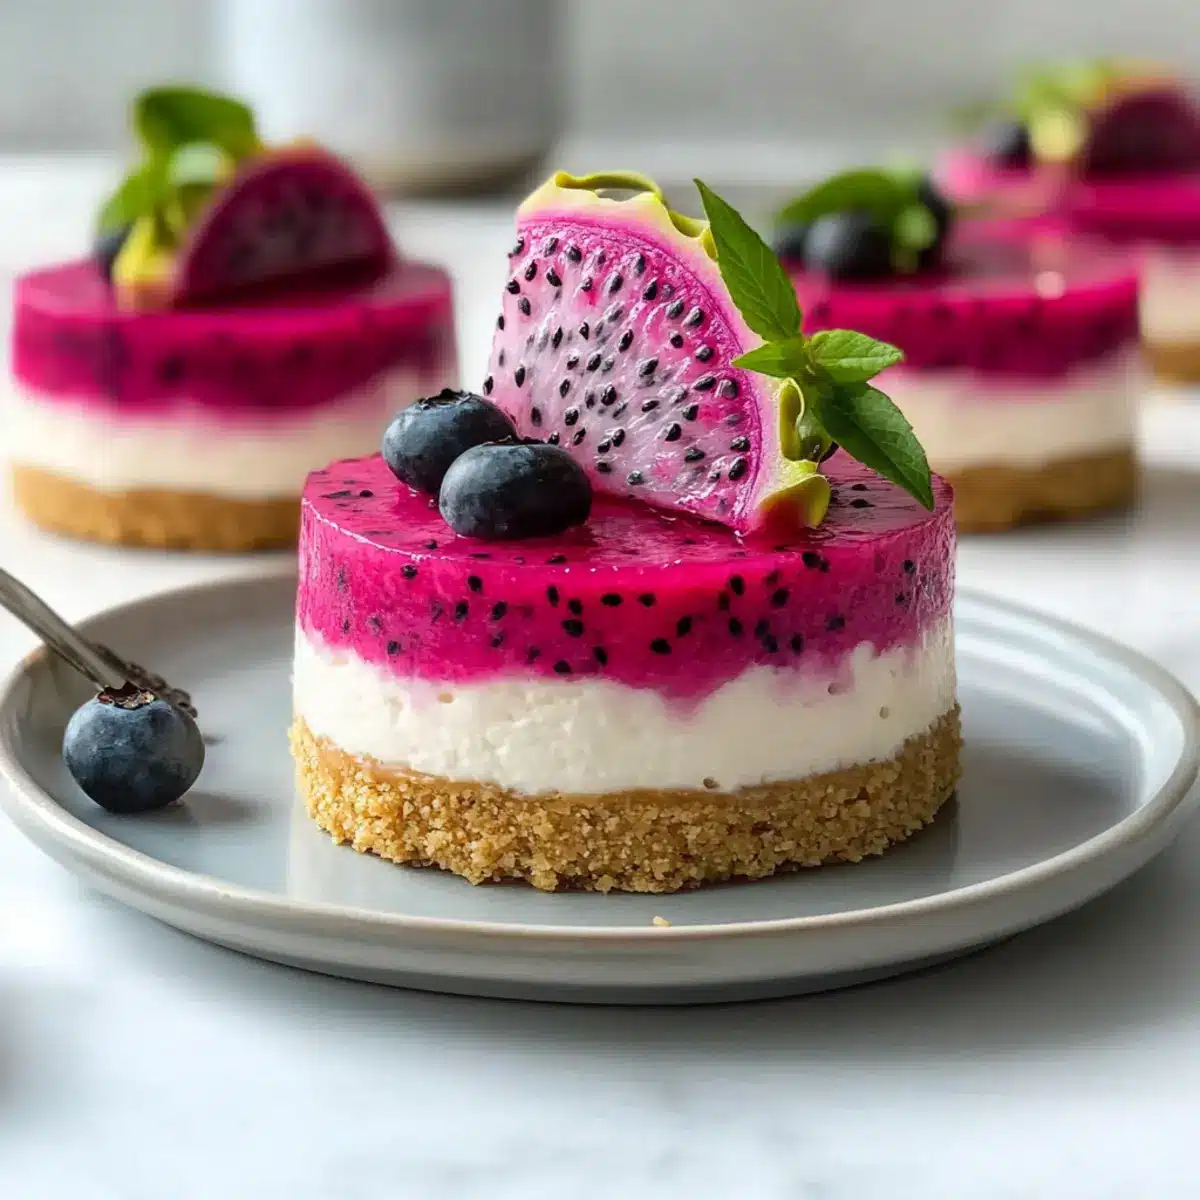
These No-Bake Dragon Fruit Mini Cheesecakes are a delightful treat that you can whip up with ease, showcasing the beautiful and captivating flavor of tropical fruits!
Step‑by‑Step Instructions for No-Bake Dragon Fruit Mini Cheesecakes
Step 1: Prepare the Crust
In a mixing bowl, combine crushed graham crackers, melted unsalted butter, and sugar, stirring until well blended. The texture should resemble damp sand. Firmly press this mixture into the bottoms of muffin cups or your chosen dessert molds to form an even layer. Chill in the refrigerator for at least 30 minutes to set the crust while you prepare the filling.
Step 2: Make the Filling
In a clean mixing bowl, beat softened cream cheese and powdered sugar together until the mixture is smooth and fluffy, about 2-3 minutes. In a separate bowl, whip the chilled heavy cream to soft peaks. Gently fold the whipped cream into the cream cheese mixture, followed by adding the vanilla extract and lemon juice. This creamy filling will be light and airy – perfect for your No-Bake Dragon Fruit Mini Cheesecakes.
Step 3: Assemble Mini Cheesecakes
Once the crust has set, carefully spoon the cheesecake filling over the chilled crusts, smoothing the tops with a spatula for an even finish. Fill each mold about three-quarters full, leaving room for the dragon fruit layer on top. Return the mini cheesecakes to the refrigerator while you prepare the vibrant dragon fruit topping.
Step 4: Prepare the Dragon Fruit Layer
In a bowl, mix pureed dragon fruit with dissolved gelatin or agar-agar, ensuring there are no lumps. If desired, add powdered sugar to sweeten the mixture. Whisk until perfectly blended into a vibrant pink consistency that will beautifully top your mini cheesecakes.
Step 5: Top Cheesecakes
Remove the cheesecake-filled cups from the refrigerator and carefully spoon the dragon fruit mixture over the cheesecake layer. Distribute the topping evenly, ensuring it covers the filling. The contrasting colors will be visually striking. Chill the mini cheesecakes again for about 4 hours to ensure everything sets properly.
Step 6: Garnish and Serve
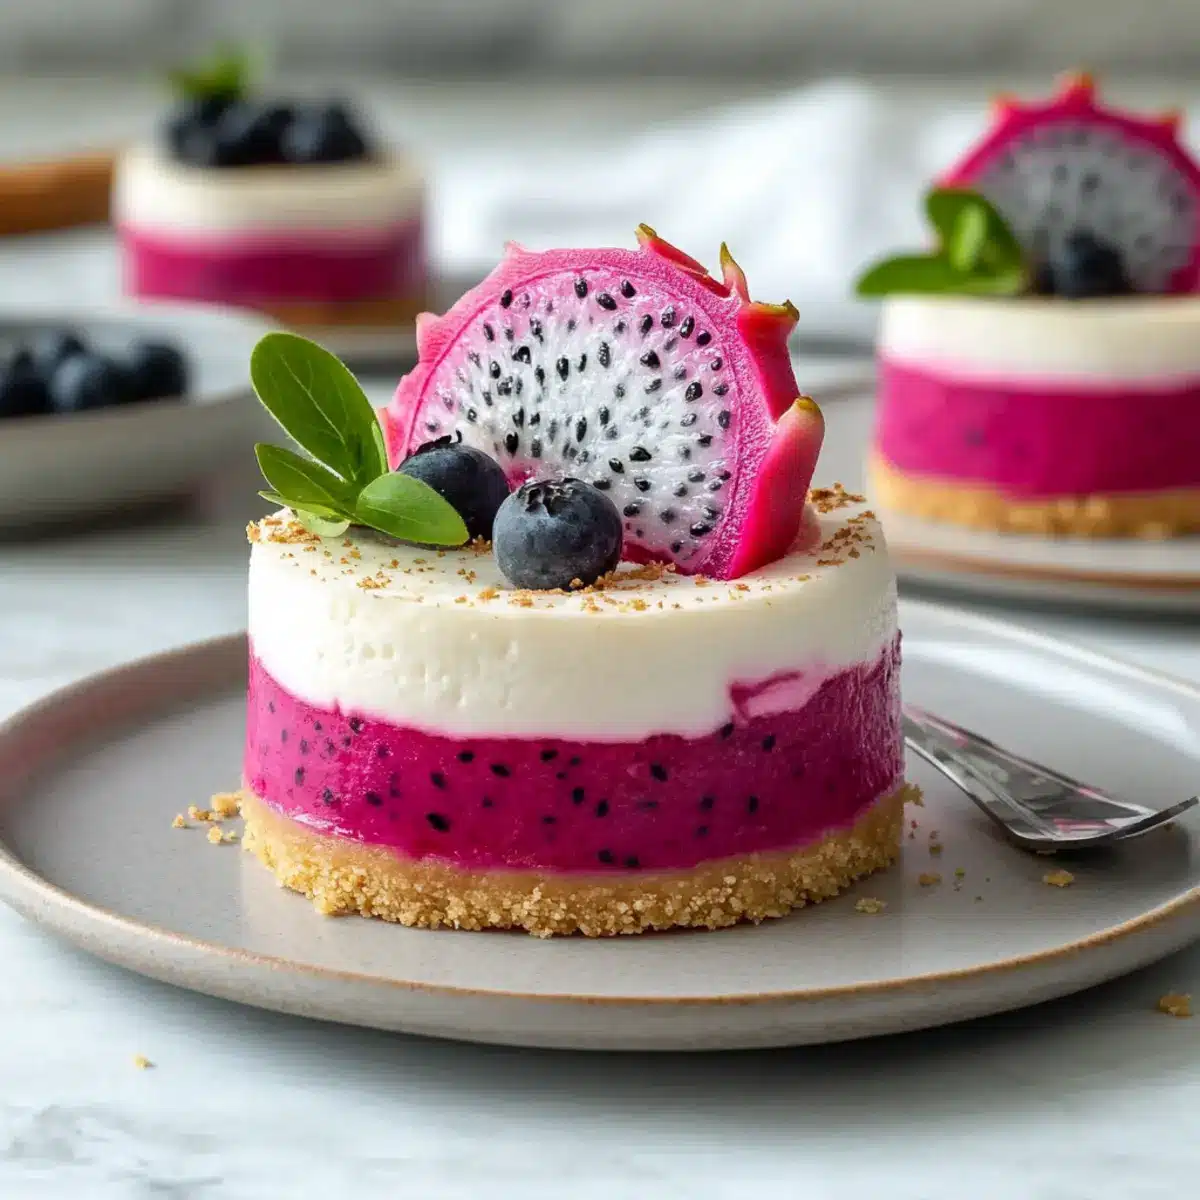
Once the cheesecakes have set, take them out of the refrigerator. Garnish each mini cheesecake with fresh dragon fruit cubes, mint leaves, or a dollop of whipped cream for an eye-catching presentation. Serve these delightful No-Bake Dragon Fruit Mini Cheesecakes chilled for an irresistible tropical treat that will impress your guests!
Expert Tips for No-Bake Dragon Fruit Mini Cheesecakes
-
Proper Cream Cheese: Ensure your cream cheese is fully softened before mixing. This prevents lumps and guarantees a creamy filling, crucial for your No-Bake Dragon Fruit Mini Cheesecakes.
-
Chilling Time: Don’t rush the chilling process! Allow the cheesecakes to set for at least 4 hours, or overnight if possible. This time ensures they hold their shape and flavor well.
-
Adjust Sweetness: Taste as you go! Modify the amount of powdered sugar in your filling and topping so that it aligns perfectly with your sweetness preference.
-
Layer Wisely: Pour the dragon fruit layer carefully over the cheesecake filling to maintain distinct layers. This beautiful presentation enhances both taste and visual appeal.
-
Keep Refrigerated: Always keep your mini cheesecakes chilled until service. They should not be left at room temperature for more than 2 hours to maintain their texture.
No-Bake Dragon Fruit Mini Cheesecakes Variations
Feel free to unleash your creativity and tailor this delightful dessert to your taste buds!
-
Dairy-Free: Substitute cream cheese with dairy-free alternatives and use coconut cream for a vegan-friendly twist.
Your guests won’t even notice the difference, but they’ll appreciate the inclusive option! -
Gluten-Free: Swap out graham crackers for gluten-free cookies or nuts to keep everyone happy and satiated.
This way, those with gluten sensitivities can enjoy a slice of the tropical paradise too! -
Flavor Fusion: Incorporate mango puree or mixed berries into the filling for a different fruity flair.
Pairing flavors can elevate your cheesecakes to new heights, turning them into a rainbow of delicious options! -
Citrus Kick: Replace lemon juice with lime juice for a zesty alternative that adds a fun twist to the tartness.
It contrasts beautifully with the sweetness of dragon fruit, bringing a whole new dimension to each bite. -
Less Sweet: Cut down on the powdered sugar in the filling for a lighter dessert that still satisfies.
This alteration is perfect if you’re keen on enjoying the natural sweetness of the dragon fruit itself! -
Nutty Crust: Experiment with almond flour or crushed nuts instead of graham crackers for a richer, nuttier base.
Not only does this add texture, but it also brings a wholesome touch to your mini cheesecakes! -
Heat Lover’s Dream: Toss in a dash of chili powder or cayenne pepper in the dragon fruit layer if you’re in the mood for some heat.
The spice complements the sweetness beautifully for those who like to live on the wild side. -
Chocolate Drizzle: Add a drizzle of melted dark chocolate on top before serving for an indulgent touch.
Chocolate and dragon fruit create an unexpected but delightful combination that will have everyone reaching for seconds!
Feel free to mix and match these ideas, too; the possibilities are endless! And if you’re interested in pairing these delightful treats with something savory, check out my Orzo Soup Mini recipe — it makes for a perfect light meal before these sweet desserts!
Storage Tips for No-Bake Dragon Fruit Mini Cheesecakes
-
Fridge: Store the mini cheesecakes in an airtight container in the refrigerator for up to 3-4 days to keep them fresh and creamy.
-
Freezer: If you need to freeze them, wrap each cheesecake securely in plastic wrap and foil, then place in the freezer for up to 2 months. Thaw in the fridge before serving.
-
Serving Tip: Serve chilled to enjoy the best texture and flavor. Avoid leaving them out at room temperature for more than 2 hours.
-
Reheating: Since these No-Bake Dragon Fruit Mini Cheesecakes are best served cold, there’s no reheating necessary; simply enjoy them straight from the fridge!
Make Ahead Options
These No-Bake Dragon Fruit Mini Cheesecakes are a dream come true for busy home cooks! You can prepare both the crust and the cheesecake filling up to 24 hours in advance, allowing you more time to relax before serving. Simply follow the initial steps of making the crust and filling, then chill them as directed. The vibrant dragon fruit layer can also be made and stored in the refrigerator for a few hours until you’re ready to assemble. To maintain quality, ensure all components are well-covered to prevent drying or any absorption of other flavors. When you’re ready to enjoy, just top the cheesecakes with the dragon fruit mixture and garnish before serving—your guests will be amazed at how fresh and delicious they taste!
What to Serve with No-Bake Dragon Fruit Mini Cheesecakes
Elevate your tropical dessert experience with delightful pairings that balance flavors and textures beautifully.
- Coconut Sorbet: A refreshingly cool treat that enhances the tropical vibe, complementing the dragon fruit’s sweetness perfectly.
- Tropical Fruit Salad: Fresh mango, pineapple, and kiwi add vibrant colors and textures, enhancing the dessert’s summery appeal.
- Lightly Sweetened Whipped Cream: A dollop on top softens the cheesecake’s richness, providing a luscious mouthfeel without overwhelming flavors.
- Mint Limeade: This zesty drink refreshes the palate, creating a delightful contrast to the creamy mini cheesecakes.
- Almond Biscotti: A crunchy companion that adds a satisfying textural contrast, perfect for dipping or enjoying alongside the cheesecakes.
- Pineapple Chunks: Juicy and sweet, they bring an additional tropical element that brightens the entire dessert experience.
- Chai-Spiced Rice Pudding: Creamy and cozy, this dessert brings warmth and spice to the table, offering a delightful balance of flavors.
- Chocolate-Covered Strawberries: Decadent, yet light, these berries introduce a lovely richness that complements the cheesecake’s fluffiness nicely.
- Iced Green Tea: A refreshing and lightly bitter drink that cleanses the palate, allowing the flavors of the cheesecakes to shine through.
- Passion Fruit Coulis: Drizzled over each mini cheesecake, it adds a vibrant tanginess that enhances the overall flavor profile beautifully.
No-Bake Dragon Fruit Mini Cheesecakes Recipe FAQs
How do I choose ripe dragon fruit?
Absolutely! When selecting dragon fruit, look for one that’s slightly soft to the touch but not too mushy. The skin should be vibrant in color, typically pink or yellow with green scales. Avoid fruits with dark spots or blemishes, as they may be overripe.
What is the best way to store No-Bake Dragon Fruit Mini Cheesecakes?
Very! You can store these delightful mini cheesecakes in an airtight container in the refrigerator for up to 3-4 days. This helps maintain their creamy texture. If you need to keep them longer, consider freezing.
Can I freeze No-Bake Dragon Fruit Mini Cheesecakes?
Of course! To freeze, wrap each mini cheesecake securely in plastic wrap and then in foil. Place them in a freezer-safe container. They can be stored like this for up to 2 months. When you’re ready to enjoy, thaw them in the refrigerator overnight for the best texture.
What should I do if my cheesecake layer is too soft?
No worries! If your cheesecake filling didn’t set properly, consider refrigerating them for a longer period, at least 6-8 hours or overnight if you can manage. If the issues persist, check if your gelatin was fully dissolved before adding it to the dragon fruit layer; it’s essential for the right texture.
Are there any dietary considerations for pets or allergies?
Absolutely! While dragon fruit is safe for most dogs to consume in small quantities, it’s best to keep these cheesecakes away from pets due to the ingredients like cream cheese and sugar. For allergies, always double-check that your cream cheese and any substituted ingredients are free from the allergens you may be sensitive to.
No-Bake Dragon Fruit Mini Cheesecakes for a Tropical Escape
Ingredients
Equipment
Method
- In a mixing bowl, combine crushed graham crackers, melted unsalted butter, and sugar, stirring until well blended. Firmly press this mixture into the bottoms of muffin cups or your chosen dessert molds to form an even layer. Chill in the refrigerator for at least 30 minutes to set the crust while you prepare the filling.
- In a clean mixing bowl, beat softened cream cheese and powdered sugar together until the mixture is smooth and fluffy, about 2-3 minutes. In a separate bowl, whip the chilled heavy cream to soft peaks. Gently fold the whipped cream into the cream cheese mixture, followed by adding the vanilla extract and lemon juice.
- Once the crust has set, carefully spoon the cheesecake filling over the chilled crusts, smoothing the tops with a spatula for an even finish. Fill each mold about three-quarters full, leaving room for the dragon fruit layer on top.
- In a bowl, mix pureed dragon fruit with dissolved gelatin or agar-agar, ensuring there are no lumps. If desired, add powdered sugar to sweeten the mixture. Whisk until perfectly blended into a vibrant pink consistency.
- Remove the cheesecake-filled cups from the refrigerator and carefully spoon the dragon fruit mixture over the cheesecake layer. Chill the mini cheesecakes again for about 4 hours to ensure everything sets properly.
- Once the cheesecakes have set, garnish each mini cheesecake with fresh dragon fruit cubes, mint leaves, or a dollop of whipped cream for an eye-catching presentation. Serve these delightful No-Bake Dragon Fruit Mini Cheesecakes chilled.
Leave a Reply