
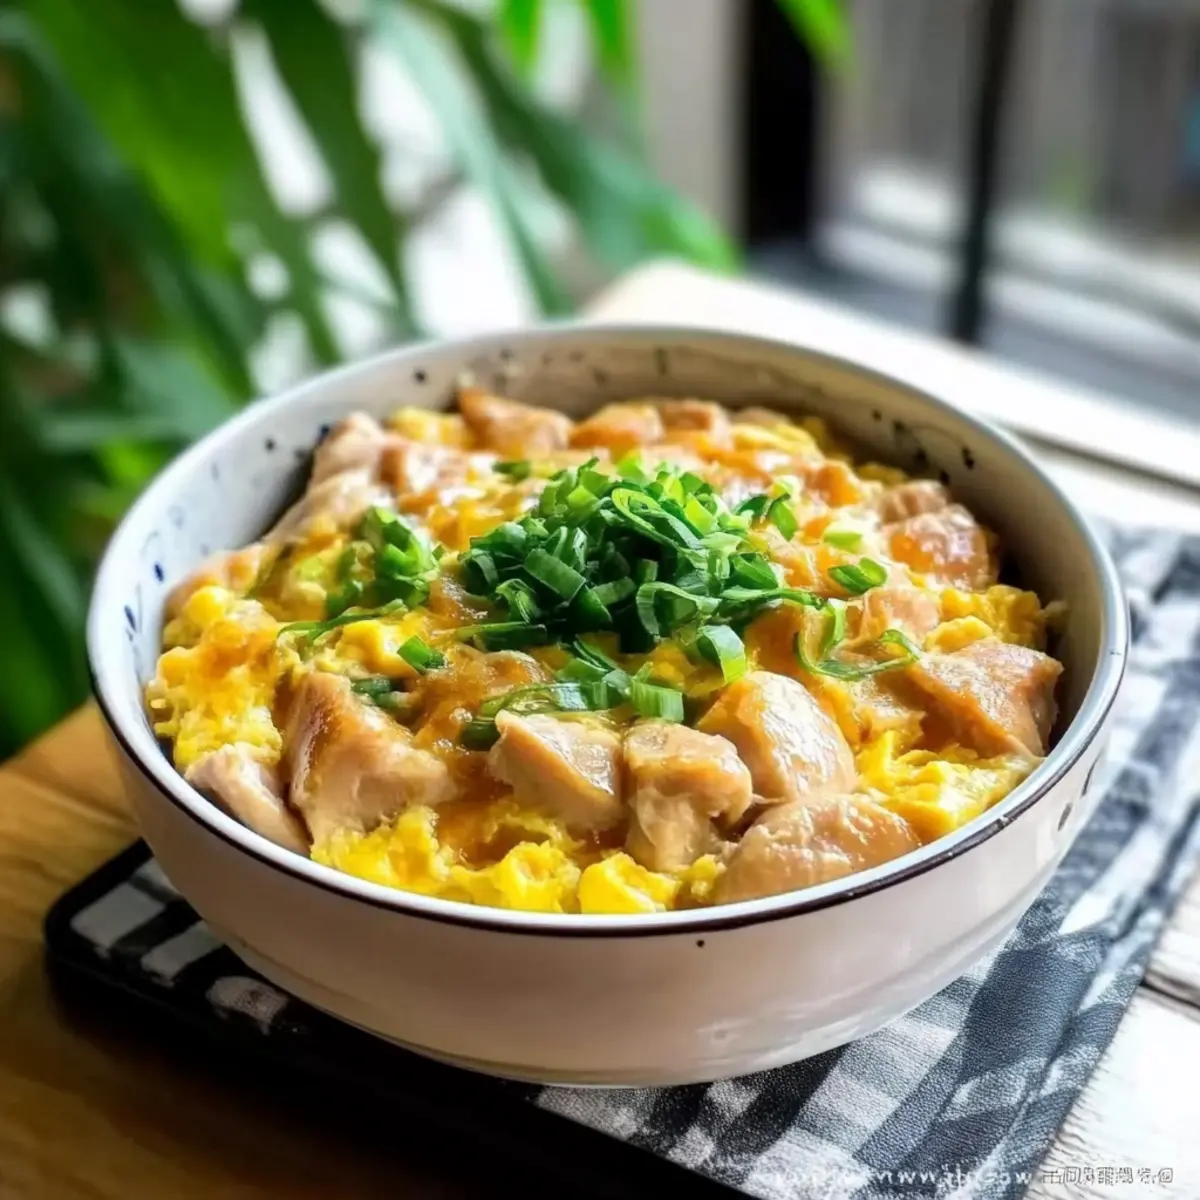
As the scent of simmering chicken wafted through my kitchen, it brought back warm memories of family dinners and laughter. Today, I’m excited to share my quick and easy Oyakodon, a beloved Japanese Chicken & Egg Rice Bowl that has become a staple in my home. Loaded with tender chicken cooked in a sweet and savory broth, and creamy scrambled eggs, this dish comes together in just 15 minutes! It’s the perfect comfort food that not only satisfies your cravings but also fits seamlessly into your busy lifestyle. Whether you’re winding down after a long day or whipping up something special for the family, this single-pan donburi is sure to impress. So, are you ready to dive into a bowl of cozy goodness?
Why is Oyakodon a Must-Try?
Quick and Easy: This Oyakodon comes together in just 15 minutes, so dinner doesn’t have to be a chore! Perfect for busy weekdays when you want something delicious without spending hours in the kitchen.
Comforting Flavors: Each bite bursts with savory chicken and creamy eggs bathed in a sweet broth, creating a dish that warms your soul.
Single-Pan Wonder: With everything cooked in one pan, cleanup is a breeze. You’ll have more time to relax or enjoy a side of Honey Dijon Chicken or Lemon Garlic Chicken.
Customizable Goodness: You can easily tailor this recipe to your liking; swap chicken for leaner options or toss in some veggies, making it versatile enough for any palate.
Crowd-Pleaser: Serve this dish to family or friends, and watch as they savor every bite—it’s always a hit. Who wouldn’t love a hearty Japanese Chicken & Egg Rice Bowl at the dinner table?
Japanese Chicken & Egg Rice Bowl Ingredients
For the Chicken and Broth
- 150 g skinless boneless chicken thighs – The heart of this dish; chicken thighs provide tenderness.
- 1/2 medium onion – Adds sweetness and depth; yellow or white types can be used interchangeably.
- 1/2 cup chicken stock or dashi – Delivers umami flavor; vegetable stock can be a vegetarian alternative.
- 1 tbsp soy sauce – Provides savory depth; use tamari for a gluten-free variation.
- 1 tbsp mirin – Adds a hint of sweetness; can be substituted with cooking sake mixed with a little sugar.
- 1 tsp sugar – Balances the flavors; reduce or omit for lower sweetness.
For the Eggs and Rice
- 2 large eggs – Creates a soft, creamy texture; whisk to your preference.
- 1 1/2 cups cooked rice – Serves as the delicious base; short-grain rice is ideal for authenticity.
Optional Garnishes
- Green onion – Provides freshness and color; chop finely for garnish.
- Sesame oil – Adds a nutty aroma; drizzle a little on top for extra flavor.
- Nori – A touch of umami; cut into strips to sprinkle over your bowl.
- Togarashi – A spicy Japanese seasoning; for an extra kick if you like heat.
Now that you have your ingredients ready, you’re just a few steps away from savoring this delightful Japanese Chicken & Egg Rice Bowl!
Step‑by‑Step Instructions for Japanese Chicken & Egg Rice Bowl
Step 1: Marinate the Chicken
In a medium mixing bowl, combine the 150 g of skinless boneless chicken thighs with 1 tbsp soy sauce, 1 tbsp mirin, and 1 tsp sugar. Mix thoroughly and allow the chicken to marinate for about 5-10 minutes at room temperature while you prepare the other ingredients. This step enhances the flavor, setting the foundation for your delicious Japanese Chicken & Egg Rice Bowl.
Step 2: Prepare Eggs
Crack 2 large eggs into a bowl and whisk gently until the yolks and whites are combined, but not overmixed. You want a marbled effect, maintaining some structure in the mixture for a lovely texture once cooked. Set the eggs aside so they are ready for incorporation into the pan later.
Step 3: Sauté Aromatics
In a small skillet or frying pan, heat 1/2 cup of chicken stock over medium heat. Once warmed, add the thinly sliced 1/2 medium onion and sauté for about 1 minute, or until the onion becomes fragrant and translucent. This step infuses your broth with aromatic goodness, enhancing the overall flavor of your Oyakodon.
Step 4: Cook Chicken
Add the marinated chicken to the pan with onions, cooking for 1-2 minutes. Stir gently, ensuring the chicken is evenly coated in the broth. You’ll know it’s ready when the chicken starts to turn opaque and is nearly cooked through. This step is essential for achieving tender meat that melds beautifully with the other flavors.
Step 5: Add Eggs
Pour the beaten eggs evenly over the chicken mixture in the pan. Allow the eggs to set slightly at the edges for about 30 seconds before gently mixing. Lightly scramble the eggs for a few seconds until still slightly runny, creating that signature soft and creamy texture found in a classic Japanese Chicken & Egg Rice Bowl.
Step 6: Serve
Spoon the delicious chicken and egg mixture over 1 1/2 cups of hot cooked rice in serving bowls. For an extra touch, garnish with finely chopped green onion, a drizzle of sesame oil, and strips of nori or a sprinkle of togarashi. Savor the warmth and comfort of your homemade Japanese Chicken & Egg Rice Bowl, perfect for any meal.
Japanese Chicken & Egg Rice Bowl Variations
Feel free to play around with these ideas to make the Oyakodon uniquely yours; it’ll be a delightful adventure for your taste buds!
-
Dairy-Free: Substitute traditional eggs with a vegan scramble for a plant-based version that caters to dietary needs. It’s just as comforting and delicious!
-
Vegetarian: Use firm tofu or seitan in place of chicken, simmered in the same savory broth for a satisfying alternative that doesn’t compromise flavor.
-
If You Crave Crunch: Add chopped vegetables like bell peppers or carrots halfway through cooking to maintain some texture and add vibrant colors.
-
For a Spicy Twist: Toss in red pepper flakes or a dash of sriracha to the marinade for a zesty kick that elevates the dish’s complexity.
-
Add Extra Umami: Incorporate shiitake mushrooms or a touch of miso paste into the broth for a hearty, depth-boosting flavor that’s full of richness.
-
Different Grains: Swap the rice for quinoa or brown rice to give your bowl a nutritious boost while maintaining a delightful texture.
-
For Citrus Zest: Drizzle some fresh lemon or yuzu juice over your bowl right before serving to brighten the flavors and add a refreshing touch.
-
Samurai Upgrade: Serve your Oyakodon with a side of pickled vegetables or miso soup for an authentic Japanese dining experience that warms the soul. Check out this delicious Crockpot Coconut Chicken for more flavorful inspiration!
How to Store and Freeze Oyakodon
Fridge: Store leftovers in an airtight container for up to 2 days. To maintain moisture when reheating, add a splash of water before warming on the stove.
Freezer: Oyakodon can be frozen for up to 1 month. Portion into airtight containers, ensuring they’re sealed tightly to avoid freezer burn.
Reheating: When ready to enjoy, thaw overnight in the fridge, then reheat gently on the stove over low heat, stirring occasionally to ensure even warming.
Serving Suggestion: For best flavor, consider garnishing with fresh green onions or nori just before serving your reheated Japanese Chicken & Egg Rice Bowl.
What to Serve with 15-Minute Oyakodon?
Experience a delightful symphony of flavors by creating a comforting spread around this quick and satisfying rice bowl.
- Miso Soup: A warm bowl of miso soup complements the Oyakodon perfectly, adding umami and a light brininess that elevates your meal.
- Pickled Vegetables: Serve alongside tangy pickles to add crunch and brightness, balancing the rich, savory flavors of the rice bowl.
- Steamed Edamame: These lightly salted, tender beans provide an added protein boost and delightful texture that works beautifully with the comforting rice dish.
- Crispy Tempura: The contrasting crunch of tempura vegetables or shrimp enhances the overall meal experience, creating a delightful harmony of textures.
- Japanese Salad: A refreshing side salad with sesame dressing brings balance and freshness, making it a perfect companion to the hearty Oyakodon.
- Sake or Green Tea: A glass of chilled sake or a warm cup of green tea will enhance the flavors and create a relaxing atmosphere for your dinner.
- Fruit Miso Soup: Round out the meal with a refreshing fruit miso soup—its sweetness will cleanse the palate after the savory richness of the rice bowl.
- Sweet Mochi Dessert: Finish on a sweet note with soft and chewy mochi for a satisfying texture contrast, providing a delightful end to your dining experience.
Make Ahead Options
These delightful Oyakodon bowls are perfect for meal prep enthusiasts! You can marinate the chicken (150 g skinless boneless chicken thighs) up to 24 hours ahead in the mixture of soy sauce, mirin, and sugar to enhance flavors. To save even more time, you can also chop the onion and refrigerate it for up to 3 days. When ready to serve, simply sauté the onions and chicken, then add the eggs as instructed, and you’ll enjoy just as delicious a meal with minimal effort. Remember, for best results, store the marinated chicken in an airtight container to maintain its quality, ensuring your Japanese Chicken & Egg Rice Bowl is fresh and comforting!
Expert Tips for Japanese Chicken & Egg Rice Bowl
-
Perfectly Marinated Chicken: Let the chicken marinate for at least 10 minutes to enhance flavor absorption, creating that savory depth in your Japanese Chicken & Egg Rice Bowl.
-
Egg Consistency: Whisk the eggs until they’re about 70-80% mixed. This helps maintain a soft, creamy texture without becoming too rubbery when cooked.
-
Rice Cooking Tip: Use slightly less water than usual to cook the rice, ensuring it can absorb delicious broth without becoming too soggy.
-
Vegetable Additions: Feel free to sneak in pre-cooked vegetables like bell peppers or mushrooms for a nutritional boost; just make sure they’re tender before adding them to the pan.
-
Watch the Heat: Keep your pan at medium heat when cooking chicken and eggs to prevent overcooking, ensuring everything remains tender and flavorful.
Japanese Chicken & Egg Rice Bowl Recipe FAQs
What is the best way to select chicken for Oyakodon?
Absolutely! When choosing chicken for your Oyakodon, opt for skinless boneless chicken thighs as they’re tender and flavorful. If you prefer a leaner option, chicken breast works well, though it might be a bit drier. Look for thighs that are plump and have a fresh pink color without any dark spots or unpleasant odors.
How should I store leftover Oyakodon?
Very! To store leftover Oyakodon, place it in an airtight container and keep it in the refrigerator for up to 2 days. To reheat, simply add a splash of water or chicken stock to keep it moist and warm gently over low heat on the stove. This way, you’ll retain that lovely texture of the chicken and eggs!
Can I freeze Oyakodon?
Yes, you can! To freeze, portion the Oyakodon into airtight containers and seal them tightly to prevent freezer burn. It can be stored in the freezer for up to 1 month. When you’re ready to enjoy it, thaw it overnight in the fridge before gently reheating on the stove with a little added liquid for moisture.
What should I do if my Oyakodon is too dry?
If you find that your Oyakodon has turned out dry, don’t worry! Simply add a little chicken stock or water to the pan while reheating it, stirring gently to incorporate. Another option is to scramble a couple of eggs and mix them in just before serving, adding a creamy texture and richness to the dish!
Is Oyakodon suitable for those with dietary restrictions?
Absolutely! If you or someone you’re serving has dietary restrictions, it’s easy to adapt. Use gluten-free soy sauce (like tamari) to make it suitable for those with gluten sensitivities. For a vegetarian version, substitute chicken with firm tofu, and use vegetable broth instead of chicken stock.
How do I know if my eggs are cooked perfectly in Oyakodon?
For that signature creamy texture, aim for the eggs to be just slightly runny when you serve the Oyakodon. After pouring the beaten eggs over the chicken in the pan, let them set at the edges for about 30 seconds before gently mixing. The residual heat will continue cooking the eggs without overcooking them. Enjoy!
Savory Japanese Chicken & Egg Rice Bowl in Just 15 Minutes
Ingredients
Equipment
Method
- In a medium mixing bowl, combine the chicken thighs with soy sauce, mirin, and sugar. Mix and marinate for about 5-10 minutes.
- Crack eggs into a bowl and whisk gently until combined; set aside.
- In a frying pan, heat chicken stock over medium heat and sauté the onion for about 1 minute.
- Add the marinated chicken to the pan, cooking for 1-2 minutes or until cooked through.
- Pour the beaten eggs over the chicken and mix gently until slightly runny, then remove from heat.
- Spoon the chicken and egg mixture over the cooked rice and garnish as desired.
Leave a Reply