
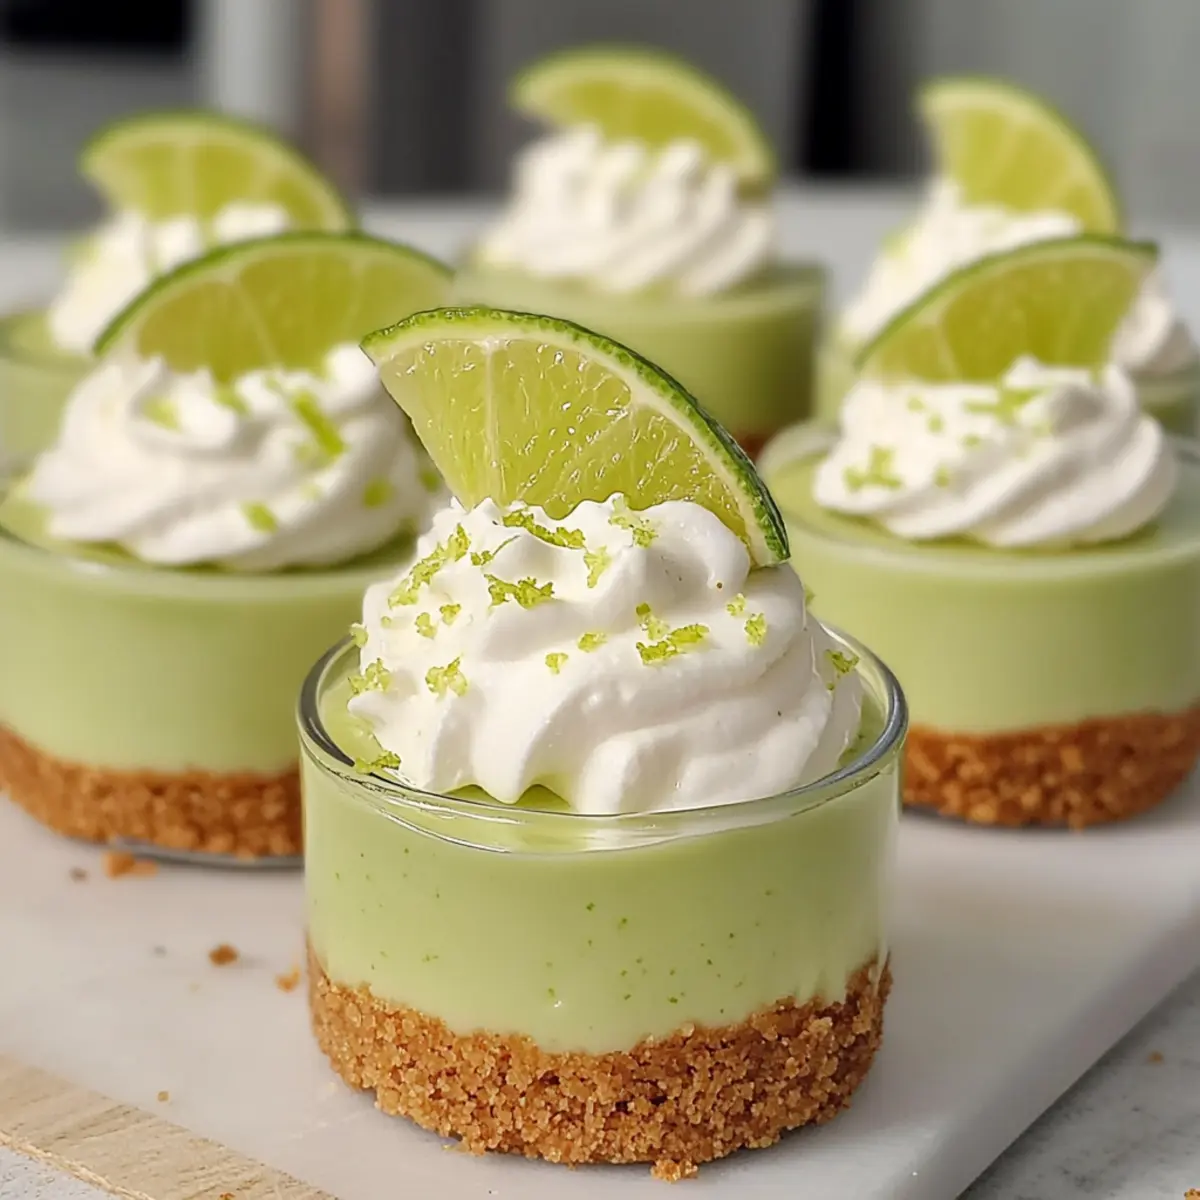
On a sweltering summer afternoon, the last thing I want is to bake in the kitchen! That’s when I discovered these delightful No-Bake Key Lime Cheesecake Cups—my go-to solution for a refreshing dessert. Each cup is a little treasure of creamy, zesty goodness, perfectly seated on a buttery graham cracker crust. They’re not just easy to whip up; they also invite a sprinkle of creativity, allowing you to customize with your favorite toppings. Whether you’re hosting a picnic or treating yourself after a long day, these individual cheesecake cups are bound to impress. Curious about making these irresistible bites at home? Let’s dive into this delightful recipe!
Why Are These Cheesecake Cups So Amazing?
Simply Delightful: These No-Bake Key Lime Cheesecake Cups are a breeze to prepare and eliminate the need for turning on the oven, making them an ideal choice for warmer days.
Inviting Customization: With endless topping possibilities—from fresh berries to zesty lime slices—you can create a unique dessert perfect for any gathering.
Light and Refreshing: Each cup packs a punch of tart lime flavor, balanced by a creamy filling, making it the perfect treat for those craving something refreshing.
Gluten-Free Option: Easily swap to gluten-free graham crackers for an inclusive dessert everyone can enjoy, just like with Iced Cinnamon Whiskey cocktails.
Perfect for Any Occasion: Whether it’s a weekend BBQ or a cozy family dinner, these cups will surely steal the show. Turn your dessert into something extraordinary without all the hassle—give them a try!
No-Bake Key Lime Cheesecake Cups Ingredients
• Tempted to create your very own No-Bake Key Lime Cheesecake Cups? Here’s what you’ll need!
For the Crust
- Graham Cracker Crumbs – Provides the crust’s structure and crunch; consider using crushed digestive biscuits for a unique flavor.
- Granulated Sugar – Adds sweetness to the crust; you can reduce the amount or substitute it with a low-calorie sweetener if desired.
- Melted Butter – Binds the crust ingredients together; coconut oil can be a fantastic dairy-free alternative.
For the Filling
- Cream Cheese – A creamy base for the cheesecake filling; ensure it’s softened for easy blending.
- Powdered Sugar – Sweetens the filling and creates a smooth texture; feel free to substitute with coconut sugar for a less refined option.
- Key Lime Juice – Provides that essential tart flavor; bottled key lime juice comes in handy if you’re in a pinch.
- Lime Zest (optional) – Enhances the lime flavor and adds a fragrant touch that elevates the dessert.
- Whipped Topping – Contributes lightness and fluffiness to the filling; homemade whipped cream can be used for an even fresher taste.
Step‑by‑Step Instructions for No-Bake Key Lime Cheesecake Cups
Step 1: Prepare the Crust
In a medium mixing bowl, combine graham cracker crumbs, granulated sugar, and melted butter, mixing well until all crumbs are evenly coated. Press this mixture firmly into the bottom of individual serving cups, creating a compact, even layer. Aim for a thickness of about ¼ inch. Set the crust aside to firm up while you work on the filling.
Step 2: Make the Filling
In a large mixing bowl, beat softened cream cheese with an electric mixer on medium speed until completely smooth and creamy—this should take about 2-3 minutes. Gradually incorporate the powdered sugar while continuing to mix, then slowly add the key lime juice and optional lime zest. Keep blending until the mixture is light and fluffy, about 1-2 minutes, ensuring all ingredients are well combined.
Step 3: Fold in Whipped Topping
Gently fold in the whipped topping using a spatula until fully blended with the cream cheese mixture, taking care not to deflate the lightness of the whipped cream. This process should be done slowly to maintain a fluffy texture. The creamy filling for your No-Bake Key Lime Cheesecake Cups should now have a beautiful, airy consistency.
Step 4: Assemble Cups
Spoon the creamy filling generously into each prepared crust, smoothing the tops with a spatula or the back of a spoon. Make sure each cup is filled evenly to give you a delightful presentation. Cover the cups with plastic wrap or lids to keep them fresh as you prepare to chill them.
Step 5: Chill
Place the assembled cheesecake cups in the refrigerator and allow them to chill for at least 2 hours, or until set. This step is crucial for achieving a firm but creamy texture, perfect for serving. If time allows, letting them sit overnight will enhance the flavors even more.
Step 6: Garnish
Just before serving, remove the cups from the refrigerator and optionally top each with extra whipped topping and a sprinkle of lime zest for added flair. You can also add fresh fruit or lime slices for an extra burst of color and flavor. Your No-Bake Key Lime Cheesecake Cups are now ready to enjoy!
Expert Tips for No-Bake Key Lime Cheesecake Cups
-
Room Temperature Cream Cheese: Ensure your cream cheese is at room temperature for easier blending, which helps create a smooth filling without lumps.
-
Whipped Topping Care: Avoid overmixing the whipped topping when combining it with the cream cheese mixture. This keeps the filling light and fluffy, essential for the best No-Bake Key Lime Cheesecake Cups.
-
Chill for Texture: Don’t skip the chilling step! Allow the cheesecake cups to set for at least 2 hours; this is key for achieving the perfect creamy texture and flavor.
-
Consider Alternatives: If you’re out of key lime juice, bottled versions work well in a pinch. Fresh is always best, but convenience comes in handy!
-
Garnish Creativity: Feel free to experiment with toppings like fresh fruit or crushed nuts. These add a delightful touch and personalization to each cup, making them truly your own.
Storage Tips for No-Bake Key Lime Cheesecake Cups
Fridge: Store the No-Bake Key Lime Cheesecake Cups in the refrigerator for up to 3 days. Cover them with plastic wrap or a lid to maintain their freshness and prevent them from absorbing other odors.
Freezer: If you need to keep them longer, freeze the cups for about 2 months. Make sure they are well-wrapped in plastic and then placed in an airtight container to avoid freezer burn.
Thawing: To enjoy frozen cheesecake cups, simply transfer them to the fridge for several hours or overnight before serving. This gentle method preserves their texture and flavor.
Reheating: These desserts are best enjoyed cold, so there’s no need to reheat them! Just garnish with whipped topping or fresh fruit right before serving for an appealing presentation.
No-Bake Key Lime Cheesecake Cups Variations
Feel free to let your creativity shine and customize these delightful cheesecake cups to suit your tastes!
-
Citrus Swap: Try using lemon or orange juice instead of key lime for a refreshing twist. Each will infuse a fresh burst of flavor, perfect for those who enjoy a variety of sweet and tart notes.
-
Berry Bliss: Top with fresh strawberries, blueberries, or raspberries for a vibrant and fruity finish. This addition not only elevates the taste but also adds a pop of color that makes serving an eye-catching delight.
-
Nutty Crunch: Add crushed nuts, such as pecans or walnuts, as a topping for an extra crunch. This contrasts beautifully with the creamy filling, providing both texture and a nutty flavor that complements the lime.
-
Chocolate Drizzle: Drizzle melted chocolate over the top for an indulgent dessert experience. The richness of chocolate pairs surprisingly well with the tangy cheesecake, creating a flavor explosion that will leave your guests wanting more!
-
Dairy-Free Alternative: Substitute coconut cream for the whipped topping for a coconut-infused variation. This friendly option ensures everyone can enjoy the dessert while maintaining a creamy texture and rich taste.
-
Sweetener Switch: If you’re looking to cut sugar, replace granulated and powdered sugar with a sugar substitute like stevia or erythritol. This will keep your dessert light while still being indulgent—perfect for a health-conscious treat!
-
Zesty Garnish: Garnish with additional lime zest or candied lime slices for that extra touch of elegance. This not only enhances the flavor but also makes your presentation pop—a trick I learned from making Velvet Oreo Cheesecake that always wows!
-
Layered Delight: Create layers by alternating the cheesecake filling with fruit puree or a swirl of berry compote. It adds visual appeal and a delightful burst of flavor in every bite, reminiscent of a summertime dessert you’ll find at a quaint little café.
With all these exciting variations, you’ll find countless ways to enjoy your No-Bake Key Lime Cheesecake Cups! Whether it’s a summer BBQ or a cozy evening in, there’s a delightful flavor waiting for you to explore.
What to Serve with No-Bake Key Lime Cheesecake Cups
Indulging in these creamy, zesty cheesecake cups opens the door to a host of delightful pairings that elevate your dessert experience.
-
Fresh Berries: Juicy strawberries or tart raspberries provide a refreshing contrast, balancing the creamy sweetness perfectly.
-
Coconut Whipped Cream: A dollop of this airy topping adds an exotic twist, enhancing the tropical vibes of the key lime flavor.
-
Mint Sprigs: Bright green mint not only adds a pop of color but offers a cooling freshness that complements the cheesecake beautifully.
-
Iced Tea: A glass of sweetened or unsweetened iced tea serves as a light, refreshing beverage that won’t overwhelm the dessert.
-
Chocolate Drizzle: A rich, chocolate topping artfully drizzled over the cheesecake cups brings a decadent touch, creating a delightful pairing of flavors.
-
Honey-Lime Fruit Salad: A medley of seasonal fruits tossed in honey and lime is a sweet, tangy accompaniment that adds vibrancy to your dessert spread.
Serve these with your No-Bake Key Lime Cheesecake Cups for an unforgettable treat!
Make Ahead Options
These No-Bake Key Lime Cheesecake Cups are a fabulous choice for anyone looking to save time during busy days! You can prepare the crust and filling up to 24 hours in advance. To do this, simply mix the graham cracker crumbs, sugar, and melted butter, pressing them into the cups, then refrigerate until you’re ready to make the filling. The creamy filling can also be made ahead—just store it in an airtight container in the refrigerator. When it’s time to serve, fill the prepped crusts with the cheesecake mixture, chill for a few hours if necessary, then add your favorite toppings like whipped cream or lime zest before indulging in these delightful treats!
No-Bake Key Lime Cheesecake Cups Recipe FAQs
How do I select ripe key limes for this recipe?
Absolutely! When choosing key limes, look for ones that are slightly firm yet yield softly to pressure, indicating they’re ripe. The skin should be smooth, shiny, and bright green. Dark spots all over the lime often signal overripeness, so steer clear of those!
What is the best way to store No-Bake Key Lime Cheesecake Cups?
You can store your cheesecake cups in the refrigerator for up to 3 days. Just cover them tightly with plastic wrap or use an airtight container to maintain their delicious freshness. Also, try to keep them away from strong odors in the fridge!
Can I freeze No-Bake Key Lime Cheesecake Cups?
Yes, absolutely! To freeze your cheesecake cups, wrap them individually in plastic wrap and then place them in an airtight container or heavy-duty freezer bag. They can be stored in the freezer for up to 2 months. To thaw, simply place them in the refrigerator for a few hours or overnight before serving.
What if my cream cheese mixture is too lumpy?
If you find your cream cheese mixture is lumpy, it likely wasn’t softened enough before mixing. To fix this, you can try letting it sit at room temperature for 15-30 minutes to soften further. If it’s still not smooth, use a hand mixer to beat the mixture until creamy. Ensure you mix on medium speed for about 2-3 minutes, which typically does the trick!
Are these No-Bake Key Lime Cheesecake Cups suitable for those with allergies?
It’s important to check the specific brands for allergens, but generally, this recipe can be made allergy-friendly! For a gluten-free version, simply use gluten-free graham crackers. Additionally, if you’re concerned about dairy, opt for a dairy-free cream cheese substitute and coconut whipped cream. Always consider individual dietary restrictions when preparing for guests!
Zesty No-Bake Key Lime Cheesecake Cups for Easy Indulgence
Ingredients
Equipment
Method
- In a medium mixing bowl, combine graham cracker crumbs, granulated sugar, and melted butter. Press mixture into the bottom of individual serving cups, creating a compact layer.
- In a large mixing bowl, beat softened cream cheese with an electric mixer on medium speed until smooth. Gradually incorporate powdered sugar, then slowly add key lime juice and optional lime zest. Blend until light and fluffy.
- Gently fold in whipped topping using a spatula until fully blended with the cream cheese mixture.
- Spoon the creamy filling into each prepared crust, smoothing the tops. Cover with plastic wrap or lids.
- Refrigerate for at least 2 hours, or until set. Letting them sit overnight enhances flavors.
- Before serving, optionally top each cup with extra whipped topping and a sprinkle of lime zest, along with fresh fruit or lime slices.
Leave a Reply