
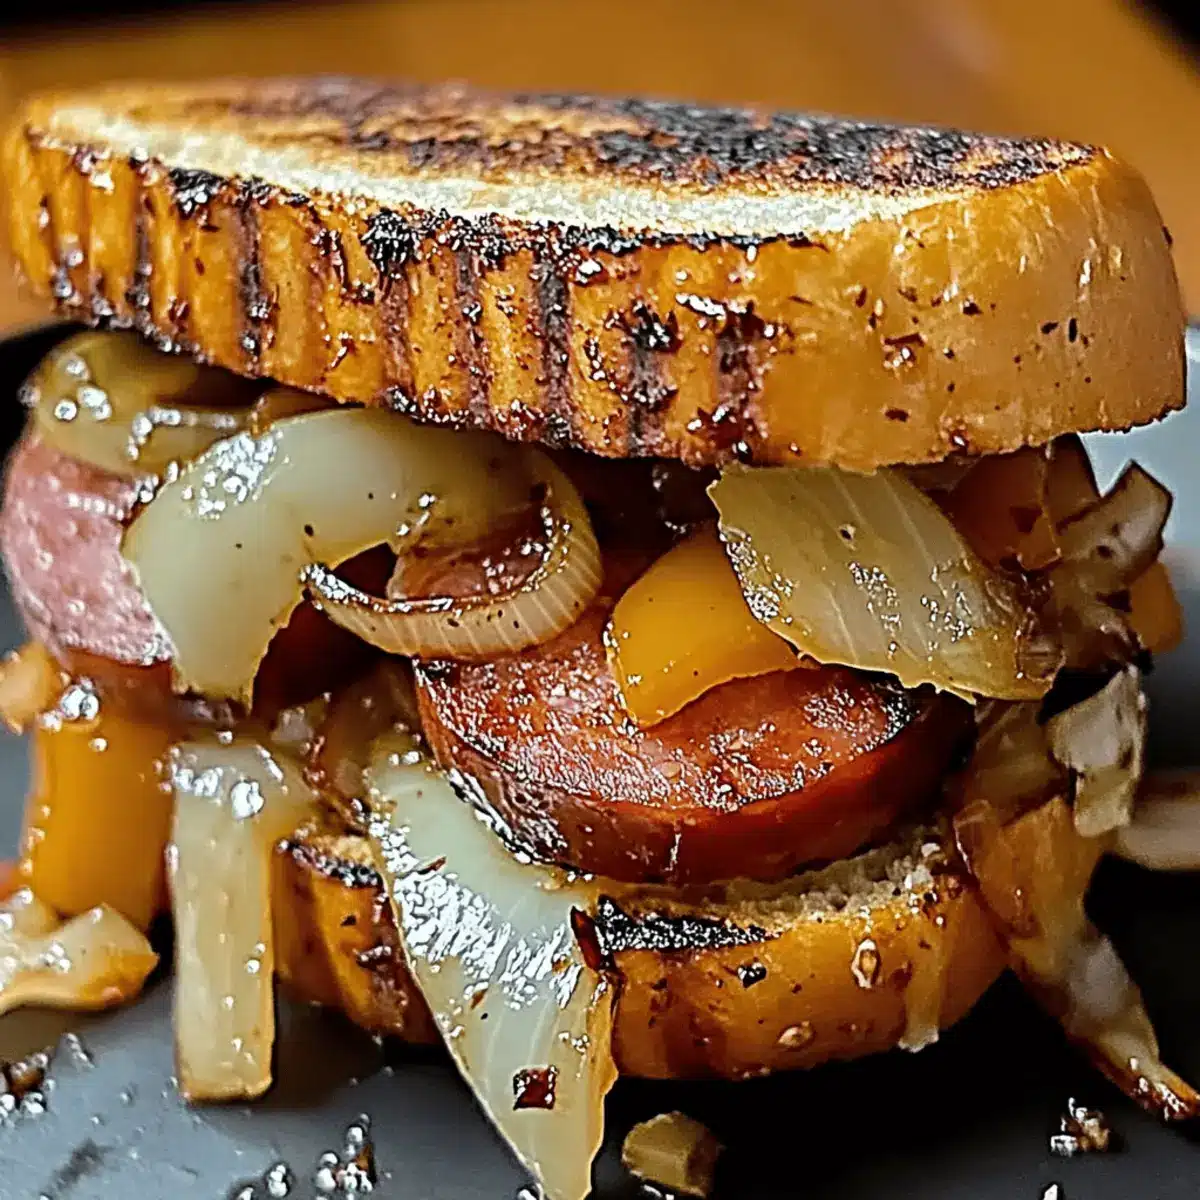
As I stood by the grill, the tantalizing aroma of grilling kielbasa mingled with the sweet scent of caramelizing onions and colorful bell peppers—it felt like summer in a sandwich! These Grilled Kielbasa Sandwiches with Sweet Onion and Peppers are the ultimate comfort food, perfect for those warm evenings when you crave something deliciously hearty yet effortless to prepare. Not only do these sandwiches let you customize the toppings and breads to your liking, but they also come together in a snap, meaning you’ll have more time to enjoy with family and friends. Imagine biting into a juicy kielbasa, adorned with smoky, sweet vegetables, all nestled in a toasted bun. Are you ready to elevate your grilling game? Let’s dive into the recipe!
Why Make Grilled Kielbasa Sandwiches?
Flavor Explosion: Each bite is filled with savory, juicy kielbasa complemented by caramelized sweetness from grilled onions and peppers.
Customizable Delight: Perfectly adapt your sandwiches with endless topping options like spicy aioli or melted cheese, ensuring everyone’s tastes are satisfied.
Quick and Easy: These sandwiches come together in under 30 minutes, making them ideal for busy weeknights or spontaneous gatherings.
Crowd-Pleasing: Whether it’s a family dinner or barbecue, these sandwiches are guaranteed to impress guests with their vibrant flavors and textures.
Versatile Toppings: Feel free to mix it up with each serving! Add jalapeños for a kick or swap in your favorite bread—like a pretzel roll—for added fun!
Grilled Kielbasa Sandwich Ingredients
For the Kielbasa
• Beef Kielbasa – Juiciness and savory flavor; feel free to use pork or turkey kielbasa too!
• Olive Oil – Adds moisture while grilling; substitute with vegetable oil if you prefer.
For the Vegetables
• Red Bell Pepper – Provides sweetness and crunch; any color bell pepper works well.
• Yellow Bell Pepper – Adds sweetness and slight tang; can substitute with orange bell pepper.
• Green Bell Pepper – Contributes a fresh, slightly bitter note; omit if you prefer sweeter flavors.
• Large Onion – Delivers that wonderful sweetness when grilled; use shallots or sweet onions as alternatives.
• Garlic Powder – Enhances the overall flavor; fresh garlic can also be substituted.
• Italian Seasoning/Dried Oregano – Infuses an herbal note; other dried herbs are great alternatives.
• Salt and Black Pepper – Essential seasoning to enhance flavors; adjust to your taste as needed.
For the Sandwich
• Hoagie/Sandwich Rolls – A sturdy base for your sandwiches; you can try pretzel rolls, ciabatta, or baguettes.
Optional Toppings
• Mustard, Mayonnaise, Provolone, or Mozzarella Cheese – Customize to add extra flavorful surprises to your sandwiches; the keyword here is variety!
Step-by-Step Instructions for Grilled Kielbasa Sandwiches
Step 1: Preheat the Grill
Begin by preheating your grill or stovetop grill pan to medium-high heat, around 375°F. This ensures that your grilled kielbasa sandwich will cook evenly and achieve that beautiful char. While the grill heats up, gather all your ingredients so you’re ready for quick assembly and minimize prep time.
Step 2: Prepare the Vegetables
In a mixing bowl, toss sliced red, yellow, and green bell peppers along with large onion pieces with a drizzle of olive oil, garlic powder, Italian seasoning, salt, and pepper. Ensure the vegetables are well-coated in the seasoning mixture to enhance their flavor. Set them aside for a moment as you prepare to grill.
Step 3: Grill the Vegetables
Carefully place the seasoned bell peppers and onion on the preheated grill. Grill for about 8-10 minutes, flipping occasionally, until they are softened and lightly charred, showcasing those beautiful grill marks. Once done, remove them from the grill and set them aside to keep warm while you grill the kielbasa.
Step 4: Grill the Kielbasa
Next, place the beef kielbasa on the grill, allowing it to cook for 4-5 minutes on each side. You want it to be well-browned and heated through, achieving that delectable smoky flavor. Make sure to turn the sausages to get an even char on all sides, enhancing the overall taste for your grilled kielbasa sandwiches.
Step 5: Toast the Sandwich Rolls
If desired, lightly toast your hoagie or sandwich rolls on the grill for 1-2 minutes. This step adds warmth and a little crunch to the buns, making them perfect for holding all those juicy fillings. Keep an eye on them, as they can toast quickly, and you’ll want them golden but not burnt.
Step 6: Assemble the Sandwiches
Once everything is grilled to perfection, it’s time to assemble your grilled kielbasa sandwiches. Start with the toasted roll, placing the grilled kielbasa first, then generously top it with the sweet grilled peppers and onions. Feel free to add optional toppings like mustard, mayonnaise, or cheese for an extra kick of flavor.
Step 7: Serve and Enjoy
Serve your grilled kielbasa sandwiches warm, allowing the savory flavors to meld beautifully. These delicious sandwiches are sure to be a crowd-pleaser, perfect for outdoor gatherings or a hearty weeknight meal. Relish each bite of juicy kielbasa paired with the smoky sweetness of grilled vegetables—dinner couldn’t get better!
What to Serve with Grilled Kielbasa Sandwiches
Pair your grilled kielbasa sandwiches with these delicious accompaniments to create a complete and satisfying meal experience.
- Crispy Coleslaw: A tangy, crunchy slaw balances the richness of the sausage, adding a refreshing crunch that contrasts beautifully.
- Herbed Potato Salad: Creamy and zesty, this salad complements the grilled flavors, while fresh herbs bring vibrant notes to the meal.
- Grilled Corn on the Cob: Sweet and smoky, charred corn enhances the barbecue theme and offers a delightful texture alongside your sandwiches.
- Baked Beans: Savory and slightly sweet, the hearty mixture pairs perfectly with kielbasa, making for a comforting and filling combo.
- Garlic Bread: Warm, buttery garlic bread adds a comforting touch while you soak up the delicious juices from the sandwich. To elevate this classic, sprinkle fresh herbs on top.
- Ice-Cold Lemonade: Refreshing and bright, this drink is the perfect thirst-quencher that balances the savory flavors of your meal.
- Roasted Seasonal Vegetables: A mix of grilled zucchini, carrots, and asparagus provides a nutritious flavor boost that complements the sandwich beautifully.
- Chocolate Chip Cookies: For a sweet finish, classic cookies provide a delightful contrast, rounding out your meal with warmth and familiarity.
Make Ahead Options
These Grilled Kielbasa Sandwiches are perfect for meal prep enthusiasts looking to save time during busy weeknights! You can chop and grill the bell peppers and onions up to 3 days in advance, then store them in an airtight container in the refrigerator. This helps maintain their flavor and texture without losing that delicious sweetness. The kielbasa can be grilled up to 24 hours ahead of time; simply refrigerate it as well. When you’re ready to enjoy, reheat the grilled vegetables and kielbasa in a skillet or microwave, and toast the sandwich rolls briefly to ensure they are warm and crisp. With these prep tips, you’ll have a satisfying meal ready in no time!
How to Store and Freeze Grilled Kielbasa Sandwiches
Fridge: Store assembled sandwiches in an airtight container for up to 2 days to keep the flavors fresh. It’s best to separate moist toppings to prevent sogginess.
Freezer: For longer storage, wrap individual sandwiches tightly in plastic wrap and then foil; freeze for up to 3 months. Thaw overnight in the fridge before reheating.
Reheating: Reheat on a grill or skillet over medium heat for about 5-7 minutes, ensuring the kielbasa is heated through and the buns are toasted. Enjoy your flavorful grilled kielbasa sandwiches even after storing!
Grilled Kielbasa Sandwiches Variations & Substitutions
Feel free to get creative with these grilling staples to elevate your kielbasa experience!
- Dairy-Free: Omit any cheese or use a dairy-free alternative like vegan cheese or a creamy avocado spread.
- Spicy Kick: Add sliced jalapeños or a drizzle of spicy aioli for those who enjoy a little heat.
- Extra Veggies: Mix in grilled zucchini or mushrooms to boost flavor and add nutritious elements to each bite.
- Flavor Boost: Swap regular mustard for a flavored version like honey mustard or a tangy chipotle mustard for an exciting twist.
- Whole Wheat Rolls: Opt for whole wheat hoagie rolls instead of the usual, adding a wholesome touch to your sandwiches.
- Herb-Infused Oils: Brush the rolls with garlic or herb-infused olive oil before toasting for an aromatic enhancement.
- Pickle Lovers: Add a layer of tangy pickles or relish to your sandwiches for a bursting flavor that complements the meatiness.
- BBQ Flair: Brush the grilled kielbasa with your favorite barbecue sauce during the last minute of grilling for a smoky-sweet glaze.
Ready to get inspired? Check out how to make your own BBQ sauce or explore the deliciousness of grilled vegetables to elevate your meal!
Expert Tips for Grilled Kielbasa Sandwiches
Perfect Grill Marks: Ensure your grill is preheated to maintain high heat; this allows for those beautiful char marks and enhances the flavor of the grilled kielbasa sandwiches.
Even Cooking: Slice the kielbasa lengthwise before grilling. This not only promotes even cooking but also allows juices to infuse with the bun better.
Freshness Counts: Use fresh vegetables to amplify flavors in your grilled kielbasa sandwiches. Fresh produce adds vibrant colors and crunch.
Prevent Sogginess: Toast the insides of the sandwich rolls to form a barrier against juicy toppings, ensuring your sandwich remains delectably crunchy.
Prep Ahead: If hosting friends, prepare your toppings and vegetables ahead of time. This way, you can grill everything just before serving for maximum freshness.
Customize Away: Feel free to experiment with toppings and flavors! Adding jalapeños or different cheeses can elevate your grilled kielbasa sandwiches to a gourmet level.
Grilled Kielbasa Sandwiches Recipe FAQs
How do I choose ripe and flavorful vegetables?
Absolutely! When selecting bell peppers and onions for your grilled kielbasa sandwiches, look for vibrant colors and firm skin. Avoid any with dark spots or wrinkles, which indicate they might be past their prime. Ideally, opt for fresh, local produce or visit a farmer’s market for the best flavors!
What’s the best way to store leftover sandwiches?
You can store assembled grilled kielbasa sandwiches in an airtight container in the fridge for up to 2 days. To prevent sogginess, it’s best to keep moist toppings like mayonnaise or mustard separate from the main filling until you’re ready to eat.
Can I freeze grilled kielbasa sandwiches?
Yes! For freezing, wrap each sandwich tightly in plastic wrap, then in aluminum foil to prevent freezer burn. They can be frozen for up to 3 months. To reheat, thaw them overnight in the refrigerator, then either grill or heat them in a skillet over medium heat for about 5-7 minutes until heated through.
What should I do if my vegetables are not grilling properly?
If your bell peppers and onions aren’t getting that beautiful char, it might be due to not enough oil or incorrect grill temperature. Ensure your grill is properly preheated to medium-high heat and coat the veggies lightly in olive oil. You can also try cutting them into thicker slices or skewering them to prevent them from falling through the grates.
Are these sandwiches suitable for gluten-free diets?
Absolutely! To accommodate gluten-free diets, simply swap out the hoagie/sandwich rolls with gluten-free buns or lettuce wraps. This way, you can still enjoy the delicious flavors of grilled kielbasa and veggies without the gluten!
Can I adjust the spiciness in the recipe?
Very! If you prefer a milder sandwich, simply omit any spicy toppings like jalapeños or spicy mustards. Alternatively, for added spice, feel free to incorporate fresh jalapeños or a spicy aioli to bring a kick to your grilled kielbasa sandwiches without affecting the overall recipe balance!
Grilled Kielbasa Sandwiches Loaded with Sweet Peppers
Ingredients
Equipment
Method
- Preheat your grill or stovetop grill pan to medium-high heat, about 375°F.
- In a mixing bowl, toss sliced bell peppers and onion with olive oil, garlic powder, Italian seasoning, salt, and pepper.
- Grill the seasoned vegetables for about 8-10 minutes, flipping occasionally until softened.
- Grill the kielbasa for 4-5 minutes on each side, until browned and heated through.
- Lightly toast your sandwich rolls on the grill for 1-2 minutes if desired.
- Assemble sandwiches with the grilled kielbasa, topped with grilled vegetables and optional toppings.
- Serve warm and enjoy your flavorful grilled kielbasa sandwiches.
Leave a Reply