
As I peeled back the vibrant skin of the oranges, the zesty aroma wrapped around me like a sweet, citrus hug. There’s something magical about transforming fresh fruit into a nostalgic treat, and today, I’m excited to share my recipe for Classic Homemade Orange Candy. This delightful candy is not only incredibly easy to make, but it also brings a refreshing burst of flavor that’s perfect for gifting or satisfying that sweet tooth. You’ll love how just a few simple pantry staples can turn into a nostalgic dessert that brightens up any day. So, are you ready to craft your own batch of citrus-infused goodness? Let’s dive into this easy and rewarding homemade adventure!
Why Choose Homemade Orange Candy?
Nostalgic Treat: This Classic Homemade Orange Candy takes you back to simpler times, filling your kitchen with delightful citrus scents.
Easy to Make: With just a few accessible ingredients, you can whip up a batch of this candy even if you’re a kitchen novice.
Fresh Flavors: Unlike store-bought versions, this recipe lets you savor the bright, natural taste of real oranges in every bite.
Perfect for Gifting: Whether it’s a birthday or just because, these candies make wonderful homemade gifts that your friends and family will adore.
Versatile Enjoyment: Serve them as a snack, a party favor, or a delightful addition to your afternoon tea. Explore other homemade sweets like Homemade Lemon Jellies for a fresh twist!
Homemade Orange Candy Ingredients
For the Candy Mixture
- Orange Zest – Adds a vibrant citrus flavor and aroma; remember to only use the outermost layer to avoid bitterness.
- Fresh Orange Juice – Provides natural sweetness and enhances the candy’s citrus flavor.
- Granulated Sugar – Serves as the main sweetener, essential for achieving that perfect candy texture.
- Corn Syrup – Prevents crystallization, ensuring a smooth candy consistency.
- Gelatin – Gives the candy its chewy and soft texture by providing structure.
- Butter – Adds richness and a silky mouthfeel to the finished candy.
- Water – Used to dissolve the sugar and assist in cooking the syrup.
Enjoy crafting this nostalgic Homemade Orange Candy that brings joy and sweetness to every bite!
Step‑by‑Step Instructions for Homemade Orange Candy
Step 1: Prepare Ingredients
Start by zesting two large oranges, taking care to avoid the bitter white pith. Once zested, juice the oranges until you have about one cup of fresh orange juice, straining out any seeds. Set the orange zest and juice aside to ensure everything is ready for your delightful homemade orange candy.
Step 2: Make Syrup
In a medium saucepan, combine the prepared orange juice, ½ cup of water, 2 cups of granulated sugar, and ½ cup of corn syrup. Place the saucepan over medium heat, stirring gently until the sugar has fully dissolved. Once dissolved, allow the mixture to simmer for about 10 minutes, watching for small bubbles to form as the syrup thickens.
Step 3: Bloom Gelatin
While the syrup simmers, take a small bowl and sprinkle 2 tablespoons of gelatin over ¼ cup of cold water. Let the gelatin sit for about 5 minutes to bloom, during which it will absorb the water and become spongy. This step is crucial for achieving the chewy texture that defines your homemade orange candy.
Step 4: Combine Gelatin
After the syrup has simmered for 10 minutes, remove it from heat and add the bloomed gelatin to the warm mixture. Stir gently but thoroughly until the gelatin has completely dissolved, blending smoothly into the syrup. This integration is essential for a uniform texture in your homemade orange candy.
Step 5: Finish Mixture
Now, add the reserved orange zest and 2 tablespoons of unsalted butter to the syrup. Return the saucepan to low heat and cook for an additional 5-10 minutes, stirring frequently. You’ll know it’s ready when the mixture has thickened and coats the back of a spoon, enhancing the rich citrus flavor of the homemade orange candy.
Step 6: Set Candy
Prepare an 8×8-inch baking dish by greasing it lightly with butter or lining it with parchment paper. Pour the thickened candy mixture into the dish, spreading it evenly. Allow the mixture to cool to room temperature before covering with plastic wrap and refrigerating for at least 4-6 hours to fully set.
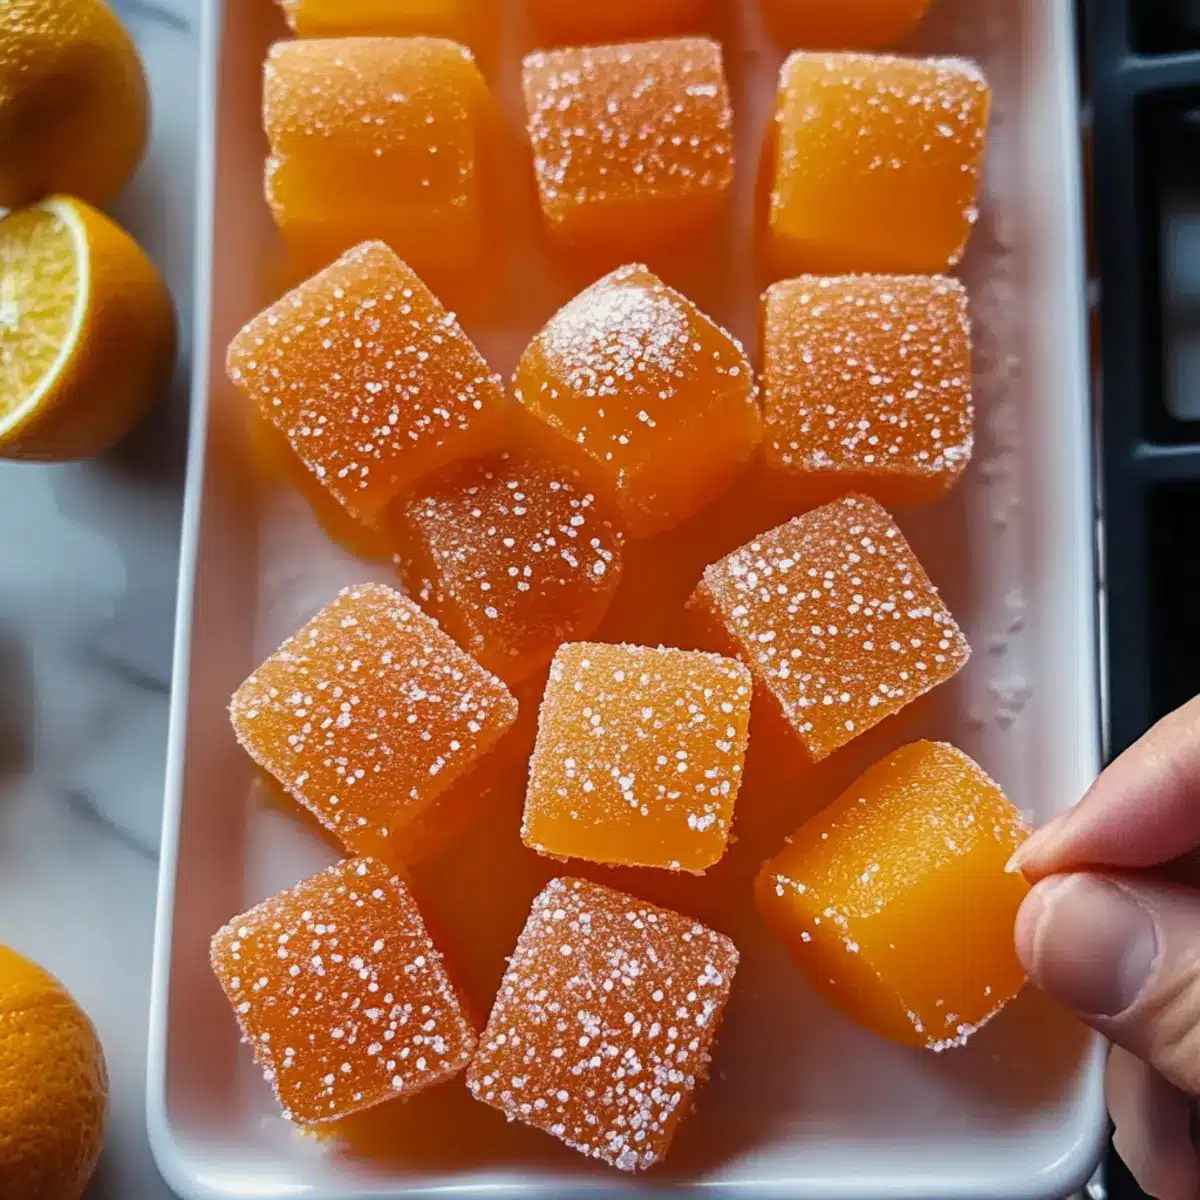
Step 7: Cut and Serve
Once your homemade orange candy has set firmly, remove it from the fridge and lift it out of the baking dish. Use a sharp knife to cut the candy into bite-sized pieces, ensuring you’re cutting through the entire thickness. Optionally, dust the candies with confectioners’ sugar to prevent sticking, making them easy to serve and share.
Expert Tips for Homemade Orange Candy
-
Cooling Time: Allow the candy to cool completely before refrigerating. This ensures a proper setting for your homemade orange candy’s texture.
-
Zesting Technique: Use a microplane for zesting the oranges, avoiding the bitter white pith beneath the skin for a sweeter result.
-
Sugar Solubility: Stir the syrup gently while heating to ensure the sugar dissolves completely, preventing grainy texture in your homemade orange candy.
-
Watch the Thickness: Keep a close eye on the syrup; cooking too long can lead to overly thick candy, while undercooking may result in a sticky mess.
-
Storage Tips: Store candies in an airtight container, layering pieces with parchment paper to prevent sticking and retain freshness for up to two weeks.
What to Serve with Classic Homemade Orange Candy
As you savor the deliciousness of this nostalgic treat, consider enhancing your culinary experience with complementary flavors and textures.
-
Herbal Tea: A warm cup of chamomile or green tea balances the sweetness of the candy, offering a soothing, aromatic experience.
-
Creamy Cheesecake: The rich and smooth texture of cheesecake pairs beautifully, creating a delightful contrast to the chewy candy, perfect for sharing at gatherings.
-
Fresh Fruit Salad: A bowl of mixed citrus fruits adds a refreshing zing and vibrant colors, enhancing the overall brightness of your snack table.
-
Dark Chocolate Dips: Indulge in a sophisticated pairing by dipping the candies into dark chocolate; the rich bitterness beautifully offsets the sweetness of the orange.
-
Flavored Sparkling Water: Opt for a lightly carbonated drink to cleanse your palate between bites; the bubbles bring a lively and refreshing touch to your candy enjoyment.
-
Vanilla Ice Cream: Serve these candies alongside a scoop of vanilla ice cream for an indulgent treat, combining creamy and citrus flavors for a winning dessert duo.
Make Ahead Options
These Classic Homemade Orange Candies are a fantastic option for meal prep that can save you time and hassle on busy days! You can prepare the syrup mixture and refrigerate it for up to 24 hours before adding the gelatin. Simply follow the initial steps of zesting and juicing the oranges, then make the syrup and allow it to cool. Store the mixture in an airtight container in the fridge. When you’re ready to finish your homemade orange candy, just reheat the syrup gently, add the bloomed gelatin, and proceed with the remaining steps. This ensures your candies will be just as delicious and fresh as if made all at once, providing a sweet treat whenever you desire!
Variations & Substitutions for Homemade Orange Candy
Feel free to get creative with this recipe and tailor it to your taste buds for an exciting twist on the classic.
-
Lemon Twist: Substitute lemon juice and zest for a tangy lemon candy experience that brightens your palate.
-
Grapefruit Glow: Use fresh grapefruit juice and zest to create a refreshing, mildly bitter candy that’s deliciously unique. The sweetness of the grapefruit adds an unexpected layer of flavor.
-
Tangerine Delight: Swap in tangerine juice and zest for a sweeter, delicate candy, perfect for those who prefer milder flavors. Enjoy this vibrant twist that still packs that citrus punch!
-
Honey-Sweetened: Replace granulated sugar with honey or agave syrup for a natural sweetness that adds depth and a hint of floral notes to your candy. This substitution can make your Homemade Orange Candy feel a bit more decadent.
-
Spiced Kick: Add a pinch of cinnamon or ginger to the syrup for a warming flavor complement, turning your citrus candy into a fragrant, spiced treat!
-
Fruit Infusion: Mix in puree from other citrus fruits like blood oranges or limes for a colorful, vibrant candy experience. The added variety will surely spark joy in every bite!
-
Hot & Spicy: For an adventure in heat, sprinkle in some chili powder or cayenne pepper just before pouring the mixture into the dish. It adds a surprising kick that’s delightful with the sweetness.
Discover other homemade sweet creations, like festive treats for your next gathering, or simply explore the fulfilling world of Homemade Lemon Jellies to entice those taste buds!
How to Store and Freeze Homemade Orange Candy
Room Temperature: Keep your homemade orange candy in a cool, dry place, storing it in an airtight container to maintain freshness for up to 2 weeks.
Fridge: For longer shelf life, refrigerate the candy in a tightly sealed container. This helps preserve its texture and flavor for up to 3 weeks.
Freezer: If you want to store your homemade orange candy even longer, freeze it! Wrap pieces individually in plastic wrap and place them in a freezer-safe bag, which can last for up to 3 months.
Reheating: When ready to enjoy, there’s no need to reheat. Simply let the candy sit at room temperature for a few minutes to soften before serving.
Classic Homemade Orange Candy Recipe FAQs
How do I select the best oranges for this candy?
Absolutely! Look for oranges that are firm, shiny, and heavy for their size—these are usually juicier. Avoid any with dark spots or blemishes, as they might indicate overripeness. Navel oranges are a great choice due to their sweetness and lack of seeds.
How should I store my homemade orange candy?
I recommend storing your homemade orange candy in an airtight container at room temperature for up to 2 weeks. For longer storage, refrigerate it in a tightly sealed container where it can last for about 3 weeks. To maintain its delightful texture and prevent sticking, place parchment paper between layers.
Can I freeze the homemade orange candy?
Yes, you can definitely freeze your homemade orange candy! To do this, wrap individual pieces in plastic wrap and then place them in a freezer-safe bag. They will keep well in the freezer for up to 3 months. When you’re ready to enjoy them, simply allow them to sit at room temperature for a few minutes to soften before serving.
What if my candy doesn’t set properly?
If your homemade orange candy doesn’t set as expected, it may be due to a few factors. Ensure that you’ve accurately measured the gelatin; using too little can prevent your candy from firming up. If you find it too soft, you can return the mixture to a saucepan, gently reheat it, and add more bloomed gelatin, mixing well before re-setting it in the fridge.
Are there any dietary considerations for this candy?
Very! This recipe contains gelatin, which is not suitable for vegetarians or vegans. If you’re looking for a gelatin-free alternative, you could experiment with agar-agar, following package instructions as a substitute. Be mindful of any nut allergies as well, especially if you’re gifting the candy; it’s always best to check with recipients before sharing homemade treats.
Delightful Homemade Orange Candy That Sparks Nostalgia
Ingredients
Equipment
Method
- Zest the oranges and juice them to yield about one cup of juice. Set zest and juice aside.
- In a saucepan, combine orange juice, water, sugar, and corn syrup. Heat gently until dissolved, then simmer for 10 minutes.
- Sprinkle gelatin over cold water and let it bloom for 5 minutes.
- Add bloomed gelatin to the warm syrup, stirring until dissolved.
- Mix in the reserved orange zest and butter, cooking for an additional 5-10 minutes until thickened.
- Pour mixture into a greased or lined baking dish, cool to room temperature, then refrigerate for 4-6 hours to set.
- Cut into bite-sized pieces and dust with confectioners' sugar before serving.
Leave a Reply