
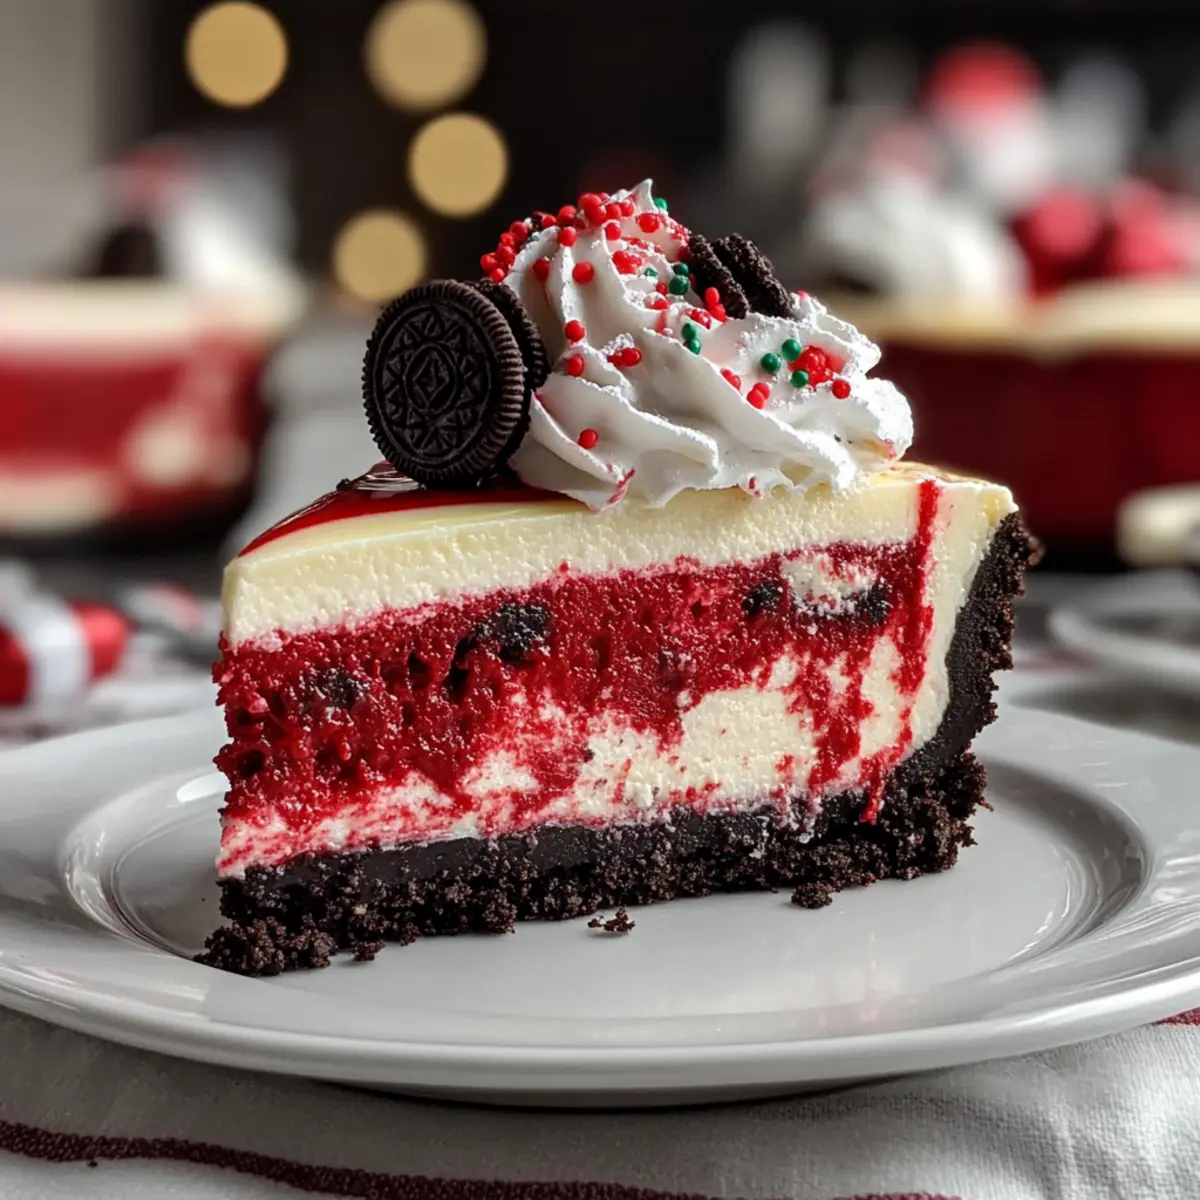
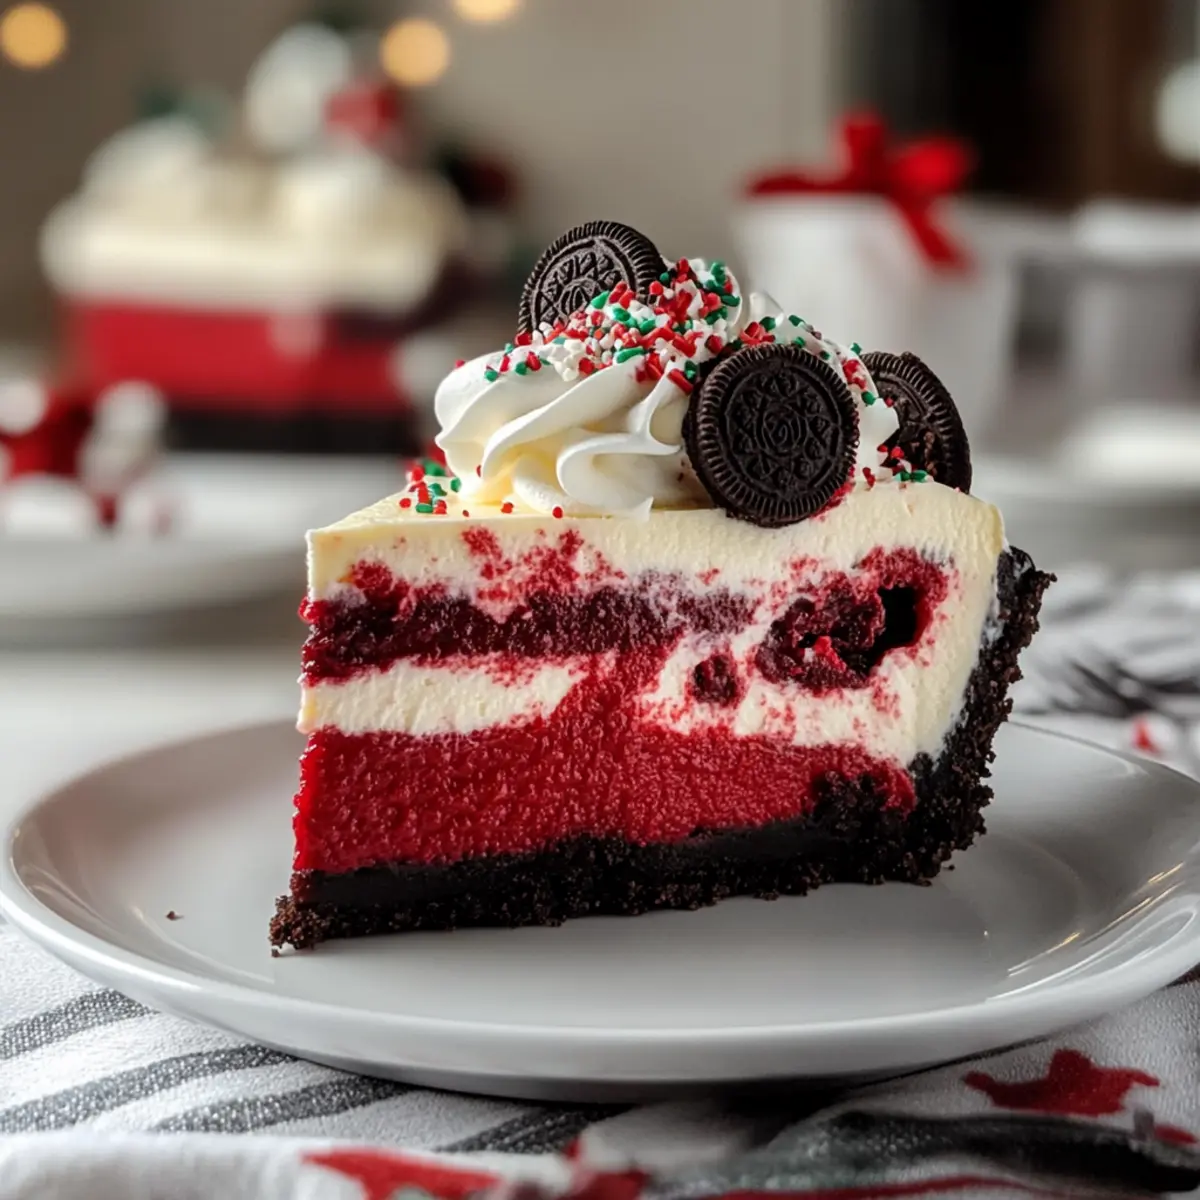
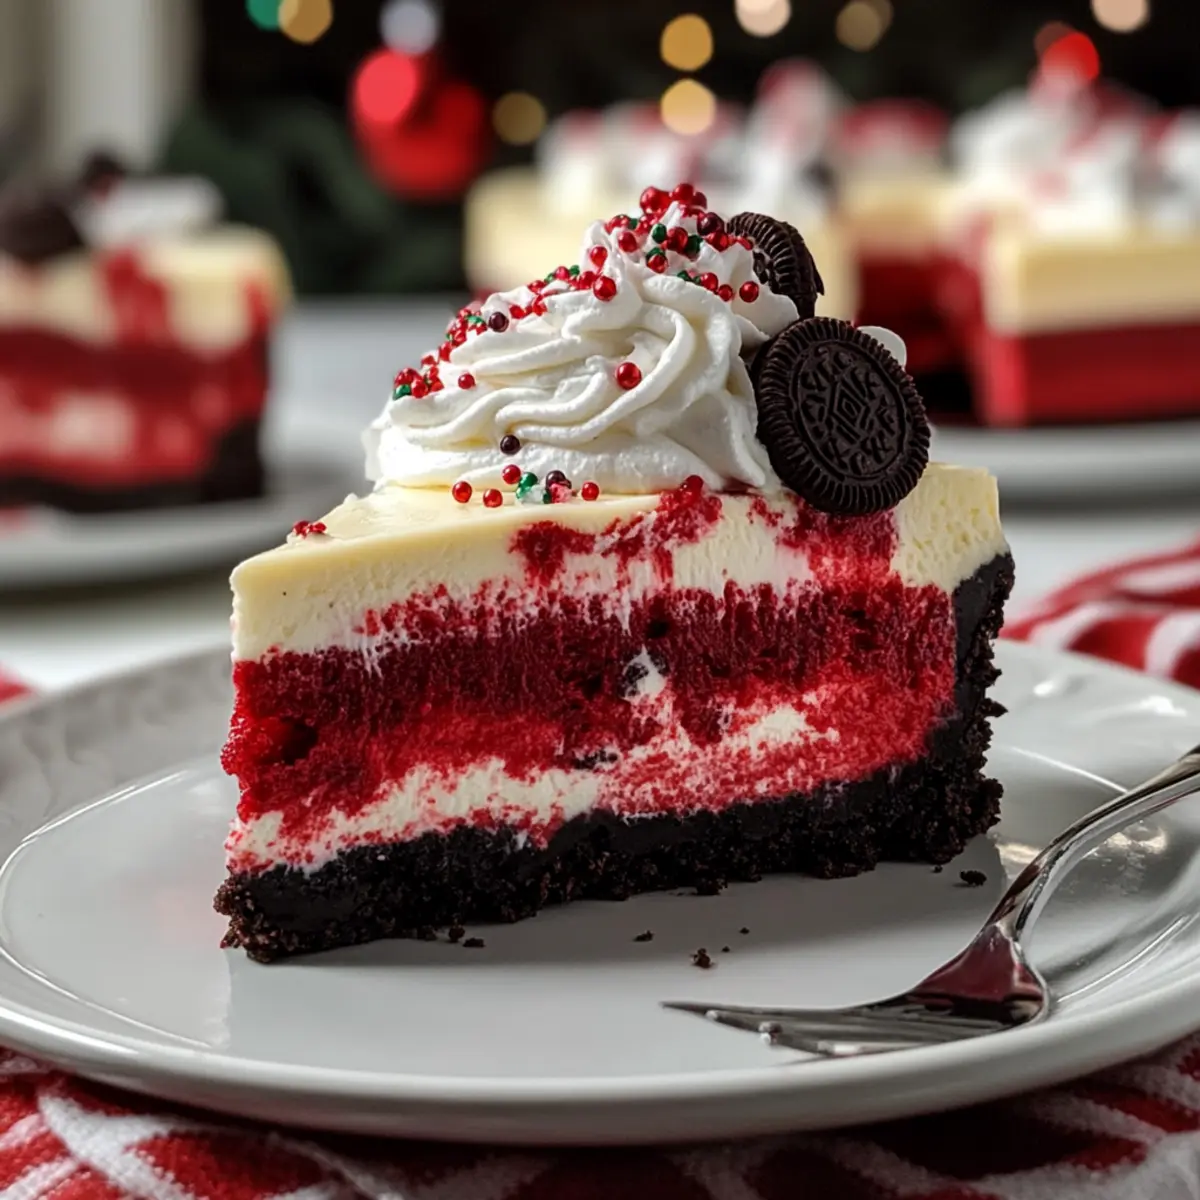
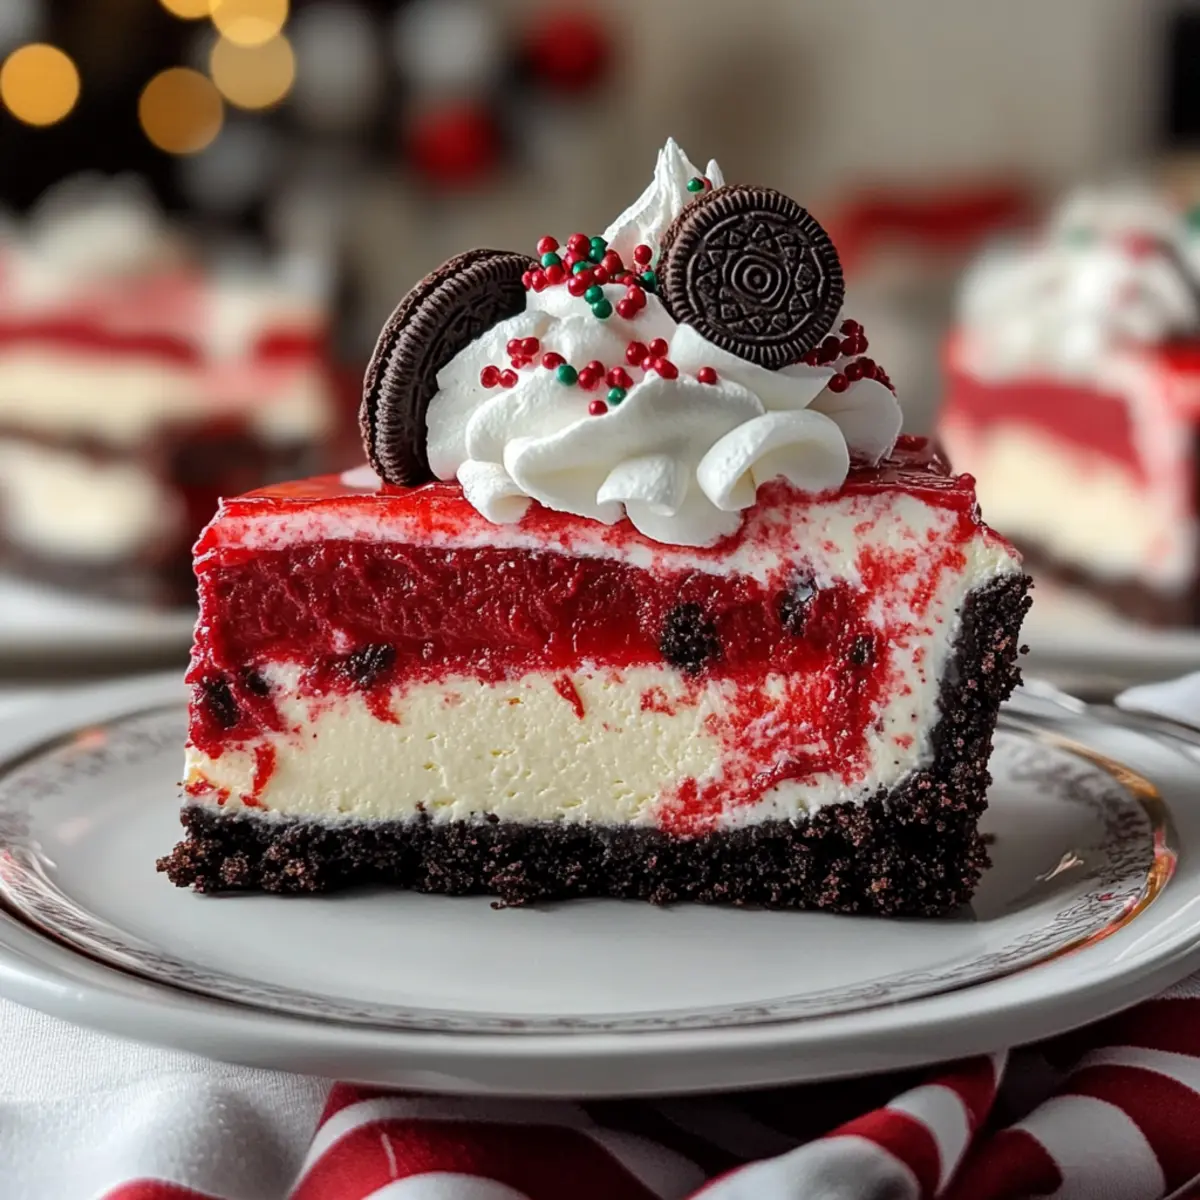
As I hovered over the colorful holiday decorations, a wave of nostalgia washed over me. The scent of baking wafted through the air, evoking memories of joyful celebrations filled with laughter and delicious treats. That’s when I knew it was time to whip up a festive favorite—Christmas Red Velvet Cheesecake. This showstopper melds the moist richness of classic red velvet with the creamy indulgence of cheesecake, making it the perfect centerpiece for any holiday gathering. Not only is it visually stunning, but it also offers a delightful twist that will keep your loved ones coming back for seconds. Plus, this recipe is surprisingly simple, ensuring you’ll spend less time in the kitchen and more time soaking up the holiday spirit. Are you ready to make this festive delight the star of your dessert table?
Why is Red Velvet Cheesecake a Must-Try?
Festive Appeal: This Christmas Red Velvet Cheesecake is not just delicious, but it’s also a stunning centerpiece that brings vibrant holiday colors to your dessert table.
Decadent Indulgence: The combination of creamy cheesecake and moist red velvet creates a rich, irresistible flavor profile that your guests will love.
Time-Saving Delight: Surprisingly easy to make, you can whip up this festive treat without spending hours in the kitchen.
Versatile Options: Feel free to personalize it—try adding orange zest for a fresh twist or swap the crust for ginger snap cookies!
Crowd-Pleasing Dessert: It’s a guaranteed hit with family and friends, making it perfect for any holiday gathering.
For even more festive ideas, check out our holiday dessert collection to keep the celebrations going!
Christmas Red Velvet Cheesecake Ingredients
• Discover the essentials for this festive dessert!
For the Crust
- Oreo Cookies – Provides a sweet, chocolatey flavor as the base; you can substitute with chocolate cookie crumbs if desired.
- Butter – Binds the crust together and adds richness; feel free to use margarine as a substitute if needed.
For the Filling
- Cream Cheese – The main ingredient that creates a smooth and creamy texture; make sure it’s softened for easier mixing.
- White Sugar – Balances the sweetness in the filling; granulated sweetener can be used as a substitute.
- Heavy Whipping Cream – Adds lightness and richness to the cheesecake; for a non-dairy option, coconut cream works well.
- Vanilla Extract – Enhances all the wonderful flavors in the cheesecake; consider vanilla bean paste for a more intense taste.
- Cocoa Powder – Contributes a subtle chocolate flavor; using Dutch-process cocoa will deepen the flavor profile.
- Red Food Coloring – Essential for that classic red velvet look; gel coloring is recommended for a vibrant hue without altering the batter’s consistency.
- Christmas Sprinkles – Adds a fun festive flair; while optional, they definitely enhance presentation.
For Topping
- Whipped Cream – Provides a creamy contrast on top; you can use store-bought or make your own.
- Mini Oreos – Great for garnish, adding a playful touch; they’re optional but visually appealing.
Step‑by‑Step Instructions for Christmas Red Velvet Cheesecake
Step 1: Prepare Pan & Oven
Preheat your oven to 350°F (175°C). To prepare your 9-inch springform pan, wrap the outside with aluminum foil to prevent any water leaks during the baking process. This ensures your Christmas Red Velvet Cheesecake maintains the perfect creamy texture. Set your pan aside while you work on the crust.
Step 2: Make the Red Velvet Crust
Crush enough Oreo cookies to make a crumbly mixture, then combine them with melted butter in a bowl. Stir in a bit of sugar until fully incorporated. Press this mixture firmly into the bottom of your prepared springform pan, creating an even layer. Bake the crust for 8-10 minutes until slightly set, then remove it from the oven and let it cool completely.
Step 3: Prepare Cheesecake Filling
In a large mixing bowl, beat the softened cream cheese until it’s completely smooth and fluffy. Gradually add the white sugar, mixing well after each addition. Next, gently stir in the vanilla extract, cocoa powder, and red food coloring until the mixture is evenly colored and combined. This vibrant batter will be the heart of your Christmas Red Velvet Cheesecake!
Step 4: Whip and Fold
In a separate bowl, whip the heavy cream until soft peaks form, creating a light and airy texture. Carefully fold the whipped cream into the red velvet cheesecake batter using a spatula, being gentle to retain the fluffiness. Finally, add in the Christmas sprinkles for a festive touch, ensuring they are evenly distributed throughout the mixture.
Step 5: Bake the Cheesecake
Lower the oven temperature to 325°F (160°C). Place your springform pan into a larger baking dish filled with hot water—this water bath helps prevent cracks. Bake for 1 to 1.25 hours, until the edges are firm but the center still jiggles slightly. This delicate cooking method will help achieve a perfectly smooth Christmas Red Velvet Cheesecake.
Step 6: Cool & Chill
Once baked, turn off the oven and leave the cheesecake inside with the door slightly ajar for about 1 hour. This gradual cooling process helps maintain the cheesecake’s texture. After cooling, transfer it to a wire rack and let it cool for 2-3 hours at room temperature. Then, refrigerate for at least 6-8 hours, or preferably overnight, to allow all flavors to meld beautifully.
Step 7: Decorate & Serve
Once fully chilled, carefully remove the sides of the springform pan. Top your Christmas Red Velvet Cheesecake with a generous layer of whipped cream, then garnish with mini Oreos and additional festive sprinkles for a holiday touch. For neat servings, slice with a hot and clean knife, and share this delightful treat with your loved ones!
Christmas Red Velvet Cheesecake Variations
Feel free to embrace your creativity and customize this festive cheesecake to suit your tastebuds!
-
Ginger Snap Crust: Swap the Oreo crust for a crushed ginger snap cookie base, adding a spicy and zesty flavor to your cheesecake. The combination of flavors is delightful and perfect for the holiday season.
-
Citrus Surprise: Mix in some orange zest to the cheesecake filling for a refreshing burst of flavor that perfectly complements the red velvet. A hint of citrus will elevate the sweetness and add a delightful surprise!
-
Elegant Toppings: Instead of mini Oreos, top your cheesecake with sugared cranberries or rosemary sprigs for a beautiful and sophisticated presentation. These garnishes not only look stunning but add a touch of natural elegance.
-
Mini Cheesecakes: Bake your batter in ramekins to create individual servings of red velvet cheesecake. Perfect for parties, these personal treats make for a charming way to serve and share!
-
Dairy-Free Delight: Use coconut cream instead of heavy whipping cream for a rich, non-dairy option that maintains a delightful texture. You won’t miss the dairy in this delicious twist!
-
Chocolate Lovers’ Twist: Enhance the chocolate flavor by using Dutch-process cocoa powder instead of regular cocoa. This swap deepens the chocolate notes for an even richer experience.
-
Nutty Flavor Boost: Add a handful of finely chopped pecans or walnuts into the crust for a satisfying crunch and a nutty flavor that pairs wonderfully with the rich cheesecake filling.
-
Spicy Seasonal Kick: Add a dash of cinnamon or nutmeg into the filling for a warm, spicy kick. The added spices will evoke all the cozy feelings of the season!
For more fun seasonal baking ideas, don’t forget to explore our holiday dessert collection to keep the festive spirit alive!
How to Store and Freeze Christmas Red Velvet Cheesecake
Fridge: Store your Christmas Red Velvet Cheesecake in an airtight container for up to 3 days to keep it fresh and delicious.
Freezer: For longer storage, wrap the cheesecake tightly in plastic wrap and then in aluminum foil. It can be frozen for up to 2 months.
Thawing: To enjoy a frozen slice, transfer it from the freezer to the fridge the night before serving and let it thaw overnight.
Reheating: If you desire a warm slice, gently reheat individual pieces in the microwave for about 10-15 seconds until slightly warmed through.
Make Ahead Options
These Christmas Red Velvet Cheesecakes are perfect for meal prep enthusiasts! You can prepare the crust up to 3 days in advance by baking and cooling it, then wrapping it tightly in plastic wrap and storing it in the refrigerator. The cheesecake filling can also be made ahead; simply mix the ingredients and refrigerate it for up to 24 hours before pouring it into the crust. When you’re ready to bake, remember to give the filling a gentle stir and then pour it over the prepped crust. This way, you can enjoy all the festive flavors that are just as delicious without the last-minute rush!
What to Serve with Christmas Red Velvet Cheesecake
Delight in a festive feast that complements the creamy richness of your dessert while enhancing the holiday spirit!
- Rich Hot Chocolate: A warm, velvety drink perfectly balances the sweet cheesecake and adds a cozy touch to your gather.
- Peppermint Bark: The refreshing crunch of peppermint bark offers a delightful contrast to the smooth cheesecakes, enhancing holiday flavors.
- Spiced Apple Cider: This warm, spiced beverage brings a comforting element, beautifully pairing with the rich notes of red velvet.
- Cranberry Salad: A light, tangy salad introduces a refreshing tartness that brightens the overall indulgence of the cheesecake.
- Pecan Pie Bars: The sweet nuttiness of these bars ties in the festive theme, creating another layer of flavor for your dessert spread.
- Vanilla Ice Cream: A classic choice, a scoop of creamy ice cream adds a cooling contrast to the luscious richness of the cheesecake.
- Chocolate Fondue: Dip fruits or marshmallows for a fun, interactive dessert option, adding a sweet and decadent twist to your spread.
- Eggnog: A creamy, spiced drink that captures holiday essence, complementing the special festive flavors of your cheese cake.
- Gingerbread Cookies: These spiced cookies can be both decorative and delicious, making a charming addition to any dessert table.
Expert Tips for Christmas Red Velvet Cheesecake
-
Soften Cream Cheese: Ensure all cream cheese is at room temperature to avoid lumps, allowing for a smooth and creamy consistency in your filling.
-
Water Bath Method: Using a water bath prevents cracks and promotes even baking. Make sure the springform pan is well-wrapped to avoid water leaking in.
-
Chill Thoroughly: Patience is key! Allow your cheesecake to chill overnight for the best texture and flavor; rushing can lead to a less stable Christmas Red Velvet Cheesecake.
-
Decorate Just Before Serving: To maintain the fluffiness of the whipped cream, add toppings right before serving for that fresh, delicious look.
-
Clean Slicing: Use a hot, clean knife to slice your cheesecake for neat and pretty pieces—perfect for sharing at holiday gatherings!
Christmas Red Velvet Cheesecake Recipe FAQs
What is the best way to select ripe ingredients for this cheesecake?
Absolutely! A key part of this recipe is using the freshest ingredients. When selecting your cream cheese, make sure it is at room temperature and soft to ensure smooth mixing. For the heavy whipping cream, look for a label indicating a high fat content (36% or more) for the richest texture. As for the red food coloring, I recommend using gel coloring over liquid, as it provides a richer hue without changing the batter consistency.
How should I store my leftovers?
Very simply! Store your Christmas Red Velvet Cheesecake in an airtight container in the refrigerator for up to 3 days. If you want to enjoy it later, wrap it tightly in plastic wrap and then in aluminum foil to freeze for up to 2 months. Just remember, cheesecakes can dry out if not stored properly, so the tighter, the better!
Can I freeze my Christmas Red Velvet Cheesecake?
Absolutely! To freeze, follow these steps: first, let the cheesecake cool completely. Next, wrap it tightly in plastic wrap to prevent freezer burn, followed by a layer of aluminum foil. Label it with the date and type of cheesecake, then place it in the freezer. For serving, move it to the refrigerator for 6-8 hours or overnight to thaw before enjoying your delightful treat!
What should I do if my cheesecake cracks during baking?
Don’t worry, it can happen to the best of us! To prevent cracks, always bake your cheesecake with a water bath—this keeps moisture in and promotes even cooking. If you still find cracks after baking, fear not! You can cover them with a thick layer of whipped cream or a dollop of frosting, turning a mishap into a delectable charm.
Is this recipe suitable for people with allergies, like dairy or gluten?
Very thoughtfully compared to traditional recipes! For those avoiding dairy, you can substitute the cream cheese with a dairy-free cream cheese alternative and coconut cream for the whipped cream. If gluten-free is your goal, substituting the Oreo crust with gluten-free chocolate cookies can give you that same delicious flavor without the worry. Always double-check labels for potential allergens as you prepare your festive dessert!
Indulge in Christmas Red Velvet Cheesecake Bliss
Ingredients
Equipment
Method
- Preheat oven to 350°F (175°C). Prepare a 9-inch springform pan by wrapping with aluminum foil to prevent water leaks.
- Crush Oreo cookies and mix with melted butter and sugar, then press into the bottom of the springform pan. Bake for 8-10 minutes and let cool.
- In a mixing bowl, beat softened cream cheese until smooth. Gradually add sugar, then stir in vanilla extract, cocoa powder, and red food coloring until evenly combined.
- In another bowl, whip heavy cream to soft peaks. Fold the whipped cream into the red velvet batter gently, adding Christmas sprinkles.
- Reduce oven to 325°F (160°C), place the springform pan in a larger baking dish with hot water. Bake for 1 to 1.25 hours until edges are firm.
- After baking, turn off the oven and leave the cheesecake in with the door slightly ajar for 1 hour. Transfer to a wire rack to cool for 2-3 hours at room temperature, then refrigerate for at least 6-8 hours.
- Once chilled, remove the sides of the pan, top with whipped cream, garnish with mini Oreos and sprinkles, and slice to serve.
Leave a Reply