
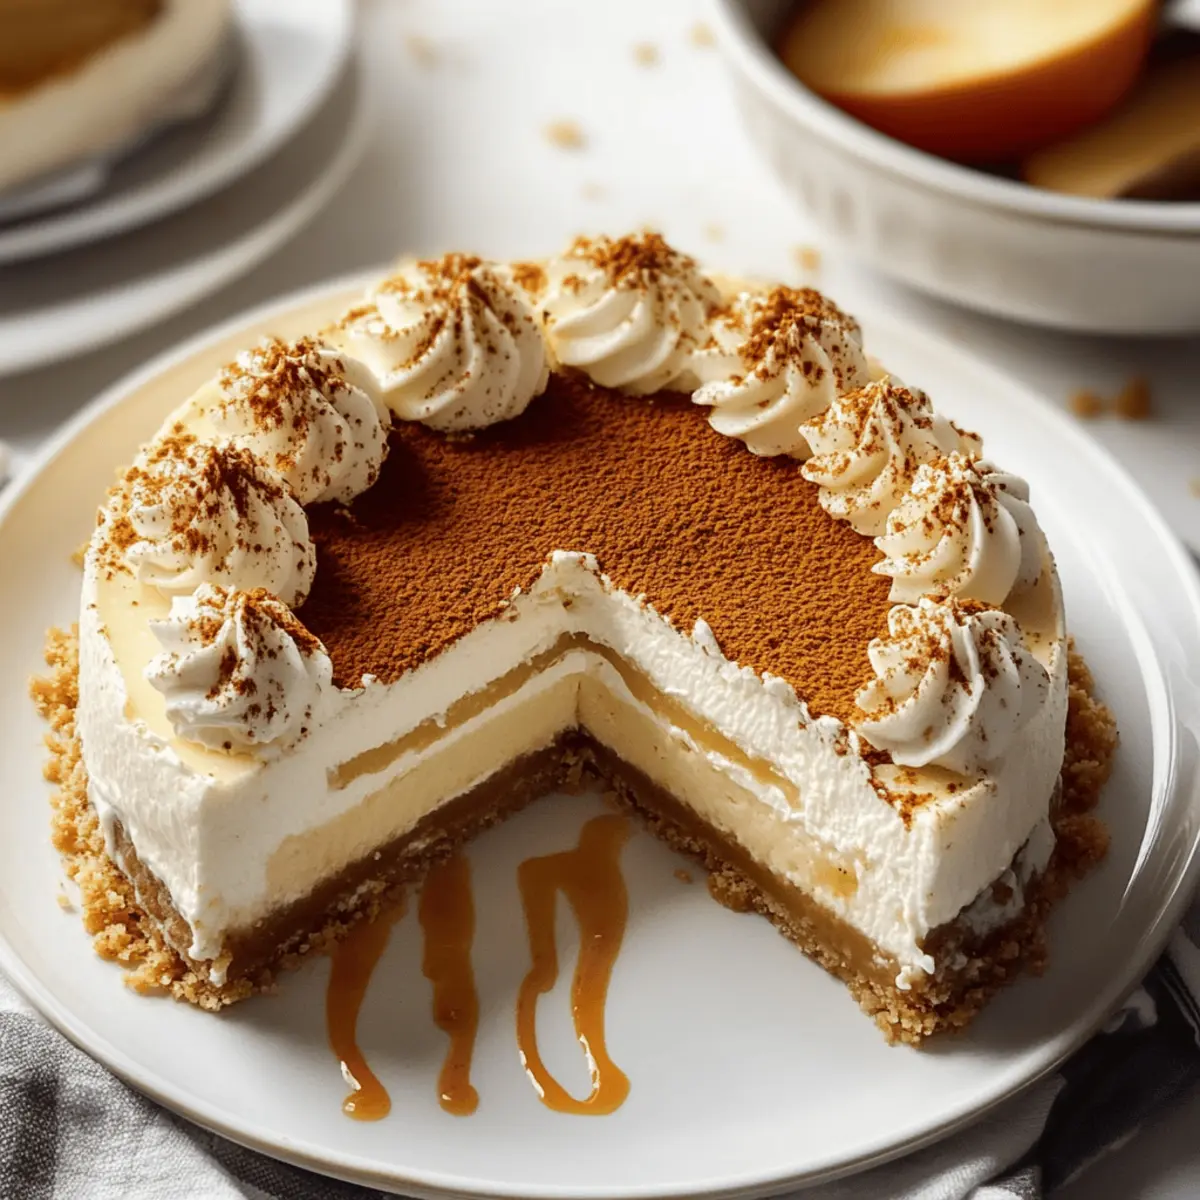
The aroma of spiced apple cider wafting through the kitchen instantly transports me to crisp fall days, where family gatherings are painted with vibrant reds and oranges. This Creamy Spiced Apple Cider Cheesecake captures that essence perfectly, merging the rich tang of cream cheese with the warmth of seasonal spices. With each bite, you’ll delight in a creamy texture sitting atop a buttery graham cracker crust that’s as comforting as your favorite sweater. Not only is this cheesecake easy to whip up, making it a perfect homemade dessert, but it also impresses friends and family, adding a festive touch to any occasion. Are you ready to experience a slice of autumn bliss?
Why Is This Cheesecake a Must-Try?
Comforting flavors: This Apple Cider Cheesecake brings the essence of fall right to your table with its cozy blend of apple cider and spices that will warm your heart.
Easy to make: With minimal steps, you’ll be able to impress guests without spending all day in the kitchen.
Perfect for gatherings: Whether it’s a holiday party or a casual get-together, this dessert will be the star of the show, leaving everyone asking for the recipe.
Versatile garnishes: Top it with caramel, fresh apples, or a dollop of whipped cream to customize each slice to match your mood or occasion.
Culinary nostalgia: Every bite takes you back to cherished family moments, making it not just a dessert, but a way to celebrate memories.
Make sure to check out seasonal flavors for more inspiration to keep your dessert game strong!
Apple Cider Cheesecake Ingredients
Get ready to whip up the most delightful Apple Cider Cheesecake with these essential ingredients!
For the Crust
- Graham Cracker Crumbs – Adds a buttery and crunchy base that perfectly complements the creamy filling.
- Sugar – Sweetens both the crust and filling, balancing the flavors beautifully.
- Unsalted Butter – Binds the crumbs together while adding richness without overpowering other flavors.
For the Filling
- Cream Cheese – The star of the show, providing that rich, creamy texture and tangy flavor everyone loves.
- Eggs – Help bind the filling together and add structure during baking.
- Vanilla Extract – Infuses a warm, floral aroma that pairs wonderfully with the apple cider.
- Apple Cider – When reduced, it brings the intense fruity flavor essential for this cheesecake’s autumnal character.
- Ground Cinnamon – Adds warmth and depth, enhancing that cozy autumn taste.
- Ground Nutmeg – Contributes a subtly sweet, nutty undertone that enriches the spice profile.
- Ground Allspice – Delivers a hint of clove-like aroma that amplifies the cozy feel of the cheesecake.
- Salt – Balances and highlights all the flavors, ensuring a well-rounded taste.
- Sour Cream – Adds creaminess and a subtle tang to ensure a luxuriously smooth filling.
These ingredients will come together to create an unforgettable Apple Cider Cheesecake that will leave everyone asking for seconds!
Step‑by‑Step Instructions for Apple Cider Cheesecake
Step 1: Preheat the Oven
Begin by preheating your oven to 325°F (163°C). This is a crucial step for our Apple Cider Cheesecake, as it ensures an even bake. While the oven warms up, you can focus on preparing the crust, which will provide a deliciously crunchy base for your cheesecake.
Step 2: Make the Crust
In a mixing bowl, combine graham cracker crumbs and sugar, stirring well to distribute. Pour in melted unsalted butter, mixing until all crumbs are moistened. This buttery mixture should hold together when pressed. Next, transfer the mixture into a 9-inch springform pan, pressing it firmly into the bottom to form an even layer. Bake for 10 minutes until lightly golden.
Step 3: Prepare the Filling
While the crust bakes, begin the filling by beating the softened cream cheese in a large bowl using an electric mixer. Mix in granulated sugar until smooth, ensuring no lumps remain. Add eggs one at a time, mixing well after each addition. This careful incorporation is essential for a creamy texture in your Apple Cider Cheesecake.
Step 4: Add Flavors
Once the cream cheese mixture is smooth, stir in vanilla extract and the reduced apple cider. Sprinkle in ground cinnamon, nutmeg, allspice, and a pinch of salt to enhance the warm flavors. Continue mixing until everything is well blended, taking care not to overmix to prevent cracks in your cheesecake.
Step 5: Incorporate Sour Cream
Gently fold in the sour cream using a spatula until just incorporated. This step adds an extra level of creaminess and tang that perfectly complements the apple cider. Pause to note the smooth texture, which is essential for that luxurious filling we seek in our Apple Cider Cheesecake.
Step 6: Combine and Bake
Now, pour this luscious filling over the pre-baked crust, smoothing the top with a spatula. This step requires careful handling to ensure a neat presentation. Place the springform pan back in the oven and bake for 50-60 minutes, or until the edges are set but the center has a slight jiggle, indicating a creamy filling.
Step 7: Cool Gradually
Once baked, turn off the oven and leave the cheesecake inside with the door slightly ajar for about 1 hour. This gradual cooling process helps prevent sudden temperature changes that can lead to cracks. You’ll notice the cheesecake settling and firming up nicely, making it perfect for slicing later.
Step 8: Chill in the Refrigerator
After the hour is up, remove the cheesecake from the oven and let it cool to room temperature. Then, refrigerate it for at least 4 hours or overnight to allow it to fully set. This chilling time is crucial for achieving the perfect texture for your Apple Cider Cheesecake.
Step 9: Serve and Enjoy
When ready to serve, carefully remove the cheesecake from the springform pan. You can garnish it with your favorite toppings like caramel sauce, thinly sliced apples, or a dollop of whipped cream for that extra special touch. Each slice will showcase the creamy texture and spiced flavors that make this Apple Cider Cheesecake a delightful autumn treat.
How to Store and Freeze Apple Cider Cheesecake
Fridge: Store the cheesecake covered in plastic wrap or in an airtight container for up to 5-7 days. This keeps it fresh while preserving its creamy texture.
Freezer: Wrap individual slices in plastic wrap followed by aluminum foil or use a freezer-safe container. Your Apple Cider Cheesecake can be frozen for up to 2 months without losing its delicious flavor.
Thawing: To enjoy your frozen cheesecake, move it to the fridge and let it thaw overnight. This gentle process ensures the texture remains intact for every delightful slice.
Reheating: Although best served chilled, if you prefer it slightly warmed, bake at 250°F (121°C) for about 15 minutes. This enhances the creaminess, making it perfect for a cozy evening treat.
Apple Cider Cheesecake Variations
Feel free to get creative and customize your cheesecake with these delightful twists and substitutions!
-
Caramel Drizzle: Add a swirl of homemade caramel on top for an inviting sweetness that pairs beautifully with the spiced flavors. It’s the perfect finishing touch to embrace the cozy feel of autumn.
-
Fresh Toppings: Garnish your cheesecake with thinly sliced apples tossed in lemon juice and cinnamon for a refreshing contrast. This adds a noteworthy crunch and a burst of freshness that lightens each bite.
-
Whipped Cream Layer: Top with a layer of fluffy whipped cream and a sprinkle of cinnamon for a classic and appealing touch. This will elevate the cheesecake’s presentation and offer a creamy, dreamy texture alongside the rich filling.
-
Alternative Crusts: Experiment with different crusts by using Oreo crumbs or shortbread for a unique flavor twist. Just remember to adjust the sugar based on the sweetness of your chosen base.
-
Pumpkin Spice Infusion: For an extra fall flair, mix in some pumpkin spice or pumpkin puree to the batter. This variation perfectly melds the flavors of apple and pumpkin, creating a heavenly autumn experience.
-
Nutty Crust Addition: Add finely chopped pecans or walnuts to the graham cracker crust for a delicious crunch. The nutty flavor complements the creamy filling and enhances the texture.
-
Chocolate Shavings: Garnish your cheesecake with chocolate shavings for a touch of indulgence. The bitter notes of chocolate enhance the sweetness of the cheesecake, creating a well-balanced dessert.
-
Spicy Kick: If you’re a fan of heat, consider adding a pinch of cayenne or chili powder to the spices. This unexpected kick will surprise and delight those who enjoy a little warmth in their sweets.
Explore these personalized variations to make your Apple Cider Cheesecake even more special! You can also check out our ideas for seasonal flavors that will inspire your next baking adventure.
Expert Tips for Apple Cider Cheesecake
-
Don’t Overmix: Mix the filling gently until combined to prevent cracks; overmixing can incorporate too much air.
-
Slow Cooling: Let the cheesecake cool in the oven with the door ajar to help minimize temperature shocks, which can cause cracks.
-
Use a Water Bath: If cracks are a concern, consider baking your Apple Cider Cheesecake in a water bath for added moisture and even cooking.
-
Chill for Best Texture: Allow the cheesecake to chill in the refrigerator for at least 4 hours or overnight to achieve that luxurious, creamy consistency.
-
Quality Ingredients Matter: Use high-quality cream cheese and fresh apple cider for the best flavor in your cheesecake; it really makes a difference!
Make Ahead Options
These Apple Cider Cheesecake are perfect for busy home cooks looking to save time! You can prepare the crust and keep it refrigerated for up to 3 days in advance; just cover it tightly to maintain that buttery crunch. The filling can also be made ahead and stored in an airtight container in the refrigerator for 2 days before baking, which helps develop the flavors beautifully. When you’re ready to bake, simply pour the fresh filling over the pre-made crust and follow the remaining steps, ensuring a delightful dessert with minimal effort. Just remember to cool the cheesecake in the oven to prevent cracks; it will be just as delicious when you finally serve it!
What to Serve with Apple Cider Cheesecake
Creating a delightful meal to accompany this luscious dessert will make your autumn gatherings even more special.
- Hot Spiced Cider: This warm drink mirrors the apple cider flavor in the cheesecake, adding a festive touch to your meal.
- Caramel Drizzle: A rich sweet sauce on top enhances the cheesecake’s flavors while providing a delightful contrast in texture.
- Whipped Cream Topping: A light dollop of freshly whipped cream provides an airy counterbalance to the dense cheesecake, making each bite even more enjoyable.
- Roasted Pumpkin Soup: The creamy, spiced nature of pumpkin soup complements the cheesecake beautifully, creating a comforting fall menu.
- Cinnamon Sugar Pecans: These crunchy treats are the perfect topping or snack alongside your cheesecake, bringing a delightful crunch and flavor harmony.
- Apple Crisp: A warm apple crisp served on the side resonates with the autumnal vibe while allowing for varied textures in your dessert experience.
- Chai Latte: This spiced tea perfectly pairs with the cheesecake, enhancing the warmth of the spices and elevating the overall flavor experience.
- Vanilla Bean Ice Cream: A scoop of creamy ice cream contrasts the cheesecake’s density, melting delightfully with every bite.
- Caramelized Apples: Add depth with warm caramelized apples, echoing the apple cider and bringing an element of visual appeal too.
- Pumpkin Spice Latte: A cozy drink with rich texture not only complements the cheesecake but also indulgently ties together the whole meal.

Apple Cider Cheesecake Recipe FAQs
What type of apple cider should I use?
Absolutely! For the best flavor, I recommend using fresh, unfiltered apple cider. Look for a product that has a rich, fruity taste without added preservatives. If you’re in a pinch, store-bought varieties can work too, but try to choose ones without added sugars or artificial flavors.
How should I store my cheesecake?
Store your Apple Cider Cheesecake properly covered in the refrigerator—plastic wrap or an airtight container works wonders! It will stay fresh for about 5 to 7 days. If you’re not planning to finish it within that time, freezing is a great option!
Can I freeze Apple Cider Cheesecake?
Yes! I often freeze slices for later enjoyment. Wrap individual slices in plastic wrap and then in aluminum foil or place them in a freezer-safe container. It can be frozen for up to 2 months. To enjoy later, just move it to the fridge to thaw overnight for the best texture.
What should I do if my cheesecake cracks?
Cracking can happen, but don’t worry. If you see cracks after baking, it’s likely due to overmixing or cooling too quickly. To avoid this in the future, ensure you mix your filling gently and leave the cheesecake to cool gradually in the oven with the door slightly ajar for about 1 hour before chilling. If it cracks anyway, cover it with a layer of whipped cream or fruit to hide those imperfections—everyone will still love it!
Are there any dietary considerations for this cheesecake?
Great question! This Apple Cider Cheesecake contains dairy and gluten from the crust and filling ingredients, so it’s not suitable for those with lactose intolerance or gluten sensitivity. For a dairy-free version, try using dairy-free cream cheese and a gluten-free cookie option for the crust. Always check labels for allergy information if you’re serving a large group.
Heavenly Apple Cider Cheesecake to Celebrate Fall Flavors
Ingredients
Equipment
Method
- Preheat the oven to 325°F (163°C).
- Combine graham cracker crumbs and sugar in a bowl. Mix in melted butter until moistened. Press into a 9-inch springform pan and bake for 10 minutes.
- Beat softened cream cheese with an electric mixer until smooth, then mix in sugar. Add eggs one at a time, blending well after each addition.
- Stir in vanilla extract and reduced apple cider. Add cinnamon, nutmeg, allspice, and salt; mix until just combined.
- Gently fold in sour cream until incorporated. Smooth the filling onto pre-baked crust.
- Bake for 50-60 minutes until edges are set but the center jiggles slightly. Turn off oven and cool with door ajar for 1 hour.
- After cooling, refrigerate for at least 4 hours or overnight before serving.
- Remove from the springform pan and garnish as desired before serving.
Leave a Reply