
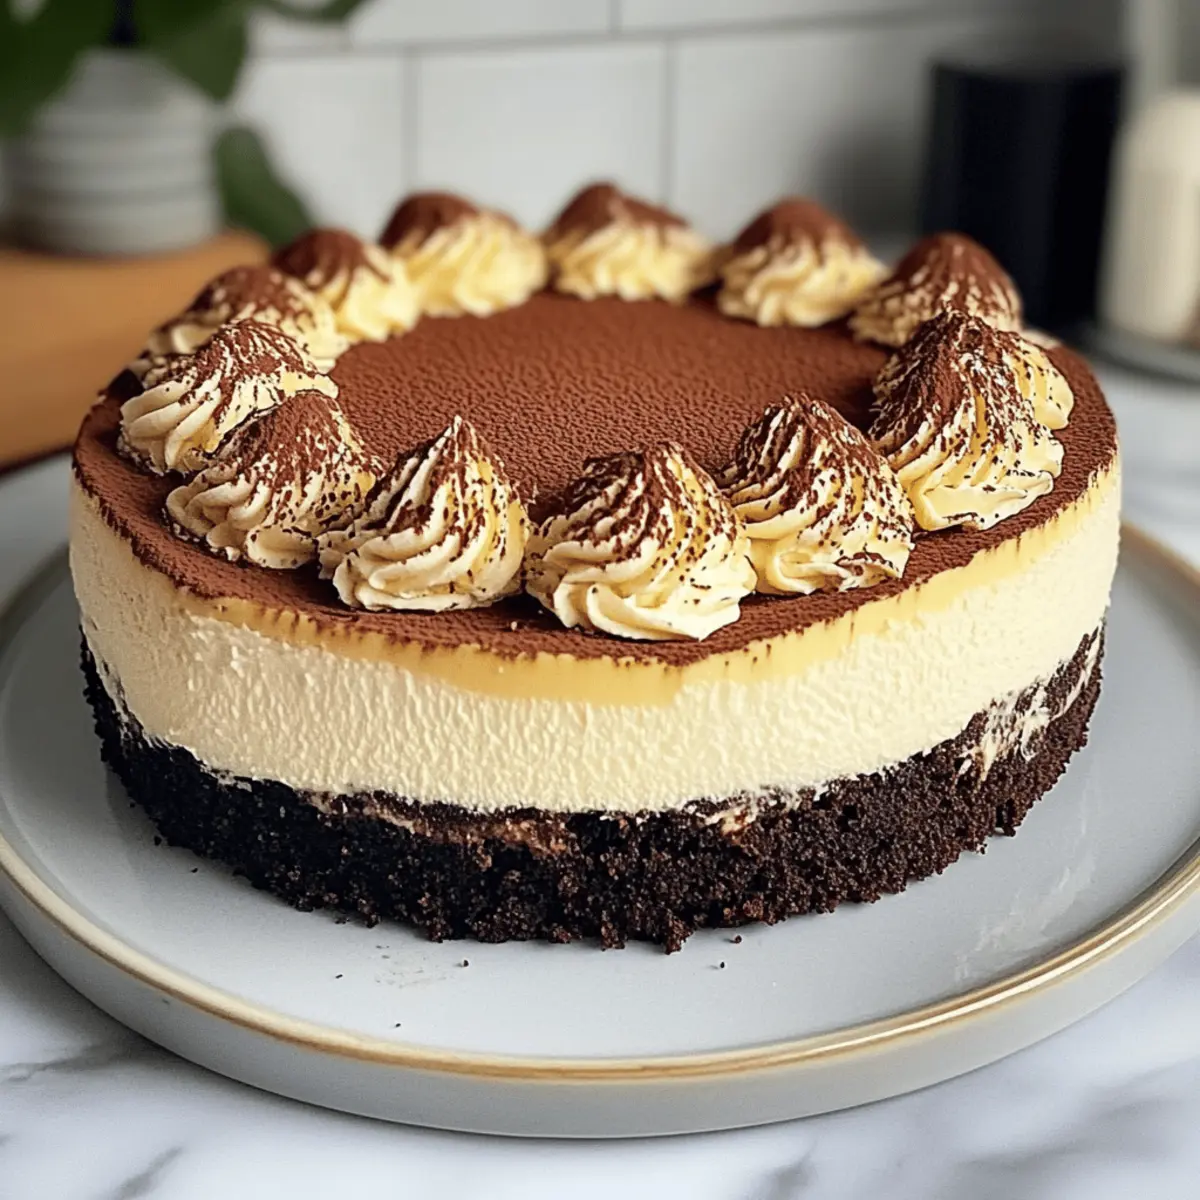
As I stood in my kitchen, the aroma of freshly brewed coffee enveloped me, instantly transporting me to a cozy Italian café. Today, I’m excited to share my recipe for Baked Tiramisu Cheesecake, a delightful marriage of rich New York cheesecake and the decadent flavors of classic Tiramisu. This irresistible dessert captures the essence of both worlds, featuring a velvety filling and a luscious chocolate crust that’s easier to make than you might think! Perfect for impressing guests or indulging yourself, this make-ahead treat is sure to be a hit at any gathering. Plus, with customizable options and easy storage, you can savor each creamy bite throughout the week. Are you ready to whip up this dreamy fusion of flavors? Let’s dive into the details!
Why is Baked Tiramisu Cheesecake a Must-Try?
Incredible Flavor Fusion: This dessert seamlessly blends the creamy richness of cheesecake with the aromatic allure of Tiramisu.
Effortless Preparation: Despite its sophisticated taste, this recipe is surprisingly simple—perfect for new bakers and seasoned chefs alike.
Make-Ahead Convenience: Prepare it the night before for hassle-free hosting. It’s even better the next day!
Customizable Options: Add a splash of coffee liqueur or top it with fresh berries to make it your own.
Crowd-Pleasing Delight: Whether for a casual dinner or a festive celebration, this cheesecake is sure to impress your guests.
With each creamy slice, you’ll fall deeper in love with the decadent pairing of flavors and textures. Get ready to elevate your dessert game with this showstopper!
Baked Tiramisu Cheesecake Ingredients
• Discover the key components for this mouthwatering dessert!
For the Crust
- Crushed Chocolate Cookies – Provides a rich, decadent base; substitute with gluten-free cookies if desired.
- Unsalted Butter – Binds the crust together and adds richness; vegan butter works for a dairy-free option.
For the Filling
- Cream Cheese – Adds smoothness and richness; be sure it’s softened for optimal mixing.
- Mascarpone Cheese – Essential for that classic Tiramisu flavor; use dairy-free cream cheese as a substitute if needed.
- Granulated Sugar – Sweetens the filling and balances flavors; feel free to replace with a sugar substitute for a lower-calorie option.
- Large Eggs – Provides structure and helps the cheesecake set; beat until fully combined for best results.
- Fresh Espresso or Strong Brewed Coffee – Infuses the filling with authentic coffee flavor; decaf coffee can work for a caffeine-free dessert.
For the Layers
- Ladyfingers – Creates distinct layers while soaking up coffee; opt for gluten-free ladyfingers if necessary.
For the Topping
- Heavy Whipping Cream – Whipped to top the cheesecake for a light finish; coconut cream can be used for a dairy-free topping.
- Confectioner’s Sugar – Sweetens the whipped cream topping; optional if you prefer a less sweet finish.
- Cocoa Powder – Dusting on top adds a classic Tiramisu touch; dark cocoa offers a more intense flavor.
Embrace the delightful fusion of textures and flavors that this Baked Tiramisu Cheesecake has to offer!
Step‑by‑Step Instructions for Baked Tiramisu Cheesecake
Step 1: Prepare the Crust
Start by preheating your oven to 350°F (175°C). In a medium bowl, combine crushed chocolate cookies with melted unsalted butter until the mixture resembles wet sand. Press this mixture firmly into the bottom of a 10-inch springform pan, creating an even layer. Bake the crust for 10 minutes, until it’s set and slightly firm. Let it cool completely before adding the filling.
Step 2: Make the Filling
In a large mixing bowl, beat the softened cream cheese and mascarpone cheese together using a hand or stand mixer until smooth and creamy. Gradually add granulated sugar, mixing until it is fully incorporated. Then, add the eggs one at a time, ensuring each one is well blended before adding the next. Finally, fold in the freshly brewed espresso or coffee until the filling is evenly mixed.
Step 3: Layer Ladyfingers
Working quickly, dip half of the ladyfingers into the brewed coffee, allowing them to soak for just a second without becoming soggy. Arrange the soaked ladyfingers evenly over the cooled chocolate crust, creating a beautiful layer. This step enhances the coffee flavor in your Baked Tiramisu Cheesecake, so take your time ensuring an even distribution.
Step 4: Pour Cheesecake Mixture
Spread half of the creamy cheesecake filling over the layer of soaked ladyfingers, smoothing it out gently with a spatula. Repeat the dipping process for the remaining ladyfingers, layering them atop the cheesecake filling. Once you’ve added the last layer of ladyfingers, pour the rest of the cheesecake mixture on top, making sure to cover the ladyfingers completely.
Step 5: Bake
Prepare a water bath by placing the springform pan into a larger pan filled with hot water (about halfway up the sides of the springform pan). Bake the cheesecake in the preheated oven at 320°F (160°C) for 75-85 minutes. Look for the cheesecake to be set but still slightly jiggly in the center—this will create a creamy texture.
Step 6: Cool and Chill
After baking, turn off the oven and let the cheesecake cool inside with the door slightly ajar for about 30 minutes. This helps prevent cracking. Once cooled, transfer the cheesecake to the refrigerator and chill for at least 2 hours, or, for best results, overnight. This allows the flavors to meld beautifully in your Baked Tiramisu Cheesecake.
Step 7: Prepare Topping
Just before serving, whip the heavy cream in a mixing bowl until soft peaks form. Gradually add confectioner’s sugar to sweeten. Spread this whipped cream on top of the chilled cheesecake, creating a fluffy layer. Finally, dust the cheesecake generously with cocoa powder for a classic Tiramisu finish that complements the rich flavors perfectly.
Baked Tiramisu Cheesecake Variations & Substitutions
Feel free to get creative and make this recipe your own with these delightful twists!
- Dairy-Free: Substitute cream cheese and mascarpone with dairy-free versions for a rich yet guilt-free delight.
- Gluten-Free: Use gluten-free chocolate cookies and ladyfingers so everyone can enjoy a slice of this tasty treat.
- Boozy Kick: Add a splash of coffee liqueur to your filling for a grown-up version that brings extra depth.
- Flavor Boost: Toss in a dash of cinnamon or nutmeg to the filling for a warm, cozy undertone—the holiday season in every bite!
- Fruit Twist: Top with fresh berries like raspberries or strawberries for a pop of color and tartness that beautifully balances the sweetness.
- Chocolate Drizzle: Elevate your cheesecake by drizzling melted dark chocolate on top—an elegant finishing touch that adds both flavor and visual appeal.
- Mocha Cream: Swap out the heavy cream on top with whipped mocha-flavored cream for an extra layer of coffee goodness.
- Layered Delight: For a stunning presentation, alternate layers of mixed fruits and cream to create a visually dynamic cheesecake that tastes just as amazing as it looks.
With every bite of this Baked Tiramisu Cheesecake, you can explore not just flavor, but also texture and visual flair! And if you find a favorite variation, do share it with friends—it’s all about creating warm memories together over delicious food.
What to Serve with Baked Tiramisu Cheesecake?
Looking to create an unforgettable dining experience? Pair your dessert with these delightful accompaniments!
-
Espresso Shot: A robust espresso complements the coffee flavors beautifully, creating a perfect balance of sweetness and bitterness.
-
Fresh Berries: Add a pop of color and tartness with strawberries or raspberries. Their juiciness cuts through the richness of the cheesecake.
-
Whipped Cream: A dollop of lightly sweetened whipped cream enhances each slice, keeping it light and airy. Consider a flavored cream for extra flair!
-
Chocolate Sauce: A drizzle of rich chocolate sauce over slices adds an indulgent touch, amplifying the dessert’s decadent flavors.
-
Vanilla Ice Cream: Serve with a scoop of creamy vanilla ice cream for an extra layer of sweetness and a delightful temperature contrast.
-
Limoncello: This refreshing Italian lemon liqueur cleanses the palate, making it an elegant drink choice after such a rich dessert.
Each of these pairings not only enhances the experience but brings out the best in your homemade Baked Tiramisu Cheesecake!
How to Store and Freeze Baked Tiramisu Cheesecake
Refrigeration: Store your Baked Tiramisu Cheesecake covered in the refrigerator for up to 5 days to maintain its creamy texture and flavor.
Freezing: For longer storage, freeze the cheesecake wrapped tightly in plastic wrap and then in aluminum foil for up to 2 months.
Thawing: When you’re ready to enjoy it, move the cheesecake to the refrigerator to thaw overnight, preserving its delectable layers and creamy consistency.
Serving After Storage: If you’ve frozen it, let the cheesecake come to room temperature before serving for the best flavor experience.
Expert Tips for Baked Tiramisu Cheesecake
-
Use Softened Cheese: Make sure both the cream cheese and mascarpone are softened to room temperature for a smooth, lump-free filling.
-
Chill Overnight: For the best flavor and texture, allow your Baked Tiramisu Cheesecake to chill overnight before serving. The flavors truly deepen with time!
-
Water Bath Technique: Use a water bath while baking to prevent cracking and keep the texture creamy; this extra step makes all the difference.
-
Quick Ladyfinger Dips: Dip ladyfingers in coffee quickly—too long will make them soggy and affect the layers. A quick dip keeps them light and perfect for layering.
-
Customize Your Topper: Experiment with flavored whipped cream, like vanilla or mocha, and fresh berries for a delightful touch that complements the rich flavors.
-
Bake to Perfection: Look for a slight jiggle in the center of the cheesecake when baking. This indicates it’s creamy and will set perfectly as it cools.
Make Ahead Options
These Baked Tiramisu Cheesecake treats are perfect for busy home cooks looking to save time without sacrificing flavor! You can prepare the crust and cheesecake filling up to 24 hours in advance. Simply mix the crushed chocolate cookies with melted butter and bake the crust, then combine the cream cheese, mascarpone, and other filling ingredients. Store both components separately in airtight containers in the refrigerator. When you’re ready to assemble, layer the soaked ladyfingers over the cooled crust, pour the filling, and bake. For optimal taste and texture, allow the cheesecake to chill overnight after baking—this step enhances the flavors, making it just as delicious the next day!
Baked Tiramisu Cheesecake Recipe FAQs
What type of chocolate cookies should I use for the crust?
I recommend using crushed chocolate cookies, like Oreos, for a rich, decadent crust. If you need a gluten-free option, choose gluten-free chocolate cookies instead—this way, everyone can enjoy it!
How should I store the Baked Tiramisu Cheesecake?
Store your cheesecake covered in the refrigerator for up to 5 days. Make sure to keep it well-covered to prevent it from absorbing any other flavors in your fridge.
Can I freeze this cheesecake?
Absolutely! To freeze, wrap the cooled cheesecake tightly in plastic wrap and then in aluminum foil. It can be frozen for up to 2 months. When you’re ready to enjoy it, simply thaw it in the refrigerator overnight—this helps preserve its textures and flavors.
How can I tell if my cheesecake is fully baked?
Look for the cheesecake to be set with a slight jiggle in the center; it should not be overly wobbly. The edges should look firm while the center remains slightly soft. This will allow the creaminess to come through once it cools.
Are there any dietary considerations I should be aware of?
Yes! This recipe can be modified for different dietary needs. For a dairy-free version, substitute cream cheese and mascarpone with dairy-free alternatives, and use coconut cream for the topping. Also, check the labels on ingredients like ladyfingers to ensure they meet your dietary requirements.
What kind of coffee should I use in the recipe?
For the best flavor, opt for fresh espresso or strong brewed coffee. If you’re looking for a caffeine-free option, decaf coffee works great as well! Make sure it’s served warm for dipping those ladyfingers without sogginess.
Decadent Baked Tiramisu Cheesecake You Need to Try Today
Ingredients
Equipment
Method
- Preheat your oven to 350°F (175°C). In a medium bowl, combine crushed chocolate cookies with melted unsalted butter until the mixture resembles wet sand. Press this mixture firmly into the bottom of a 10-inch springform pan and bake for 10 minutes.
- In a large mixing bowl, beat the softened cream cheese and mascarpone cheese together until smooth and creamy. Gradually add granulated sugar, mixing until fully incorporated. Add eggs one at a time, ensuring each one is blended before adding the next. Finally, fold in the freshly brewed coffee until evenly mixed.
- Dip half of the ladyfingers into the brewed coffee quickly, allowing them to soak for just a second. Arrange the soaked ladyfingers evenly over the cooled chocolate crust.
- Spread half of the cheesecake filling over the layer of soaked ladyfingers, smoothing it out gently. Repeat the dipping process for the remaining ladyfingers and layer them atop the cheesecake filling. Pour the rest of the cheesecake mixture on top, covering the ladyfingers completely.
- Prepare a water bath by placing the springform pan into a larger pan filled with hot water. Bake the cheesecake at 320°F (160°C) for 75-85 minutes until set but slightly jiggly in the center.
- After baking, turn off the oven and let the cheesecake cool inside with the door slightly ajar for about 30 minutes. Once cooled, transfer it to the refrigerator and chill for at least 2 hours, or overnight for best results.
- Whip the heavy cream until soft peaks form, gradually adding confectioner’s sugar to sweeten. Spread this whipped cream on top of the chilled cheesecake and dust generously with cocoa powder.
Leave a Reply