
As I stood in my kitchen, the aroma of caramelized cream cheese filled the air, captivating my senses and igniting my passion for baking. Enter the Basque Cheesecake Loaf Pan, a deliciously simple dessert that combines the rich indulgence of traditional Basque cheesecake with the ease of a loaf pan. This gluten-free recipe not only allows for quick prep but also delivers a wonderfully creamy custard-like interior paired with a delightfully charred exterior — an impressive treat that even novice bakers can master! Imagine serving this elegant dessert at your next gathering or savoring a slice with your afternoon coffee. Are you ready to whip up this unforgettable masterpiece that might just become your new favorite dessert?

Why is Basque Cheesecake So Irresistible?
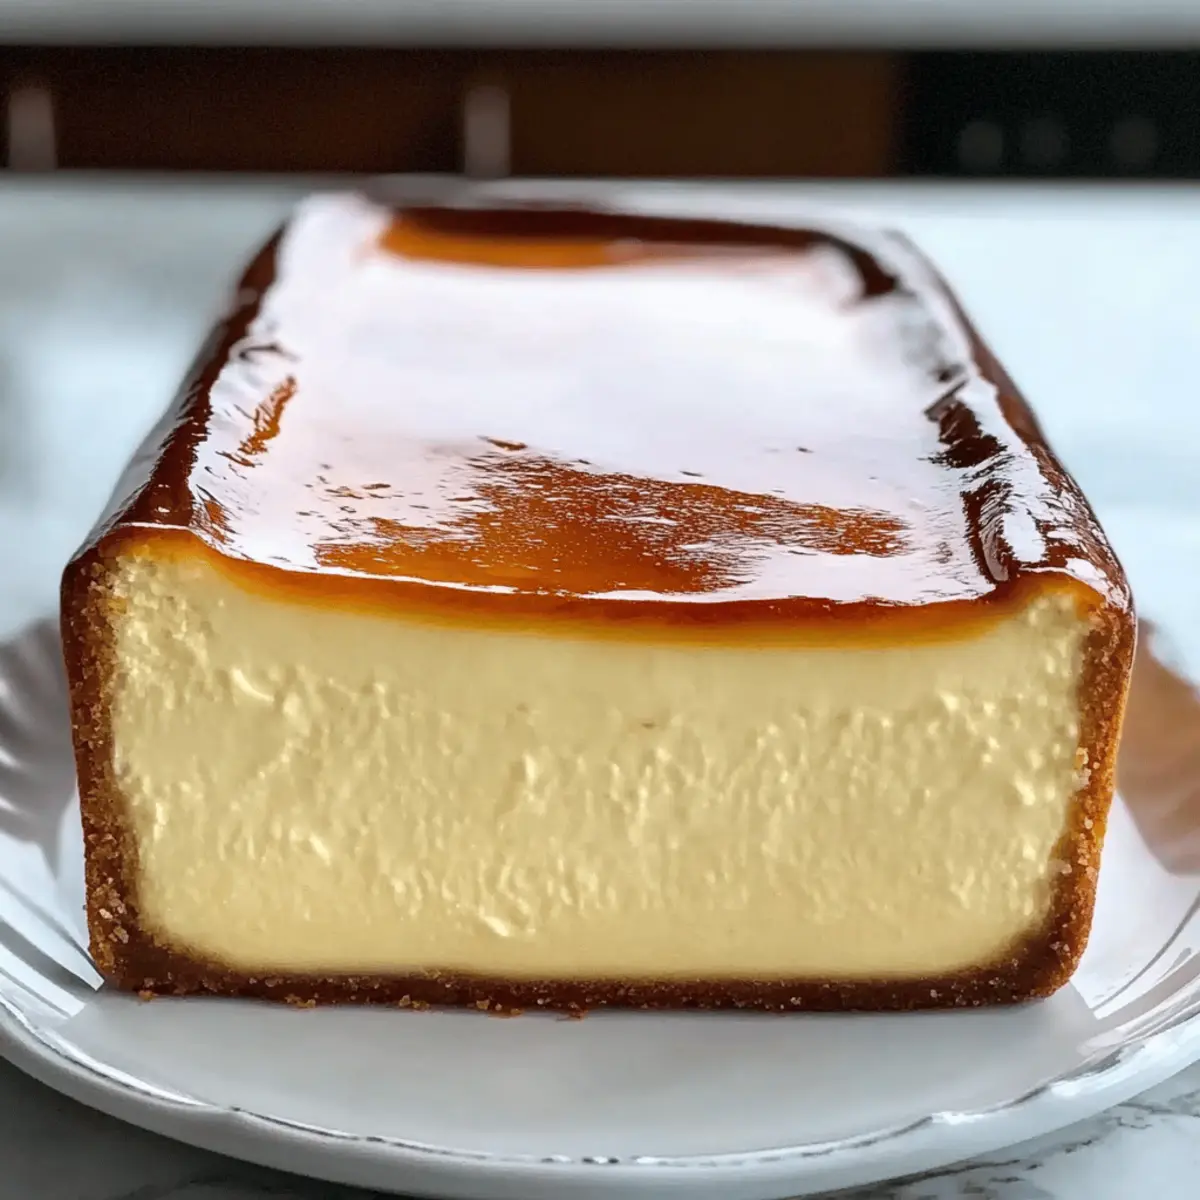
Decadent, creamy texture: Imagine sinking your fork into a luscious slice, where each bite melts in your mouth. Effortless preparation: This easy recipe is perfect for busy bakers, requiring minimal ingredients and steps. Gluten-free goodness: With no crust to worry about, it’s an ideal treat for those avoiding gluten. Versatile variations: Experiment with add-ins like lemon zest or even swirl in Nutella for a personal touch. Impressive presentation: The burnt top isn’t a flaw; it’s a hallmark of this beloved dish, making for an eye-catching centerpiece. Treat yourself to a fusion of flavors that’s perfect for any occasion!
Basque Cheesecake Loaf Pan Ingredients
• Let’s dive into the essentials for creating your Basque Cheesecake Loaf Pan!
For the Cheesecake Batter
• Cream Cheese – Provides the rich, creamy base essential for the cheesecake’s texture; make sure it’s softened for smooth mixing.
• Granulated Sugar – Sweetens the cheesecake and contributes to the caramelization; you can substitute it with a sugar alternative if desired.
• Eggs – Bind the ingredients together for structural integrity; using room temperature eggs helps with better incorporation.
• Heavy Cream – Adds richness and moisture, crucial for the creamy consistency; if dairy-free, consider using full-fat coconut cream.
• Vanilla Extract – Enhances flavor beautifully; opt for pure vanilla extract for optimal taste.
• All-Purpose Flour – Provides slight stability to the cheesecake; it can be omitted for a gluten-free version.
• Salt – Balances sweetness and enhances flavor; a pinch goes a long way.
Optional Add-Ins
• Lemon Zest – Adds a fresh, zesty flavor; perfect to lighten the richness of the cheesecake.
• Cinnamon – A warm spice that complements the creaminess; a sprinkle can elevate your dessert.
• Nutella – Swirl it in for a decadent twist; adds a delightful chocolate flavor that pairs well with the creamy texture.
• Crushed Biscoff Cookies – Layer at the bottom of the loaf pan for added complexity and crunch; creates a delightful surprise with each bite.
Gather these ingredients, and get ready to create a Basque Cheesecake Loaf Pan that’s not only visually stunning but also a true indulgence!
Step‑by‑Step Instructions for Basque Cheesecake Loaf Pan
Step 1: Cream the Cream Cheese
Start by beating the softened cream cheese in a large mixing bowl using an electric mixer on medium speed for 3-5 minutes. You want the cream cheese to become smooth and fluffy, free of lumps. This forms the creamy base of your Basque Cheesecake Loaf Pan, so take your time to achieve that velvety texture.
Step 2: Add Sugar Gradually
Once the cream cheese is smooth, slowly add granulated sugar to the mixture. Continue mixing for another 2-3 minutes until the sugar is fully incorporated and the batter looks light and airy. The sugar not only sweetens the cheesecake but also aids in creating that deliciously caramelized crust we love in a Basque cheesecake.
Step 3: Incorporate the Eggs
Next, add the eggs one at a time to the mixture, ensuring each is fully blended before adding the next. Mix gently until just combined; the batter may still look a bit lumpy, which is perfectly fine. This step is crucial for maintaining the structure of your Basque Cheesecake Loaf Pan, so be mindful not to overmix.
Step 4: Add Heavy Cream and Vanilla
Pour in the heavy cream and vanilla extract, mixing on low speed until the batter is just blended. This should only take about 30 seconds. The heavy cream contributes to the rich, custard-like texture, while the vanilla adds depth of flavor, making your cheesecake delightful and aromatic.
Step 5: Add Flour and Salt
Sift in the all-purpose flour and a pinch of salt, gently folding them into the mixture with a spatula. Mix until no lumps remain, but be careful to avoid overmixing. This step ensures the batter has a slight stability without compromising the creamy bliss of your Basque Cheesecake Loaf Pan.
Step 6: Preheat the Oven
While preparing the batter, go ahead and preheat your oven to 425°F (220°C). The high temperature is essential to achieving the signature burnt top of the Basque cheesecake. This also allows the cheesecake to rise beautifully while cooking.
Step 7: Line the Loaf Pan
Prepare a 9×5 inch loaf pan by generously lining it with parchment paper, allowing some overhang on the sides. This makes it easier to remove the cheesecake once it’s cooled. The parchment will help maintain the rustic look we love in a Basque Cheesecake Loaf Pan.
Step 8: Pour in the Batter
Now, carefully pour the cheesecake batter into the prepared loaf pan. Use a spatula to smooth the top and ensure even distribution. The batter should fill the pan about three-quarters full, allowing enough space for rising without overflowing.
Step 9: Bake
Place your filled loaf pan in the preheated oven and bake for 50-60 minutes. You’ll know it’s ready when the top is deeply browned, and the center slightly jiggles—a perfect balance for a Basque cheesecake. The internal temperature should ideally reach 150-160°F (65-71°C).
Step 10: Cooling
Once baked, turn off the oven and crack the oven door open to cool the cheesecake gradually for about 1 hour. This gentle cooling process helps prevent cracking. Allow the Basque Cheesecake Loaf Pan to settle into its ultimate texture.
Step 11: Refrigerate
After the hour of cooling, let the cheesecake come to room temperature completely before refrigerating it for a minimum of 4 hours, or ideally overnight. This chill time enhances the flavors and ensures that it sets up nicely for slicing.
Step 12: Unmold & Serve
When you’re ready to serve, carefully lift the cheesecake out of the loaf pan using the parchment overhang. Slice it into thick pieces and serve chilled or at room temperature. Each slice of your Basque Cheesecake Loaf Pan is sure to impress with its creamy interior and beautifully charred top!

Make Ahead Options
These Basque Cheesecake Loaf Pan are perfect for busy home cooks looking to save time during the week! You can prepare the batter up to 24 hours in advance by mixing all the ingredients up to the baking stage. Simply cover the bowl tightly with plastic wrap and refrigerate. When you’re ready to bake, just pour the batter into your lined loaf pan and follow the baking instructions. For optimal texture and flavor, allow the cheesecake to chill in the refrigerator for at least 4 hours or overnight after baking. This chilling time ensures your cheesecake remains just as delicious when it’s time to slice and serve!
Storage Tips for Basque Cheesecake Loaf Pan
Fridge: Store your Basque cheesecake in an airtight container in the refrigerator for up to 5 days. This helps maintain its rich flavor and creamy texture.
Freezer: If you want to keep it longer, you can freeze the cheesecake for up to 2 months. Wrap it tightly in plastic wrap and then in aluminum foil to prevent freezer burn.
Reheating: For best results, thaw the cheesecake overnight in the fridge. Serve it chilled or at room temperature for a delightful experience.
Slicing: When slicing, use a warm knife to achieve clean cuts through the creamy layers. Enjoy this decadent treat, whether fresh or from the freezer!
Expert Tips for the Best Basque Cheesecake Loaf Pan
- Perfectly Softened Cream Cheese: Ensure your cream cheese is at room temperature for easy mixing. Cold cream cheese can lead to lumps in your batter.
- Gentle Mixing: Avoid overmixing, especially after adding eggs and flour. This guarantees the desired creamy texture remains intact in your Basque Cheesecake Loaf Pan.
- Achieve the Burnt Top: Do not shy away from a dark top! The high baking temperature is crucial for that signature caramelized crust we adore.
- Use Parchment Paper: Generous overhang of parchment in the loaf pan allows for easy removal. It creates a beautiful rustic presentation without any mess.
- Chill Overnight: For optimal flavor and texture, refrigerating the cheesecake overnight is recommended. This step ensures every slice is as indulgent as the last!
What to Serve with Basque Cheesecake Loaf Pan
The perfect pairing elevates your dessert experience, turning a simple treat into a memorable feast.
- Fresh Berries: Juicy strawberries, raspberries, or blueberries add a burst of flavor and brightness, balancing the cheesecake’s rich creaminess.
- Vanilla Ice Cream: A scoop of velvety vanilla ice cream complements the warm caramel notes of the cheesecake beautifully. Imagine the creamy textures mingling in every bite!
- Espresso: A bold shot of espresso enhances the flavors of the cheesecake, creating a delightful coffee and dessert combination perfect for coffee lovers.
- Mascarpone Cheese: Smooth and slightly sweet, whipped mascarpone drizzled over the cheesecake adds an extra layer of indulgence. It’s like a glorious spoonful of heaven!
- Chocolate Ganache: Drizzle a rich chocolate ganache over your slices for a luxurious touch that will satisfy any chocolate lover’s craving. Perfectly decadent!
- Lemon Zest: A simple sprinkle of lemon zest on top can add a refreshing brightness, cutting through the sweetness and providing a zesty pop of flavor.
- Dessert Wine: A glass of dessert wine, such as Sauternes, pairs wonderfully with the cheesecake, enhancing its sweetness while introducing a delightful complexity.
- Honey Drizzle: A light drizzle of honey can elevate the flavors, bringing a touch of floral sweetness that contrasts beautifully with the cheesecake’s richness.
Variations & Substitutions for Basque Cheesecake Loaf Pan
Feel free to get creative and tailor this delightful recipe to your taste—your imagination is the only limit!
-
Dairy-Free: Substitute heavy cream with full-fat coconut cream for a rich, vegan-friendly dessert.
-
Sugar Alternatives: Swap granulated sugar for coconut sugar or a suitable sugar alternative for a healthier option.
-
Flavor Burst: Add zest from one lemon or a teaspoon of almond extract to brighten up the flavors.
-
Nutty Twist: Gently fold in 1/2 cup of roasted chopped nuts like pistachios or almonds for added crunch.
-
Chocolate Delight: Swirl in 1/2 cup of melted dark chocolate for a fudgy version that chocolate lovers will adore.
-
Spiced Variations: Sprinkle in a teaspoon of ground cinnamon or nutmeg for a seasonal warm note.
-
Layered Surprise: Add a layer of crushed cookies, like Biscoff or Oreos, at the bottom of the loaf pan for delightful texture.
-
Swirl it Up: Introduce flavor by swirling in some jam or caramel sauce before baking. The results are stunning!
Remember, your journey in the kitchen is meant to be fun! Each of these variations offers a unique twist to the classic Basque cheesecake, so don’t hesitate to experiment and find the flavors that make your heart sing. If you’re in the mood for some fruitiness, consider pairing it with a dollop of homemade vanilla ice cream, or serve alongside a scoop of mascarpone cheese for a luscious experience. Happy baking!

Basque Cheesecake Loaf Pan Recipe FAQs
What should I look for when selecting cream cheese?
Absolutely! For the best results, choose full-fat cream cheese that is softened at room temperature. Check the packaging for freshness, and avoid any with dark spots or unusual odors. A good-quality cream cheese ensures a smooth and rich batter for your Basque Cheesecake Loaf Pan.
How should I store leftover cheesecake?
Great question! The Basque cheesecake can be kept in an airtight container in the refrigerator for up to 5 days. Just make sure it’s well-sealed to maintain its creamy texture and delicious flavor. I often cover it with plastic wrap directly on the surface to prevent it from drying out.
Can I freeze the Basque cheesecake?
Sure! You can freeze your Basque Cheesecake Loaf Pan for up to 2 months. Wrap it tightly in plastic wrap, then cover with aluminum foil to prevent freezer burn. When you’re ready to enjoy it, thaw it overnight in the fridge and serve either chilled or at room temperature.
Why did my cheesecake crack during baking?
Very! Cracking can happen if the batter is overmixed or if the cheesecake cools too quickly. To minimize cracking, avoid overmixing after adding the eggs and flour. Also, let the cheesecake cool gradually in the oven by cracking the door open to prevent sudden temperature changes.
Is this dessert suitable for my gluten-free friend?
Yes, indeed! The Basque Cheesecake Loaf Pan is naturally gluten-free since it doesn’t have a crust and only requires a small amount of flour that can easily be omitted. Always double-check labels on other ingredients, like baking powder or vanilla extract, to ensure they are gluten-free if allergies are a concern.
Can I add flavors to the cheesecake batter?
Absolutely! You can customize your Basque Cheesecake by adding lemon zest, spices like cinnamon, or even swirling in Nutella before baking for added richness. Just remember to adjust the quantities to keep the balance of the batter intact while adding these delightful flavors!
Decadent Basque Cheesecake Loaf Pan for Effortless Indulgence
Ingredients
Equipment
Method
- Cream the softened cream cheese in a large mixing bowl using an electric mixer on medium speed for 3-5 minutes until smooth and fluffy.
- Gradually add granulated sugar to the cream cheese mixture, mixing for another 2-3 minutes until fully incorporated.
- Incorporate the eggs one at a time, mixing gently until just combined.
- Add heavy cream and vanilla extract, mixing on low speed for about 30 seconds until blended.
- Sift in the all-purpose flour and a pinch of salt, folding into the mixture gently until no lumps remain.
- Preheat the oven to 425°F (220°C).
- Line a 9x5 inch loaf pan with parchment paper, allowing for overhang on the sides.
- Pour the cheesecake batter into the prepared loaf pan and smooth the top.
- Bake for 50-60 minutes until the top is browned and the center jiggles slightly.
- Turn off the oven and crack the door open to cool the cheesecake for about 1 hour.
- After cooling, let it come to room temperature before refrigerating for at least 4 hours or overnight.
- When ready to serve, lift the cheesecake out of the pan using the parchment overhang and slice.
Leave a Reply