
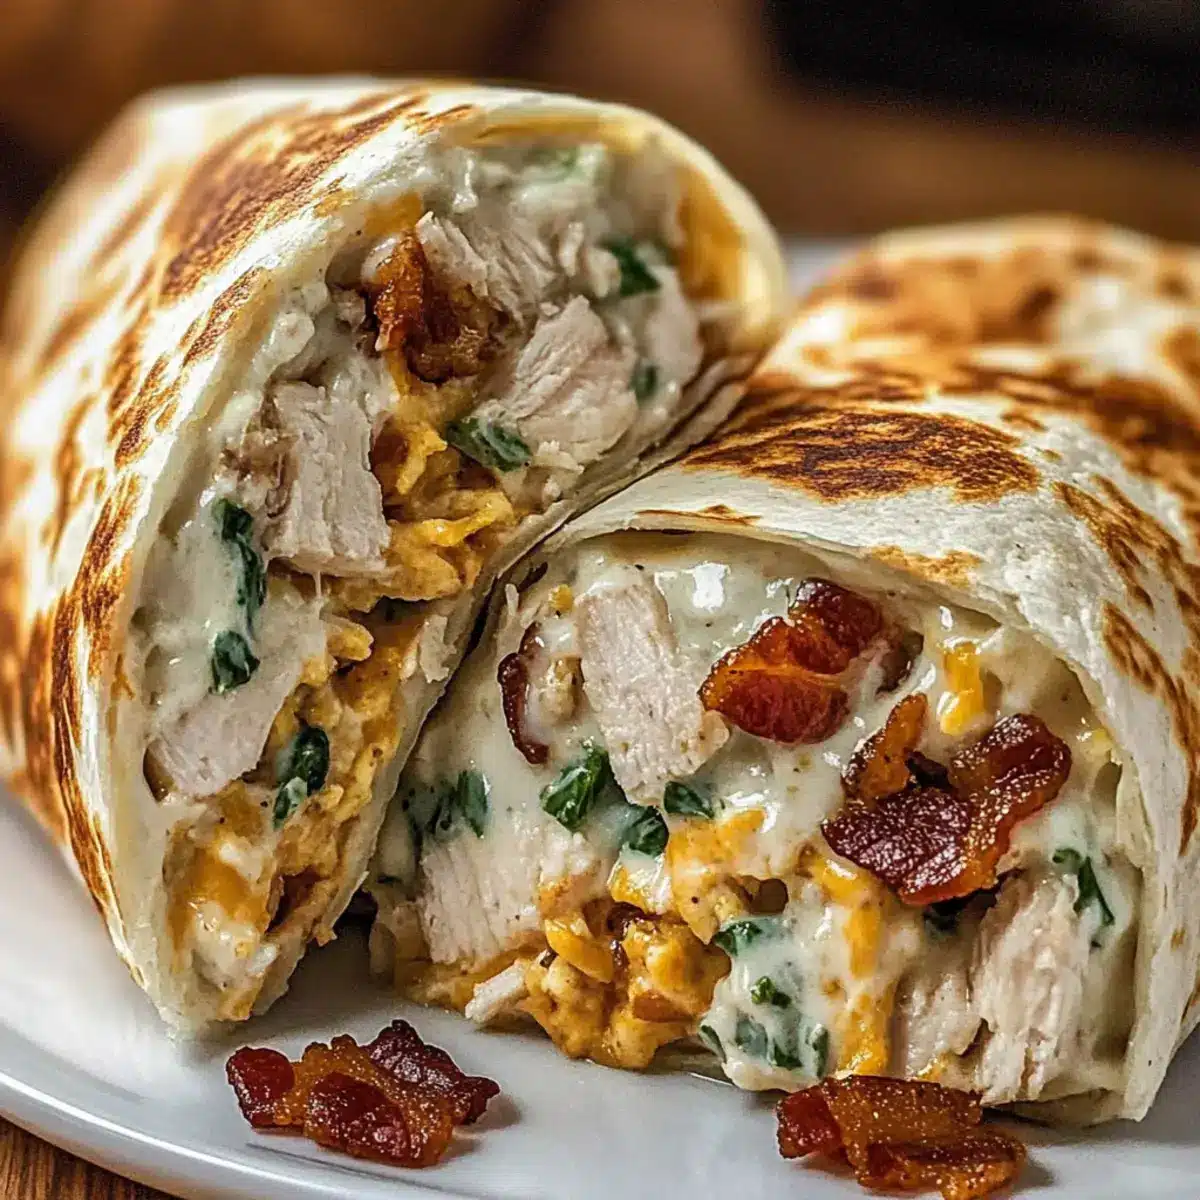
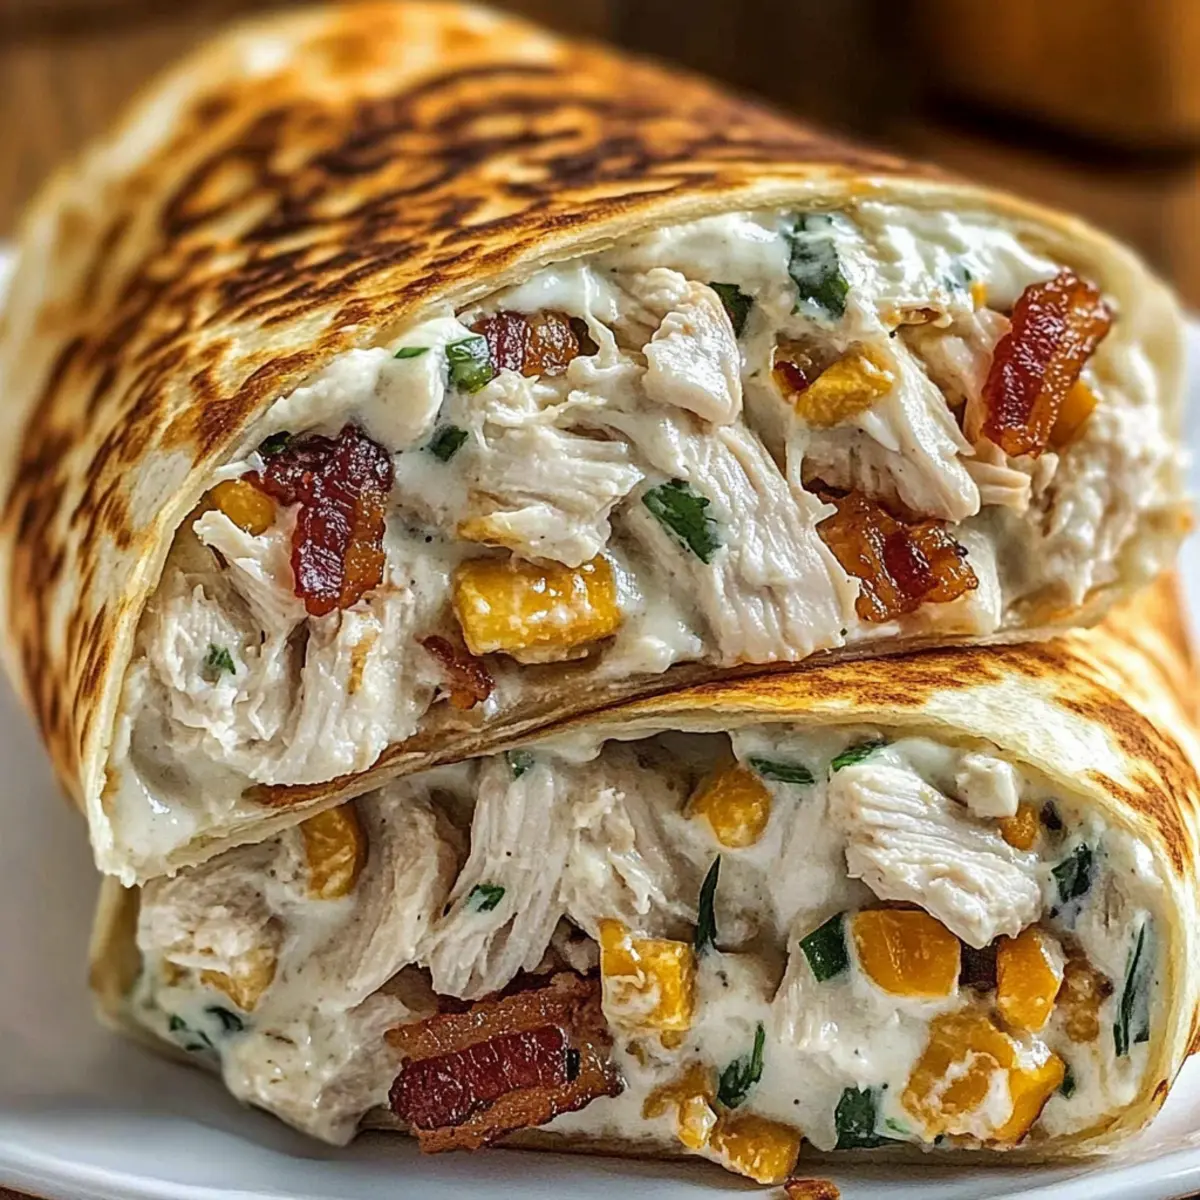
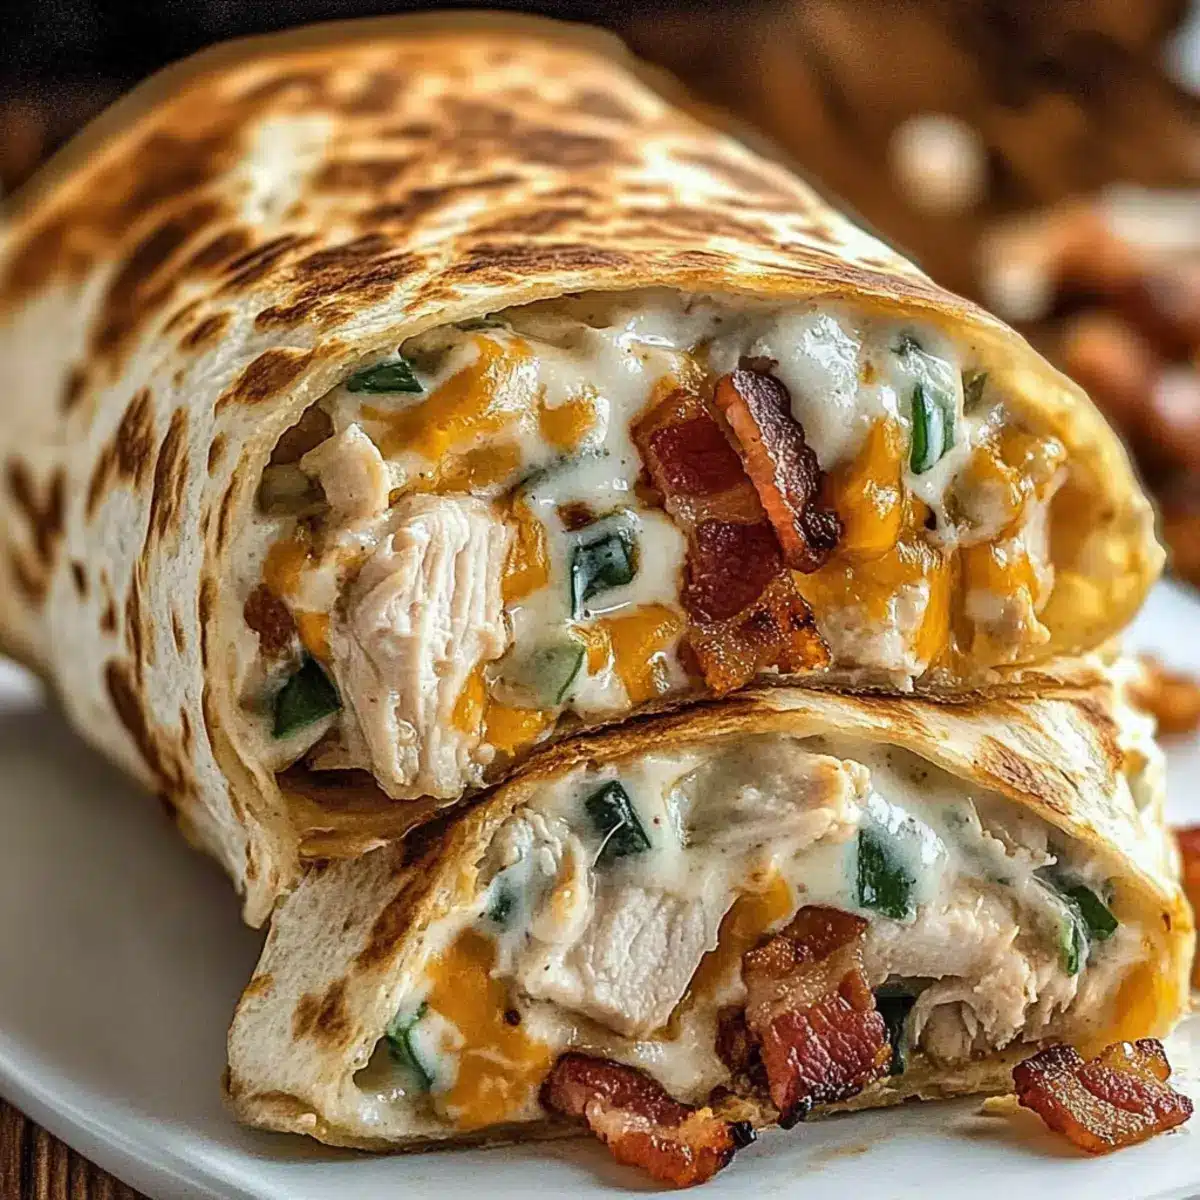
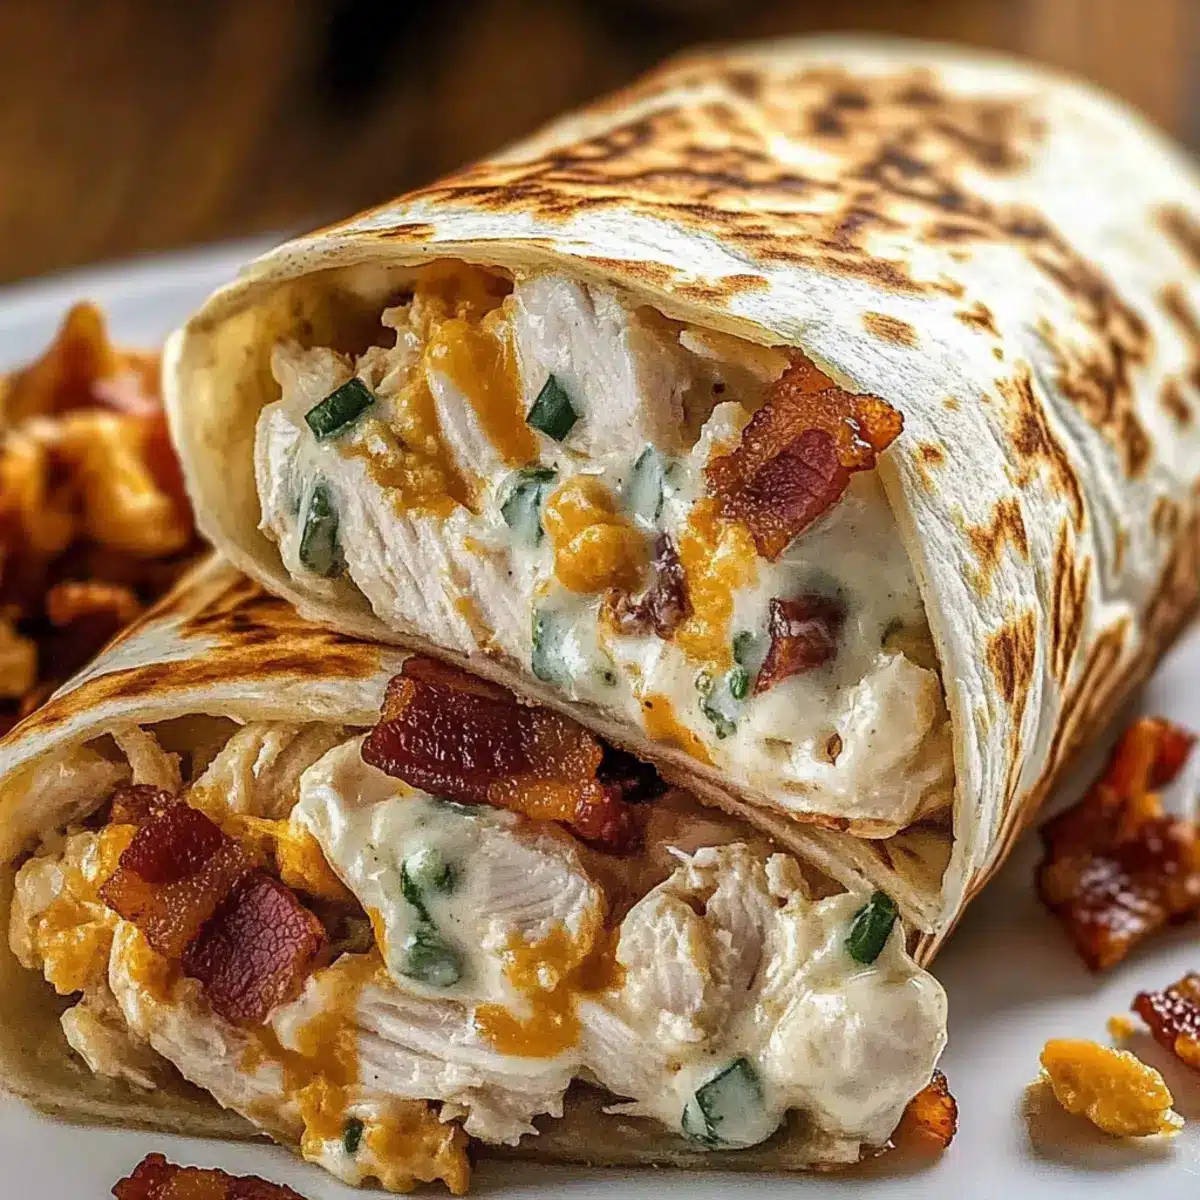
As I stood in the kitchen, the tantalizing sound of sizzling bacon filled the air, instantly transporting me back to warm family gatherings and game nights. This Crunchy Bacon Ranch Wrap recipe has become a go-to for my busy days—it’s a delightful feast that’s not only quick to prepare but also a hit among my loved ones. With golden-brown tortillas enveloping creamy, cheesy chicken and crispy bacon, these wraps deliver comfort with every bite. Plus, they’re highly customizable; you can throw in veggies or adjust the dressing for a twist! Whether it’s a spontaneous lunch at home or a snack for friends, this dish is your ultimate lifesaver. Curious about how to whip up these scrumptious wraps? Let’s dive into the details!
Why are Crunchy Bacon Ranch Wraps a Must-Try?
Quick and Easy: The prep time is a breeze, making these wraps perfect for busy weeknights or last-minute gatherings.
Flavor Packed: Each wrap is bursting with savory goodness from smoky bacon, zesty ranch, and creamy cheese—a flavor combination that pleases everyone!
Customizable Greatness: Feel free to mix in your favorite vegetables or experiment with different cheeses. This recipe is designed to suit all tastes!
Family-Friendly: Perfect for all ages, these wraps are a hit with kids and adults alike, making them a reliable option for family meals.
Crunchy Delight: The golden crust adds a satisfying crunch that pairs beautifully with the rich, melty filling, creating a delightful contrast in every bite.
Elevate your meal game and find more quick meal ideas like this creamy chicken pasta and easy taco salad!
Crunchy Bacon Ranch Wrap Ingredients
For the Filling
- Cooked Bacon Pieces – Adds crunch and smoky flavor; consider turkey bacon for a lighter option.
- Shredded Chicken (cooked) – Main protein source; rotisserie chicken is a convenient substitute.
- Garlic (minced) – Provides depth of flavor; fresh garlic is ideal for a robust taste.
- Heavy Cream – Adds richness; substitute with half milk for a lighter option.
- Milk – Balances the cream for a smooth sauce; any milk variety works great.
- Ranch Dressing – Provides tangy flavor and creaminess; try Greek yogurt ranch for a healthier twist.
- Grated Cheddar Cheese – Adds melty texture; switch to Monterey Jack for a different flavor profile.
- Salt, Parsley, and Pepper – Seasoning components to enhance flavor; use fresh herbs for a vibrant touch.
- Green Onions (diced) – Adds freshness and mild onion flavor; can be omitted if desired.
For the Wraps
- Large Flour Wraps – The base for the wraps; whole wheat or corn tortillas are excellent substitutes.
- Butter (melted) – For creating a rich cheese sauce; olive oil works for a lighter alternative.
- Flour – Acts as a thickening agent in the cheese sauce; no substitutions necessary.
Ready to make these Crunchy Bacon Ranch Wraps? Let’s get cooking!
Step‑by‑Step Instructions for Crunchy Bacon Ranch Wrap
Step 1: Prepare the Cheese Sauce
In a medium skillet, melt 2 tablespoons of butter over medium heat until bubbly. Add 2 cloves of minced garlic and sauté for about 1 minute until fragrant, being careful not to let it brown. Sprinkle in 2 tablespoons of flour and cook, stirring constantly, for 1 minute to form a roux, which will help thicken your cheese sauce.
Step 2: Make it Creamy
Gradually whisk in 1 cup of milk and ½ cup of heavy cream, stirring continuously until the mixture thickens, about 3 to 4 minutes. You’re looking for a creamy consistency that coats the back of a spoon. Once thickened, reduce the heat to low to keep warm while you work on the next steps for your Crunchy Bacon Ranch Wrap.
Step 3: Add Flavor to the Sauce
Stir in 1 cup of grated cheddar cheese, ½ cup of ranch dressing, and ½ cup of cooked bacon pieces. Mix until the cheese has completely melted and the sauce is smooth and creamy. Incorporate ¼ cup of chopped parsley, salt, and pepper to taste; this will elevate the flavor profile of your filling as you prepare the wraps.
Step 4: Combine with Chicken
In a large bowl, combine the creamy cheese mixture with 2 cups of shredded cooked chicken. Ensure all pieces of chicken are well-coated with the cheesy goodness. This mixture will be the star of your Crunchy Bacon Ranch Wraps, offering a delightful balance of flavors in every bite.
Step 5: Fill the Tortillas
Take a large flour wrap and spoon a generous portion of the chicken and cheese mixture onto the center. Fold the sides of the wrap over the filling, then roll it tightly from the bottom up to create a secure wrap. Repeat this process for the remaining wraps, ensuring each is filled evenly for a perfectly delicious Crunchy Bacon Ranch Wrap.
Step 6: Toast the Wraps
Preheat a nonstick skillet over medium heat. Place the wraps seam-side down in the skillet and cook for about 2 to 3 minutes, or until golden and crispy. Flip each wrap carefully and toast the opposite side until it reaches the same golden hue. The crispy exterior creates a delightful contrast to the rich filling inside.
Step 7: Serve and Enjoy
Once toasted, slice each Crunchy Bacon Ranch Wrap in half for easy serving. Pair with extra ranch dressing on the side for dipping, allowing everyone to enjoy the creamy goodness. Whether for a family dinner or a casual gathering, these wraps promise warmth and satisfaction in every crunchy bite.
Make Ahead Options
These Crunchy Bacon Ranch Wraps are a fantastic choice for meal prep! To make your busy week a breeze, you can assemble the wraps up to 3 days in advance. Simply prepare the filling and fill each tortilla, then wrap them tightly in plastic wrap or store them in an airtight container in the refrigerator. To maintain their crispiness, it’s best to wait until just before serving to toast them in a skillet. When ready to enjoy, simply heat the wraps seam-side down over medium heat for 2-3 minutes on each side until golden brown, ensuring a delightful crunch that makes these wraps just as delicious as when they were freshly made!
How to Store and Freeze Crunchy Bacon Ranch Wraps
Fridge: Store assembled but un-toasted wraps in an airtight container for up to 3 days. This keeps them fresh and ready for a quick meal.
Freezer: For extended storage, freeze uncooked wraps individually wrapped in plastic for up to 2 months. Toast directly from frozen, adding a few extra minutes to ensure they’re heated through.
Reheating: To maintain the crunch, reheat in a dry skillet over medium heat rather than using the microwave. This method ensures your wraps stay crispy and enjoyable.
Make-Ahead Tip: Prepare the filling in advance and store it in the fridge. This allows for quick assembly of your Crunchy Bacon Ranch Wraps on busy days!
Crunchy Bacon Ranch Wrap Variations
Feel free to play with this recipe and make it your own with fun, delicious twists!
- Dairy-Free: Swap heavy cream and milk with coconut milk or a plant-based milk to keep it creamy without dairy.
- Turkey Bacon: Use turkey bacon instead of traditional bacon for a healthier, lower-fat option that still packs flavor.
- Extra Veggies: Toss in chopped bell peppers, shredded carrots, or fresh spinach for a burst of color and nutrition.
- Spicy Kick: Add sliced jalapeños or a dash of hot sauce into the filling for those who like a little heat in their wraps.
- Herbed Cream Cheese: Swap ranch dressing with herbed cream cheese for a richer, creamier experience with delightful herby notes.
- Wrap Variety: Try using whole wheat, spinach, or corn tortillas to change up the wrap’s flavor and nutritional profile.
- Cheese Blend: Experiment with a mix of cheeses like pepper jack for a spicy twist, or a Mediterranean blend for an exciting flavor profile.
If you’re looking to elevate your meal prep further, don’t forget to check out this easy taco salad for a delightful side dish!
Expert Tips for Crunchy Bacon Ranch Wraps
-
Cool Before Assembling: Allow the cheese filling to cool slightly to prevent sogginess in your wraps. A warm mixture can lead to a less crunchy texture.
-
Maximize Crunch: Toast the seam side of the wraps last until golden brown for an extra crunch. This ensures a crispy exterior that enhances the overall eating experience.
-
Reheat Right: To maintain the wrap’s crunchiness when reheating leftovers, avoid the microwave. Instead, use a dry skillet or toaster oven for the best results.
-
Watch the Garlic: Sauté the minced garlic until fragrant but not browned; overcooked garlic can impart a bitter taste to your delicious Crunchy Bacon Ranch Wraps.
-
Fill Generously: Don’t be shy when filling your tortillas! Generous portions of the creamy filling yield wraps that are fulfilling and bursting with flavor, making each bite a delight.
What to Serve with Crunchy Bacon Ranch Wraps
Enhance your meal experience by pairing these delectable wraps with sides that complement their crunch and savory flavors.
-
Creamy Coleslaw: Adds a refreshing crunch and tang, balancing the richness of the wraps perfectly. The crisp vegetables contrast beautifully with the warm filling.
-
Sweet Potato Fries: Their natural sweetness and crispy texture provide a delightful contrast to the savory bacon and cheese. Serve them with a dipping sauce for an extra treat.
-
Garlic Butter Corn on the Cob: The buttery sweetness of corn makes a great side, and its simple flavor lets the wraps shine. Plus, the juicy kernels are a fun finger food!
-
Crisp Garden Salad: A light salad with mixed greens, cherry tomatoes, and cucumbers brings freshness to your plate. Drizzle with a lemon vinaigrette to brighten the meal.
-
Tomato Soup: A warm, comforting bowl of tomato soup serves as a great dip for your wraps and adds a cozy feel to your dining experience. Ideal for those cooler evenings!
-
Zesty Pickles: Their tangy flavor adds a sharp bite that contrasts with the creamy filling, making each bite more exciting. They also bring a nostalgic diner vibe to your meal.
Enjoy creating a vibrant spread that elevates your Crunchy Bacon Ranch Wraps into a memorable feast!
Crunchy Bacon Ranch Wrap Recipe FAQs
What type of bacon should I use for the wraps?
Absolutely! Regular cooked bacon pieces add a delightful crunch and smoky flavor. However, if you’re aiming for a lighter option, turkey bacon works just as well and still provides that savory goodness.
How should I store left-over wraps?
To keep your assembled but un-toasted Crunchy Bacon Ranch Wraps fresh, store them in an airtight container in the fridge for up to 3 days. They are perfect for a quick meal on busy days!
Can I freeze the wraps, and if so, how?
Yes, you can freeze these delicious bites! Wrap each unassembled Crunchy Bacon Ranch Wrap individually in plastic wrap and place them in a freezer-safe bag or container. They can stay frozen for up to 2 months. When you’re ready to enjoy, simply toast them directly from frozen, adding a few extra minutes to ensure they’re heated through.
What’s the best way to reheat my leftover wraps?
To maintain their delicious crunch, skip the microwave! Instead, reheat the wraps in a dry skillet over medium heat. This method ensures that they regain their crispy exterior, making them just as delightful as when first cooked.
Can these wraps be made ahead, and how should I do it?
Of course! You can prepare the creamy filling in advance and store it in the fridge in an airtight container for up to 3 days. When you’re ready to enjoy, just assemble the wraps and toast them up for a quick meal!
Are there any dietary considerations for pets or allergies?
When it comes to sharing with our furry friends, it’s best to avoid feeding these wraps to pets, particularly due to the potential harmful effects of garlic. Additionally, always be cautious about any allergies your guests may have; feel free to substitute any ingredients accordingly. Enjoy crafting these wraps with love and care!
Crunchy Bacon Ranch Wraps for a Crunchy Family Feast
Ingredients
Equipment
Method
- Prepare the Cheese Sauce: Melt 2 tablespoons of butter over medium heat until bubbly. Add 2 cloves of minced garlic and sauté for about 1 minute until fragrant. Sprinkle in 2 tablespoons of flour and cook, stirring constantly, for 1 minute to form a roux.
- Make it Creamy: Gradually whisk in 1 cup of milk and ½ cup of heavy cream, stirring continuously until thickened, about 3 to 4 minutes.
- Add Flavor to the Sauce: Stir in 1 cup of grated cheddar cheese, ½ cup of ranch dressing, and ½ cup of cooked bacon pieces. Mix until the cheese has completely melted and the sauce is smooth.
- Combine with Chicken: In a large bowl, combine the creamy cheese mixture with 2 cups of shredded cooked chicken until well-coated.
- Fill the Tortillas: Spoon a portion of the chicken and cheese mixture onto a large flour wrap, fold the sides, and roll tightly to create a secure wrap.
- Toast the Wraps: Preheat a nonstick skillet over medium heat. Place the wraps seam-side down and cook for about 2 to 3 minutes until golden. Flip and toast the opposite side.
- Serve and Enjoy: Slice each wrap in half and serve with extra ranch dressing on the side.
Leave a Reply