
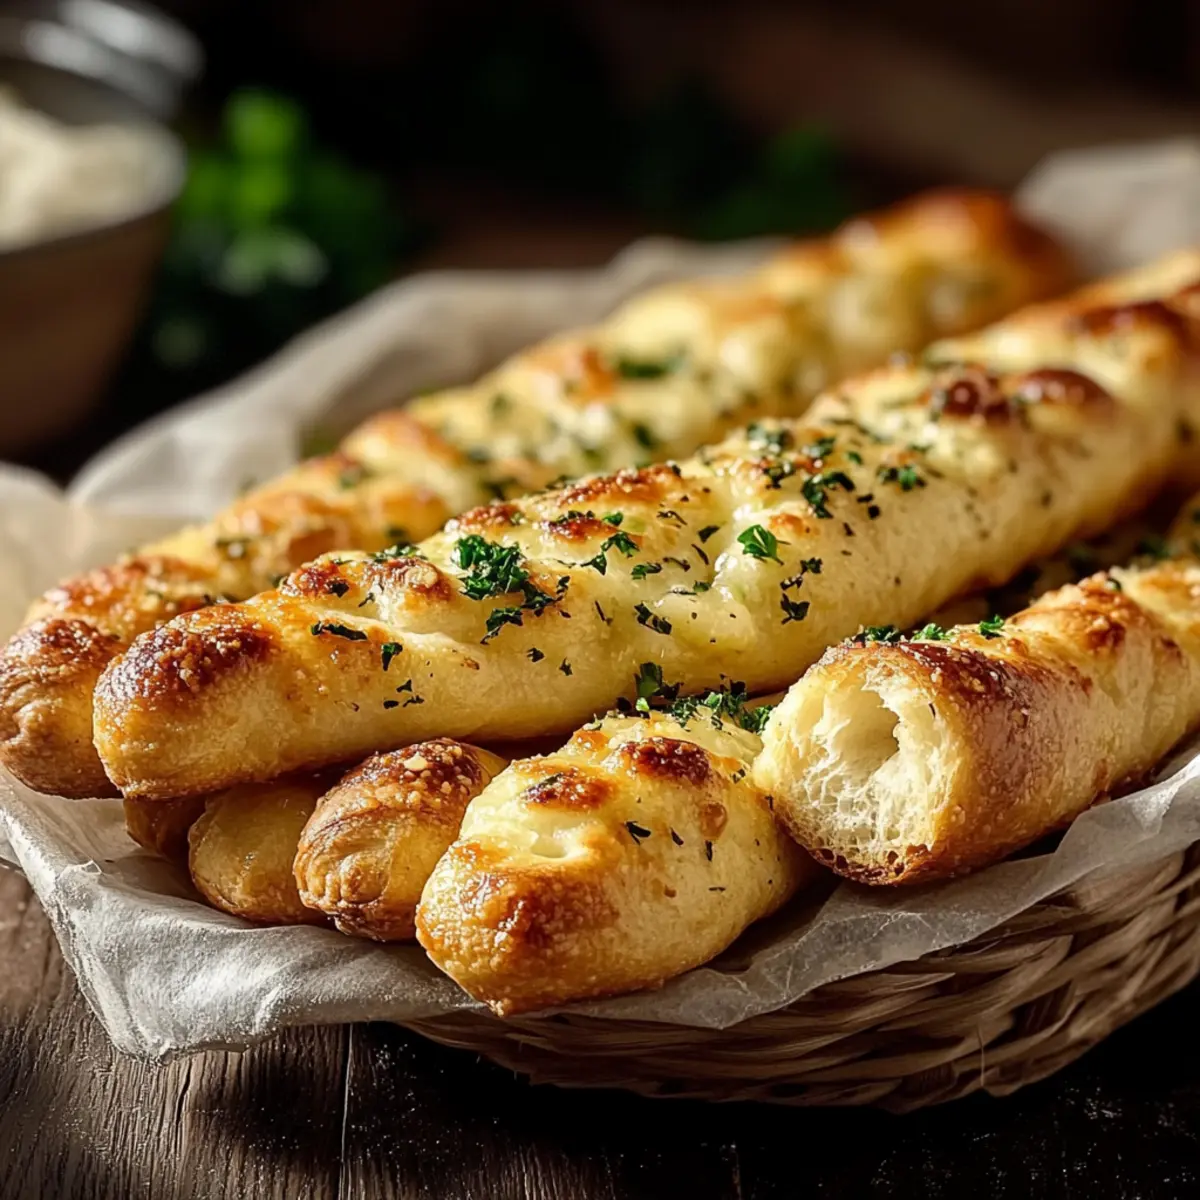
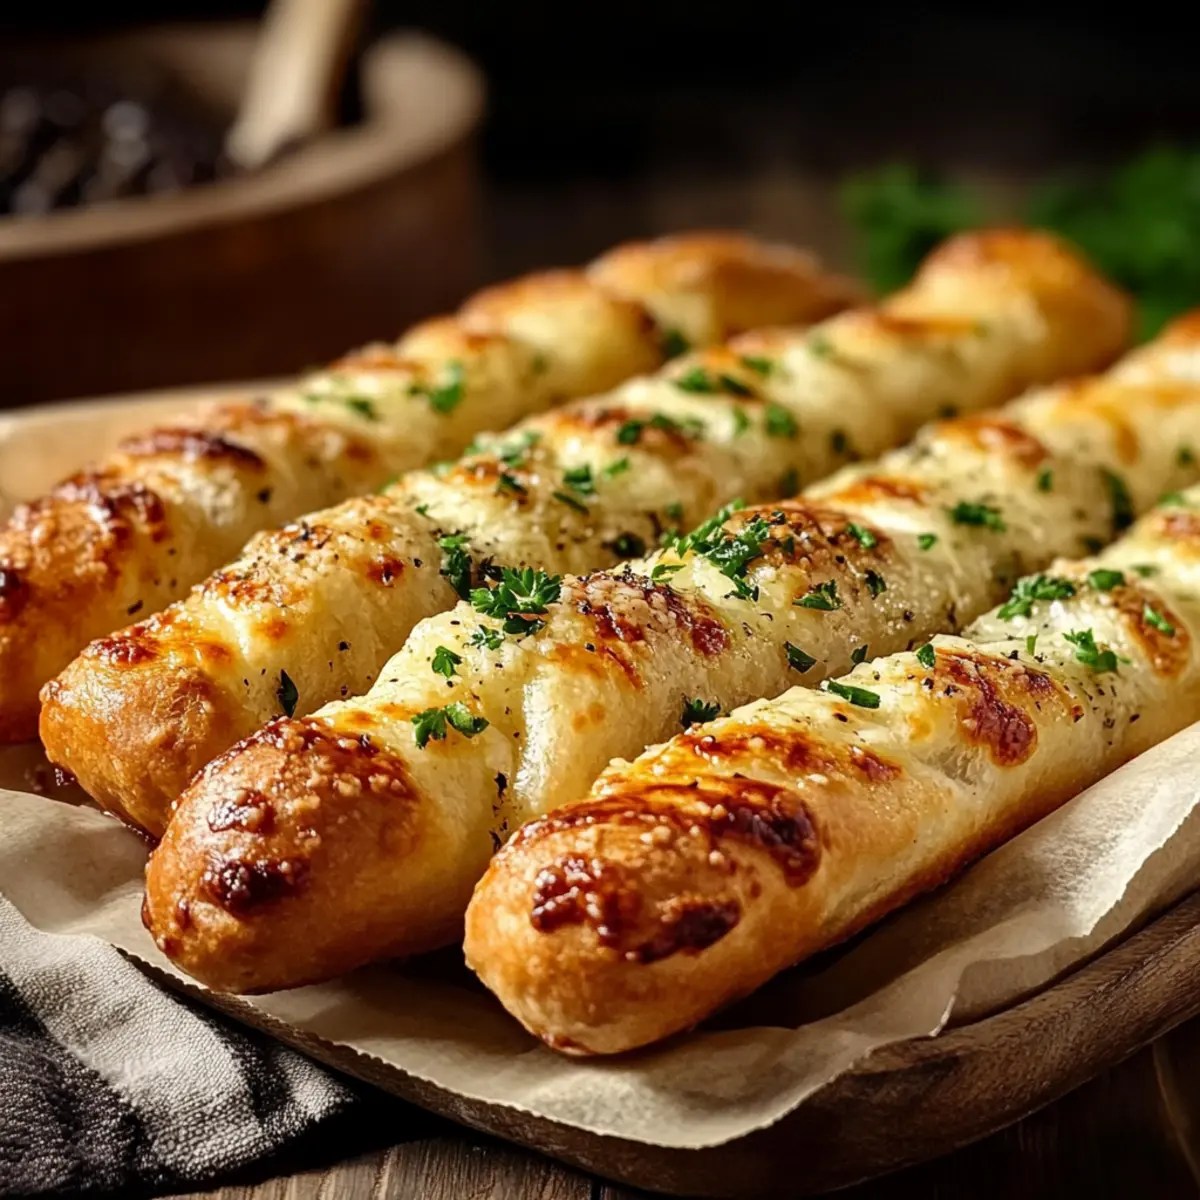
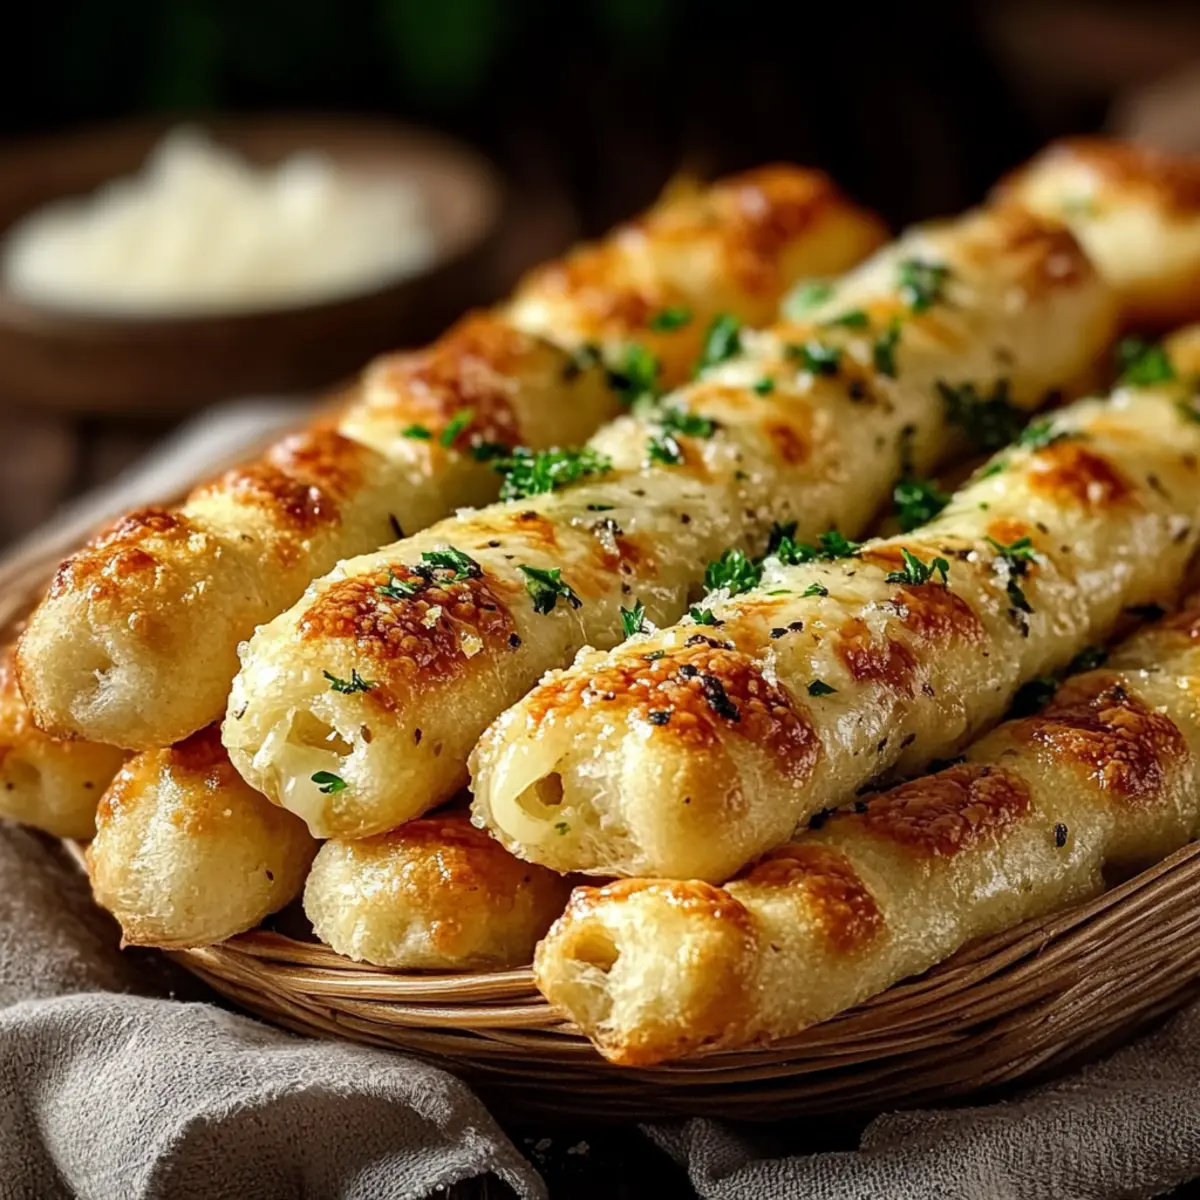
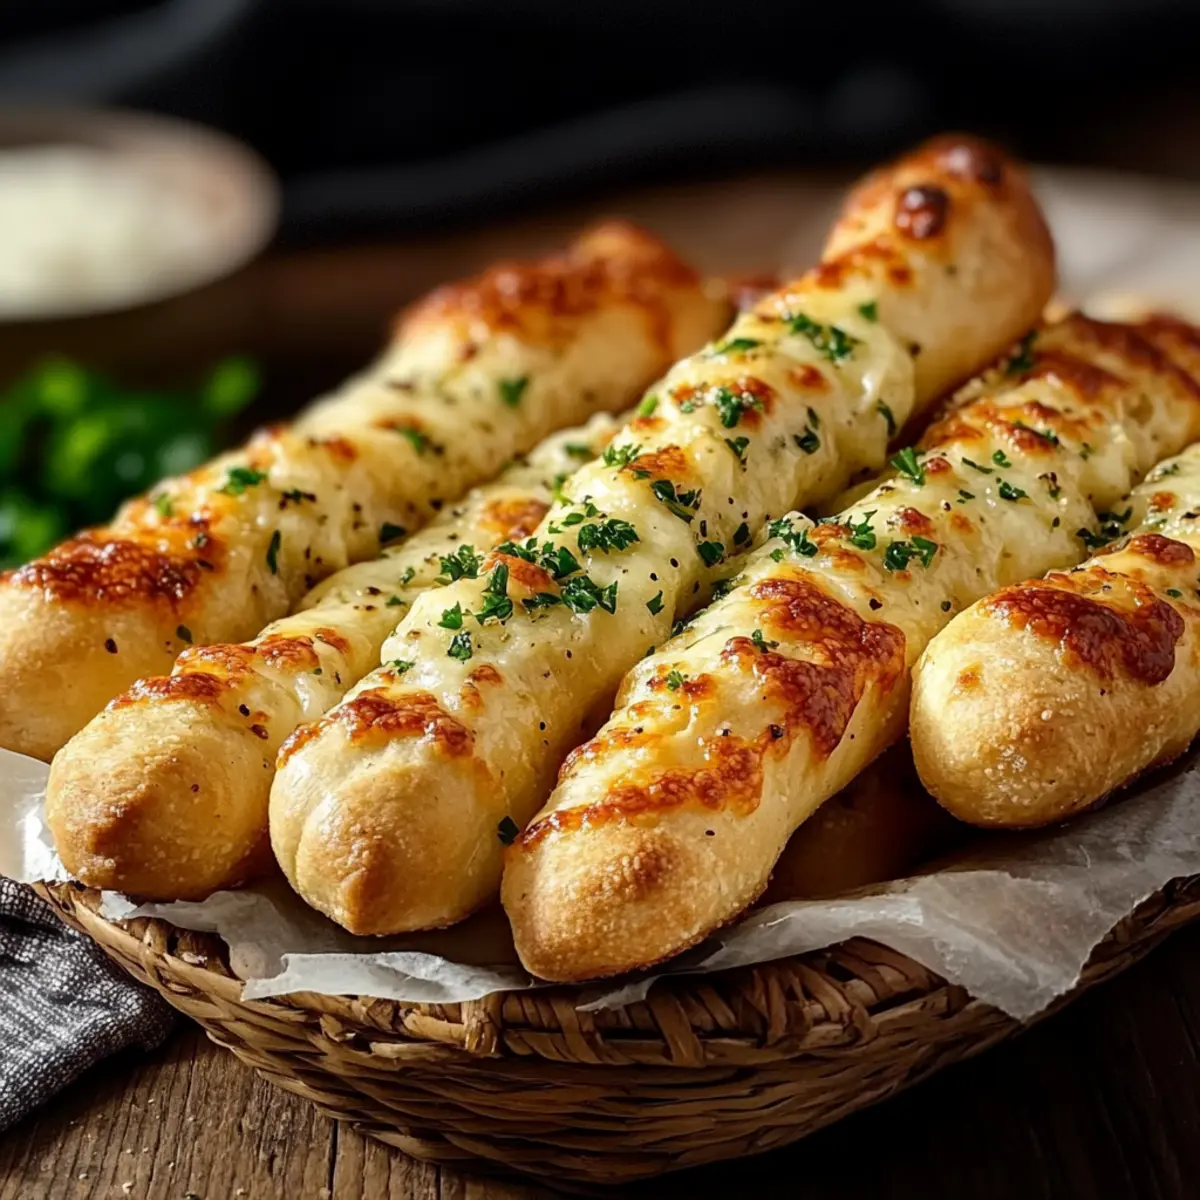
As I stood in my kitchen, the warm, inviting aroma of garlic began to fill the air, instantly transforming the space into a cozy haven. Today, I’m excited to share my Soft and Buttery Gluten-Free Garlic Breadsticks recipe—a delightful way to elevate any meal. These breadsticks are not only incredibly easy to whip up from scratch but also provide a heartwarming alternative to those store-bought versions. The beauty of these garlic breadsticks lies in their versatility; they pair perfectly with pasta, soups, or even as a snack with marinara sauce. Plus, with the option to make them dairy-free or customize the flavors with your favorite herbs, you’ll find they suit any dietary needs. Are you ready to indulge in some homemade comfort? Let’s dive into the recipe!
Why Are Gluten-Free Breadsticks So Irresistible?
Softness, these gluten-free garlic breadsticks boast a fluffy texture that melts in your mouth, making every bite a joy. Flavor-packed, the fragrant garlic and rich buttery finish create the perfect accompaniment to any dish. Versatile, whether you’re enjoying them with pasta or savoring them alone with marinara, they fit any meal beautifully. Customizable, you can easily make them dairy-free or elevate them with herbs to suit your taste. Time-efficient, these breadsticks come together quickly, allowing you to create a delicious side dish without spending hours in the kitchen. Don’t miss the chance to try out these delightful creations!
Gluten-Free Garlic Breadsticks Ingredients
• For the Dough
- Gluten-Free All-Purpose Flour Blend – Ensure it contains xanthan gum for optimal elasticity.
- Instant Yeast – Vital for a fluffy rise; don’t skip this ingredient!
- Sugar – Activates the yeast and enhances the overall flavor.
- Warm Water – This helps hydrate the dough, creating the perfect texture.
- Olive Oil – Adds richness and tenderness to the dough.
- Salt – Essential for amplifying all the flavors in your breadsticks.
• For the Topping
- Butter – For brushing; adds a wonderful flavor and helps with browning, but can be substituted with vegan butter for a dairy-free version.
- Garlic (fresh or powdered) – This key flavor component showcases the delightful garlic bread experience.
- Parsley – Perfect for garnish, adding a pop of color and freshness.
- Parmesan Cheese (optional) – Adds a cheesy finish; feel free to omit for a dairy-free option.
Each of these ingredients plays a vital role in creating the soft and buttery experience of gluten-free garlic breadsticks that you’ll cherish.
Step‑by‑Step Instructions for Gluten-Free Garlic Breadsticks
Step 1: Prepare the Dough
In a large mixing bowl, combine 1 cup of warm water with 1 tablespoon of sugar and 2 teaspoons of instant yeast. Let it sit for about 5 minutes until the mixture becomes frothy and bubbly. Then, gradually add 2 ½ cups of gluten-free all-purpose flour blend, 2 tablespoons of olive oil, and 1 teaspoon of salt. Mix until a sticky dough forms.
Step 2: Rest the Dough
Cover the bowl with a clean kitchen towel and place it in a warm area to rest for 30–40 minutes. During this time, the dough will rise slightly and become airy. You should see bubbles forming on the surface, which indicates it’s ready for the next step in creating your gluten-free garlic breadsticks.
Step 3: Shape the Breadsticks
Once the dough has rested, lightly flour your work surface with gluten-free flour. Transfer the dough to the surface and gently divide it into equal portions. Roll each piece into 6–8 inch sticks, ensuring they are uniform in size. Arrange them on a parchment-lined baking sheet, leaving some space between each stick for expansion.
Step 4: Preheat and Bake
Preheat your oven to 375°F (190°C). While the oven heats up, brush the shaped breadsticks generously with olive oil or melted butter. This step is crucial for achieving a lovely golden-brown finish. Bake the breadsticks for 18–22 minutes, until they are golden on the outside and slightly firm to the touch.
Step 5: Add Garlic Butter
While your gluten-free garlic breadsticks are baking, prepare the garlic butter by melting ½ cup of butter in a small pan over low heat. If using fresh garlic, mince 2-3 cloves and add them to the melted butter. Once the breadsticks are done baking, remove them from the oven and immediately brush them with the garlic butter mixture. Sprinkle with fresh parsley for garnish, and if desired, add a dusting of parmesan cheese.
Make Ahead Options
These Gluten-Free Garlic Breadsticks are a fantastic option for meal prep enthusiasts looking to save time on busy weeknights! You can prepare the dough up to 24 hours in advance; simply cover it tightly in the refrigerator to maintain its freshness. When you’re ready to bake, allow the dough to come to room temperature for about 30 minutes before shaping the breadsticks. You can also shape the sticks and refrigerate them on a baking sheet for up to 3 days. Just remember to brush them with olive oil or melted butter before baking to achieve that golden, crispy finish. This way, you’ll enjoy delightful and warm garlic breadsticks with minimal effort!
What to Serve with Soft and Buttery Gluten-Free Garlic Breadsticks
These delightful garlic breadsticks make every meal feel special, transforming simple dishes into extraordinary experiences.
- Creamy Tomato Soup: The velvety texture and rich flavor perfectly contrast with the warm, garlicky breadsticks for a comforting combination.
- Traditional Spaghetti: A classic pairing! The soft, buttery breadsticks soak up the luscious sauce, enhancing each bite of pasta.
- Caesar Salad: The crisp greens and creamy dressing are vibrant and refreshing against the savory breadsticks, creating a balanced meal.
- Marinara Sauce: Perfect for dipping, this tangy sauce elevates the garlic flavor while adding a zesty twist to every bite.
- Minestrone Soup: Packed with veggies and hearty beans, this soup is a nutritious option that contrasts beautifully with the fluffy breadsticks.
- Roasted Vegetables: Their caramelized sweetness complements the savory garlic, adding delightful texture and flavor diversity to your plate.
- White Wine Spritzer: A refreshing drink that lightens up the meal while enhancing the garlic’s richness with its crisp notes.
- Chocolate Lava Cake: For dessert, this indulgent treat provides a rich, gooey end to a comforting meal, balancing the savory with sweetness.
- Pesto Dip: Offering a burst of fresh basil flavor, this dip pairs wonderfully with the garlic undertones of the breadsticks.
Embrace creativity and explore these various pairings to craft a wonderful dining experience around your gluten-free garlic breadsticks!
Gluten-Free Garlic Breadsticks Variations
Feel free to get creative with this recipe and make it your own with these delicious twists!
-
Dairy-Free: Swap butter for vegan butter and skip the parmesan, or try nutritional yeast for a cheesy flavor.
-
Herb-Infused: Incorporate dried herbs like oregano or basil directly into the dough for a fragrant breadstick that sings with flavor!
-
Spicy: Add a pinch of red pepper flakes to your garlic butter for a delightful kick. It’s a simple way to spice things up!
-
Cheesy Garlic: For a rich, cheesy touch, mix shredded dairy-free cheese into the dough or sprinkle on top before baking.
-
Garlic Lovers: Amp up the garlic flavor by adding roasted garlic to the dough, creating an even more aromatic experience.
-
Different Shapes: Instead of traditional sticks, shape the dough into mini rolls or flatbread strips for a fun twist that’s perfect for dipping.
-
Mix & Match: Get creative with seasonings — try Italian seasoning, smoked paprika, or even everything bagel seasoning for unique flavor profiles!
-
Sweet Twist: For a different take, incorporate a touch of honey or maple syrup and a dash of cinnamon into the dough for a sweet treat that pairs wonderfully with warm drinks.
These variations not only personalize your gluten-free garlic breadsticks but also cater to various dietary preferences. And if you’re looking for more ways to add flavor, consider incorporating seared vegetables or serve them alongside a zesty sauce for dipping!
Expert Tips for Gluten-Free Garlic Breadsticks
- Choose the Right Flour: Use a gluten-free flour blend with xanthan gum for proper elasticity; this is crucial for achieving that fluffy texture.
- Monitor Dough Stickiness: The dough should be sticky yet manageable; if it’s too dry, the breadsticks may end up crumbly rather than soft and buttery.
- Immediate Butter Brush: Brush with garlic butter as soon as they come out of the oven to lock in moisture and keep the breadsticks soft and delicious.
- Check Bake Time: Keep an eye on the baking time; an extra minute can turn perfectly golden breadsticks into overdone puffs!
- Refrigerate or Freeze: If making ahead, refrigerate the dough for up to 24 hours or freeze the baked breadsticks for a quick, indulgent side later.
Storage Tips for Gluten-Free Garlic Breadsticks
- Room Temperature: Store leftover gluten-free garlic breadsticks in an airtight container at room temperature for up to 2 days; they are best enjoyed fresh!
- Fridge: If you want to keep them longer, refrigerate the breadsticks in an airtight container for up to 5 days; reheat gently in a low oven to restore softness.
- Freezer: For long-term storage, wrap cooled breadsticks tightly in foil and place them in a freezer bag. They can be frozen for up to 2 months.
- Reheating: To reheat from frozen, bake in a preheated oven at 375°F for about 15 minutes, ensuring they come out warm and fluffy.
Gluten-Free Garlic Breadsticks Recipe FAQs
What type of gluten-free flour blend should I use?
Absolutely! Ensure you select a gluten-free all-purpose flour blend that includes xanthan gum for the best results. Xanthan gum helps mimic the elasticity of gluten, giving your breadsticks that ideal soft and fluffy texture that we all love.
How should I store leftover gluten-free garlic breadsticks?
To keep your leftover breadsticks fresh, store them in an airtight container at room temperature for up to 2 days. If you want to enjoy them longer, refrigerate in an airtight container for up to 5 days, then reheat in a low oven for a few minutes to bring back their delightful softness.
Can I freeze gluten-free garlic breadsticks? How do I do it?
Yes, you can! To freeze the breadsticks, let them cool completely after baking. Then, wrap them tightly in foil and place them in a freezer bag or container. They will stay fresh for up to 2 months. When you’re ready to enjoy them, just pop them in a preheated oven at 375°F for about 15 minutes, and voilà—deliciously warm breadsticks!
What can I do if my dough seems too dry?
If your dough appears too dry, don’t worry! Add a tablespoon of warm water at a time, mixing well until the dough feels sticky but manageable. The final texture should be soft and slightly tacky. This is essential to ensure your gluten-free garlic breadsticks turn out tender and fluffy!
Are these gluten-free garlic breadsticks suitable for people with dairy allergies?
Absolutely! To make these breadsticks dairy-free, simply substitute the butter with vegan butter. You can also skip the parmesan cheese or replace it with nutritional yeast for a cheesy flavor without the dairy. It’s all about customization to suit your dietary needs!
How long should I let the dough rise?
Let your dough rest and rise for 30-40 minutes in a warm spot, covered with a clean kitchen towel. During this time, you’ll see the dough slightly expand and bubbles form on the surface, indicating it’s ready for shaping! Enjoy the process!
Melt-In-Your-Mouth Gluten-Free Garlic Breadsticks Recipe
Ingredients
Equipment
Method
- In a large mixing bowl, combine warm water, sugar, and instant yeast. Let it sit for about 5 minutes until frothy.
- Gradually add gluten-free flour blend, olive oil, and salt. Mix until a sticky dough forms.
- Cover the bowl with a towel and let it rest for 30-40 minutes in a warm area until airy.
- Lightly flour your work surface and divide dough into equal portions. Shape into 6-8 inch sticks.
- Preheat oven to 375°F. Brush sticks with olive oil or melted butter before baking for 18-22 minutes.
- Prepare garlic butter by melting butter and adding minced garlic. Brush on the baked breadsticks.
- Garnish with parsley and optional parmesan cheese before serving.
Leave a Reply