
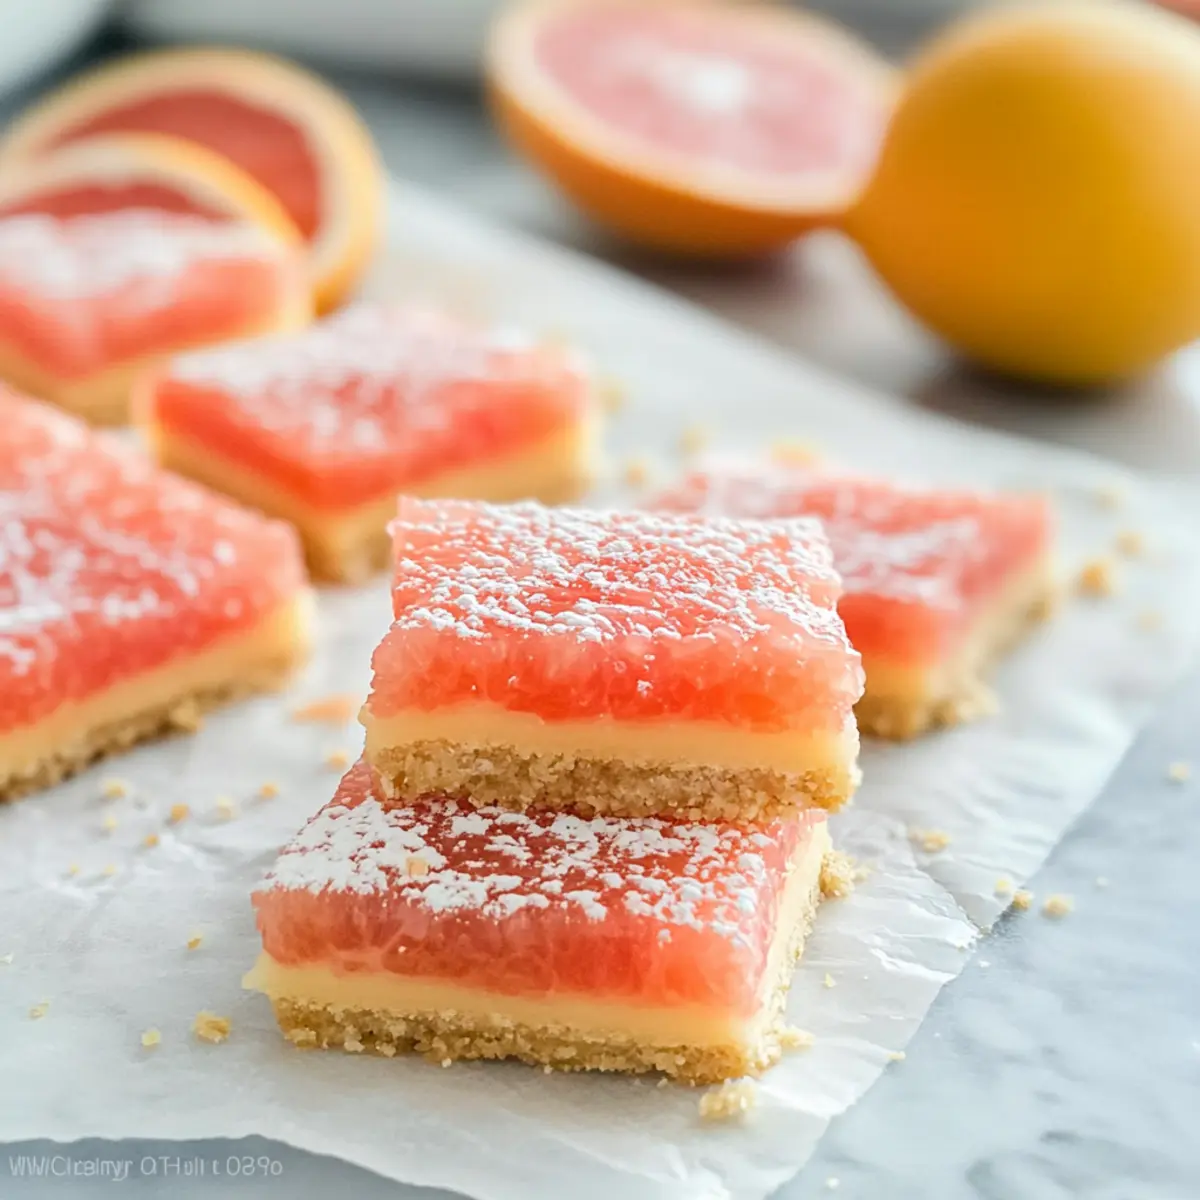
As I squeezed the fresh grapefruit juice into my mixing bowl, the zesty aroma instantly lifted my spirits. Who would have thought that such a vibrant citrus could inspire the perfect dessert? These Sweet and Tangy Grapefruit Bars combine a crumbly shortbread crust with a luscious, citrusy filling, transforming a simple fruit into a delightful treat that balances sweetness and tang. They not only come together quickly, making them a great option for unexpected guests, but they also offer a refreshing alternative to the usual heavy desserts we often indulge in. With gluten-free options available, everyone can enjoy this bright addition to their dessert table. Are you ready to awaken your taste buds and impress your friends with this irresistible twist on a classic?
Why are Grapefruit Bars a Must-Try?
Bright, Vibrant Flavor: These grapefruit bars deliver a refreshing burst of citrus that awakens the palate, making them the perfect choice for those sunny days.
Quick and Easy: With just a few simple steps, this recipe is designed for busy home cooks and baking enthusiasts alike, ensuring you can whip up a delightful dessert in no time.
Gluten-Free Option: You can easily substitute all-purpose flour for gluten-free flour, making it a friendly choice for everyone at your table.
Crowd-Pleasing Treat: Whether served at a picnic or a casual dinner party, these tangy bars are sure to be a hit among friends and family craving something different.
Customize to Your Taste: Not a grapefruit fan? Feel free to swap with other citrus fruits like oranges or limes for a delectable twist!
Don’t forget to check out my Coconut Toffee Bars or Sweet Potato Pie Bars for more delightful and refreshing desserts.
Grapefruit Bars Ingredients
For the Crust
- All-Purpose Flour – Provides structure to the crust; for a gluten-free option, use a gluten-free flour blend.
- Powdered Sugar – Adds sweetness and a melt-in-your-mouth texture; no direct substitute recommended.
- Salt – Enhances flavor in both the crust and filling; it’s optional but recommended for balance.
- Butter (Room Temperature) – Creates a rich, tender crust; substitute with vegan butter for a dairy-free option.
For the Filling
- Granulated Sugar – Sweetener for the filling, balancing the tartness of grapefruit; substitute with coconut sugar for lower glycemic levels.
- Additional All-Purpose Flour – Thickens the filling to ensure it sets properly; no direct substitute recommended.
- Large Eggs – Provides stability and richness; for an egg-free version, consider flax eggs or a commercial egg replacer.
- Grapefruit Zest – Infuses fresh citrus aroma and flavor; can be replaced with lemon or lime zest for variation.
- Grapefruit Juice – The primary flavor component; for best results, use fresh juice, or mix with lemon juice for extra tartness.
- Pink Food Coloring (Optional) – Enhances visual appeal but can be skipped if desired.
These delightful ingredients come together to create zesty grapefruit bars that will surely become a favorite at your dessert gatherings!
Step‑by‑Step Instructions for Grapefruit Bars
Step 1: Preheat the Oven
Begin by preheating your oven to 350°F (180°C). This temperature is ideal for achieving a perfectly baked crust. While the oven warms up, gather your ingredients and have your 11×7-inch baking dish ready. Lightly greasing the dish with butter will help prevent sticking when it’s time to enjoy your delicious grapefruit bars.
Step 2: Prepare the Crust
In a food processor, combine the all-purpose flour, powdered sugar, salt, and room temperature butter. Pulse until the mixture resembles coarse crumbs, about 30 seconds. Transfer this mixture into your prepared baking dish, and press it evenly across the bottom. Bake the crust for 18 to 20 minutes, until it turns a light golden brown, indicating it’s ready for the vibrant filling.
Step 3: Make the Filling
While the crust is baking, whisk together the granulated sugar and additional flour in a mixing bowl. Add the large eggs one at a time, ensuring each egg is well combined before adding the next. Finally, stir in the freshly squeezed grapefruit juice and zest until the mixture is smooth and creamy, showcasing the bright flavors of your upcoming grapefruit bars.
Step 4: Combine and Bake
Once the crust has finished baking and is slightly cooled, carefully pour the grapefruit filling over the hot crust. This allows the filling to set beautifully. Place it back in the oven and bake for an additional 20 minutes. The edges should appear set, with the center having a slight jiggle, indicating the filling will firm up as it cools.
Step 5: Cool the Bars
After baking, remove the grapefruit bars from the oven and let them cool in the pan for about 1 hour. This cooling period is essential for the filling to set properly. Once cooled, transfer the pan to the refrigerator and chill for an additional 2 hours. This final step enhances the texture and makes for cleaner cuts when you slice the bars.
Step 6: Slice and Serve
After the grapefruit bars have fully chilled, take a sharp knife and carefully cut them into squares or rectangles. For a lovely presentation, dust the tops with powdered sugar if desired. Serve these delightful grapefruit bars chilled, perhaps alongside a dollop of whipped cream or a scoop of vanilla ice cream for a refreshing treat that everyone will love.

What to Serve with Sweet and Tangy Grapefruit Bars
Indulging in these bright grapefruit bars can turn any occasion into a delightful celebration, and accompanying them with the right sides can elevate your dessert experience.
-
Creamy Whipped Cream: This classic topping adds a rich, airy contrast to the tangy citrus flavor, perfectly balancing sweetness and acidity.
-
Fresh Berries: A medley of strawberries, blueberries, and raspberries brings a burst of color and freshness, enhancing each bite with their natural sweetness.
-
Minty Fresh Salad: A light salad of greens tossed with mint and a citrus vinaigrette offers refreshing notes that complement the bars without overpowering them.
-
Vanilla Ice Cream: Pairing these grapefruit bars with a scoop of creamy vanilla ice cream adds warmth and creaminess, creating a delightful temperature contrast.
-
Sparkling Water or Lemonade: A glass of sparkling water with a squeeze of lime or a refreshing lemonade makes for a zesty drink that echoes the vibrant citrus notes of the dessert.
-
Chocolate Drizzle: A thin drizzle of dark chocolate on top provides a hint of richness, enhancing the flavors and adding a gourmet touch to each bar.
These pairings will not only enhance the delightful sweetness and tang of your grapefruit bars but also create a full, enjoyable meal experience.
How to Store and Freeze Grapefruit Bars
Fridge: Store leftover grapefruit bars in an airtight container in the refrigerator for up to 1 week to maintain their freshness and flavor integrity.
Freezer: For longer storage, wrap individual bars tightly in plastic wrap and then place them in a freezer-safe container or bag. They can be frozen for up to 3 months.
Thawing: When ready to enjoy, remove from the freezer and let sit at room temperature for about 30 minutes, or refrigerate overnight for a gentle thaw.
Reheating: If you prefer them warmed, gently reheat in a preheated oven at 300°F (150°C) for about 10 minutes, or until they reach your desired warmth.
Make Ahead Options
These Grapefruit Bars are perfect for meal prep! You can prepare the crust up to 24 hours in advance—just press it into the baking dish, wrap it tightly in plastic wrap, and store it in the refrigerator. The filling can be made ahead as well; whisk it together and refrigerate for up to 3 days. When you’re ready to enjoy your bars, simply pour the chilled filling over the baked crust and bake as directed. This method ensures the bars maintain their delightful texture and flavor. Enjoy the time-saving benefits of having these refreshing citrus treats ready to serve with minimal last-minute effort!
Grapefruit Bars: Fun Variations & Substitutions
Feel free to play with these grapefruit bars and tailor them to your taste and dietary needs for a personal touch!
-
Citrus Swap: Substitute grapefruit with orange or lime juice for a delightful twist on flavor. Each fruit brings its unique sweetness, creating a whole new experience!
-
Gluten-Free Flour: Use a gluten-free all-purpose flour blend in place of regular flour to make these bars accessible for gluten-sensitive friends. They won’t miss the traditional flour at all!
-
Dairy-Free Option: Switch butter for vegan butter or coconut oil to create a rich, non-dairy crust that everyone can enjoy. The taste remains deliciously buttery without the dairy!
-
Natural Sweetness: For a lower glycemic choice, replace granulated sugar with coconut sugar in the filling. This will add a subtle caramel note that beautifully complements the grapefruit tang.
-
Texture Variation: For added crunch, mix in some finely chopped nuts, like almonds or walnuts, into the crust. This is a great way to change the texture and enrich the flavor of the bars.
-
Flavor Enhancements: Add a teaspoon of vanilla or almond extract to the filling for an aromatic boost. It can create a lovely depth of flavor that harmonizes with the citrus beautifully.
-
Zesty Extras: Incorporate extra grapefruit zest into the filling for an amplified citrus taste. It’s a simple way to turn up the freshness and make the bars feel even more vibrant!
-
Presentation Lift: Finish with a dusting of powdered sugar or a drizzle of icing on top for an elegant touch. This simple addition can elevate your dessert visually and flavor-wise.
If you’re exploring more citrus delights, don’t miss my delicious Coconut Toffee Bars or the comforting Sweet Potato Pie Bars. Happy baking!
Expert Tips for Grapefruit Bars
- Choose Fresh Grapefruit: Using fresh grapefruit juice enhances the flavor significantly. Bottled juice lacks the vibrant taste necessary for these grapefruit bars.
- Check for Doneness: Avoid overbaking; the bars should have a slight jiggle in the center when you take them out. They will firm up as they cool down.
- Cool Completely: Allow the bars to cool fully in the pan before slicing to achieve clean, professional-looking pieces. This ensures your grapefruit bars look as beautiful as they taste.
- Store Wisely: Keep leftover bars in the refrigerator to maintain their texture, and consume them within a week for the best taste.
- Parchment Paper Aid: Lining your baking dish with parchment paper allows for easy removal and less mess when cutting your grapefruit bars.
Grapefruit Bars Recipe FAQs
How do I choose the best grapefruit for my bars?
Absolutely! When selecting grapefruits, look for ones that feel heavy for their size, indicating juiciness. The skin should be smooth and free of dark spots. A hint of softness when gently pressed means they are ripe and ready to use, providing the zesty flavor you’re after.
What is the best way to store leftover grapefruit bars?
For optimal freshness, store any leftover grapefruit bars in an airtight container in the refrigerator. They will stay delicious for up to a week. If you’re a fan of meal prep, feel free to make a batch ahead of time and enjoy for later!
Can I freeze grapefruit bars?
Yes! To freeze grapefruit bars, first, cut them into individual portions. Wrap each bar tightly in plastic wrap, then place them in a freezer-safe container or zip-top bag. They can be frozen for up to 3 months. When you’re ready to enjoy, simply thaw them in the refrigerator overnight or at room temperature for about 30 minutes.
What should I do if my filling is too runny?
If your filling seems too runny after mixing, don’t fret! You can add an extra tablespoon of flour to help thicken it. Ensure you mix it well and let it sit for a few minutes before pouring it over the crust. This slight adjustment can help achieve the right consistency for that perfect set.
Are there any dietary considerations for grapefruit bars?
Very! If you’re baking for someone with dietary restrictions, you can easily make these bars gluten-free by substituting all-purpose flour with a gluten-free blend. For a dairy-free option, use vegan butter in the crust. Just be sure to check if your sweeteners align with any dietary needs!
What’s the best way to serve grapefruit bars for a gathering?
For a lovely presentation, consider dusting the top of your chilled grapefruit bars with powdered sugar. They pair beautifully with a dollop of whipped cream or a scoop of vanilla ice cream on the side. Serve them on a colorful plate to highlight that zesty hue!
Zesty Grapefruit Bars for a Refreshing Sweet Treat
Ingredients
Equipment
Method
- Preheat your oven to 350°F (180°C). Prepare an 11x7-inch baking dish by lightly greasing it with butter.
- In a food processor, combine the all-purpose flour, powdered sugar, salt, and butter. Pulse until the mixture resembles coarse crumbs. Press it evenly into the bottom of your prepared baking dish and bake for 18 to 20 minutes.
- While the crust is baking, whisk together the granulated sugar and additional flour in a mixing bowl. Add the eggs one at a time, and mix each in before adding the next. Stir in the grapefruit juice and zest until smooth.
- Pour the grapefruit filling over the hot crust and bake for another 20 minutes. The edges should be set, while the center has a slight jiggle.
- Let the bars cool in the pan for about 1 hour, then transfer to the refrigerator for an additional 2 hours before slicing.
- Slice the cooled grapefruit bars into squares or rectangles and serve chilled, optionally dusted with powdered sugar.
Leave a Reply