
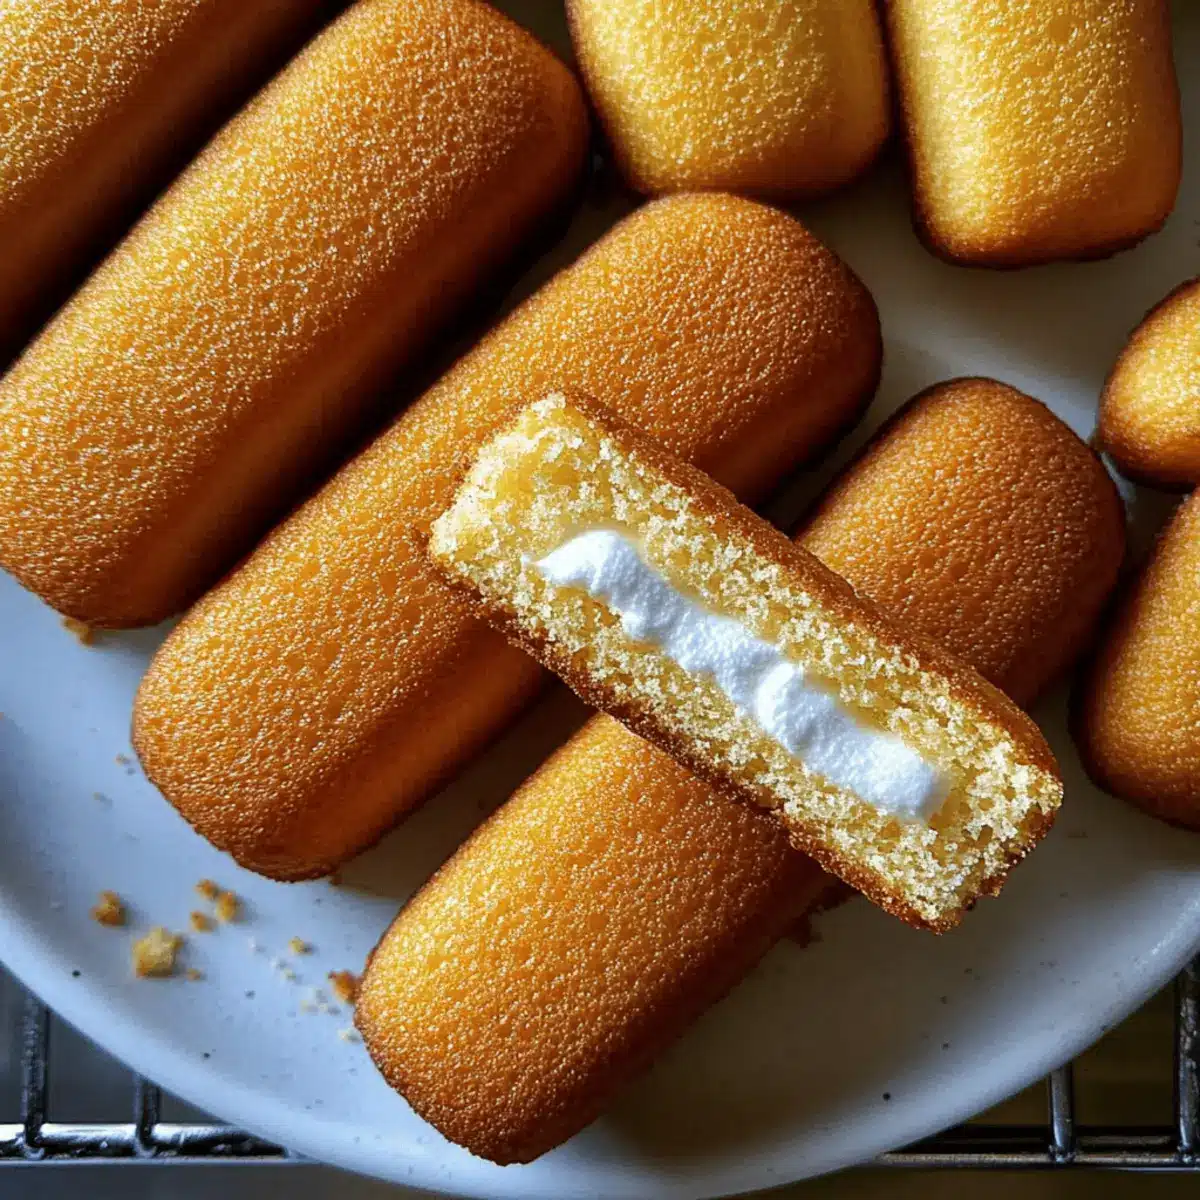
“Can you believe how simple it is to recreate those nostalgic treats from our childhood?” With this Homemade Twinkies recipe, that’s exactly what you’ll achieve—and let me tell you, there’s something incredibly satisfying about whipping up your own version of this classic snack. Tender, golden sponge cakes filled with a custom-made marshmallow crème are not only a delightful nod to the past but also a healthier option, free from preservatives. In just a short time, you can have a fun dessert that impresses guests or brings back sweet memories for a cozy night in. Curious about how to make these nostalgic wonders from scratch? Let’s dive in!
Why Make Homemade Twinkies?
Simplicity at its Finest: You only need basic ingredients and techniques to create these nostalgic delights in your own kitchen.
Nostalgic Flavor: Experience the joy of the classic Twinkie, but made with wholesome ingredients you can trust!
Customizable Options: Whether you prefer rich chocolate or zesty citrus, feel free to tailor the filling to your taste.
No Preservatives: Enjoy the peace of mind that comes with knowing these treats are free from artificial additives.
Perfect for Any Occasion: Delight your family, or impress friends at your next gathering with this fun yet sophisticated treat! Dive into the world of homemade desserts and check out our easy baking tips to enhance your skills.
Homemade Twinkies Ingredients
For the Sponge Cake
- All-Purpose Flour – Provides structure to the sponge; you can substitute with gluten-free flour for a gluten-free option.
- Baking Powder – Helps the cake rise and become light; this ingredient is essential for texture and should not be substituted.
- Salt – Enhances overall flavor; a pinch of sea salt can add a gourmet touch.
- Eggs (4 large) – Acts as the leavening agent, contributing to fluffiness; ensure they are at room temperature for best results.
- Granulated Sugar (2/3 cup) – Adds sweetness and volume; alternatives like baking sugar substitutes can be used, if needed.
- Vanilla Extract (1/2 teaspoon) – Supplies depth of flavor; consider using almond extract for a unique twist.
- Milk (2 tablespoons) – Adds moisture to the batter; feel free to use any type of milk or plant-based milk for a dairy-free version.
- Unsalted Butter (1 tablespoon, melted) – Contributes richness; coconut oil can substitute if you need a dairy-free option.
For the Filling
- Unsalted Butter (1/2 cup) – The base for the filling, lending creaminess; swap with vegan butter for a plant-based version.
- Marshmallow Crème (1/2 cup) – Key to achieving the classic filling texture; homemade marshmallow fluff can be used as an alternative, if desired.
- Powdered Sugar (1 cup) – Sweetens the filling and aids with stabilization; gluten-free powdered sugar varieties are available.
- Vanilla Extract (1 teaspoon) – Adds flavor to the filling; feel free to swap with other extracts for a creative twist.
- Heavy Cream (1 tablespoon) – Improves the filling’s texture; coconut cream is a great substitute for a dairy-free option.
Unlock the joy of Homemade Twinkies with these carefully chosen ingredients, and get ready to create a delightful treat that’s certain to impress!
Step‑by‑Step Instructions for Homemade Twinkies
Step 1: Preheat Oven
Start by preheating your oven to 350°F (175°C). While the oven heats, greasing a Twinkie or mini loaf pan will ensure your homemade Twinkies release easily after baking. Use butter or non-stick spray to cover every nook of the molds, creating a non-stick surface that will yield perfectly-shaped cakes.
Step 2: Prepare Dry Ingredients
In a small bowl, sift together 1 cup of all-purpose flour, 1 teaspoon of baking powder, and a pinch of salt. This mixture is essential for the structure of the cake, so be sure to create a fine blend. Set aside the bowl while you move on to the egg mixture, ensuring that all dry ingredients are ready for incorporation.
Step 3: Beat Egg Mixture
In a large bowl, use an electric mixer to beat 4 large eggs and 2/3 cup of granulated sugar together. Continue mixing for about 6-8 minutes until the mixture is thick and pale in color, resembling a creamy cloud. This process helps to incorporate air into the batter, making your homemade Twinkies light and fluffy.
Step 4: Incorporate Vanilla
Once your egg and sugar mix is thick, gently add 1/2 teaspoon of vanilla extract. Gradually incorporate the sifted dry ingredients into the egg mixture, being careful to fold rather than stir, as this retains the air you’ve just beaten in. The batter should look fluffy without any lumps of flour remaining.
Step 5: Combine Wet Ingredients
In a separate bowl, warm 2 tablespoons of milk and 1 tablespoon of melted unsalted butter until just combined. Stir this mixture into your main batter using a spatula, folding gently until it is seamlessly incorporated. This step adds moisture to your homemade Twinkies, enhancing their soft texture.
Step 6: Fill Molds
Carefully fill each mold of your prepared Twinkie pan about 3/4 full with the batter, using a spoon or a piping bag for precision. Bake in the preheated oven for 12-15 minutes, or until the tops are golden brown and a toothpick inserted into the centers comes out clean. This will signal that your cakes are perfectly baked and ready to cool.
Step 7: Cool Cakes
Once baked, remove the pan from the oven and allow the cakes to cool in the pan for about 5 minutes. Then, carefully transfer the cakes to a wire rack to cool completely. Ensure they are fully cooled before removing them from the molds, as this helps maintain their shape and prevents any tearing.
Step 8: Make Filling
In a mixing bowl, beat 1/2 cup of unsalted butter until fluffy, approximately 2-3 minutes. Gradually add 1/2 cup of marshmallow crème, 1 cup of powdered sugar, 1 teaspoon of vanilla extract, and 1 tablespoon of heavy cream. Continue beating until the filling is smooth and airy, perfect for injecting into your homemade Twinkies.
Step 9: Fill Cakes
Using a piping bag or a squeeze bottle, inject the marshmallow filling into each cooled cake by inserting the nozzle into three small holes at the bottom. Fill each cake until they feel slightly heavy with the luscious filling, which will create that delightful creaminess beloved in traditional Twinkies.
Step 10: Serve
Finally, enjoy your homemade Twinkies right away, or store them in an airtight container in the refrigerator for up to 4-5 days. This treat not only makes for a nostalgic snack but also adds a touch of homemade love that everyone will appreciate.
Homemade Twinkies Variations & Substitutions
Feel free to put your own spin on these delightful treats and unleash your creativity in the kitchen!
- Gluten-Free: Substitute all-purpose flour with a high-quality gluten-free blend for a delicious, gluten-free version that everyone can enjoy.
- Dairy-Free: Use almond or coconut milk and replace butter with coconut oil to keep the recipe dairy-free without sacrificing flavor.
- Rich Chocolate: Add 1/3 cup of cocoa powder to the batter for a chocolatey twist, and consider filling it with chocolate ganache for extra indulgence.
- Citrus Zest: Add the zest of one orange or lemon to the filling to brighten the flavor and give a refreshing twist that pairs beautifully with the sweetness.
- Nutty Flavor: Stir in 1/2 cup of finely chopped nuts (like walnuts or pecans) to the batter for added texture and a nutty flavor that elevates each bite.
- Spicy Kick: Mix in a pinch of cinnamon or even a dash of cayenne pepper into the filling for an unexpected spicy sweetness that adds depth to the filling.
- Creative Extracts: Experiment with different extracts (like maple or peppermint) in both the batter and filling to create a new flavor profile that’s uniquely yours.
By unlocking these variations, you can turn your Homemade Twinkies into a delightful canvas for exploration. Check out our easy baking tips to inspire your next kitchen adventure!
What to Serve with Homemade Twinkies?
Indulging in freshly made Homemade Twinkies is just the beginning of a delightful experience. Complement these nostalgic treats with accompaniments that elevate the sweetness and create a charming meal or gathering.
- Coffee or Tea: A warm mug of coffee or freshly brewed tea enhances the sweet flavors of your Twinkies, creating a cozy afternoon moment.
- Fresh Berries: Juicy strawberries, raspberries, or blueberries add a tart contrast to the sweetness, making for a refreshing and vibrant pairing.
- Whipped Cream: A dollop of lightly sweetened whipped cream transforms the indulgence into a dessert that feels extra special.
- Chocolate Sauce: Drizzling rich chocolate sauce over your Twinkies offers a decadent touch, satisfying any chocolate lover’s cravings.
- Vanilla Ice Cream: Scooping a generous portion of vanilla ice cream alongside the Twinkies creates an irresistible dessert experience, balancing creaminess and nostalgia.
- Nutty Trail Mix: A handful of nutty trail mix adds a crunchy texture and earthy flavor, making for a delightful contrast to the soft cake.
- Milkshakes: Thick and creamy milkshakes—whether chocolate, vanilla, or strawberry—make a playful pairing that transports you back to your childhood.
- Fruit Salad: A bowl of colorful fruit salad introduces a fresh element that brightens up the dessert table and balances the sweetness.
- Sparkling Lemonade: Refreshing sparkling lemonade cuts through the richness of the filling and provides a fizzy, celebratory touch to your meal.
- Chocolate Chip Cookies: Serve alongside warm chocolate chip cookies for a sweet treat extravaganza that any crowd would adore!
Expert Tips for Homemade Twinkies
-
Room Temperature Eggs: Ensure eggs are at room temperature for maximum volume and fluffiness in your cake batter.
-
Gentle Folding: Be gentle when folding in the dry ingredients to avoid deflating the batter, which is key to achieving the light texture of your Homemade Twinkies.
-
Cooling is Crucial: Always let the cakes cool completely before filling them. This helps maintain the integrity of the marshmallow filling and prevents any mess.
-
Piping Precision: Use a piping bag for filling the cakes; it allows for better control and ensures each Twinkie is evenly filled.
-
Experiment with Flavors: Feel free to customize your Twinkies with different extracts or by adding chocolate chips for a delicious twist on this nostalgic treat.
How to Store and Freeze Homemade Twinkies
- Room Temperature: Keep homemade Twinkies wrapped in plastic wrap or stored in an airtight container at room temperature for up to 2 days for the best texture.
- Fridge: Store in the fridge in an airtight container for up to 4-5 days to maintain freshness. Allow them to come to room temperature before enjoying for optimal flavor.
- Freezer: For longer storage, freeze the Twinkies in a single layer on a baking sheet, then transfer to an airtight container or freezer bag. They can be frozen for up to 3 months.
- Reheating: To enjoy your frozen Homemade Twinkies, thaw them overnight in the fridge or on the counter for a couple of hours. Reheat them gently in the microwave for a few seconds if desired.
Make Ahead Options
These Homemade Twinkies are a fantastic choice for meal prep enthusiasts looking to save time during busy weeks! You can prepare the sponge cakes up to 24 hours in advance. Simply bake them, allow them to cool completely, and then store them in an airtight container in the refrigerator. The marshmallow filling can be made up to 3 days ahead; just refrigerate it in a separate airtight container to keep it fresh and fluffy. When you’re ready to serve, inject the filling into the cakes and enjoy. This way, your Homemade Twinkies will taste just as delicious as when they were freshly made, all with minimal effort on your part!
Homemade Twinkies Recipe FAQs
How do I know when my eggs are at room temperature?
Absolutely! To bring eggs to room temperature, simply take them out of the refrigerator about 30 minutes before you begin baking. If you’re in a hurry, place the eggs in a bowl of warm water for 10-15 minutes.
What’s the best way to store my Homemade Twinkies?
You’re in luck! Homemade Twinkies can be stored in an airtight container at room temperature for up to 2 days. For longer freshness, keep them in the fridge for up to 4-5 days. Just make sure they’re sealed tightly to maintain their soft texture.
Can I freeze Homemade Twinkies? How?
Yes, indeed! To freeze your Homemade Twinkies, lay them out in a single layer on a baking sheet and freeze until firm. After about an hour, transfer them to an airtight container or a freezer bag, and they’ll keep well for up to 3 months. Just remember to label the bag with the date!
What if my sponge cake turned out too dense?
Very often! A dense cake can mean that the eggs were not whipped enough or that the batter was over-mixed after adding the dry ingredients. Be sure to whip the eggs and sugar until thick and pale, then fold in the dry ingredients gently to keep air in the mixture. If in doubt, don’t rush—it’ll make all the difference!
Are there any allergy considerations I should keep in mind?
Definitely! If you’re serving these Homemade Twinkies to guests, be mindful of common allergens: these cakes contain eggs, dairy, and gluten. You can make substitutions like using gluten-free flour, plant-based milk, and dairy-free butter to create a delicious dessert for those with dietary restrictions. Always check labels and consider individual allergies before serving.
What if I want to customize the filling?
The more the merrier! You can absolutely customize the marshmallow crème filling to suit your taste. Try adding flavored extracts like almond or lemon for a unique twist, or mix in chocolate chips or crushed cookies for an unexpected texture and flavor. Feel free to get creative with your own twist on this classic!
Homemade Twinkies: Nostalgic Treats You’ll Love to Make
Ingredients
Equipment
Method
- Preheat your oven to 350°F (175°C) and grease the Twinkie or mini loaf pan.
- Sift together flour, baking powder, and salt in a bowl and set aside.
- Beat eggs and sugar together for 6-8 minutes until thick and pale.
- Incorporate vanilla and gently fold in the sifted dry ingredients.
- Warm milk and melted butter, then fold into the main batter.
- Fill molds about 3/4 full and bake for 12-15 minutes until golden brown.
- Let cakes cool in the pan for 5 minutes, then transfer to a wire rack.
- Beat filling ingredients until smooth and airy.
- Inject the filling into cooled cakes using a piping bag.
- Serve immediately or store in an airtight container for up to 4-5 days.
Leave a Reply