
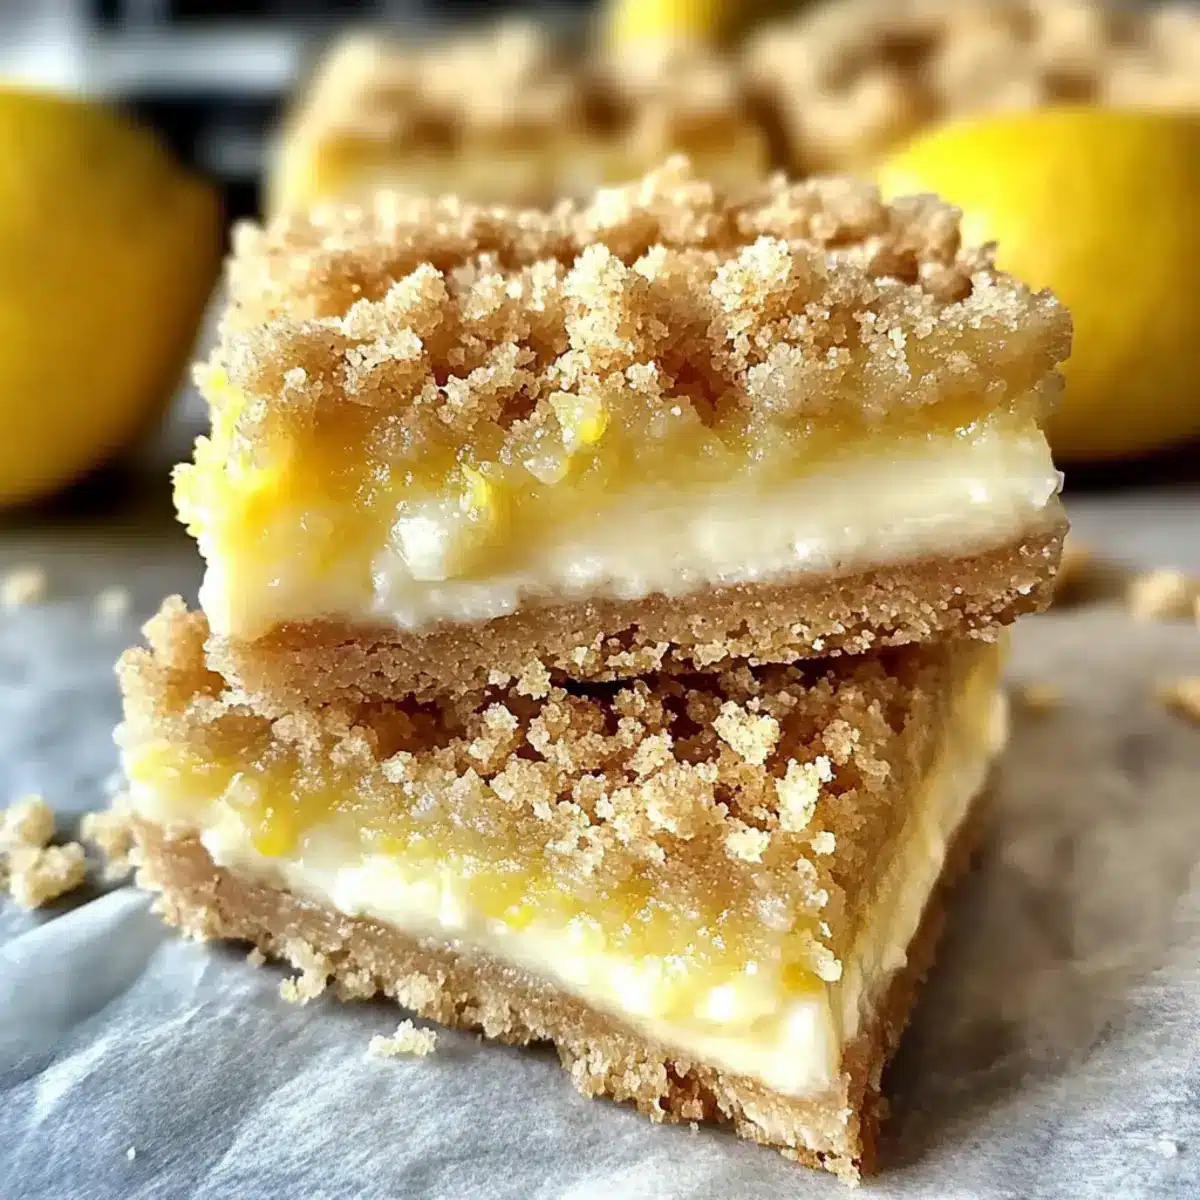
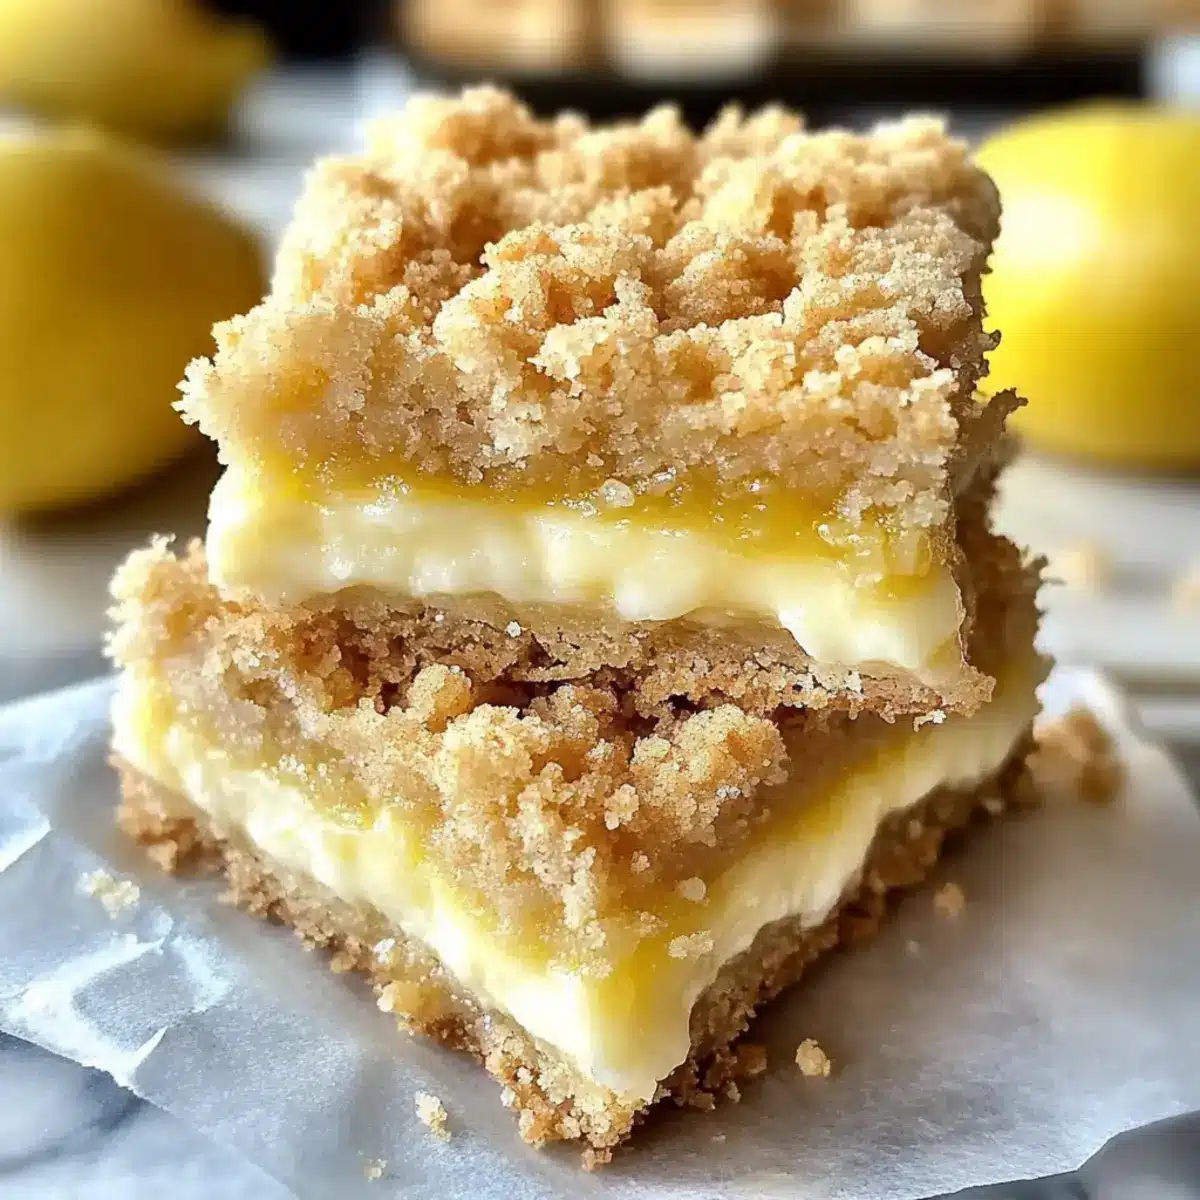
As I opened the oven to check on my latest creation, the warm scent of citrus instantly took me back to sunny summer days. These Homemade Lemon Crumb Bars are my go-to dessert that captures that refreshing vibe with every bite! With their buttery crust, creamy lemon filling, and crunchy oat topping, they’re not just a treat; they’re a quick and visually stunning crowd-pleaser, perfect for any gathering or a sweet pick-me-up. Plus, they’re freezer-friendly, letting you prepare ahead and enjoy that zesty goodness anytime. Are you ready to make these delicious bars that will brighten your day? Let’s dive in!
Why are Lemon Crumb Bars a Must-Try?
Bright, Tangy Flavor: The zesty lemon filling mingles beautifully with the buttery crust, providing a refreshing taste that dances on your palate.
Quick Prep Time: In just a few simple steps, you’ll have a delightful dessert ready, making it perfect for unexpected guests or a last-minute treat.
Crowd-Pleasing Appeal: These bars are sure to impress at summer gatherings, alongside a chilled glass of iced tea or as a sweet finish to a BBQ.
Versatile Twist: Feel free to swap in lime juice for a fun variation, or even serve with fresh berries to elevate your presentation further.
Make-Ahead Convenience: Enjoy the flexibility of prepping these bars ahead of time; they freeze beautifully so you can indulge on demand! Don’t forget to try them alongside our refreshing Coconut Toffee Bars for a delightful dessert spread!
Lemon Crumb Bars Ingredients
For the Crust
• Flour – Provides structure to the crust; can substitute with gluten-free all-purpose flour for dietary needs.
• Oats – Adds texture and crunch; rolled oats yield the best result.
• Salt – Enhances flavor, bringing out the sweetness in the crust.
• Baking Soda – Helps the crust rise and achieve a light texture.
• Butter (melted) – Contributes richness and moisture; no substitutes recommended.
• Brown Sugar – Sweetens the crust and adds a slight caramel flavor; white sugar can be used but may alter the taste.
• Vanilla Extract – Adds aroma and depth; can be swapped with almond extract for a different flavor.
For the Filling
• Sweetened Condensed Milk – Provides creaminess and sweetness; avoid substitutes for the best result.
• Sour Cream – Adds tanginess and a creamy texture; Greek yogurt works well as an alternative.
• Egg Yolk – Binds the filling together and enhances richness; using a whole egg offers a firmer texture.
• Lemon Juice – Essential for that bright, vibrant flavor; fresh lemon juice is highly recommended.
• Lemon Zest – Intensifies the lemon flavor, making the bars even more enticing.
For the Topping
• Reserved Crust Mixture – Sprinkled on top to add a crunchy finish; ensure you save enough dough for this layer.
These Lemon Crumb Bars are a delightful balance of flavors and textures that will absolutely brighten your day!
Step‑by‑Step Instructions for Lemon Crumb Bars
Step 1: Preheat and Prepare
Begin by preheating your oven to 350°F (175°C). While it warms up, grab an 8×8-inch baking pan and line it with aluminum foil or parchment paper for easy removal later. This setup will help your Lemon Crumb Bars have a nice even edge while baking.
Step 2: Whisk the Dry Ingredients
In a medium bowl, whisk together 1 cup of flour, 1 cup of rolled oats, 1/2 teaspoon of salt, and 1/2 teaspoon of baking soda. This mixture forms the base of your lemon crumb bars. Ensure that the ingredients are well combined to create a consistent texture throughout the crust.
Step 3: Mix the Wet Ingredients
In a larger bowl, mix together 1/2 cup of melted butter, 1 cup of brown sugar, and 1 teaspoon of vanilla extract until smooth and creamy. The blending of these ingredients infuses a delightful sweetness and depth into your crust, essential for those irresistible Lemon Crumb Bars.
Step 4: Combine Dry and Wet Mixtures
Gradually incorporate the dry ingredients into the wet mixture, stirring gently until a crumbly dough forms. Take care not to overmix, as this will ensure your crust remains tender and flaky. It should be crumbly yet cohesive enough to press into a base.
Step 5: Reserve Dough and Form Crust
Set aside about 3/4 cup of the dough for the topping. Press the remaining crumb mixture evenly into the bottom of the prepared pan, forming a solid crust layer. This creates the perfect foundation for the luscious lemon filling that’s about to come!
Step 6: Bake the Crust
Bake the crust in your preheated oven for around 10 minutes, or until it turns a light golden brown. This initial baking step sets the base of your Lemon Crumb Bars and provides a delightful crunch that pairs perfectly with the creamy filling.
Step 7: Prepare the Lemon Filling
Meanwhile, in a separate bowl, whisk together 1 can of sweetened condensed milk, 1/2 cup of sour cream, 1 egg yolk, 1/2 cup of fresh lemon juice, and the zest of one lemon. Blend thoroughly until smooth; this zesty mixture will bring a refreshing and creamy element to your bars.
Step 8: Pour the Filling
Once the crust has cooled slightly, pour the lemon filling evenly over the warm crust. Take a moment to spread it into the corners gently, ensuring every bite of your Lemon Crumb Bars is packed with that vibrant citrus flavor.
Step 9: Top and Bake Again
Sprinkle the reserved crumb topping over the filling. Carefully spread it to cover the filling completely, creating a beautiful texture contrast. Return the pan to the oven and bake for an additional 17 to 20 minutes, until the topping is golden brown and the filling is set yet slightly jiggly.
Step 10: Cool and Slice
Once baked, remove your Lemon Crumb Bars from the oven and let them cool completely on a wire rack. This cooling step is crucial, as it allows the bars to firm up. Once cool, slice them into squares for serving, showcasing those delicious layers of crust and filling.
Expert Tips for Lemon Crumb Bars
Avoid Tough Crust: Overmixing the dough can lead to a tough crust. Mix until just combined for the best texture.
Cool the Crust: Letting the crust cool slightly before adding the filling prevents it from sinking, ensuring a perfect layer of Lemon Crumb Bars.
Use Fresh Ingredients: Always opt for fresh lemon juice and zest. This maximizes flavor and elevates the overall taste of your bars.
Store Them Right: Keep your Lemon Crumb Bars in an airtight container in the fridge for up to a week or freeze for longer enjoyment.
Perfect Slicing: Use a sharp knife to cut the bars once they’re completely cooled; this gives you clean edges and a beautiful presentation.
Set Baking Time: Ensure the filling sets properly by checking it towards the end of the baking time; it should be slightly jiggly but firm.
Lemon Crumb Bars Variations & Substitutions
Inviting you to make these delightful bars truly yours with easy tweaks and substitutions that will tantalize your taste buds!
- Gluten-Free: Replace all-purpose flour with gluten-free all-purpose flour for a deliciously accommodating treat.
- Lime Twist: Swap lemon juice and zest with lime for a refreshing citrus variation that packs a zesty punch! You’ll love the way lime adds a new depth of flavor.
- Berry Delight: Serve topped with fresh berries for a juicy contrast that complements the tangy filling beautifully. Think luscious strawberries or blueberries for a vibrant garnish!
- Chocolate Drizzle: Elevate your bars with a drizzle of melted chocolate for added richness. Just warm up some dark chocolate and let it ooze over the top for a decadent finish.
- Nutty Crunch: Incorporate chopped nuts into the crust or sprinkle them on top for that extra crunch factor. Walnuts or pecans work marvelously and add a delightful texture!
- Greek Yogurt Substitute: If you prefer a lighter option, swap sour cream for Greek yogurt. This offers a tangy flavor without compromising creaminess.
- Herb Infusion: For a unique twist, infuse your lemon filling with a hint of fresh basil or mint for an aromatic experience that’s both refreshing and surprising.
- Sweetness Scale: Adjust the sugar level in your crust and filling to cater to your taste; use less sugar for a more tart experience or add a touch more to suit your sweet tooth.
Now that you’ve got these enticing variations in your back pocket, why not explore other delicious treats like our Cinnamon Roll Bars or indulge in the creamy layers of Lemon Garlic Chicken? Bring smiles to the table with these family-loved recipes!
How to Store and Freeze Lemon Crumb Bars
Fridge: Store your Lemon Crumb Bars in an airtight container in the fridge for up to 7 days, keeping them fresh and delicious for snacking.
Freezer: For longer storage, freeze them in individual squares for up to 3 months. Wrap each piece in plastic wrap and place them in a sealed freezer bag.
Thawing: To enjoy your frozen Lemon Crumb Bars, thaw them overnight in the fridge. This preserves their delightful texture and zesty flavor!
Reheating: If you prefer them warm, simply microwave a square for about 10-15 seconds before serving. Enjoy the warm, creamy goodness!
Make Ahead Options
These Lemon Crumb Bars are perfect for busy home cooks looking to save time! You can prepare the crust and the crumb topping up to 24 hours in advance. Simply assemble these components and store them separately in the refrigerator. The filling can also be mixed ahead and kept chilled for up to 3 days to maintain its creamy texture. When it’s time to bake, just spread the filling over the crust and top with the reserved crumb mixture before popping it into the oven. This way, you’ll enjoy fresh, vibrant Lemon Crumb Bars with minimal effort, making dessert time a breeze!
What to Serve with Lemon Crumb Bars
Indulging in these delightful Lemon Crumb Bars creates the perfect backdrop for a refreshing meal experience, bursting with sunshine and flavor.
- Iced Tea: The crispness of chilled iced tea, whether sweetened or unsweetened, perfectly balances the sweetness of the bars.
- Fresh Berries: A medley of strawberries, blueberries, or raspberries enhances the vibrant flavors and adds a refreshing touch to your dessert spread.
- Whipped Cream: Fluffy whipped cream adds a luxurious creaminess, perfectly complementing the zesty lemon filling for a gorgeous contrast.
- Coconut Sorbet: This icy treat offers a tropical twist, providing a delightful chill that harmonizes with the sunny flavors of the bars.
- Mint Leaves: Garnishing with fresh mint not only adds a pop of color but also brings a refreshing aromatic experience to every bite.
- Lemonade: Pairing your Lemon Crumb Bars with a glass of homemade lemonade offers a delightful citrusy combination that amplifies their brightness.
- Chocolate Drizzle: Adding a light drizzle of melted chocolate creates a nice contrast to the lemony tang and satisfies the chocolate lovers in your life.
- Grilled Peaches: For a warm, fruity side, grilled peaches with a scoop of vanilla ice cream makes a lovely pairing with the bars.
- Sparkling Water: Crisp, bubbly sparkling water, perhaps infused with citrus, cleanses the palate and accentuates the dessert’s flavors beautifully.
Lemon Crumb Bars Recipe FAQs
How do I select ripe lemons for the filling?
Absolutely! When choosing lemons, look for ones that are firm with a vibrant yellow color. They should feel heavy for their size, indicating plenty of juice inside. Avoid lemons with dark spots or a dull appearance, as these may be overripe or spoiled. For the best flavor, pick fresh, organic lemons whenever possible.
What’s the best way to store Lemon Crumb Bars?
I recommend storing Lemon Crumb Bars in an airtight container in the fridge for up to 7 days. This keeps them fresh and delicious for snacking! Ensure each bar has minimal exposure to air to avoid drying out. If you’re not planning to eat them all within that time, freezing is a fantastic option.
Can I freeze Lemon Crumb Bars?
Yes! To freeze your Lemon Crumb Bars, start by cutting them into individual squares. Wrap each piece tightly in plastic wrap, then place them in a sealed freezer bag. They can be stored for up to 3 months. When you’re ready to enjoy them, simply thaw them overnight in the fridge for the best texture.
What should I do if the filling doesn’t set properly?
Very! If you find that your filling isn’t setting, it may be due to underbaking. Make sure to bake the bars until the topping is golden brown and the filling is just slightly jiggly in the center. If you suspect they need more time, don’t hesitate to pop them back in the oven for a few extra minutes! Once done, let them cool completely before slicing.
Are Lemon Crumb Bars suitable for gluten-free diets?
Absolutely! You can easily adapt this recipe for gluten-free diets by substituting regular all-purpose flour with a high-quality gluten-free all-purpose flour blend. Just ensure that your oats are labeled gluten-free as well, and you’ll have a delightful treat that can be enjoyed by everyone!
Can I use a different fruit for the filling?
Absolutely! If you’re looking for a twist, consider using lime juice and zest instead of lemon to create Lime Crumb Bars. Another delightful alternative is to incorporate raspberry purée for a berry-infused version! Just be sure to adjust the sugar to suit the sweetness of the other fruits.
Lemon Crumb Bars That Will Brighten Your Day Instantly
Ingredients
Equipment
Method
- Preheat your oven to 350°F (175°C) and line an 8x8-inch baking pan with aluminum foil or parchment paper.
- Whisk the dry ingredients: In a medium bowl, whisk together flour, oats, salt, and baking soda.
- Mix the wet ingredients: In a larger bowl, mix melted butter, brown sugar, and vanilla extract until smooth.
- Combine dry and wet mixtures, stirring gently until a crumbly dough forms.
- Set aside about 3/4 cup of the dough and press the remaining mixture evenly into the bottom of the prepared pan.
- Bake the crust for about 10 minutes, until light golden brown.
- Prepare the lemon filling: Whisk together sweetened condensed milk, sour cream, egg yolk, lemon juice, and zest until smooth.
- Pour the lemon filling evenly over the warm crust.
- Sprinkle the reserved crumb topping over the filling, covering it completely.
- Bake for an additional 17 to 20 minutes, until topping is golden brown and filling is set but slightly jiggly.
- Cool the lemon crumb bars completely on a wire rack, then slice into squares for serving.
Leave a Reply