
As I stood in my kitchen, the sweet aroma of melting marshmallows wafted through the air, instantly transporting me back to carefree summer days spent at family barbecues. This Marshmallow Whip Cheesecake is my modern take on nostalgia, blending a fluffy marshmallow base with rich cream cheese and airy whipped topping—all resting in a buttery graham cracker crust. The beauty of this no-bake dessert lies in its effortless preparation; you can whip it up in no time, making it the perfect crowd-pleaser for potlucks and gatherings. Plus, it’s incredibly versatile, offering gluten-free options and endless customizations to suit every palate. Ready to create some sweet memories? Let’s dive into this heavenly treat that promises to be a showstopper at your next event!

Why Is This Cheesecake So Irresistible?
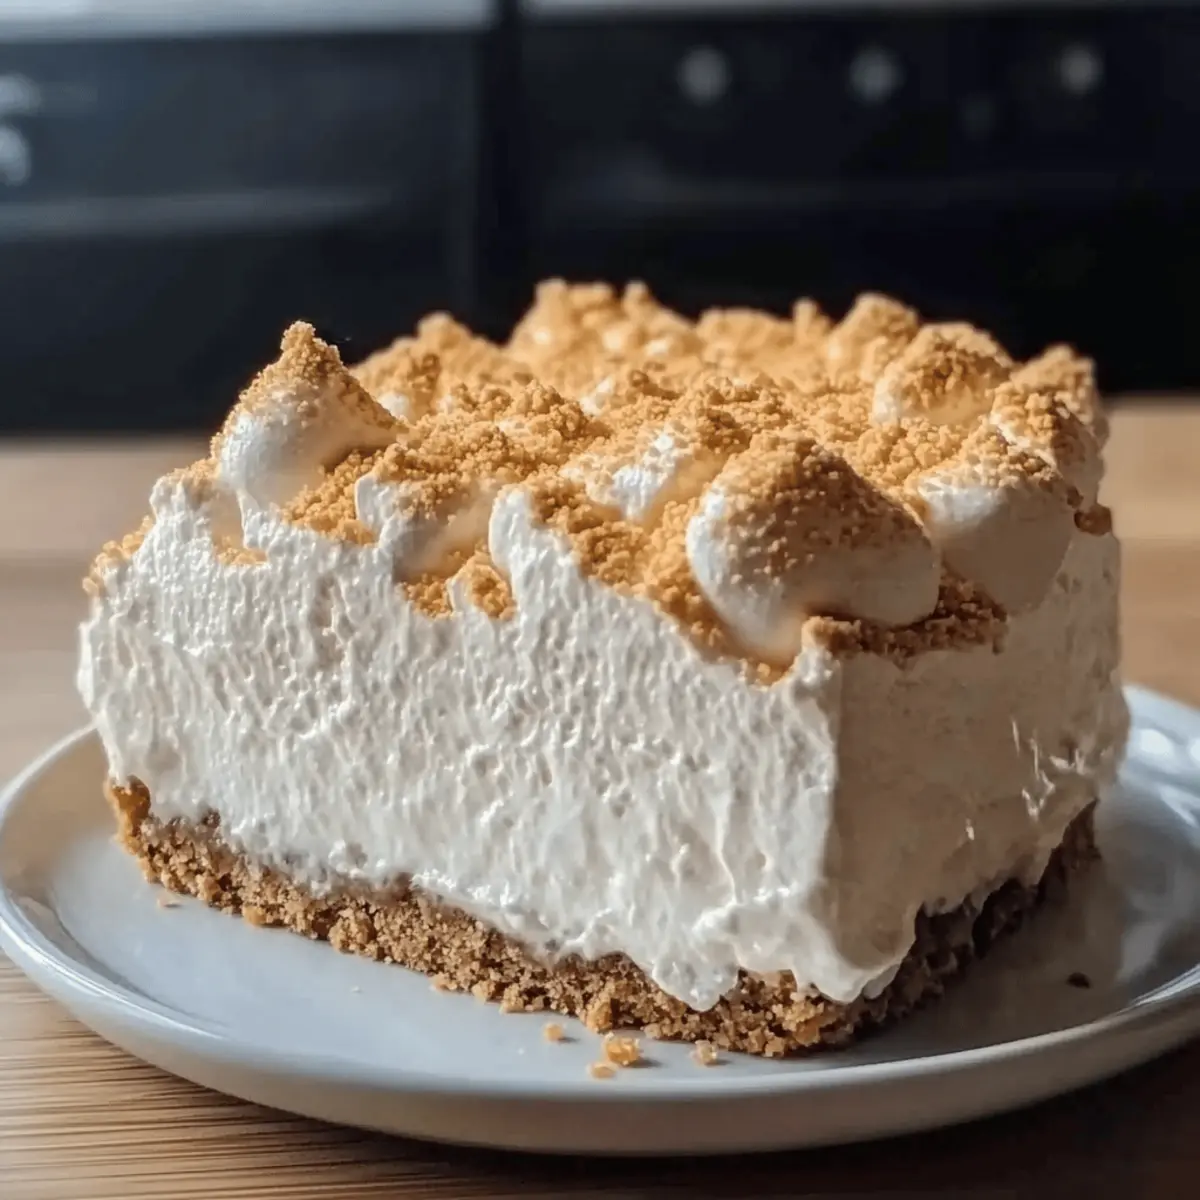
Dreamy, Velvety Texture: This no-bake cheesecake is a culinary hug, boasting a light and airy profile that seems to float on your tongue.
Quick and Easy: With minimal prep time, you can have this showstopper ready within minutes—perfect for those spontaneous gatherings!
Customizable for Everyone: Whether you prefer a gluten-free crust or want to add your favorite mix-ins like berries or nuts, this recipe adapts to suit all tastes.
Visual Appeal: Its stunning layers and fluffy topping make it as delightful to look at as it is to eat, sure to impress at parties.
Perfectly Shareable: Ideal for potlucks, family gatherings, or just a cozy night at home, this cheesecake is a crowd favorite that never fails to bring smiles.
Marshmallow Whip Cheesecake Ingredients
For the Crust
• Graham Cracker Crumbs – Forms a buttery crust; for a gluten-free version, try gluten-free graham crackers or cookies.
• Melted Butter – Binds the crust ingredients; opt for unsalted butter for better control over flavor.
For the Cheesecake Filling
• Cream Cheese (2 x 8 oz blocks, softened) – Provides a smooth, tangy base; remember to use room temperature to mix easily.
• Marshmallow Crème (7 oz jar) – Adds sweetness and fluffiness; feel free to substitute with marshmallow fluff.
• Whipped Topping (8 oz tub, thawed) – Incorporates air and lightness, creating a heavenly texture; homemade stabilized whipped cream works perfectly too.
Each fluffy slice of this Marshmallow Whip Cheesecake is sure to delight everyone at your next gathering!
Step‑by‑Step Instructions for Marshmallow Whip Cheesecake
Step 1: Prepare the Crust
In a mixing bowl, combine the graham cracker crumbs with melted butter until evenly moistened. Press this mixture firmly into the bottom of a 9×13-inch dish using the bottom of a measuring cup to create a flat, compact layer. Once formed, place it in the refrigerator to chill for about 30 minutes while you prepare the filling.
Step 2: Make the Filling
Using an electric mixer, beat the softened cream cheese in a large bowl until it reaches a smooth and creamy consistency, approximately 2-3 minutes. Next, gently fold in the marshmallow crème until fully combined, ensuring the mixture is uniform. This creates a luscious base for your Marshmallow Whip Cheesecake.
Step 3: Add Whipped Topping
Carefully fold the thawed whipped topping into the cream cheese mixture using a spatula. It’s crucial to maintain the airiness, so be gentle and avoid overmixing. Fold until you see no streaks of white, allowing the mixture to reach a light, fluffy mousse-like texture that will elevate your cheesecake beautifully.
Step 4: Assemble the Cheesecake
Once the filling is ready, spread it evenly over your chilled crust, using an offset spatula to smooth the top. Make sure the filling reaches the edges of the crust for a neat presentation. This creamy layer will create the gorgeous appearance of your Marshmallow Whip Cheesecake, so take your time with this step.
Step 5: Chill the Cheesecake
Cover the cheesecake with plastic wrap or aluminum foil and refrigerate it for at least 4 hours, though leaving it overnight is ideal for the best texture and flavor melding. During this time, the cheesecake will firm up beautifully, transforming into a sliceable dessert that’s sure to impress.
Step 6: Serve the Cheesecake
When you’re ready to serve, remove the cheesecake from the fridge. For clean cuts, dip a knife in warm water and wipe it dry before slicing into squares. Top each piece with your choice of toppings like fresh berries or chocolate drizzle, adding a personal touch to each creamy slice of your Marshmallow Whip Cheesecake.

Marshmallow Whip Cheesecake Variations & Substitutions
Feel free to get creative! With a little tweaking, your Marshmallow Whip Cheesecake can cater to every taste and dietary need.
-
Gluten-Free: Substitute regular graham crackers with gluten-free graham crackers or almond flour for a deliciously inclusive crust. It’s just as tasty, without missing a beat!
-
Chocolate Lovers: Replace the graham cracker crust with chocolate cookie crumbs for a rich and decadent version. The chocolate base elevates the dessert even more!
-
Fruity Twist: Fold in fresh berries like raspberries or strawberries into the filling for a pop of flavor and color. Each bite will burst with sweetness!
-
Nutty Delight: Add crushed nuts like pecans or almonds as a topping to introduce a delightful crunch that contrasts beautifully with the smooth cheesecake.
-
Freaky Flavor: Incorporate a tablespoon of your favorite flavored extract, like almond or vanilla, into the cheesecake filling for an exciting twist. It’s an easy way to personalize your treat!
-
Dairy-Free Option: Switch the cream cheese and whipped topping with vegan alternatives to create a creamy, non-dairy dessert anyone can enjoy!
-
Heat It Up: Drizzle your cheesecake with a spicy chocolate sauce or add a sprinkle of cayenne pepper on top for a surprising and delightful kick your taste buds won’t forget.
-
Seasonal Sensation: Top with pumpkin puree for a fall-inspired version, or add peppermint extract in winter for a festive sensation. Customize depending on the season!
With these delicious options, your Marshmallow Whip Cheesecake can bring joy to every table. For more delightful dessert ideas, check out our no-bake chocolate cheesecake or transform your crust by exploring this simple gluten-free biscuit recipe! Enjoy the creative process!
Helpful Tricks for Marshmallow Whip Cheesecake
Chill Everything: Keep your mixing bowl, spatula, and even the cream cheese chilled for an airy filling. A cooler environment helps maintain the fluffy texture of your Marshmallow Whip Cheesecake.
Gentle Folding: Always fold in whipped topping and marshmallow crème gently to avoid deflating the mixture. Overmixing can lead to a denser cheesecake and ruin the lightness.
Room Temperature Cream Cheese: Make sure your cream cheese is softened to room temperature. This ensures a smooth blending process without lumps, leading to a silky filling.
Chill Time: Don’t rush the chilling step! Allow at least 4 hours in the fridge for the flavors to meld and the filling to set perfectly. Overnight chilling yields the best results.
Clean Cuts: To achieve neat slices, dip your knife in warm water, wipe it dry, and then slice. This technique prevents the filling from sticking to the knife and keeps each piece looking pristine.
What to Serve with Marshmallow Whip Cheesecake Heaven?
Indulge in a delightful spread that perfectly complements the dreamy textures and flavors of this light dessert.
-
Fresh Berries: The tartness of strawberries or blueberries contrasts beautifully with the sweet cheesecake, adding brightness and color to your plate.
-
Chocolate Drizzle: A rich chocolate sauce drizzled atop each slice adds an elegant touch and deepens the decadent experience.
-
Crispy Lemon Sorbet: The refreshing zing of lemon sorbet serves as a palate cleanser, cutting through the cheesecake’s sweetness and providing a cool, bright finish.
-
Crushed Nuts: Sprinkling chopped walnuts or pecans brings a satisfying crunch and nutty flavor, enhancing the overall texture and taste.
-
Coffee or Espresso: A warm cup of coffee or a shot of espresso pairs wonderfully with the creamy cheesecake, balancing the sweetness with its robust flavor.
-
Coconut Whipped Cream: Light, airy coconut whipped cream adds a tropical twist and elevates the dessert’s fluffiness, making it extra indulgent.
-
Mint Iced Tea: For a refreshing drink option, mint iced tea adds a hint of herbal brightness that complements the dessert without overpowering it.
-
Mini Fruit Tarts: These bite-sized pastries serve as light accompaniments, offering a burst of fruity goodness that echoes the flavors of the cheesecake.
-
Lemonade Spritzer: A fizzy lemonade spritzer brings a refreshing sparkle to your meal, enhancing the cheerful, summery vibes of your gathering.
Make Ahead Options
These Marshmallow Whip Cheesecake treats are perfect for meal prep enthusiasts! You can prepare the graham cracker crust up to 24 hours in advance by storing it in the refrigerator, ensuring it’s firm and ready for the filling. Additionally, the cheesecake filling can be made a day ahead; simply mix the cream cheese and marshmallow crème, then fold in the whipped topping. Cover and refrigerate until you’re set to assemble. To maintain the cheesecake’s delightful texture, let it chill overnight, allowing the flavors to meld beautifully. When ready to serve, just pour the filling over the crust and let it rest before slicing into this heavenly dessert, guaranteed to impress with minimal effort!
Storage Tips for Marshmallow Whip Cheesecake
Fridge: Store leftovers covered in the refrigerator for up to 3 to 5 days. This will keep your Marshmallow Whip Cheesecake fresh and ready to enjoy.
Freezer: If you want to keep it longer, freeze your cheesecake for up to 1 month. Make sure it’s wrapped tightly in plastic wrap, then in aluminum foil to prevent freezer burn.
Thawing: To enjoy your frozen cheesecake, transfer it to the fridge the night before serving to allow for slow, safe thawing while retaining its creamy texture.
Reheating: There’s no need to reheat this cheesecake—it’s best served chilled or at a cool room temperature for a delightful taste sensation!

Marshmallow Whip Cheesecake Recipe FAQs
How do I select the best graham crackers for the crust?
When choosing graham crackers, look for ones that are fresh and sturdy, with no dark spots or broken pieces in the package. If you want a gluten-free option, ensure the brand you choose clearly states it on the packaging and has no cross-contamination with gluten-containing ingredients.
What is the best way to store leftover cheesecake?
Absolutely! To keep your Marshmallow Whip Cheesecake fresh, cover it tightly with plastic wrap or aluminum foil, and store it in the refrigerator for up to 3 to 5 days. This will help maintain its delicious flavor and texture, making it a delightful treat whenever you’re ready to enjoy it.
Can I freeze my cheesecake, and if so, how?
Yes, you can freeze your cheesecake for up to 1 month! First, let it chill completely in the refrigerator. Then wrap it tightly in plastic wrap to prevent freezer burn, followed by aluminum foil for extra protection. When you’re ready to serve, simply transfer it to the refrigerator the night before to thaw slowly and safely.
What should I do if my cheesecake filling is too runny?
If your filling is too runny, it might be due to not chilling it long enough or not folding the whipped topping gently. If you find yourself in this situation, try chilling the cheesecake for an additional hour or two to see if it firms up. If it’s still too loose, you can also whip some additional cream until it forms stiff peaks and fold it in gently to help thicken the filling.
Are there any dietary considerations I should be aware of with this recipe?
Definitely! For gluten-free individuals, simply swap the graham cracker crust for gluten-free alternatives like almond flour or gluten-free cookies. Be cautious with allergies, as this recipe contains dairy and eggs; if someone has a dairy allergy, consider using non-dairy cream cheese and whipped topping alternatives for a customizable spin. Always read labels of store-bought ingredients for potential allergens.
Can I add mix-ins to the cheesecake filling?
Very much so! The beauty of this Marshmallow Whip Cheesecake lies in its versatility. You can fold in mini chocolate chips, crushed cookies, or fresh berries into the filling after you’ve combined the cream cheese and marshmallow crème. This adds bursts of flavor and texture, making each slice even more delightful!
Marshmallow Whip Cheesecake: Your Dreamy No-Bake Delight
Ingredients
Equipment
Method
- In a mixing bowl, combine the graham cracker crumbs with melted butter until evenly moistened. Press this mixture firmly into the bottom of a 9x13-inch dish and refrigerate for about 30 minutes.
- Beat the softened cream cheese in a large bowl until smooth and creamy, about 2-3 minutes. Fold in marshmallow crème until fully combined.
- Carefully fold the thawed whipped topping into the cream cheese mixture using a spatula without overmixing.
- Spread the filling evenly over the chilled crust, smoothing the top with an offset spatula.
- Cover with plastic wrap or aluminum foil and refrigerate for at least 4 hours, or overnight for best results.
- When ready to serve, dip a knife in warm water, wipe it dry, and slice into squares. Top with fresh berries or chocolate drizzle if desired.
Leave a Reply