
On a chilly winter evening, the aroma of freshly baked cookies wafts through the air, wrapping around you like a warm, cozy hug. Today, I’m excited to share my recipe for Easy Peppermint Chocolate Thumbprint Cookies, a delightful treat that’s perfect for holiday gatherings. These buttery chocolate cookies topped with festive peppermint kisses not only look beautiful but are also incredibly simple to make, making them a stress-free addition to your baking plans. Plus, they’re freezer-friendly, so you can whip up a batch ahead of time and enjoy them whenever that sweet craving strikes. Intrigued? Let’s dive into the holiday spirit together with this fun and flavorful cookie recipe!

Will these cookies impress your guests?
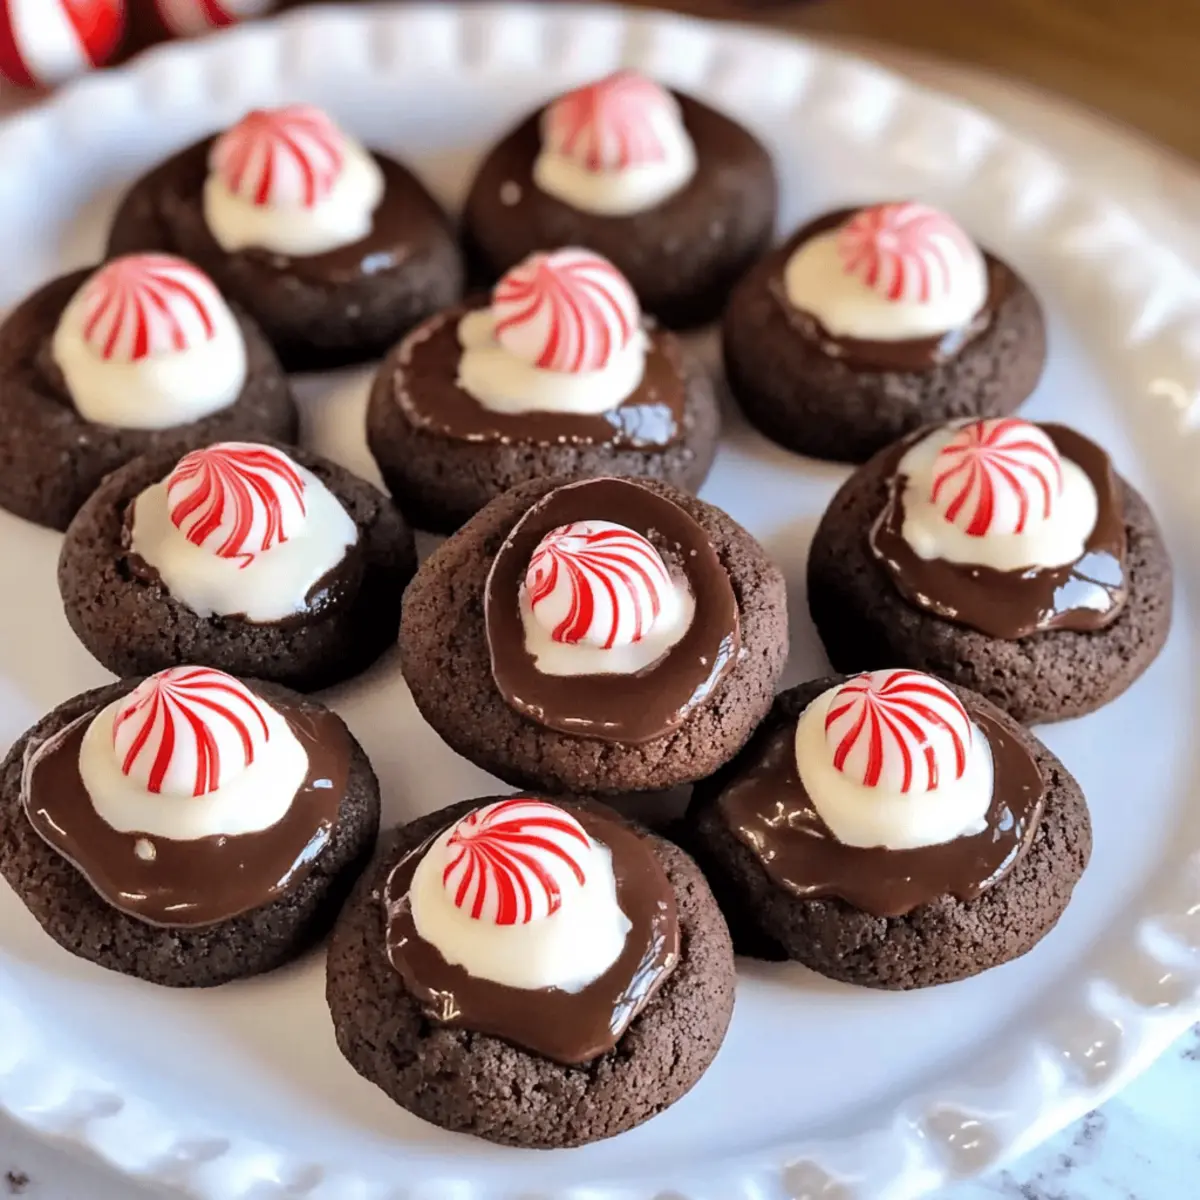
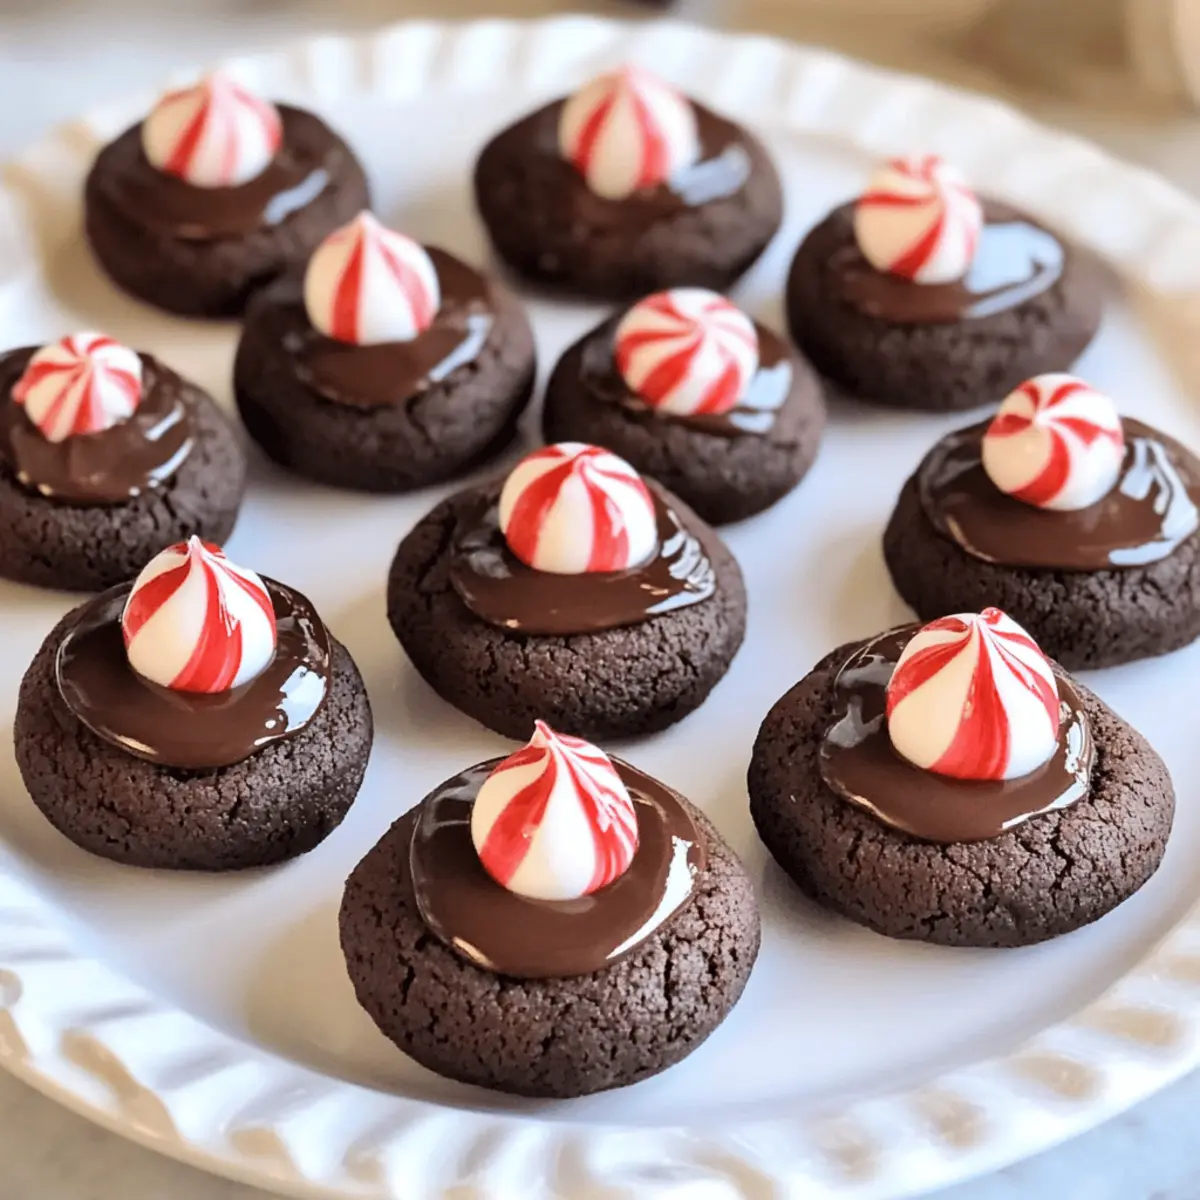
Festive and visually stunning, these Peppermint Chocolate Thumbprint Cookies are the perfect holiday showstopper! Simple to make, even novice bakers can achieve perfect results with ease, ensuring you spend less time stressing and more time enjoying. Freezer-friendly, they can be prepared ahead, saving you valuable time during the busy holiday season. Rich chocolate flavor paired with minty sweetness creates a delightful treat that everyone will love. Plus, these cookies are wonderfully versatile—swap out peppermint for other flavors to keep things exciting!
Peppermint Chocolate Thumbprint Cookies Ingredients
For the Cookie Dough
• Unsalted Butter – ensures richness and a tender texture; using high-quality butter like Land O’Lakes yields the best results.
• Sugar – provides the right amount of sweetness; go for granulated white for a clean flavor profile.
• Light Brown Sugar – adds subtle caramel notes and moisture, enhancing the cookie’s softness.
• Egg Yolks – crucial for structure and rich flavor; they make the cookies wonderfully moist.
• Vanilla Extract – adds depth and warmth; for a more pronounced mint flavor, use peppermint extract instead (reduce quantity to taste).
• All-Purpose Flour – forms the foundation of the cookie dough, providing structure.
• Unsweetened Baking Cocoa – gives each cookie its deep chocolate flavor and color.
• Salt – balances the sweetness and enhances overall flavor, so don’t skip this!
• Baking Powder & Baking Soda – help the cookies rise, giving them that lovely soft texture.
For the Topping
• Frozen Peppermint Kisses – not only do they add a festive touch, but freezing them ensures they won’t melt completely while baking; feel free to swap them with other chocolate varieties, although peppermint adds that perfect holiday flair.
Step‑by‑Step Instructions for Peppermint Chocolate Thumbprint Cookies
Step 1: Prepare Kisses
Begin by taking your frozen peppermint kisses out of the freezer. Ensure you freeze them for at least 2 hours prior to baking this delightful recipe. This prevents them from melting too quickly when pressed into the cookies. While they freeze, you can move on to the next step of the process.
Step 2: Make Dough
In a stand mixer, cream together 1 cup of softened unsalted butter and ½ cup each of granulated and light brown sugar until light and fluffy, about 2-3 minutes on medium speed. Add the egg yolks, one at a time, mixing well after each addition. Finally, incorporate 1 teaspoon of vanilla extract, mixing until just combined.
Step 3: Combine Dry Ingredients
In a separate bowl, whisk together 2 cups of all-purpose flour, ⅓ cup of unsweetened cocoa powder, ½ teaspoon of salt, ½ teaspoon of baking powder, and ½ teaspoon of baking soda. Gradually incorporate the dry mixture into the buttery mixture in three parts. Mix on low speed until the dough is just combined, ensuring not to overmix and maintaining a rich texture.
Step 4: Chill Dough
Once the dough is ready, cover it with plastic wrap and refrigerate for at least 3 hours, or overnight if you have the time. Chilling the dough helps it firm up, making it easier to shape into balls later, while allowing the flavors to meld beautifully.
Step 5: Shape Cookies
Preheat your oven to 350°F (175°C). After chilling, take the dough out of the refrigerator and roll it into 1-inch balls using your hands. Place these dough balls onto a parchment-lined baking sheet, leaving enough space in between for the cookies to spread as they bake.
Step 6: Bake
Bake the cookies in your preheated oven for 7-8 minutes. Watch them carefully; they will look slightly puffed and may have small cracks on the surface. After 3 minutes of cooling on the sheet, gently press a frozen peppermint kiss into the center of each cookie. This will create that lovely thumbprint effect.
Step 7: Cool Before Freezing
Allow the cookies to cool completely on the baking sheet. Once cooled, package them in double Ziploc bags or airtight containers for freezer storage. These Peppermint Chocolate Thumbprint Cookies are perfect for saving and enjoying later, ensuring you have a delightful treat ready whenever the craving strikes!

Peppermint Chocolate Thumbprint Cookies Variations
Feel free to get creative with these cookies and make the recipe your own with just a few easy swaps!
-
Minty Bonus: Swap vanilla extract for peppermint extract for a stronger mint flavor. Just use less to avoid overpowering sweetness.
The peppermint burst will certainly elevate your holiday treat game! -
Chocolate Variety: Use other flavored kisses like caramel or hazelnut instead of peppermint for unique taste experiences.
This little twist ensures there’s something for everyone on your cookie tray, bringing joy to all your guests. -
Candy Cane Crunch: Top the melted kisses with crushed candy canes for that extra pop of color and crunch.
The combination of textures and flavors will leave everyone wanting more! -
Nutty Delight: Add finely chopped nuts, such as pecans or walnuts, to the dough for added texture and flavor.
The nuts will create a delightful contrast to the smooth chocolate and mint for a gourmet touch. -
Dough Flavor Boost: Incorporate a teaspoon of espresso powder into the dry ingredients for a subtle coffee richness to complement the chocolate.
This deepens the flavors of your cookies and makes them even more irresistible. -
Sugar Swap: Use coconut sugar instead of regular granulated sugar for a more natural sweetness with a hint of caramel flavor.
This alternative can give your cookies a delightful twist while still keeping the holiday spirit alive. -
Heating Options: Add a pinch of cayenne pepper or chili powder for a spicy kick that contrasts beautifully with the sweetness.
It’s the perfect way to surprise your taste buds and make these cookies truly memorable! -
Flour Alternatives: Try gluten-free all-purpose flour as a substitute for a gluten-free version, ensuring everyone can enjoy these tasty treats.
This way, you can share the joy of baking without any dietary restrictions holding you back.
By mixing and matching any of these variations, you’ll create a uniquely delicious experience each time you bake your Peppermint Chocolate Thumbprint Cookies. Happy baking!
How to Store and Freeze Peppermint Chocolate Thumbprint Cookies
Fridge: Store cookies in an airtight container for up to 3 days to maintain freshness and prevent them from drying out.
Freezer: Pack cooled cookies in double Ziploc bags or airtight containers for up to 6 weeks. Thaw them on a tray uncovered for optimal texture when ready to enjoy.
Reheating: If you prefer warm cookies, microwave for 10-15 seconds. Enjoy the soft, rich chocolate flavor of the Peppermint Chocolate Thumbprint Cookies fresh from the freezer!
Room Temperature: If serving right after baking, allow cookies to cool completely before transferring to a serving platter, maintaining their festive appearance and deliciousness.
Expert Tips for Peppermint Chocolate Thumbprint Cookies
Right Temperature Matters: Ensure your butter is softened, not melted, for the perfect cookie dough texture that leads to rich Peppermint Chocolate Thumbprint Cookies.
Freezing Kisses: Make sure the peppermint kisses are thoroughly frozen for at least 2 hours to prevent them from melting completely during baking.
Dough Chilling: Don’t rush the chilling process; refrigerating the dough for at least 3 hours is essential for achieving the right consistency and flavor meld.
Mixing Method: Avoid overmixing the dough once you add the dry ingredients; this helps retain the soft, rich texture that makes these cookies irresistible.
Baking Time Test: Always test your first batch for baking time; the cookies should look slightly puffed and have small cracks on the surface before removing from the oven.
Flavor Variations: Feel free to experiment with different extracts or toppings, but remember to use peppermint extract thoughtfully to maintain flavor balance in your Peppermint Chocolate Thumbprint Cookies.
What to Serve with Easy Peppermint Chocolate Thumbprint Cookies
Imagine a sweet holiday gathering filled with laughter and warmth, where these delightful cookies take center stage.
-
Creamy Hot Chocolate: This rich beverage provides a comforting contrast to the soft cookies, enhancing the chocolate flavor beautifully.
-
Peppermint Bark: Layered with chocolate and peppermint, this simple treat amplifies the festive spirit while offering a delightful crunch.
-
Vanilla Ice Cream: A scoop alongside the cookies creates a luscious pairing, adding a creamy texture that perfectly complements the chocolate.
-
Fresh Berries: Strawberries or raspberries provide a pop of freshness and acidity, balancing the sweetness of the cookies beautifully for a refreshing bite.
-
Coffee or Espresso: A warm cup of coffee or a shot of espresso intensifies the chocolate experience, giving you that cozy café vibe at home.
-
Caramel Sauce: Drizzling a little caramel over the cookies adds a sweet, buttery touch that enhances their richness and offers an inviting contrast.
-
Eggnog: Creamy, spiced eggnog is the ultimate holiday drink; its richness pairs wonderfully with the festive flavors of the cookies.
-
Crushed Candy Canes: For a fun, crunchy twist, sprinkle some on top of the cookies or serve them on the side for guests to sprinkle as they wish.
-
Milk: The classic pairing! A glass of cold milk works wonders to wash down the cookies and brings out their rich chocolate flavor.
Make Ahead Options
These Peppermint Chocolate Thumbprint Cookies are ideal for busy home cooks looking to save time during the hectic holiday season! You can prepare the dough up to 24 hours in advance, storing it in the refrigerator to enhance the flavors. Alternatively, you can shape the cookie dough into balls and freeze them for up to 3 months, making it incredibly convenient for last-minute baking. Just make sure to freeze the dough on a parchment-lined baking sheet before transferring to a bag. When you’re ready to bake, no need to thaw—just place them on a baking sheet and add a few extra minutes to the baking time for the best results. This way, you’ll have these delightful Peppermint Chocolate Thumbprint Cookies ready to impress at a moment’s notice!
Peppermint Chocolate Thumbprint Cookies Recipe FAQs
How do I select the best ingredients for these cookies?
Absolutely! For the best cookies, choose high-quality unsalted butter like Land O’Lakes to ensure a rich flavor and tender texture. When selecting egg yolks, look for fresh eggs with bright yellow yolks for optimal richness. If possible, use pure vanilla extract for depth in flavor—avoid imitation extracts as they can alter the taste.
How should I store these cookies after baking?
You can easily store your Peppermint Chocolate Thumbprint Cookies in an airtight container at room temperature for up to 3 days. This will keep them fresh and delicious. If you want to keep them longer, I recommend refrigerating them in a sealed container for even better texture and moisture retention.
Can I freeze these cookies?
Yes! To freeze your Peppermint Chocolate Thumbprint Cookies, allow them to cool completely after baking. Then, pack them in double Ziploc bags or airtight containers. They can be frozen for up to 6 weeks. When you’re ready to enjoy them, simply thaw them on a tray uncovered for the best texture.
What should I do if my dough is too sticky?
If you find your cookie dough too sticky, don’t worry! It’s likely because of warmer butter or not enough flour. Simply add a little more flour, about 1 to 2 tablespoons at a time, mixing until you achieve the right consistency. This will help the dough roll into nice balls for baking!
Can I use other flavored kisses or extracts in this recipe?
Very much so! You can substitute the peppermint kisses with other flavored kisses like caramel or hazelnut for a unique twist. If you want a stronger mint flavor, feel free to substitute peppermint extract for vanilla. Just remember to use a smaller amount, about half the quantity, to keep the flavors balanced.
Is this recipe safe for those with allergies?
Always double-check the labels of your ingredients! These Peppermint Chocolate Thumbprint Cookies contain common allergens like butter (dairy), egg yolks, and flour (gluten). If you’re baking for someone with allergies, consider using dairy-free butter alternatives, egg substitutes like applesauce or flaxseed meal, and gluten-free flour blends to make these cookies more inclusive!
Festive Peppermint Chocolate Thumbprint Cookies Made Easy
Ingredients
Equipment
Method
- Prepare Kisses: Take the frozen peppermint kisses out of the freezer and ensure they are frozen for at least 2 hours prior to baking.
- Make Dough: Cream together unsalted butter and both sugars until light and fluffy. Add egg yolks and vanilla extract.
- Combine Dry Ingredients: Whisk together flour, cocoa, salt, baking powder, and baking soda. Gradually mix into the butter mixture.
- Chill Dough: Cover the dough and refrigerate for at least 3 hours or overnight to firm up.
- Shape Cookies: Preheat oven to 350°F (175°C) and roll dough into 1-inch balls, placing them on a baking sheet.
- Bake: Bake for 7-8 minutes, then press a frozen peppermint kiss into each cookie after 3 minutes of cooling.
- Cool Before Freezing: Allow cookies to cool completely before packaging for storage.
Leave a Reply