
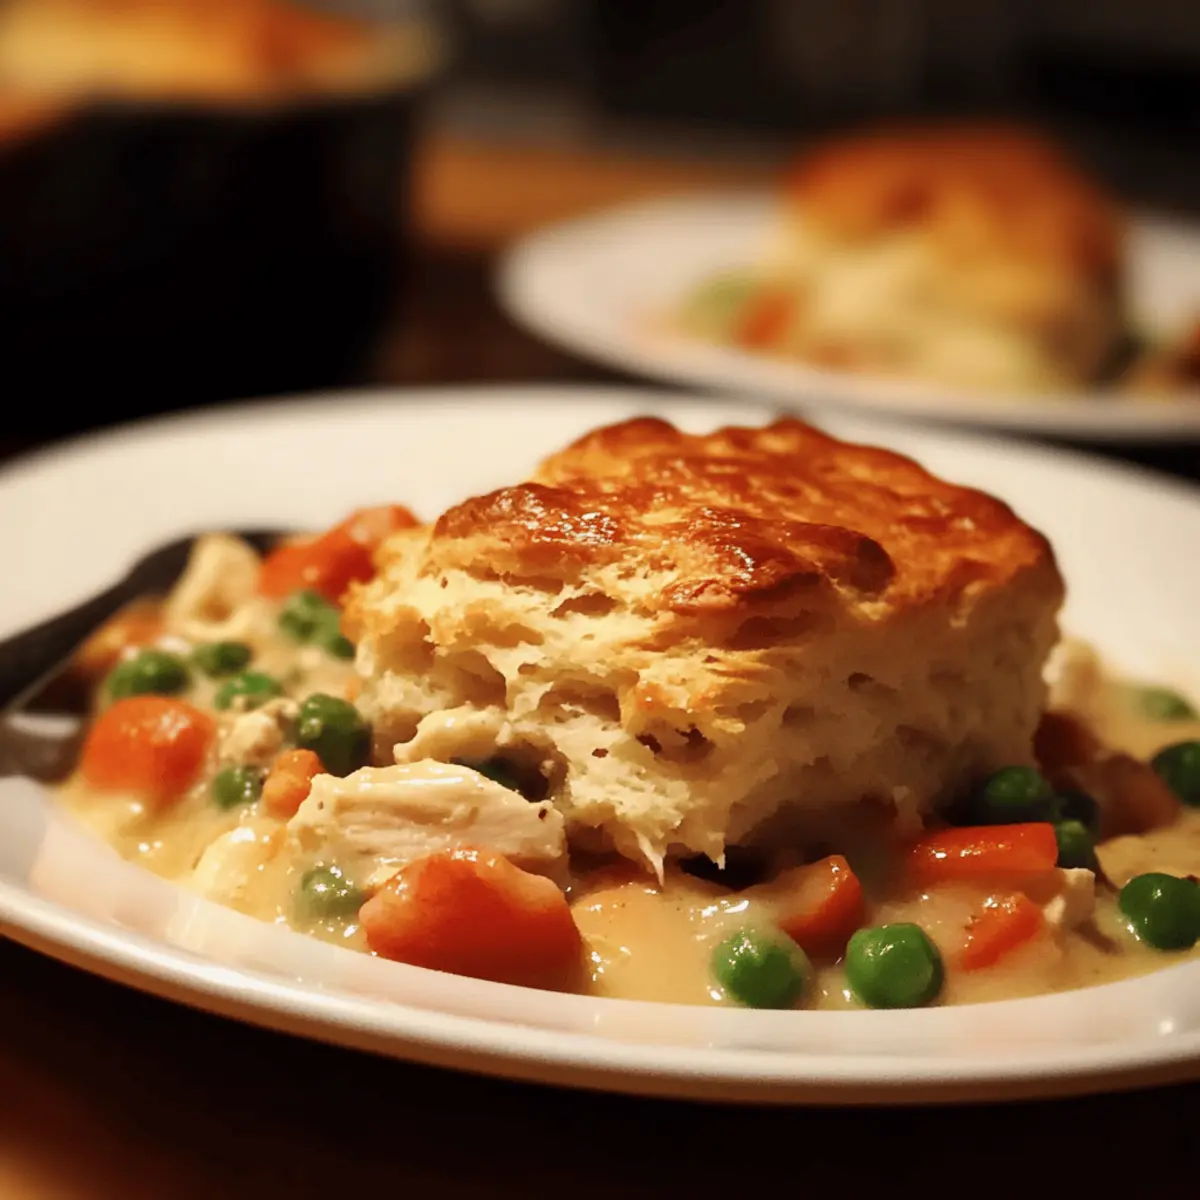
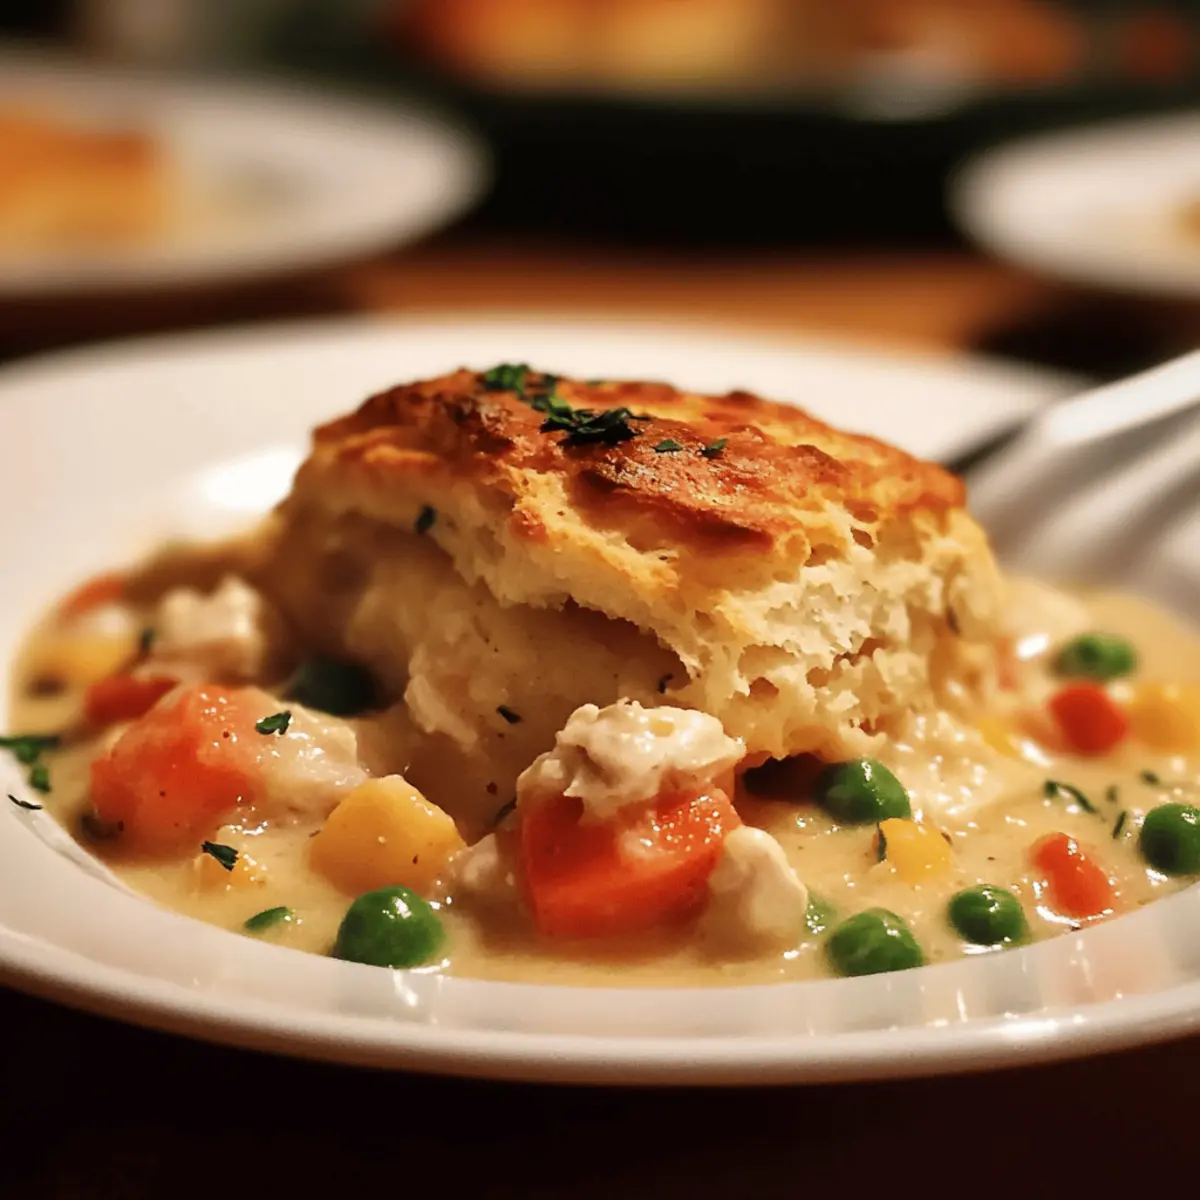
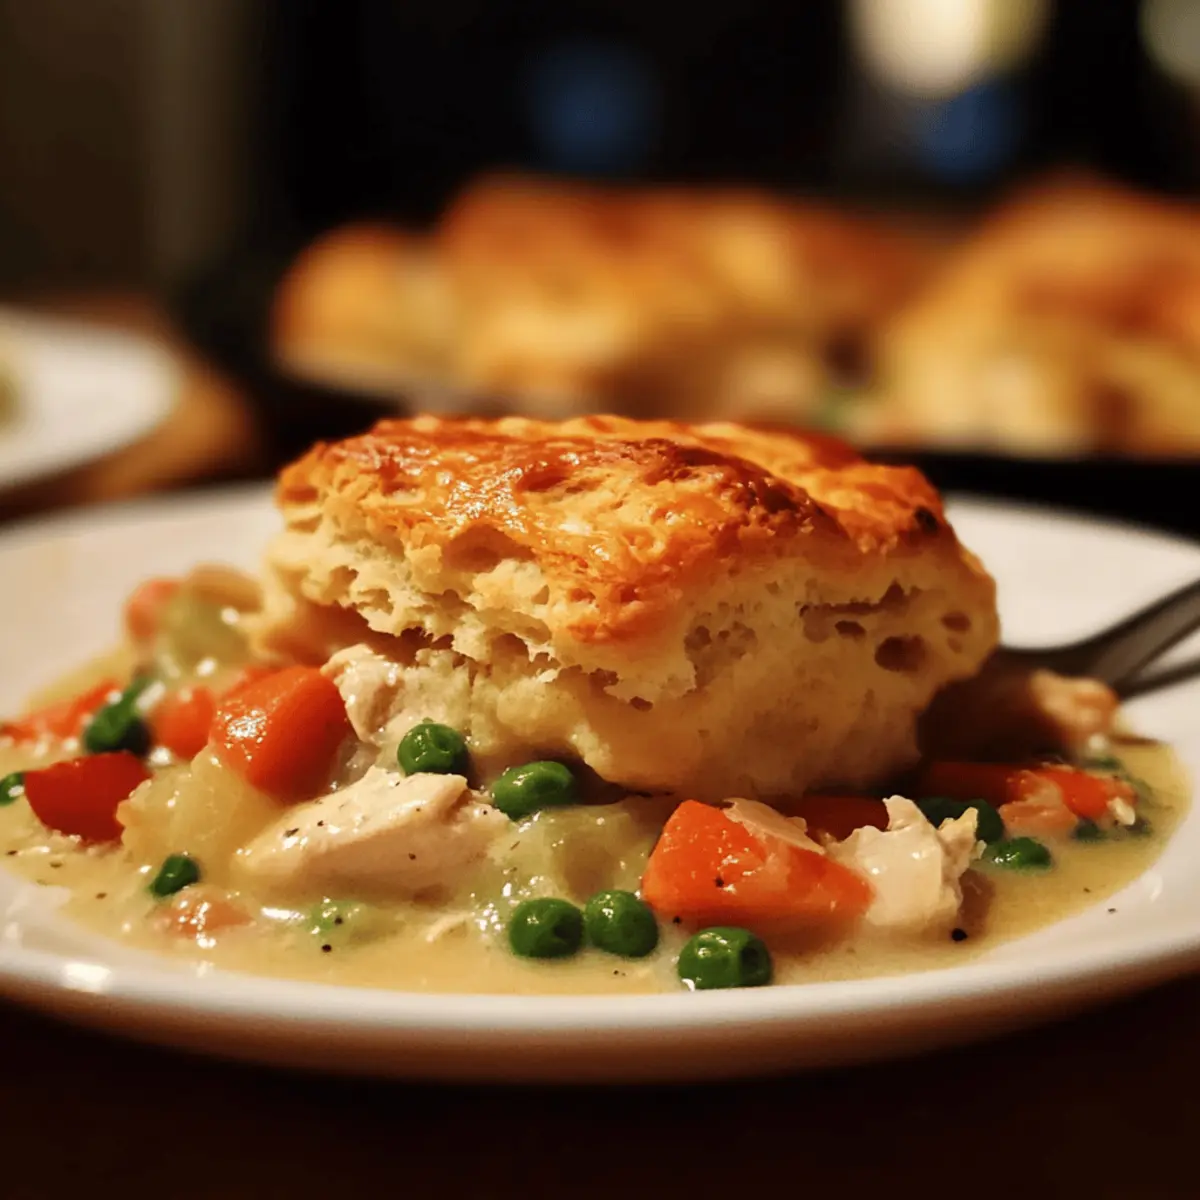
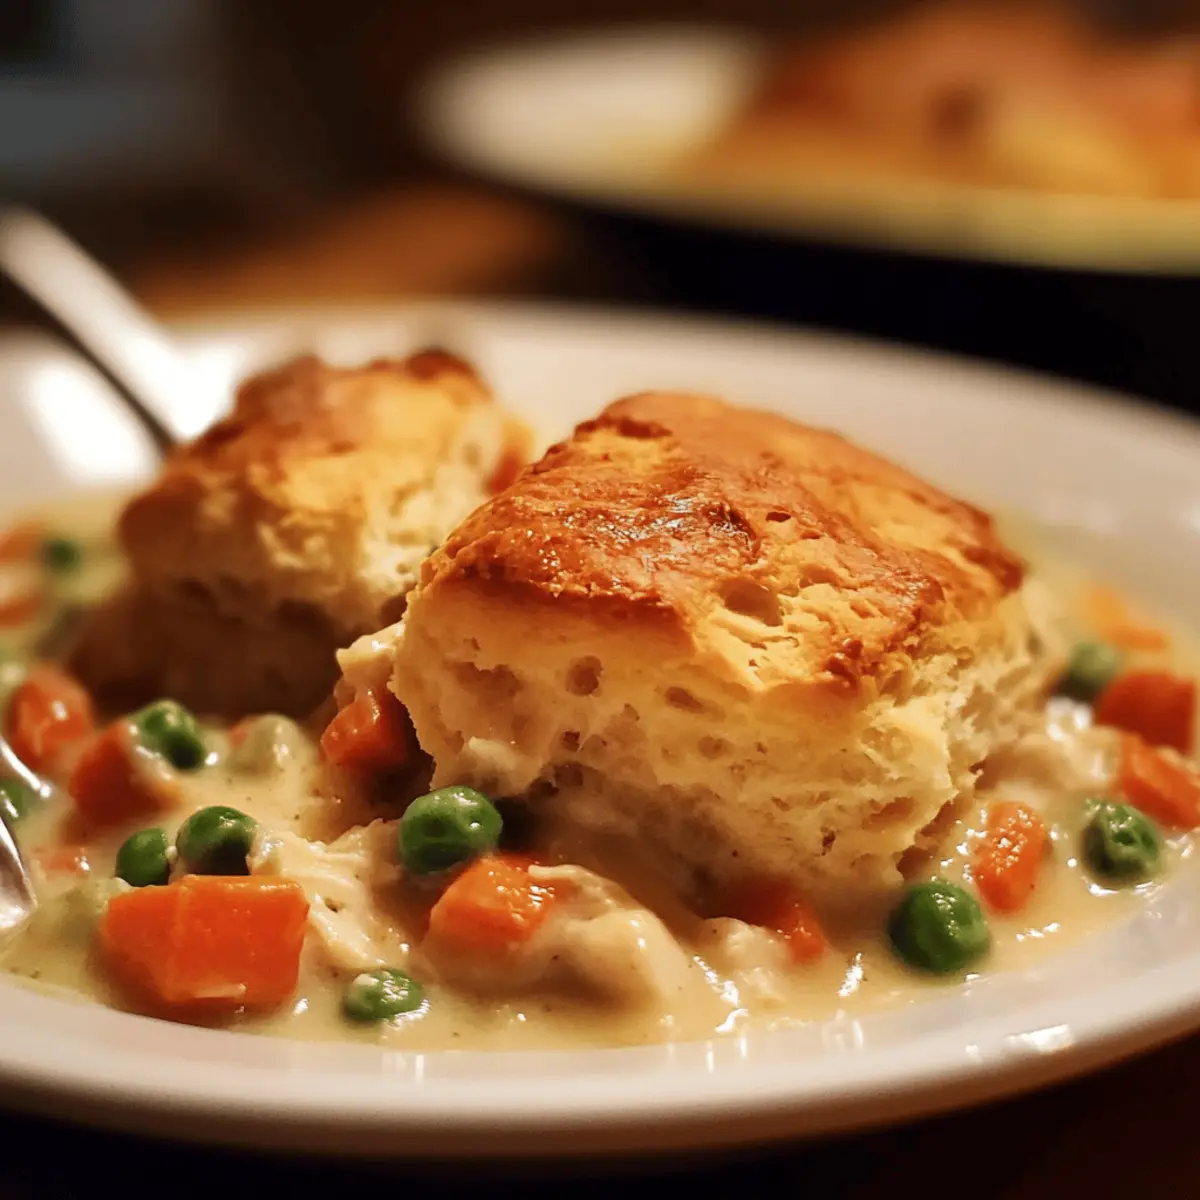
As the aroma of warm, buttery biscuits fills the kitchen, I’m transported to cozy family dinners where comfort food reigns supreme. This Red Lobster Biscuit Chicken Pot Pie is my own twist on a classic, featuring tender chicken and vibrant mixed vegetables swimming in a creamy sauce, all crowned with those irresistible Cheddar Bay Biscuits that make my heart swoon. What I love about this dish is that it marries the warmth of homemade meals with the ease of quick prep—perfect for busy weeknights yet comforting enough for family gatherings. Plus, it offers wonderful versatility with gluten-free options, making it a crowd-pleaser for everyone. Are you ready to savor this cozy, hearty delight that will make your dinner table feel like a warm hug?
Why Is This Pot Pie So Special?
Comforting Warmth: There’s nothing quite like diving into a cozy bowl of this dish, making it a go-to for chilly evenings.
Unique Biscuit Twist: The fluffy Red Lobster Cheddar Bay Biscuits on top elevate this classic like never before, adding a deliciously buttery finish.
Family-Friendly: This recipe is a hit for all ages, bringing smiles and satisfaction to the dinner table.
Quick Prep: With just a few simple steps, you’ll have a hearty meal ready in no time—perfect for busy weeknights!
Versatile Options: Easy to customize with gluten-free flour or plant-based proteins, this dish can cater to various dietary needs.
If you love comfort food, you’ll adore this Red Lobster-inspired recipe that combines nostalgia with convenience!
Red Lobster Biscuit Chicken Pot Pie Ingredients
For the Filling
- Cooked Chicken – 3 cups, diced; this is the main protein—using rotisserie chicken saves time!
- Frozen Mixed Vegetables – 1 cup; adds vibrant color and nutrition—feel free to swap in seasonal veggies!
- Cream of Chicken Soup – 1 cup; gives creaminess and flavor, but homemade is a healthier twist.
- Garlic Powder – 1 teaspoon for filling, 1 tablespoon for biscuits; enhances flavor—use fresh garlic for a bolder taste!
- Onion Powder – 1 teaspoon; contributes depth, though it’s optional depending on your taste preference.
- Salt and Pepper – to taste; essential for seasoning—adjust according to what you love!
- Chicken Broth – ½ cup; helps adjust the filling consistency; opt for low-sodium if you like.
For the Biscuit Topping
- All-Purpose Flour – 2 ½ cups; provides structure for biscuits—gluten-free flour can be used as a substitute.
- Baking Powder – 1 tablespoon; serves as a leavening agent for those fluffy biscuits.
- Salt – 1 teaspoon; enhances the biscuits’ flavor.
- Unsalted Butter – ½ cup, cold and cubed; key for flakiness—keep it cold for the best texture!
- Shredded Cheddar Cheese – 1 cup; adds delightful flavor to the biscuits—the sharper, the better!
- Milk – ¾ cup; binds the biscuit ingredients—feel free to use low-fat or dairy alternatives.
Now that we’ve gathered all the ingredients for your Red Lobster Biscuit Chicken Pot Pie, it’s time to create a dish that wraps you in warmth and nostalgia!
Step‑by‑Step Instructions for Red Lobster Biscuit Chicken Pot Pie
Step 1: Preheat the Oven
Begin by preheating your oven to 375°F (190°C). This temperature ensures the biscuits rise beautifully while the filling bubbles with warmth. Meanwhile, gather your ingredients and let your excitement build as you prepare to create this comforting Red Lobster Biscuit Chicken Pot Pie that will delight your family!
Step 2: Prepare the Filling
In a large mixing bowl, combine the diced cooked chicken, frozen mixed vegetables, cream of chicken soup, garlic powder, onion powder, salt, pepper, and chicken broth. Stir thoroughly until evenly mixed, creating a creamy filling. Once combined, transfer this comforting mixture into a casserole or pie dish, ensuring it’s spread evenly for consistent baking.
Step 3: Make the Biscuit Dough
In another bowl, whisk together the all-purpose flour, baking powder, and salt. Next, cut the cold, cubed butter into the dry ingredients until the mixture forms coarse crumbs, resembling small peas. This technique is crucial for achieving the flaky texture of the biscuits that will top your Red Lobster Biscuit Chicken Pot Pie.
Step 4: Combine with Cheese and Liquids
Add shredded cheddar cheese and garlic powder to the crumb mixture, stirring to distribute the ingredients evenly. Gradually pour in the milk, mixing just until combined. Avoid overmixing, which could lead to dense biscuits. You want a soft, slightly sticky dough that will create an inviting topping for your pot pie.
Step 5: Assemble the Pot Pie
Using a spoon, drop generous spoonfuls of the biscuit dough over the chicken filling, ensuring an even distribution across the top. Don’t worry about covering every inch; the biscuits will expand while baking. This step is vital to forming the golden, fluffy biscuit topping that complements the creamy filling of the Red Lobster Biscuit Chicken Pot Pie beautifully.
Step 6: Bake to Perfection
Bake the assembled pot pie in your preheated oven for about 30 minutes, or until the biscuit topping turns a lovely golden brown and the filling is bubbly. The delightful aroma will fill your kitchen, reminding you of comforting family meals. Keep a close eye as baking times may vary slightly based on your oven.
Step 7: Cool and Serve
Once baked, remove the Red Lobster Biscuit Chicken Pot Pie from the oven and let it cool for about 5-10 minutes before serving. This resting time allows the filling to set slightly, making it easier to serve. As you prepare to dish up, savor the comforting aroma that brings the warmth of home right to your table!
Expert Tips for Red Lobster Biscuit Chicken Pot Pie
- Thicker Filling: Ensure your filling isn’t too watery; a thicker consistency prevents soggy biscuits and enhances the overall texture of the Red Lobster Biscuit Chicken Pot Pie.
- Resting Time: Let the pot pie rest for a few minutes after baking. This helps the filling set, making it easier to cut and serve perfect slices.
- Even Biscuit Distribution: Drop spoonfuls of biscuit dough evenly over the filling. Don’t stress about full coverage; the biscuits expand while baking!
- Quality of Ingredients: Use high-quality cheese and chicken for optimal flavor. Sharp cheddar adds a rich taste to your biscuits, elevating the entire dish.
- Adapt for Dietary Needs: If needed, replace all-purpose flour with a gluten-free alternative and use dairy substitutes for a gluten-free Red Lobster Biscuit Chicken Pot Pie that everyone can enjoy!
What to Serve with Red Lobster Biscuit Chicken Pot Pie
As you savor each bite of this cozy dish, consider pairing it with delightful sides that will elevate your family meal to new heights.
-
Simple Green Salad: A light and refreshing mix of greens with a tangy vinaigrette complements the richness of the pot pie beautifully. The crunch offers a satisfying contrast to the creamy filling.
-
Garlic Bread: Golden, buttery garlic bread adds a wonderful, crispy texture that soaks up any leftover sauce. The garlic flavor ties in seamlessly with the biscuits.
-
Roasted Vegetables: Seasonal roasted veggies provide a colorful, nutritious boost that balances the meal. Their caramelized sweetness enhances the heartiness of the pot pie.
-
Mashed Potatoes: Creamy, buttery mashed potatoes serve as a comforting side that harmonizes with the flavors of the chicken pot pie while adding an extra layer of indulgence. The smooth texture beautifully complements the fluffy biscuits.
-
Coleslaw: A crunchy, vinegar-based coleslaw brings that refreshing crunch, cutting through the richness of the dish while adding a delightful zing.
-
Homemade Apple Pie: End the meal on a sweet note with a slice of warm apple pie. The warm spices and tender fruit reminisce those cozy family memories associated with pot pie.
These sides offer a delightful blend of textures and flavors, wrapping your dining experience in the essence of home-cooked comfort.
Red Lobster Biscuit Chicken Pot Pie Variations
Feel free to embrace your creativity and customize this delightful pot pie to fit your family’s tastes!
-
Vegetarian:
Replace chicken with tofu, tempeh, or chickpeas for a hearty plant-based dish. You won’t miss the meat with all the added veggies! -
Seasonal Veggies:
Swap in seasonal vegetables like butternut squash or zucchini for a fresh twist. This is a great way to use up your summer garden bounty! -
Gluten-Free:
Use gluten-free flour to make biscuits that everyone can enjoy. This helps accommodate gluten-sensitive family members without sacrificing taste. -
Extra Cheesy:
Add an extra half cup of cheese to the biscuit topping for a cheesy delight. Who can resist that wonderfully gooey cheese flavor? -
Spicy Kick:
Incorporate crushed red pepper flakes or diced jalapeños for a little heat. This variation adds a zesty surprise that jazzes up the creamy filling. -
Herb-Infused:
Mix in fresh herbs like thyme or rosemary into the biscuit dough for a fragrant twist. It adds depth and a burst of freshness in every bite! -
Creamy Mushroom:
Add sautéed mushrooms to the filling for a rich, earthy flavor. This pairs beautifully with the chicken and elevates your pot pie experience. -
Lighter Version:
Use low-fat cream of chicken soup and less butter for a lighter take on the dish. It retains its deliciousness while being a bit kinder to your waistline!
Whether you’re looking for an easy family-friendly weeknight meal or a comforting dish for entertaining, there are endless possibilities. Explore these variations to find your favorite way to enjoy this cozy, delicious recipe!
How to Store and Freeze Red Lobster Biscuit Chicken Pot Pie
Fridge: Store leftovers in an airtight container for up to 3 days. This will maintain the best flavor and texture, allowing you to enjoy your Red Lobster Biscuit Chicken Pot Pie again!
Freezer: To freeze, let the pot pie cool completely, then wrap it tightly in plastic wrap and aluminum foil. It can be frozen for up to 3 months—perfect for make-ahead meals!
Reheating: When ready to enjoy, thaw overnight in the fridge before reheating in the oven at 350°F (175°C) for about 25-30 minutes, or until heated through. This ensures the filling is warm and biscuits remain fluffy.
Make-Ahead Tips: Consider preparing the filling and biscuit dough separately ahead of time. Store in the fridge for 2 days before you’re ready to bake for a quick and comforting dinner.
Make Ahead Options
These Red Lobster Biscuit Chicken Pot Pie preparations are perfect for busy home cooks looking to save time! You can prepare the filling up to 3 days in advance by combining the cooked chicken, vegetables, cream of chicken soup, and seasonings; simply refrigerate in an airtight container. For the biscuit topping, mix the dry ingredients and cut in the cold butter one day ahead, keeping it cool in the fridge. When you’re ready to serve, just add the milk and assemble the pie, then bake it straight from the fridge for 30 minutes until bubbly and golden. This way, you’ll enjoy delicious, warm comfort food with minimal effort on busy nights!
Red Lobster Biscuit Chicken Pot Pie Recipe FAQs
How do I choose ripe vegetables for this recipe?
Absolutely! For the best results, go for vibrant and fresh vegetables. When selecting frozen mixed vegetables, look for bags that are bright in color without any ice crystals, which can indicate freezer burn. If using fresh veggies, choose firm carrots, vibrant green beans, and bell peppers without dark spots or blemishes for a flavorful and visually appealing filling.
How should I store leftover Red Lobster Biscuit Chicken Pot Pie?
After enjoying your pot pie, simply place any leftovers in an airtight container and store it in the fridge for up to 3 days. This way, you can relish the comforting flavors again! If you’d like to keep it longer, the freezer is a great option for up to 3 months. Just make sure to wrap it securely to prevent freezer burn.
Can I freeze the Red Lobster Biscuit Chicken Pot Pie before baking it?
Yes, you can absolutely freeze the assembled pot pie for a quick meal later! Once it’s assembled, cover it tightly with plastic wrap and aluminum foil. When you’re ready to bake it, thaw the pie overnight in the refrigerator, and then bake as instructed to ensure the biscuits rise perfectly.
What should I do if my filling turns out too watery?
Very good question! If you find your filling is too watery, try adding a tablespoon of cornstarch mixed with a little chicken broth or water to thicken it before adding it to your pie dish. Also, you might consider reducing the liquid next time or cooking the filling on the stove until it thickens before transferring it to the casserole dish. This will prevent soggy biscuits and give you a lovely texture.
Are there any dietary considerations for my family?
Certainly! If anyone in your family has gluten sensitivities, you can swap the all-purpose flour for a gluten-free flour blend. Additionally, you can use dairy-free alternatives for the milk and cheese to cater to those with dairy allergies, ensuring everyone can delight in this cozy dish!
Can I use different proteins in the pot pie?
Absolutely! If you want to switch things up, you can substitute the chicken with tofu, tempeh, or even chickpeas for a hearty plant-based option. Just ensure to adjust cooking times based on the protein you choose to keep everything perfectly tender and flavorful!
Cozy Up with Red Lobster Biscuit Chicken Pot Pie Tonight
Ingredients
Equipment
Method
- Preheat your oven to 375°F (190°C).
- In a large mixing bowl, combine the diced cooked chicken, frozen mixed vegetables, cream of chicken soup, garlic powder, onion powder, salt, pepper, and chicken broth. Stir thoroughly until evenly mixed.
- In another bowl, whisk together the all-purpose flour, baking powder, and salt. Cut the cold, cubed butter into the dry ingredients until the mixture forms coarse crumbs.
- Add shredded cheddar cheese and garlic powder to the crumb mixture, stirring to distribute, then gradually pour in the milk, mixing just until combined.
- Drop spoonfuls of the biscuit dough over the chicken filling, ensuring an even distribution across the top.
- Bake in your preheated oven for about 30 minutes until the biscuit topping turns golden brown and the filling is bubbly.
- Let it cool for about 5-10 minutes before serving to allow the filling to set.
Leave a Reply