
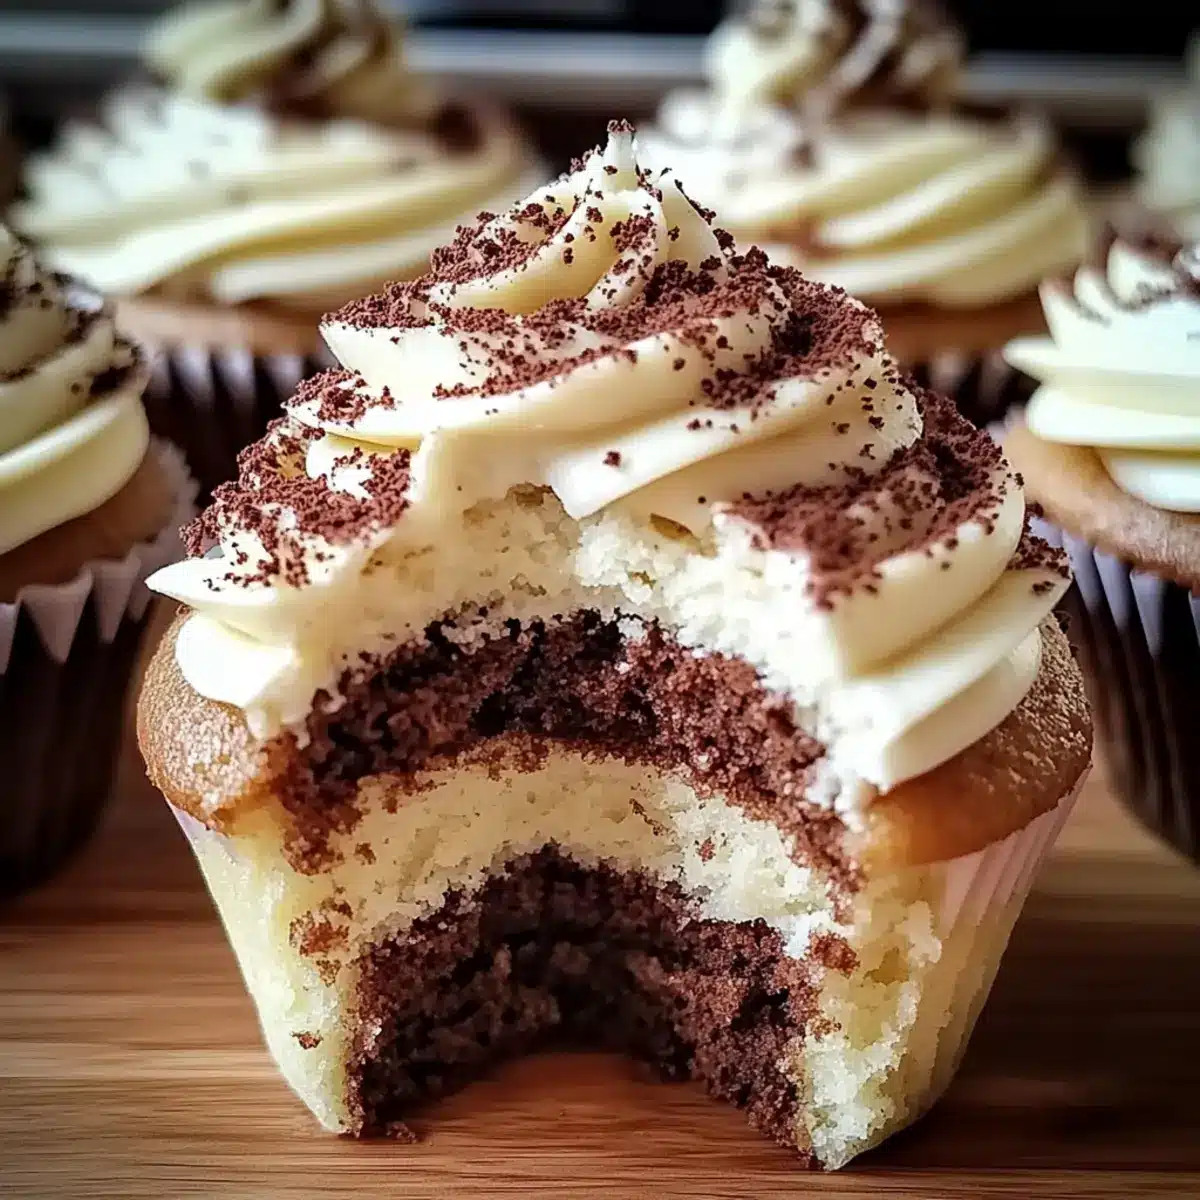
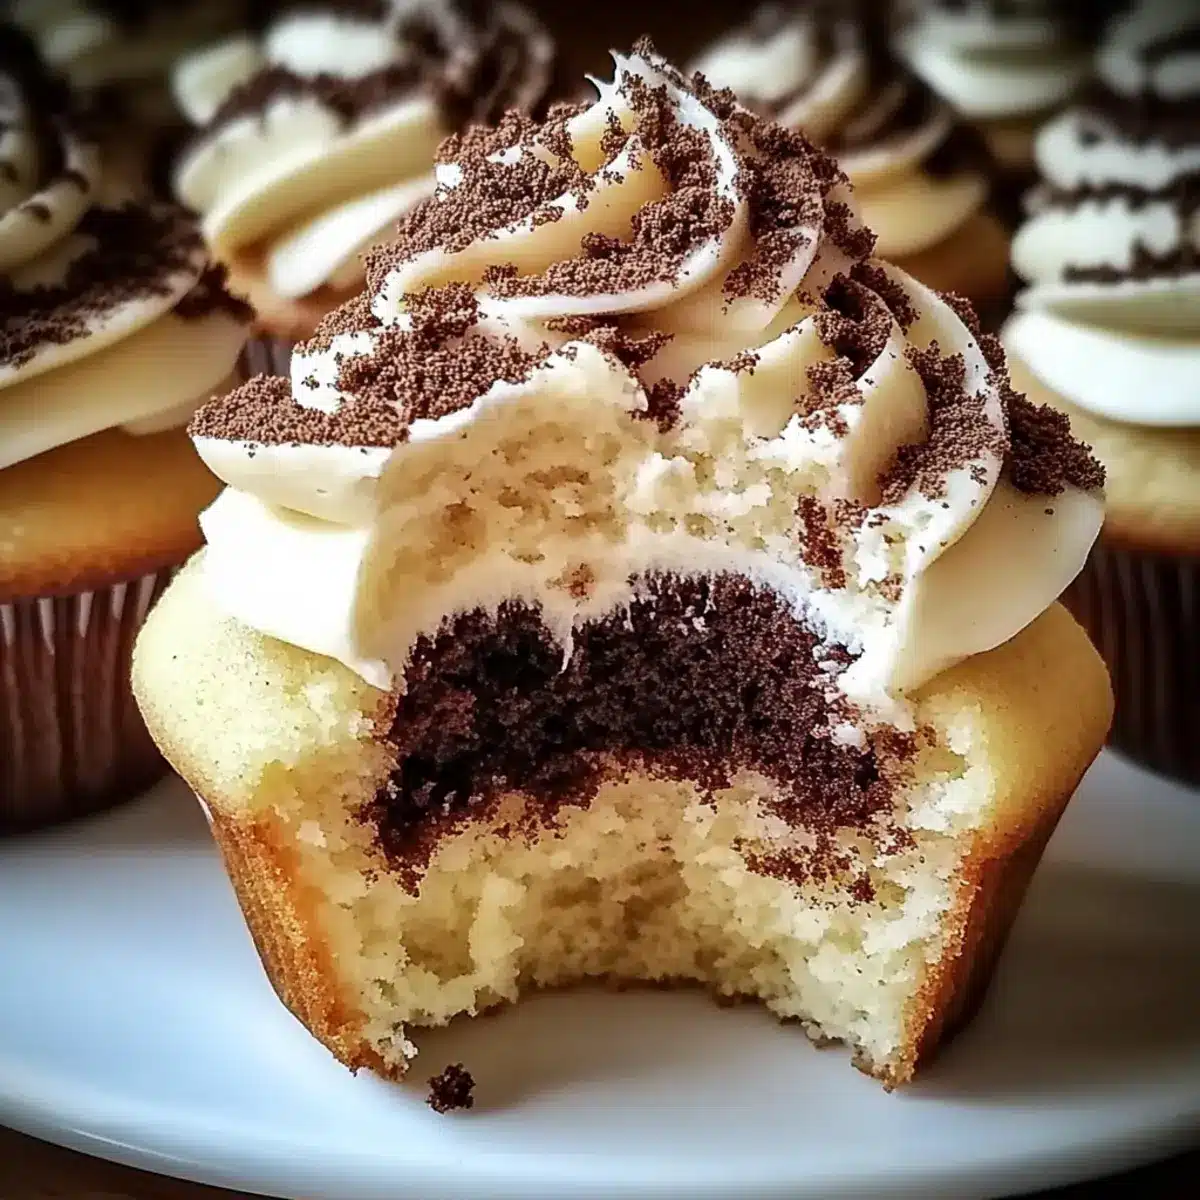
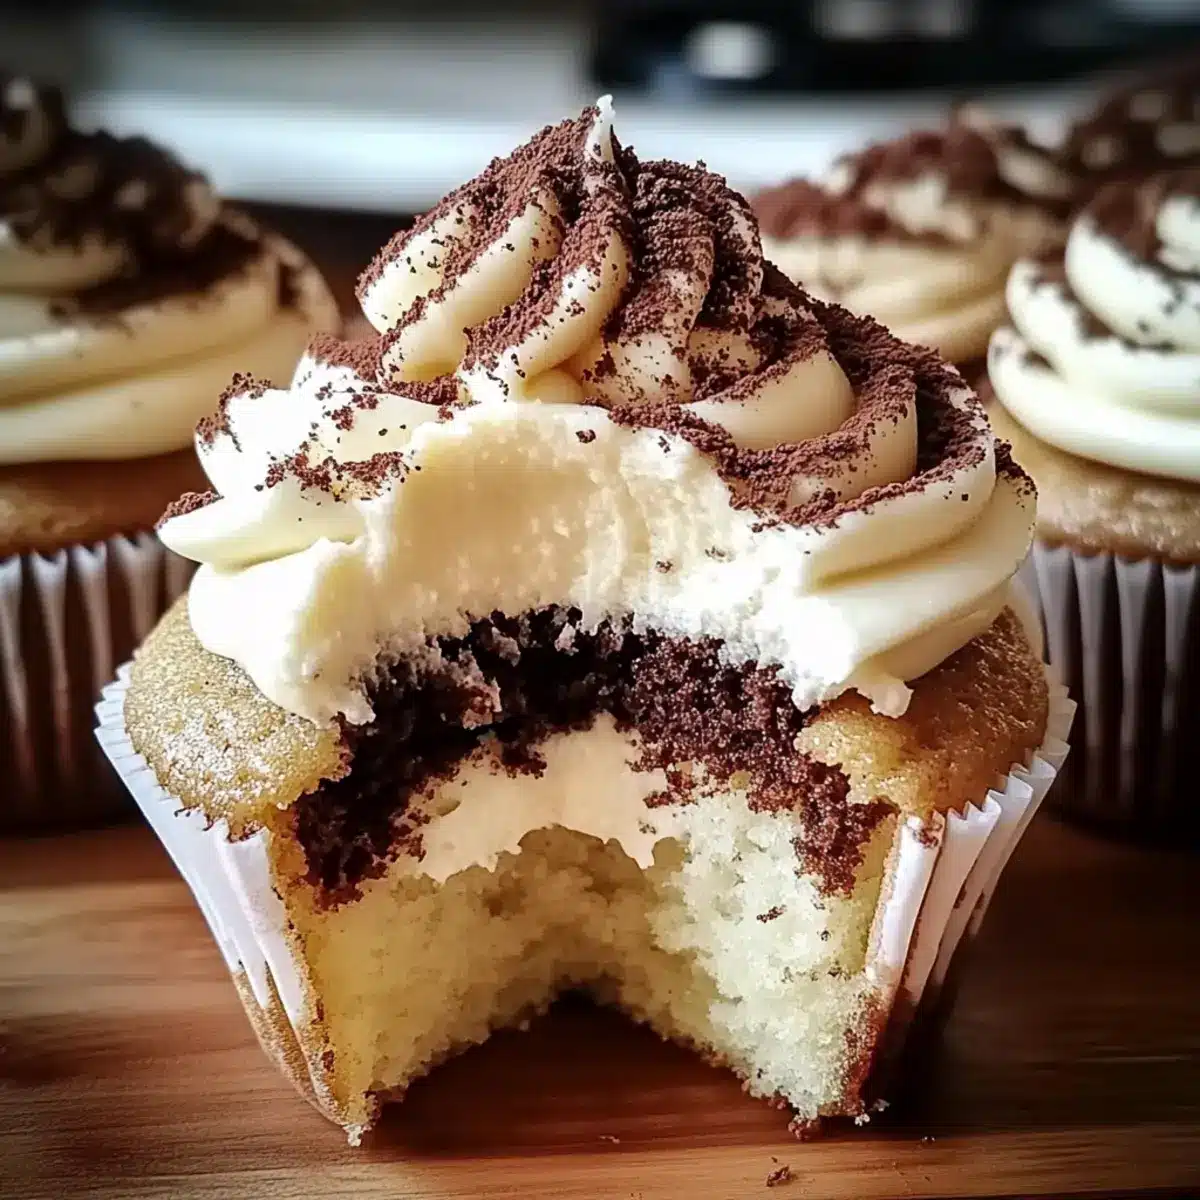
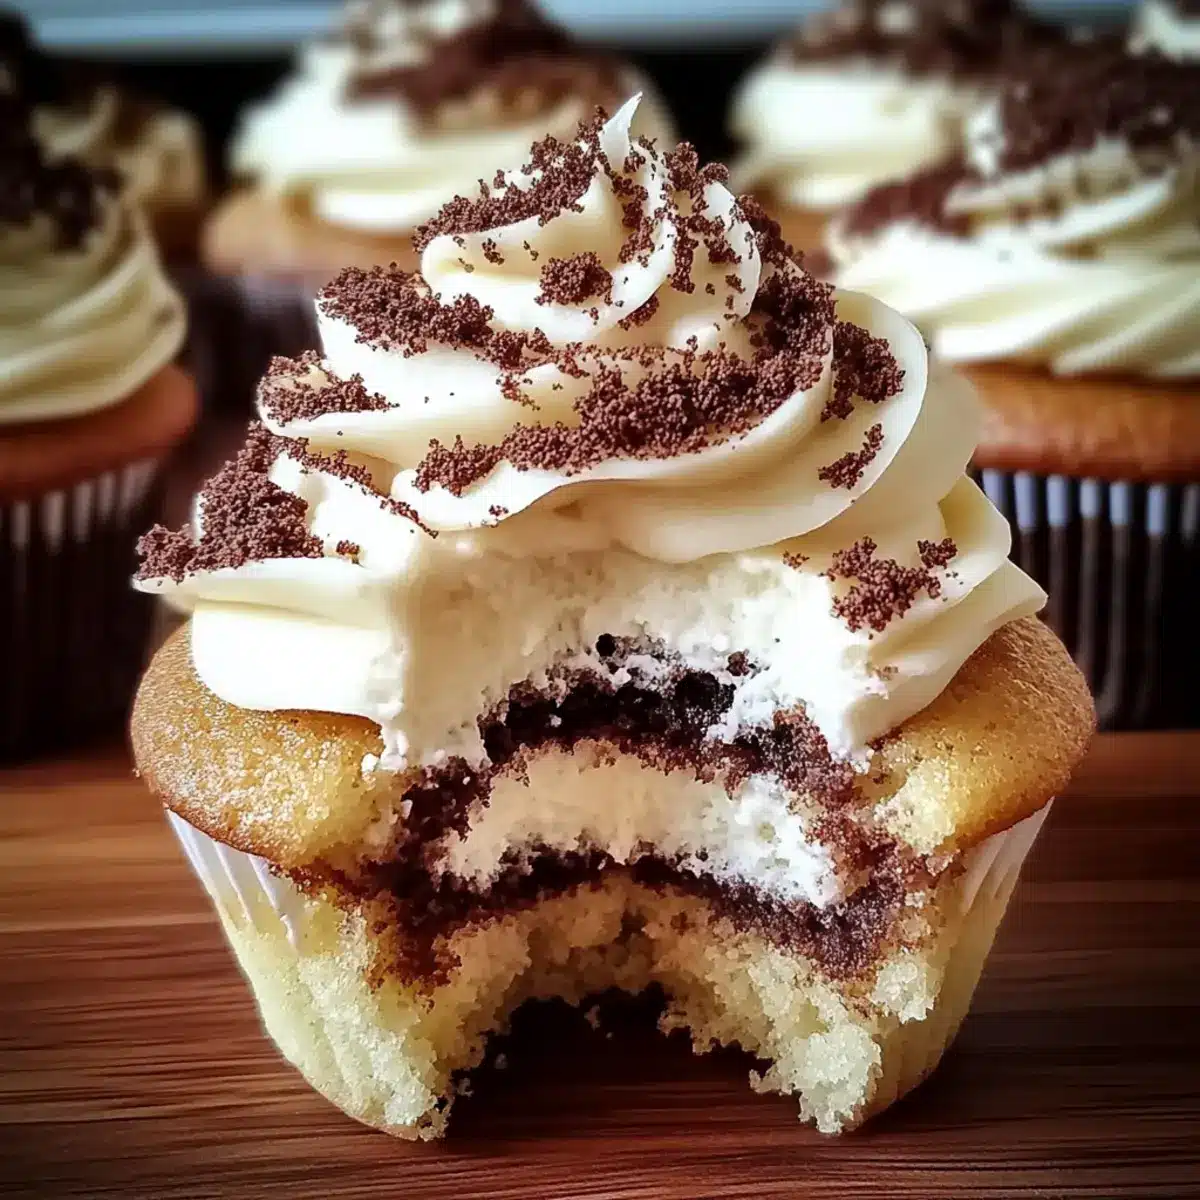
As the aroma of coffee wafts through my kitchen, a delightful sense of nostalgia washes over me. Tiramisu, a beloved Italian classic, has always been a favorite, but my latest obsession is transforming this iconic dessert into Tiramisu Cupcakes. These little gems combine tender, coffee-soaked sponge cake with the luxuriously creamy mascarpone frosting we all adore. The best part? They’re incredibly customizable, perfect for catering to specific dietary needs with gluten-free and dairy-free options. Whether you’re hosting a party or simply craving a sweet treat at home, these cupcakes promise to impress without overwhelming you in the kitchen. Curious about how to elevate your dessert game with a fun twist on the traditional? Let’s dive into this scrumptious recipe!
Why Are Tiramisu Cupcakes a Must-Try?
Decadent Flavor: These cupcakes beautifully blend rich coffee and creamy mascarpone, creating an irresistible taste sensation that’s hard to resist.
Customizable Options: With gluten-free and dairy-free alternatives, everyone can enjoy their piece of tiramisu heaven! Consider adding your favorite liqueur or fruits for a personal touch.
Perfect for Any Occasion: Whether it’s a birthday party or a casual get-together, these Tiramisu Cupcakes will be the star of the show.
Quick and Easy: With a straightforward recipe, you can whip up these delightful treats in no time—ideal for those busy weeknights!
Nostalgia in Every Bite: Transport yourself and your guests to Italy with each cupcake, delivering the authentic flavors of traditional tiramisu in a fun, individual format.
If you’re looking for more tantalizing desserts, check out these Apple Cider Cupcakes and Tiramisu Sandwich Cookies for additional inspiration!
Tiramisu Cupcakes Ingredients
For the Cupcakes
• Strong Brewed Coffee – Adds depth of flavor; crucial for the classic tiramisu taste.
• Coffee Liqueur – Enhances the coffee flavor and adds a slight kick to the cupcakes.
• All-Purpose Flour – Provides structure and texture to the cupcakes; gluten-free flour is a great substitute.
• Baking Powder – Leavening agent for a light and airy lift; ensure it’s fresh for best results.
• Salt – Balances sweetness and enhances overall flavor.
• Unsalted Butter – Adds moisture and richness; use vegan butter for a dairy-free option.
• Granulated Sugar – Sweetens the batter, crucial for moisture retention.
• Large Eggs – Binds ingredients and provides structure, contributing to fluffiness.
• Vanilla Extract – Adds aromatic sweetness to the batter.
• Whole Milk – Keeps the batter moist and flavorful; can be substituted with almond milk for dairy-free versions.
For the Frosting
• Mascarpone Cheese – Essential for the creamy frosting; provides a rich texture; coconut cream serves as a dairy-free alternative.
• Heavy Cream – Creates a stable and fluffy frosting texture.
• Powdered Sugar – Sweetens the frosting to achieve the right consistency.
• Cocoa Powder – Dusting for topping; gives traditional tiramisu flavor.
Feel free to mix and match these ingredients to create the perfect Tiramisu Cupcakes that cater to your tastes and dietary needs!
Step‑by‑Step Instructions for Tiramisu Cupcakes
Step 1: Preheat and Prepare
Begin by preheating your oven to 350°F (175°C). Line a standard cupcake pan with cupcake liners, ensuring they are snug against the pan. This will help the Tiramisu Cupcakes bake evenly and prevent sticking. Set the lined pan aside as you prepare your batter.
Step 2: Coffee Mixture
In a small bowl, combine strong brewed coffee and coffee liqueur, stirring gently. Allow this mixture to cool down while you work on the rest of the batter. The cooled coffee blend will infuse your cupcakes with that essential tiramisu flavor, so don’t rush this step!
Step 3: Dry Ingredients
In a mixing bowl, whisk together all-purpose flour, baking powder, and salt. This step not only combines the dry ingredients but also aerates them, helping your Tiramisu Cupcakes achieve that light and fluffy texture. Set the bowl aside for later when you combine your mixtures.
Step 4: Cream Butter and Sugar
In a large mixing bowl, cream together unsalted butter and granulated sugar using an electric mixer on medium speed until the mixture is light and fluffy, about 2-3 minutes. This process is crucial, as it incorporates air for your cupcakes’ rising. Next, add the eggs one at a time, followed by the vanilla extract, mixing well after each addition.
Step 5: Combine Ingredients
Gradually incorporate the dry ingredients into the wet mixture, alternating with whole milk. Mix just until combined; be careful not to overmix, as this can lead to dense cupcakes. The batter should be smooth and slightly thick, embodying the essence of your Tiramisu Cupcakes.
Step 6: Bake the Cupcakes
Fill each cupcake liner two-thirds full with batter and place the pan in your preheated oven. Bake for 18-20 minutes or until a toothpick inserted in the center comes out clean. The tops should be golden and slightly spring back when touched, indicating they are perfectly baked.
Step 7: Cool the Cupcakes
Remove the pan from the oven and allow the cupcakes to cool in the pan for about 5 minutes. Then, carefully transfer them to a wire rack to cool completely. Cooling is essential to ensure your frosting doesn’t melt when you apply it later.
Step 8: Prepare the Frosting
In a separate bowl, beat together mascarpone cheese and heavy cream until soft peaks form. Gradually mix in powdered sugar and a touch of coffee liqueur, continuing to beat until stiff peaks develop. This velvety mascarpone frosting will be the crowning glory on your Tiramisu Cupcakes.
Step 9: Soak and Frost
Once the cupcakes are completely cool, briefly soak the tops of each cupcake in the coffee mixture you prepared earlier, allowing the coffee to absorb into the sponge. Finally, generously frost each cupcake with the mascarpone mixture and finish with a light dusting of cocoa powder for that classic Tiramisu touch.
Tiramisu Cupcakes Variations & Substitutions
Get ready to unleash your creativity in the kitchen! Here are some delightful ideas to personalize your Tiramisu Cupcakes, inviting new flavors and textures to your baking adventure.
-
Gluten-Free: Swap all-purpose flour with a gluten-free flour blend to accommodate gluten sensitivities. Your cupcakes will still be soft and enticing!
-
Dairy-Free: Use coconut cream instead of mascarpone cheese and vegan butter for a completely dairy-free treat. The rich flavor remains without the dairy!
-
Sweetness Variations: Experiment with different sugars, like brown sugar or maple syrup, to add unique undertones to the cupcakes. Each sweetener brings its own personality!
-
Flavor Infusion: Add flavored liqueurs like Frangelico or amaretto for a nutty twist, or even a hint of rum for a tropical vibe. Your cupcakes will dance with flavor!
-
Chocolate Delight: Substitute half of the flour with cocoa powder for a chocolate version of these classic cupcakes. Perfect for chocolate lovers!
-
Festive Touch: Top the cupcakes with fresh berries or a drizzle of caramel sauce for an elegant presentation that tastes as good as it looks.
-
Espresso Boost: For an extra coffee kick, mix in espresso powder to the batter or frosting. The intense flavor will delight coffee enthusiasts!
-
Nutty Texture: Incorporate finely chopped nuts, like hazelnuts or almonds, into the batter or as a topping for a delightful crunch that complements the creamy frosting.
If you’re tempted by cloud-like sweetness, don’t forget to explore the enchantingly soft Apple Cider Cupcakes or the mesmerizing flavors of Tiramisu Sandwich Cookies. Each variation brings a unique twist while keeping the spirit of traditional desserts alive!
Make Ahead Options
These Tiramisu Cupcakes are perfect for meal prep enthusiasts looking to save time in the kitchen! You can bake the cupcakes up to 24 hours in advance and store them in an airtight container at room temperature, which keeps them wonderfully moist. The mascarpone frosting can be prepared up to 3 days ahead; simply refrigerate it in an airtight container. When you’re ready to serve, just frost the cupcakes after briefly soaking their tops in the coffee mixture to enhance flavor. By prepping ahead, you’ll enjoy stress-free dessert-making, ensuring that these delightful Tiramisu Cupcakes are just as delicious on serving day!
Storage Tips for Tiramisu Cupcakes
-
Room Temperature: Tiramisu Cupcakes can be kept at room temperature for up to 1 day if consumed quickly. Store them in a cool, dry place, covered lightly to prevent drying out.
-
Fridge: Store in an airtight container in the refrigerator for up to 5 days. This helps maintain the moisture and flavor of the cupcakes, preserving their deliciousness.
-
Freezer: For long-term storage, freeze the Tiramisu Cupcakes tightly wrapped in plastic wrap and placed in a freezer-friendly container for up to 3 months. Thaw before serving to enjoy their perfect texture.
-
Reheating: If enjoying chilled cupcakes, you can allow them to sit at room temperature for about 30 minutes or give them a quick 10-15 second blast in the microwave for a warm treat.
Expert Tips for Tiramisu Cupcakes
-
Room Temperature Ingredients: Ensure all ingredients are at room temperature before mixing; this helps create a smoother, well-blended batter for your Tiramisu Cupcakes.
-
Light Mixing: Be mindful not to overmix your batter. Gently fold in dry ingredients to maintain a light and airy texture, essential for delicious cupcakes.
-
Cooling Time: Allow cupcakes to cool completely before frosting; warm cupcakes can cause the mascarpone frosting to melt and lose its shape.
-
Flavor Infusion: For a deeper coffee flavor, let the coffee and coffee liqueur mixture cool fully so it effectively soaks into the tops of the cupcakes.
-
Custom Toppings: Experiment with toppings like fresh berries or flavored liqueurs to personalize your Tiramisu Cupcakes; these variations can elevate your dessert experience!
What to Serve with Tiramisu Cupcakes?
Unleash the ultimate dessert experience by pairing these luscious cupcakes with delightful companions that elevate each bite.
-
Rich Espresso: A small cup of bold, freshly brewed espresso enhances the coffee flavors, creating a match made in dessert heaven. It’s like taking your taste buds on a delightful café adventure!
-
Vanilla Ice Cream: Creamy vanilla ice cream adds a refreshing contrast; its coolness balances the cupcakes’ sweetness, creating a perfect harmony of flavors.
-
Chocolate Ganache: Drizzling warm chocolate ganache over the cupcakes introduces a decadent, rich layer that complements the coffee beautifully and takes indulgence up a notch.
-
Fresh Berries: Sweet, plump strawberries or raspberries provide a tart and juicy burst, refreshing your palate and adding a pop of color to your dessert table.
-
Whipped Cream: A dollop of lightly sweetened whipped cream topped with cocoa powder creates a lovely creamy texture, enhancing the overall experience of each bite.
-
Mint Tea: For a light and refreshing beverage, serve with mint tea. Its herbal notes complement the coffee, creating a lovely balance without overwhelming the palate.
-
Chocolate-Covered Almonds: These crunchy treats add a delightful contrast in texture and deliver an extra punch of chocolate, perfect for a snack alongside your cupcakes.
-
Coconut Macarons: These chewy confections pair wonderfully with tiramisu, echoing the luscious flavors while adding a flavorful twist that feels a bit tropical.
-
Hazelnut Liqueur: For adults, serving a chilled glass of hazelnut liqueur elevates the coffee notes found in the cupcakes, creating rich and indulgent dessert moments.
-
Cheese Platter: A selection of creamy cheeses can contrast with the sweetness of your cupcakes. Soft cheeses like brie or mascarpone highlight the flavors without overshadowing the dessert.
Tiramisu Cupcakes Recipe FAQs
What type of coffee should I use for Tiramisu Cupcakes?
Absolutely! Strong brewed coffee is essential for that classic tiramisu flavor. I recommend using espresso if you’re looking for an even richer taste. The idea is to have a deep coffee flavor that truly mimics the traditional dessert.
How should I store my Tiramisu Cupcakes?
Store your Tiramisu Cupcakes in an airtight container in the refrigerator for up to 5 days. Refrigeration helps maintain their moisture and flavor, making each bite just as delightful as the first!
Can I freeze Tiramisu Cupcakes?
Very! To freeze, wrap each cupcake tightly in plastic wrap and place them in a freezer-friendly container. They can be frozen for up to 3 months. When you’re ready to enjoy them, thaw them in the refrigerator overnight for the best texture.
What if my cupcakes turn out dense?
If you find your Tiramisu Cupcakes are dense, it’s likely from overmixing the batter. Be sure to gently fold in the dry ingredients until just combined. Also, ensure that your baking powder is fresh, as expired leavening agents won’t provide the necessary lift!
Can I make these cupcakes gluten-free or dairy-free?
Absolutely! For gluten-free Tiramisu Cupcakes, substitute the all-purpose flour with a gluten-free flour blend. Additionally, you can replace the mascarpone cheese with coconut cream for a dairy-free option. Feel free to use vegan butter and almond milk to keep everything in line with dietary preferences!
Irresistible Tiramisu Cupcakes with Custom Flavor Twists
Ingredients
Equipment
Method
- Preheat your oven to 350°F (175°C) and line a standard cupcake pan with cupcake liners.
- Combine strong brewed coffee and coffee liqueur in a small bowl and let it cool.
- Whisk together all-purpose flour, baking powder, and salt in a mixing bowl.
- Cream together unsalted butter and granulated sugar in a large mixing bowl until light and fluffy. Add eggs and vanilla extract, mixing well after each addition.
- Gradually incorporate the dry ingredients into the wet mixture, alternating with whole milk until just combined.
- Fill each cupcake liner two-thirds full with batter and bake for 18-20 minutes.
- Cool the cupcakes in the pan for 5 minutes, then transfer to a wire rack to cool completely.
- Beat together mascarpone cheese and heavy cream until soft peaks form, then mix in powdered sugar and coffee liqueur.
- Soak the tops of the cooled cupcakes in the coffee mixture, then frost with the mascarpone mixture and dust with cocoa powder.
Leave a Reply