
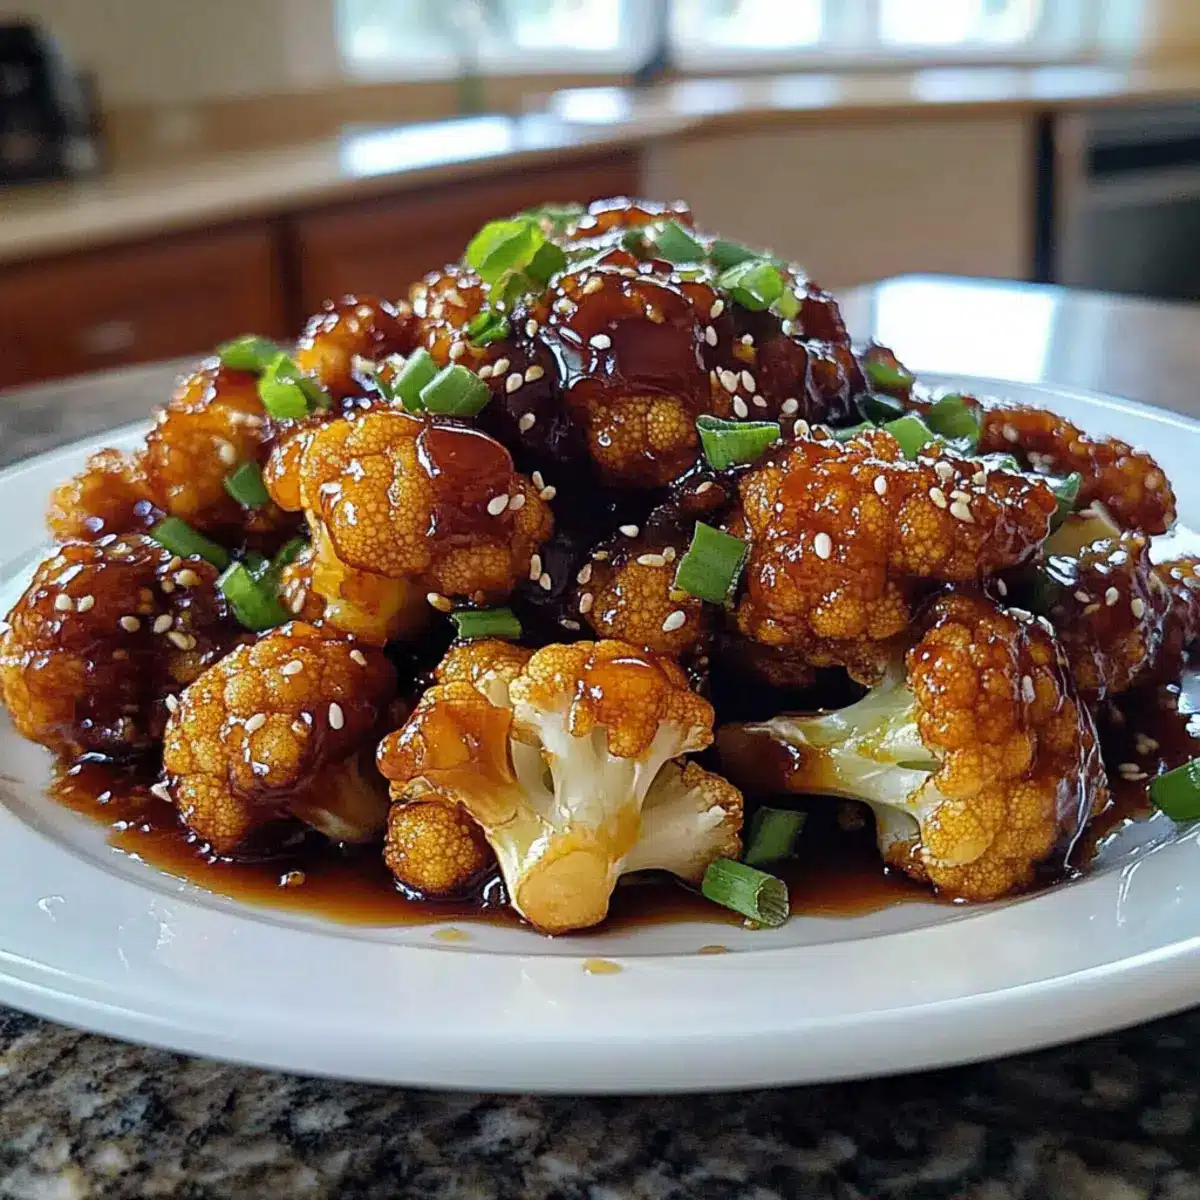
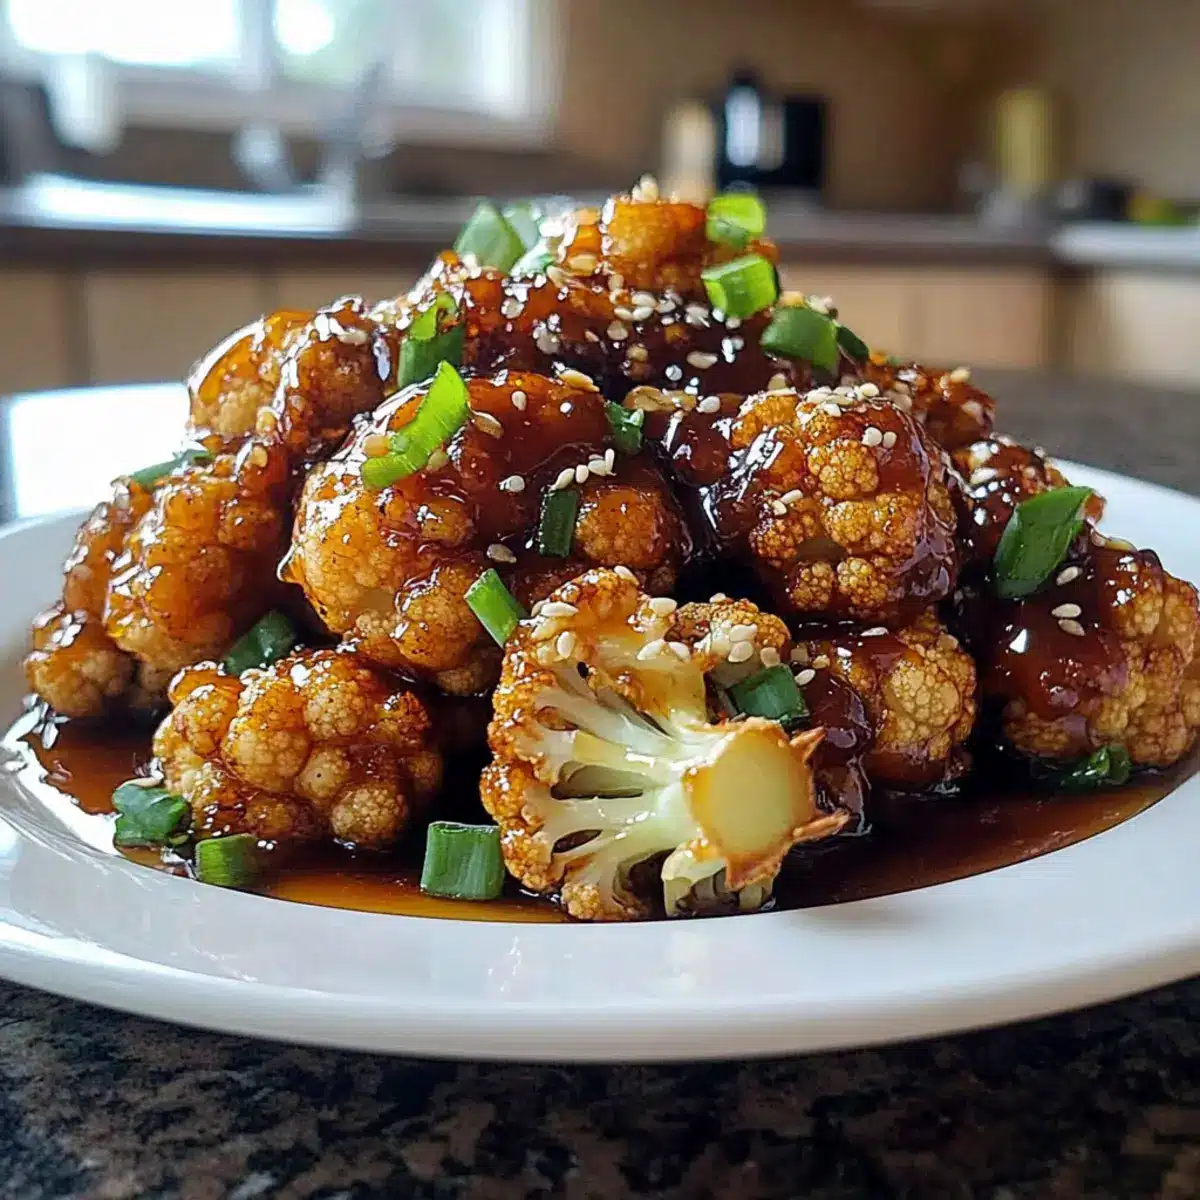
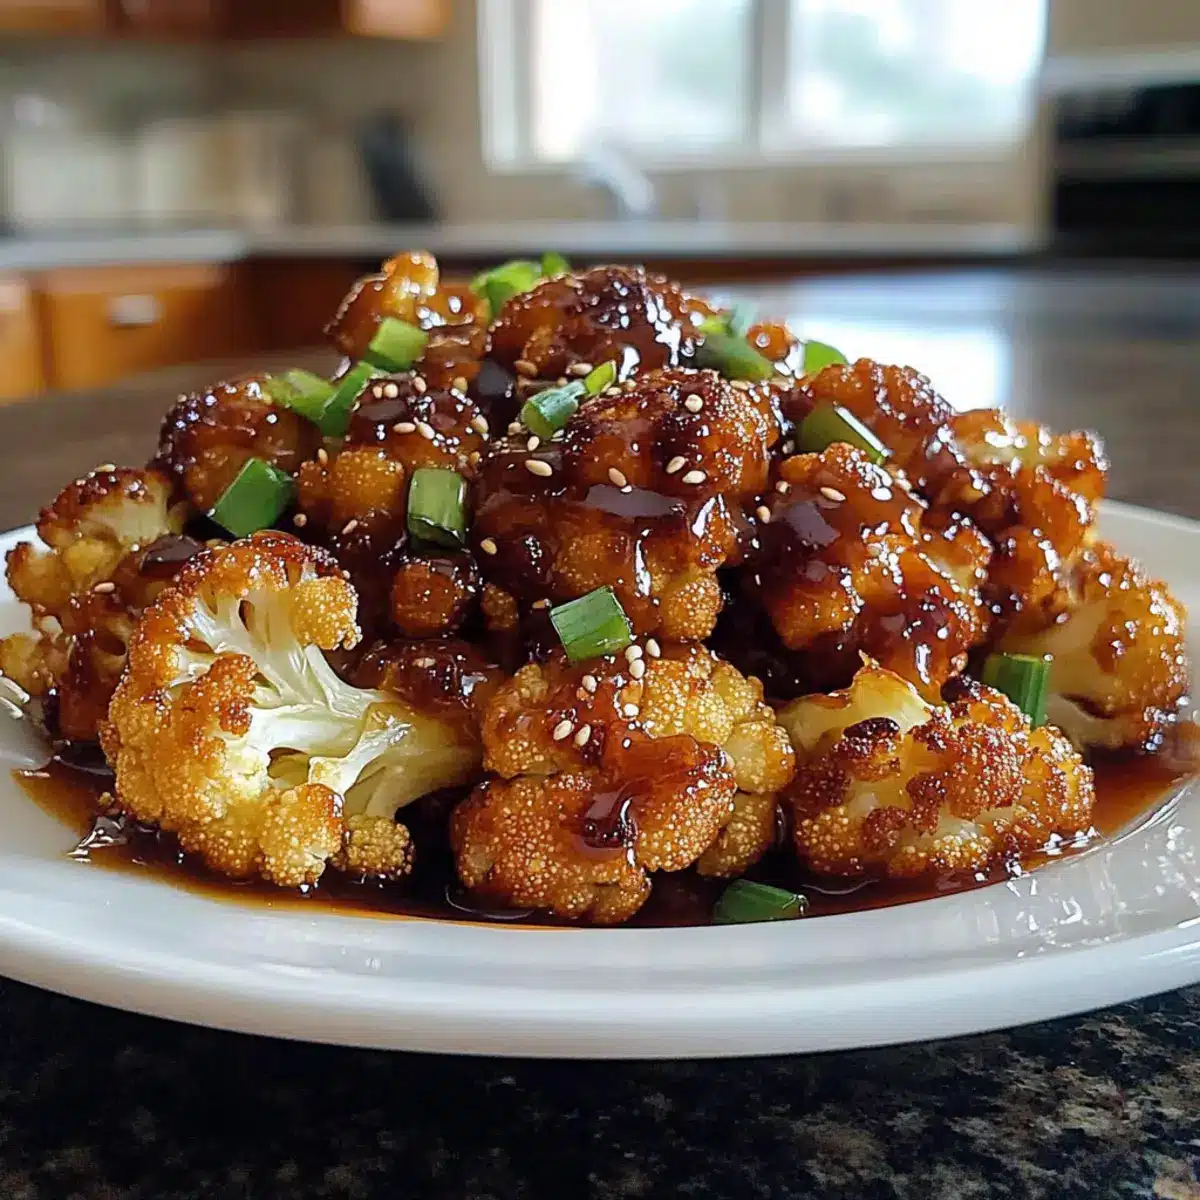
As I stood by the stove, the sweet aroma of honey mingled with the warmth of freshly minced garlic, instantly transporting me back to my favorite takeout restaurant. This Sticky Honey Garlic Cauliflower is my go-to recipe whenever I crave those beloved, comforting flavors without the hassle of delivery. Not only is it a delightful vegetarian main dish, but it also comes together in just 40 minutes, making it perfect for busy weeknights. Plus, it’s gluten-free and so easy to make crispy, giving you that satisfying crunch with every bite. So, are you ready to transform simple cauliflower florets into a sticky, savory sensation that could rival even your favorite takeout? Let’s get cooking!
Why is this Sticky Cauliflower a Must-Try?
Irresistible flavor: Each bite of this Sticky Honey Garlic Cauliflower is bursting with sweet and savory notes, satisfying your cravings like your favorite takeout.
Crispy perfection: Transform boring cauliflower into crispy, golden bites with simple tips, ensuring everyone at the table will be reaching for more.
Versatile dish: Pair it with fluffy white rice or stir-fried noodles for a complete meal. Feeling adventurous? Try it as a topping for your next Fig Honey Ricotta crostini!
Quick and easy: Ready in just 40 minutes, this dish is perfect for busy weeknights, making healthy eating effortless.
Diet-friendly: With a gluten-free option available, even those with dietary restrictions can dive into this delicious meal without a worry!
Sticky Honey Garlic Cauliflower Ingredients
For the Cauliflower
• Cauliflower – a large head, cut into bite-sized florets for a satisfying meat alternative.
• Olive Oil – helps roast the cauliflower, enhancing flavor; substitute with avocado oil for a higher smoke point.
• Cornstarch – optional, for coating the cauliflower to achieve extra crispiness during roasting.
For the Sauce
• Honey – the main sweetener that gives the sticky glaze its signature flavor; use maple syrup for a vegan version.
• Soy Sauce – provides savory depth; opt for tamari to make your sticky honey garlic cauliflower gluten-free.
• Rice Vinegar – balances the sweetness in the glaze with a hint of acidity.
• Sesame Oil – optional, but recommended for adding a delicious nutty flavor.
• Garlic – freshly minced for that unmistakable pungency that’s essential for depth of flavor.
• Ginger – freshly grated for a warm kick; you can use ground ginger in smaller amounts as a substitute.
• Red Pepper Flakes – optional for those who love a little heat; adjust according to your spice preference.
This Sticky Honey Garlic Cauliflower recipe will liven up your weeknight dinners, providing a comforting and crispy vegetarian option loved by all!
Step‑by‑Step Instructions for Sticky Honey Garlic Cauliflower
Step 1: Preheat the Oven
Begin by preheating your oven to 400°F (200°C). While it’s warming up, line a baking sheet with parchment paper. This will prevent the cauliflower from sticking and make cleanup a breeze. Take a moment to enjoy the anticipation of delicious Sticky Honey Garlic Cauliflower filling your kitchen!
Step 2: Prepare the Cauliflower
Cut one large head of cauliflower into bite-sized florets, ensuring they are even for consistent cooking. In a large bowl, toss the florets with a drizzle of olive oil, coating them evenly. If you desire extra crispiness, sprinkle on some cornstarch before adding the oil. This step is key to achieving that satisfying crunch.
Step 3: Roast the Cauliflower
Spread the cauliflower florets in a single layer on your prepared baking sheet. Roast them in the preheated oven for about 20-25 minutes, flipping them halfway through. You’ll know they’re done when they’re tender and beautifully golden brown, with their edges slightly crispy. The delightful aroma will start to fill your kitchen!
Step 4: Make the Sauce
While the cauliflower is roasting, prepare the sticky sauce. In a small saucepan, combine honey, soy sauce, rice vinegar, and sesame oil. Add freshly minced garlic, grated ginger, and if you like a kick, a pinch of red pepper flakes. Heat the mixture over medium heat, letting it simmer for 3-5 minutes until it thickens slightly, creating a glossy glaze.
Step 5: Combine and Serve
Once the cauliflower is perfectly roasted, transfer it to a large mixing bowl. Pour the luscious honey garlic sauce over the warm florets and toss everything together until each piece is thoroughly coated. Serve your Sticky Honey Garlic Cauliflower immediately, perhaps over fluffy rice or stir-fried noodles, for a truly satisfying meal!

Sticky Honey Garlic Cauliflower Variations
Feel free to let your creativity run wild with these variations, transforming this delightful dish into your perfect version!
- Air Fried: Cook at 380°F (193°C) for 12-15 minutes for extra crispiness, shaking halfway through.
- Vegan Version: Swap honey for maple syrup to cater to your vegan friends without sacrificing sweetness.
- Gluten-Free: Replace soy sauce with tamari, ensuring everyone can enjoy this delicious dish worry-free.
- Flavor Boost: Add a splash of sriracha to the sauce for a zesty kick that elevates the flavors.
- Low-Carb Option: Substitute cauliflower rice for florets, mixing it with the sauce for a unique twist.
- Sweet & Spicy: Mix in diced jalapeños with the sauce for an exciting heat that tingles the taste buds!
- Asian Fusion: Incorporate vegetables like bell peppers or snap peas for added color and nutrition in your dish.
- Rice Noodle Bowl: Serve over fresh rice noodles or alongside your favorite Lemon Garlic Chicken for an extra hearty meal.
With these variations, you can customize the Sticky Honey Garlic Cauliflower to suit your taste while keeping it fresh and exciting! Enjoy the journey of flavors as you make it your own.
What to Serve with Sticky Honey Garlic Cauliflower
Bring your dinner table to life by creating a delightful spread that beautifully balances flavors and textures alongside this sticky sensation.
-
Fluffy White Rice: This classic pairing creates a comforting base, soaking up the sweet and savory glaze perfectly, making each bite a little piece of heaven.
-
Stir-Fried Noodles: The chewy texture of stir-fried noodles adds a satisfying contrast to the tender cauliflower, enveloped in the same sticky sauce for a cohesive meal.
-
Steamed Broccoli: Bright green broccoli provides a fresh crunch and vibrant color, complementing the rich flavors of the cauliflower while enhancing your dish’s nutritional profile.
-
Sesame Cucumber Salad: A refreshing side that offers a crisp, tangy bite, the coolness of cucumbers balances the sticky sweetness of the cauliflower, enticing your palate with every mouthful.
-
Garlic Bread: A crunchy, crusty side adds a rustic touch to your meal, creating a satisfying texture that pairs surprisingly well with the sauce’s glaze.
-
Mango Lassi: This creamy, fruity drink offers a sweet and tangy contrast that refreshes your taste buds, making each bite of cauliflower even more enjoyable.
Each of these accompaniments transforms a simple dish into a delightful feast, ensuring that your Sticky Honey Garlic Cauliflower shines in every way possible!
How to Store and Freeze Sticky Honey Garlic Cauliflower
Room Temperature: Store leftover sticky honey garlic cauliflower at room temperature for no more than 2 hours to prevent spoilage.
Fridge: Place cooled leftovers in an airtight container and keep them in the fridge for up to 3 days. This will maintain the flavor and texture of the dish.
Freezer: To freeze, spread the cauliflower on a baking sheet to flash freeze it for 1-2 hours before transferring to a freezer-safe bag. It can be stored for up to 3 months.
Reheating: When ready to enjoy, reheat in a skillet to maintain crispiness, adding a splash of water if needed to prevent sticking.
Expert Tips for Sticky Honey Garlic Cauliflower
Crispy Florets: Use cornstarch: Toss cauliflower florets in cornstarch before adding oil for an extra crispy texture during roasting.
Spacing Matters: Avoid crowding: Make sure your cauliflower florets are evenly spaced on the baking sheet to ensure they roast evenly and achieve that perfect golden brown.
Taste Test: Adjust as needed: Before pouring the sauce over the cauliflower, taste it to fine-tune sweetness or saltiness for that ideal balance.
Thicken Wisely: Cornstarch slurry: If you prefer a thicker sauce, mix cornstarch with cold water and stir it into the simmering sauce for a delightful glossy finish.
Storage Tips: Keep it fresh: Store any leftovers in an airtight container for up to three days. Reheat in a skillet with a splash of water to retain crispiness.
Flavor Boost: Experiment with spice: Feel free to increase the red pepper flakes for added heat or incorporate other spices to personalize your Sticky Honey Garlic Cauliflower!
Make Ahead Options
These Sticky Honey Garlic Cauliflower bites are perfect for meal prep enthusiasts looking to save time during busy weeknights! You can cut and toss the cauliflower florets with olive oil and cornstarch up to 24 hours in advance; simply cover and refrigerate them until you’re ready to roast. The honey garlic sauce can be made ahead and stored in an airtight container for up to 3 days—just give it a light warm-up on the stove before tossing with the cauliflower. When you’re ready to enjoy this delicious dish, roast the prepped cauliflower at 400°F (200°C) and then coat it in the reheated sauce for restaurant-quality results with minimal effort!
Sticky Honey Garlic Cauliflower Recipe FAQs
What type of cauliflower should I use for this recipe?
I recommend using a fresh, large head of cauliflower without any dark spots or blemishes. Look for florets that are compact and tightly packed, as this usually indicates freshness. For the best results, choose cauliflower that feels heavy for its size.
How should I store Sticky Honey Garlic Cauliflower leftovers?
Store the cooled leftovers in an airtight container in the fridge for up to 3 days. This way, you’ll keep the amazing flavors intact! When you’re ready to reheat, do so in a skillet over medium heat, adding a splash of water to help maintain crispiness.
Can I freeze Sticky Honey Garlic Cauliflower?
Absolutely! For freezing, first spread the cauliflower in a single layer on a baking sheet and flash freeze for about 1-2 hours. Once frozen, transfer the florets to a freezer-safe bag, removing as much air as possible. They will stay fresh in the freezer for up to 3 months. When you’re ready to eat, just reheat them directly from frozen in a hot skillet.
What can I do if my cauliflower isn’t getting crispy?
If your cauliflower isn’t crisping up as you’d like, make sure not to overcrowd the baking sheet. Spacing them out allows hot air to circulate around each piece. Additionally, tossing the florets in a little cornstarch before drizzling with oil can help achieve that desired crunch. Don’t forget to flip them halfway through roasting for even browning!
Is this dish suitable for those with gluten allergies?
Yes! You can easily make this Sticky Honey Garlic Cauliflower gluten-free by substituting soy sauce with tamari, which is a gluten-free alternative. This allows everyone to enjoy this flavorful dish without worry, making it perfect for gatherings with friends or family.
Can I customize the spice level in this recipe?
Very much so! The recipe calls for red pepper flakes, which you can adjust according to your preference. If you prefer a milder flavor, you can reduce the amount or omit it entirely. On the other hand, if you’re a heat lover, feel free to increase the amount. You can also add a splash of hot sauce to the glaze for an extra kick!
Sticky Honey Garlic Cauliflower: Sweet & Savory Perfection
Ingredients
Equipment
Method
- Preheat your oven to 400°F (200°C) and line a baking sheet with parchment paper.
- Cut the cauliflower into bite-sized florets and toss them with olive oil. Optionally, add cornstarch for extra crispiness.
- Spread the florets in a single layer on the baking sheet and roast for 20-25 minutes, flipping halfway through.
- In a small saucepan, combine honey, soy sauce, rice vinegar, sesame oil, garlic, ginger, and red pepper flakes. Simmer for 3-5 minutes until it thickens.
- Transfer the roasted cauliflower to a bowl, pour the sauce over, and toss to coat. Serve immediately.
Leave a Reply