
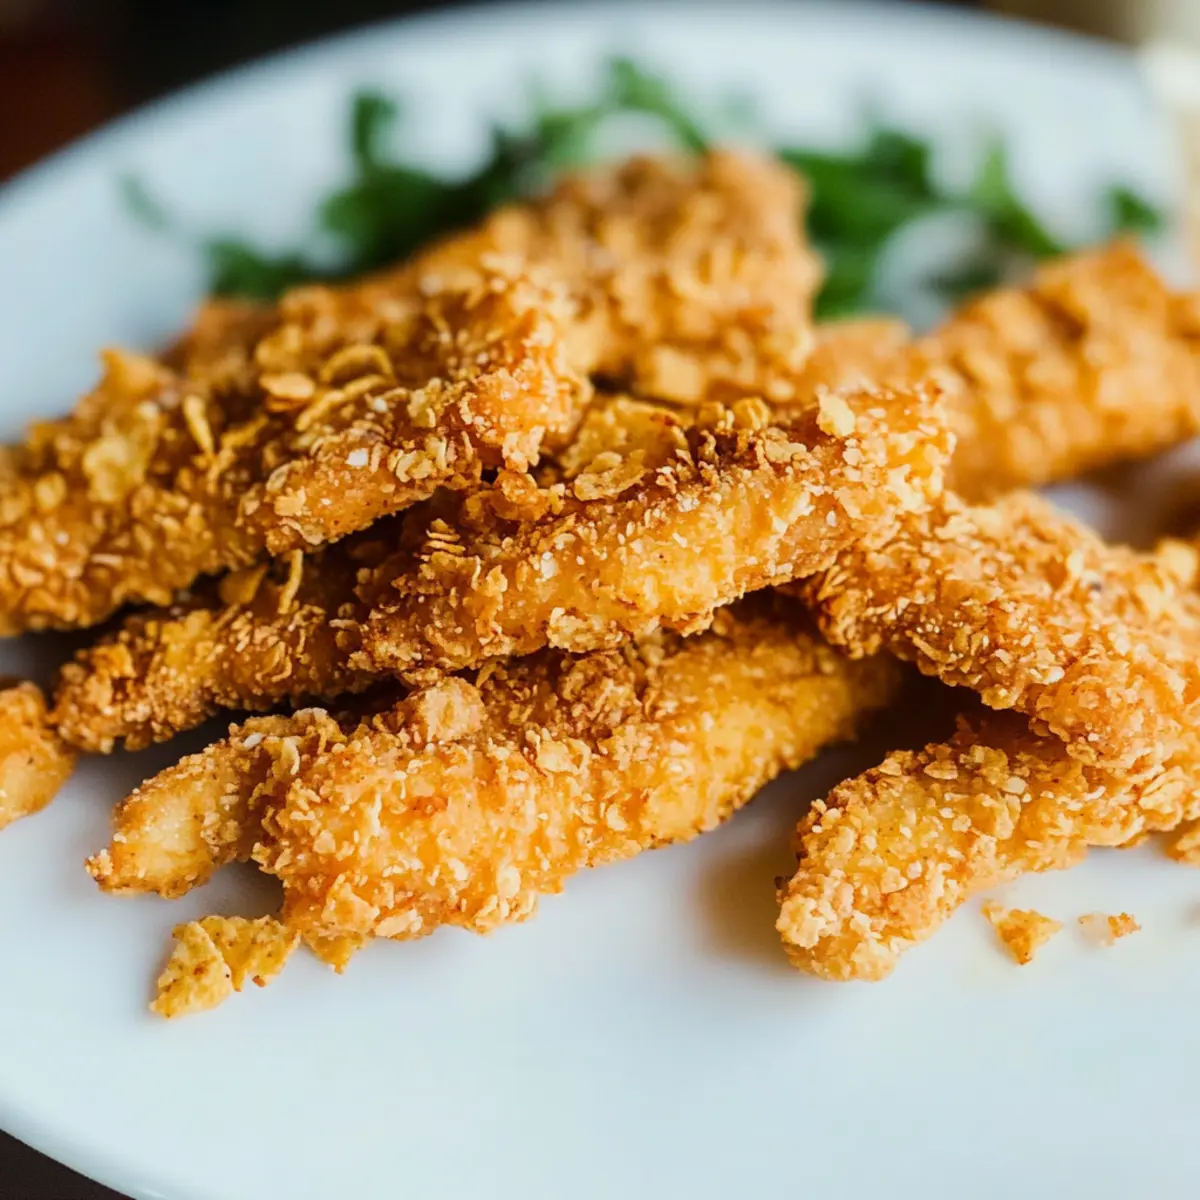
With a satisfying crunch resonating in the kitchen, I was instantly captivated by the creativity of Crispy Kettle Chip Chicken Strips. Baked instead of fried, these strips are not only quick and easy to whip up but also make for a delightful kid-friendly meal that will impress even the pickiest eaters. Imagine the last bite—a juicy piece of chicken wrapped in a flavorful kettle chip crust, paired with your favorite dipping sauce. It’s the perfect twist on traditional fried chicken that brings a playful spirit to weeknight dinners or family gatherings. Curious about how to bring this fun recipe to your own table? Let’s dive in!
Why Are Kettle Chip Chicken Strips Special?
Unique Texture: The crispy kettle chip coating offers an irresistible crunch that’s a delightful departure from traditional breading.
Quick Preparation: This recipe is not only easy to follow but can be made in under 30 minutes, perfect for busy weeknights.
Kid-Approved: These strips are fantastic for kids—their fun texture and salty flavor make them a hit with even the pickiest eaters.
Versatile Pairing: Pair them with your favorite sauces like honey mustard or ranch dressing, or get creative with options from my Chipotle Chicken Panini.
Baked, Not Fried: Enjoy the healthier side of comfort food, as these strips are baked instead of fried, allowing you to indulge guilt-free.
Flavor Variety: Experiment with different kettle chip flavors for a unique twist every time you make this dish.
Kettle Chip Chicken Strips Ingredients
For the Chicken
• Boneless Skinless Chicken Breasts – These are the main protein source; opt for convenience with easy-to-handle pieces.
For the Seasoning
• Salt – Enhances natural flavors; feel free to adjust based on your taste preference.
• Black Pepper – Provides a slight kick; freshly ground gives the best flavor.
• Paprika – Adds color and subtle smokiness; substitute with smoked paprika for extra depth.
• Garlic Powder – Enhances taste and aroma; fresh garlic can be swapped for a robust flavor.
For the Coating
• Flour – Acts as a binding agent; gluten-free flour can be used for dietary needs.
• Eggs – Binds the coating to the chicken; a flax egg serves as a vegan substitute.
• Kettle Chips – The showstopper that makes these strips crunchy and flavorful; get creative with different flavors for fun twists.
Experiment with these ingredients to make your own delicious Kettle Chip Chicken Strips that will entice and delight your family!
Step‑by‑Step Instructions for Kettle Chip Chicken Strips
Step 1: Preheat the Oven
Begin by preheating your oven to 400°F (200°C). While the oven warms up, line a baking sheet with parchment paper to prevent the chicken strips from sticking. This setup not only makes the cleanup easier but helps achieve that perfect crispiness. As the heat builds, gather your ingredients and get ready to transform the chicken!
Step 2: Prepare the Chicken
Take your boneless, skinless chicken breasts and slice them into robust 1-inch wide strips, ensuring each piece is evenly sized for consistent cooking. This uniformity will help all your Kettle Chip Chicken Strips cook evenly and achieve a beautifully crunchy exterior. Set the chicken aside once you have them all cut.
Step 3: Season the Chicken
In a small bowl, combine salt, black pepper, paprika, and garlic powder, mixing well to create a flavorful seasoning blend. Generously season your chicken strips with this mixture, ensuring each piece is evenly coated. The aromatic spices will infuse the chicken with a delightful flavor, setting the stage for the irresistible crunch of your kettle chip coating.
Step 4: Set Up Your Dredging Station
Create an efficient dredging station by arranging three shallow dishes in a line: one filled with flour, the next with beaten eggs, and the last with crushed kettle chips. This setup allows for a smooth and quick coating process as you prepare your Kettle Chip Chicken Strips, ensuring that each chicken strip gets perfectly enveloped in each ingredient.
Step 5: Coat the Chicken Strips
Start by dredging each chicken strip in the flour, shaking off any excess before dipping it into the beaten eggs. Lastly, press the chicken into the crushed kettle chips, ensuring an even and generous coating on all sides. Repeat this process for each strip; the kettle chips will create that delightful crunch you’re aiming for!
Step 6: Arrange on Baking Sheet
Once all chicken strips are coated, place them in a single layer on the prepared baking sheet. Make sure to leave some space between each strip; overcrowding can lead to steaming instead of crisping. At this stage, you can also place the strips on a wire rack over the baking sheet for extra crispiness, if desired.
Step 7: Bake to Perfection
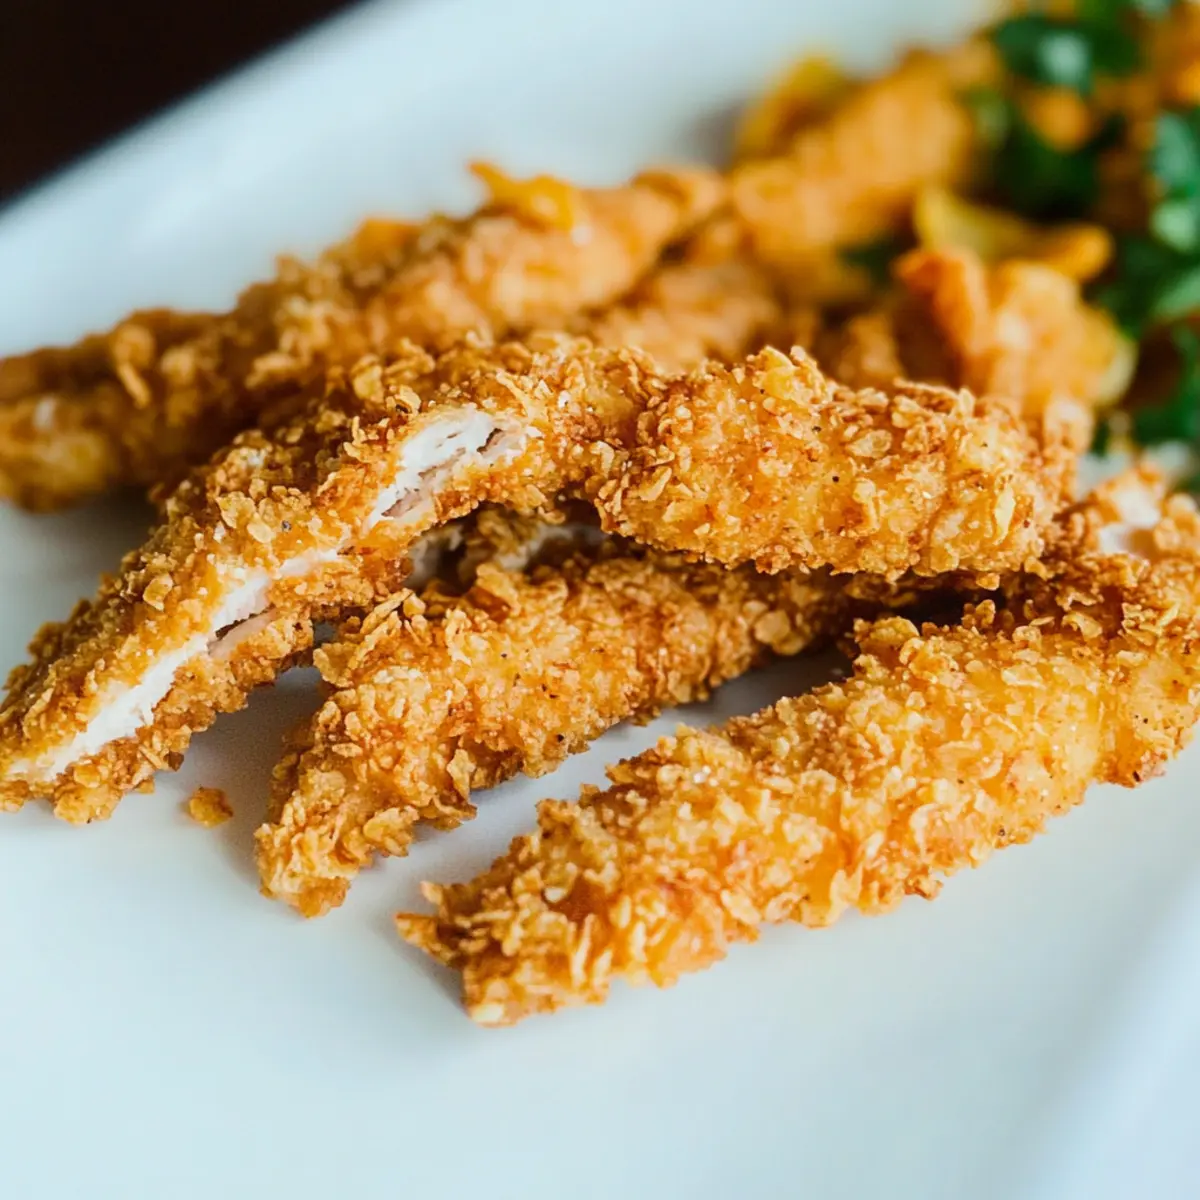
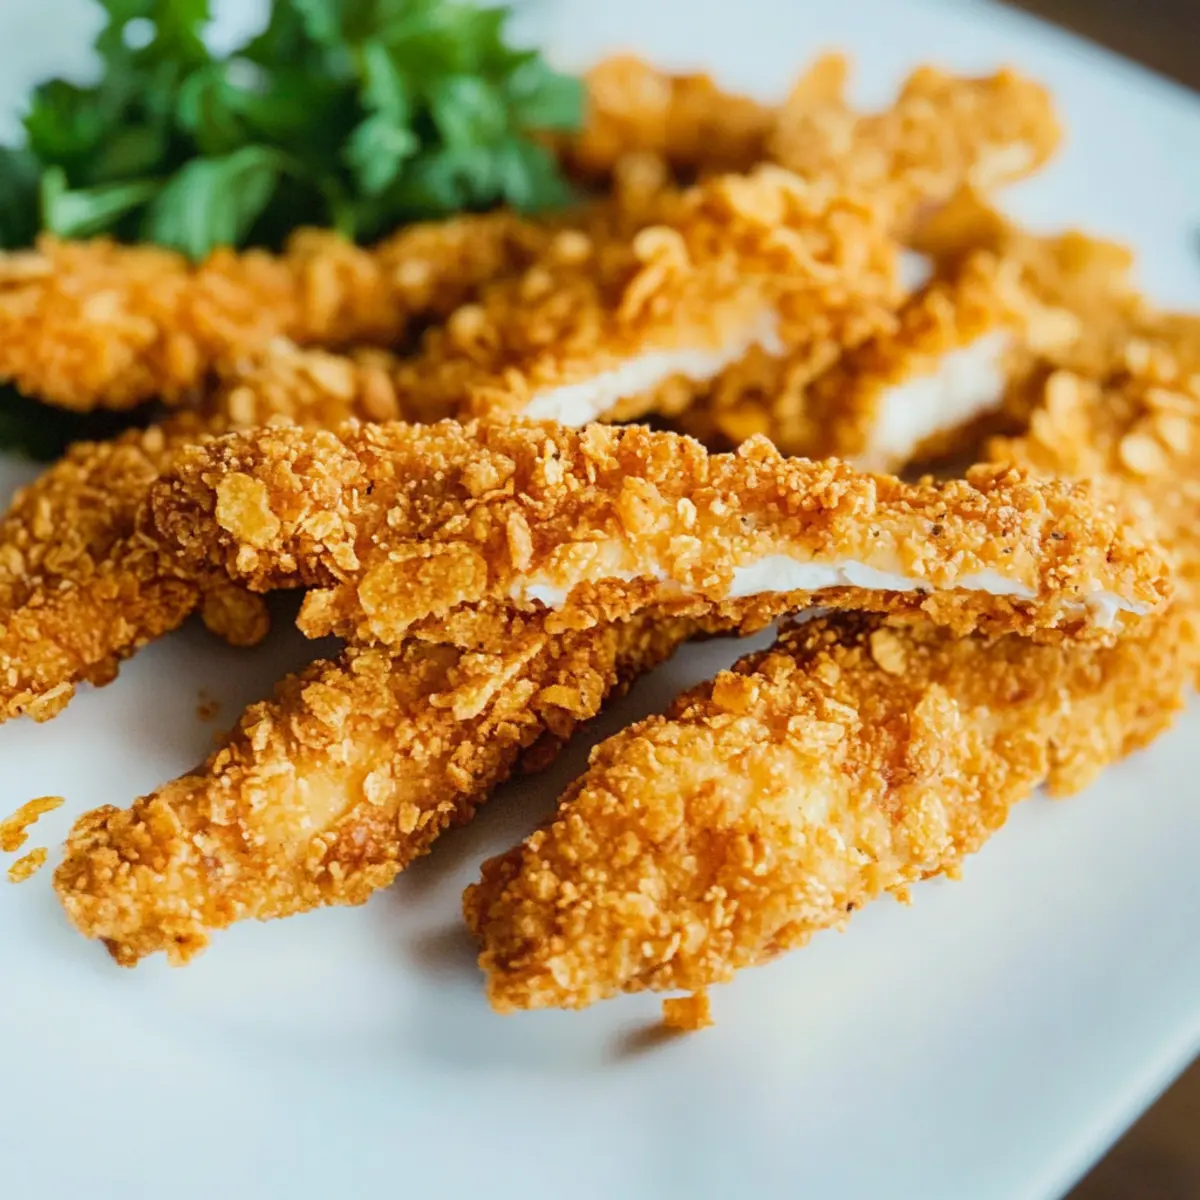
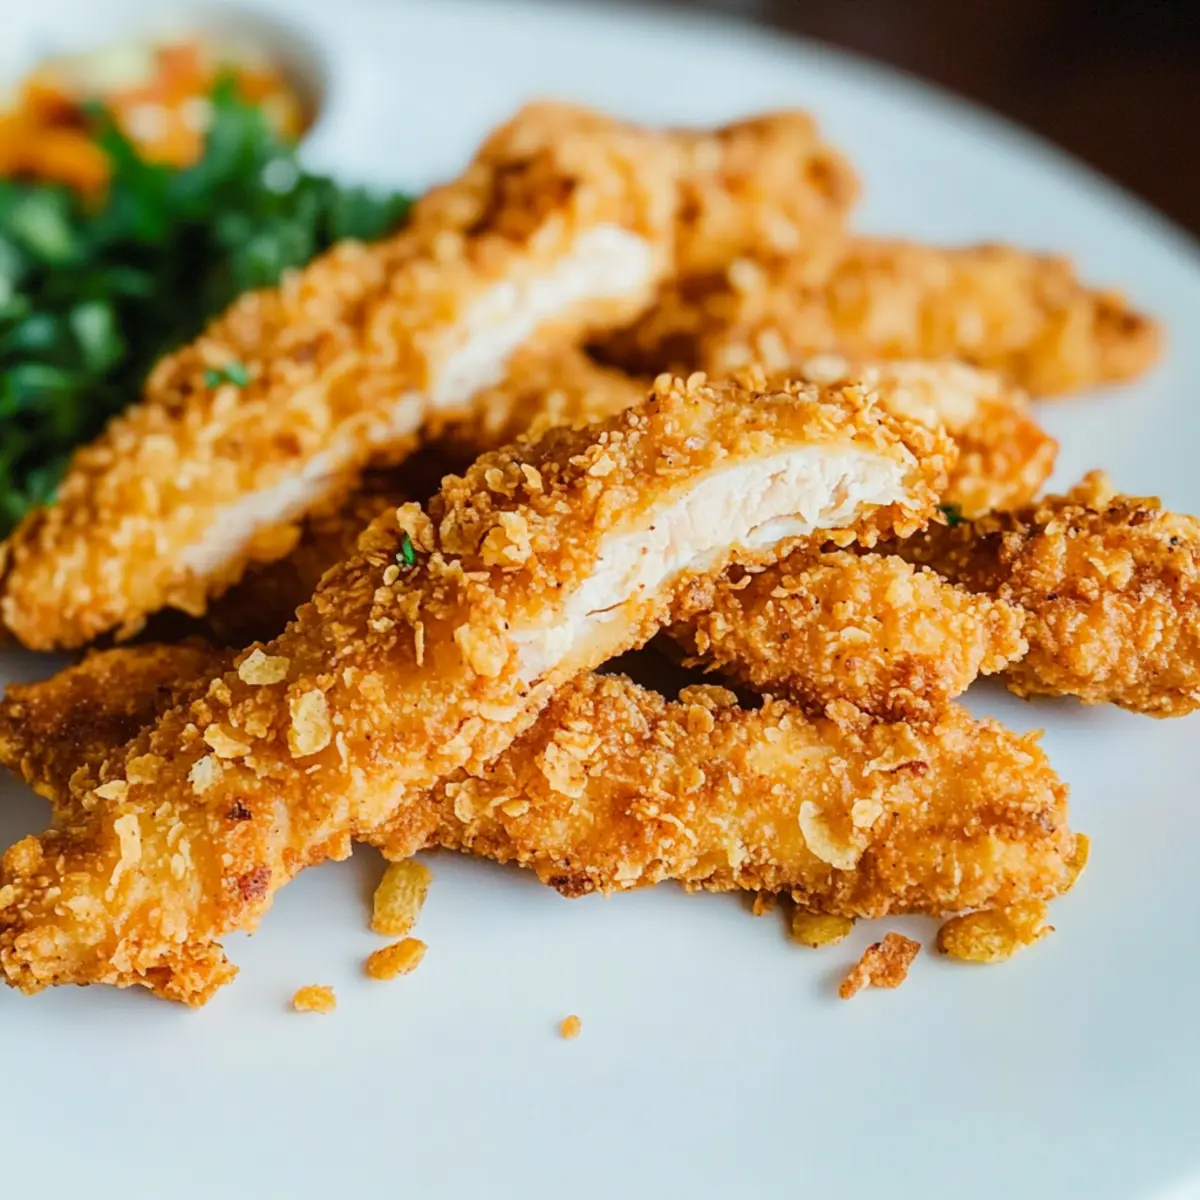
Slide the baking sheet into your preheated oven and bake the chicken strips for 20-25 minutes. Keep an eye on them; you’re looking for a golden brown color and an internal temperature of 165°F (74°C). This time allows the flavors to meld and provides the satisfying crunch you crave from your Kettle Chip Chicken Strips.
Step 8: Serve with Your Favorite Dips
Once baked to perfection, remove the Kettle Chip Chicken Strips from the oven and let them cool for a couple of minutes. Serve them hot alongside your favorite dipping sauces such as honey mustard or ranch dressing. This delightful meal is not only a hit with kids but also a fantastic treat for adults, bringing joy to any dining occasion!
What to Serve with Crispy Kettle Chip Chicken Strips
Prepare to elevate your meal experience with these delightful pairings that bring balance and excitement to your table.
-
Creamy Coleslaw: This refreshing, crunchy side is a perfect contrast to the crispy kettle chip chicken strips, adding a tangy flavor that brightens the palate.
-
Sweet Potato Fries: Their natural sweetness provides a delicious counterpoint to the savory bites, creating a comforting combination that everyone will love.
-
Garlic Bread: The savory aroma and buttery flavor of garlic bread add an indulgent touch to your meal, perfect for soaking up any leftover dipping sauce.
-
Roasted Vegetables: Tossing seasonal veggies in olive oil and herbs brings a fresh element to your plate, balancing the richness of the chicken strips with their earthy notes.
-
Macaroni and Cheese: This classic comfort food offers a creamy, cheesy texture that pairs brilliantly with the crunch of the chicken strips, making it a family favorite.
-
Fruit Skewers: Add a pop of color and sweetness to your plate with vibrant fruit skewers, providing a light and refreshing contrast to the savory chicken.
-
Apple Sauce: The sweet and smooth flavor complements the salty crunch of the chicken strips, creating a delightful mix of textures and tastes.
-
Iced Tea or Lemonade: Serve refreshing drinks like iced tea or homemade lemonade to cleanse the palate, enhancing the overall dining experience with their bright flavors.
Choose these pairings to make your Kettle Chip Chicken Strips shine even brighter at your next gathering!
Expert Tips for Kettle Chip Chicken Strips
Uniform Slices: Ensure chicken strips are evenly cut for consistent cooking; this prevents any undercooked pieces and promotes even crunch.
Avoid Overcrowding: Leave space between chicken strips on the baking sheet to maintain crispiness; overcrowding can lead to steaming instead of a satisfying crunch.
Use a Wire Rack: For extra crunch, consider placing the breaded chicken strips on a wire rack over the baking sheet while baking; this allows hot air to circulate evenly.
Flavorful Chips: Experiment with various kettle chip flavors, like BBQ or ranch, for unique twists on your Kettle Chip Chicken Strips that all family members will love.
Check Doneness: Always use a meat thermometer to ensure your chicken reaches an internal temperature of 165°F (74°C); this guarantees safety and perfect juicy results.
Make Ahead Options
These Crispy Kettle Chip Chicken Strips are perfect for meal prep enthusiasts! You can season and coat the chicken strips up to 24 hours in advance, making your weeknight dinner a breeze. Simply follow the coating instructions, then place the prepared strips in an airtight container in the refrigerator. When you’re ready to enjoy them, preheat the oven and bake straight from the fridge, adding a few extra minutes to ensure they’re bubbly and crispy. This prep-ahead approach not only saves time but also ensures you can serve up delicious, homemade Kettle Chip Chicken Strips that are just as crunchy and flavorful as if made fresh!
Storage Tips for Kettle Chip Chicken Strips
Fridge: Keep your Kettle Chip Chicken Strips in an airtight container, where they can be stored for up to 3 days. This ensures maximum freshness while preventing any sogginess.
Freezer: For long-term storage, freeze the strips in a single layer on a baking sheet before transferring them to an airtight container. They will be good for up to 3 months.
Reheating: When you’re ready to enjoy your leftovers, reheat the chicken strips in the oven at 375°F (190°C) for about 10 minutes. This will help restore their crispy texture.
Room Temperature: If you need to leave them out for a short period, they can sit at room temperature for up to 2 hours, especially during gatherings. However, avoid leaving them out longer to ensure food safety.
Kettle Chip Chicken Strips Variations
Feel free to let your culinary creativity shine while tweaking these delightful chicken strips to suit your tastes!
-
Dairy-Free: Use almond milk or oat milk to replace eggs for a dairy-free option. You’ll still capture that crispy texture!
-
Spicy Kick: Toss in a bit of cayenne pepper or red pepper flakes to the seasoning for a delightful heat. This adds just the right zing that spicy food lovers will adore.
-
Gluten-Free: Substitute regular flour with almond or coconut flour for a gluten-free alternative. It’s an easy swap that keeps the crunch intact!
-
Panko Option: Swap kettle chips with panko breadcrumbs for a lighter, equally crispy coating. Panko provides a unique texture while still delivering delicious flavor.
-
Herb-Infused: Add dried herbs like oregano or thyme to the seasoning mix for a fragrant twist. This infusion transforms the flavor profile, elevating your chicken strips to the next level.
-
Cheesy Flavor: Crumble some cheese-flavored kettle chips into the breading mix for cheesy goodness. It’s an irresistible addition that kids (and adults!) will love!
-
Baking Sheet Swap: Experiment with baking on a wire rack for elevated crispiness. This allows air to circulate all around the chicken, enhancing the Golden Crunch!
-
Marinated Chicken: Marinate chicken strips in lemon juice or buttermilk before coating for added tender zest. This marination will create juicy, flavorful bites packed with deliciousness!
For a truly delightful dipping experience, why not pair these with some of your favorite sauces? You can’t go wrong with honey mustard or ranch dressing, or take a trip down flavor alley with recipes like Lemon Garlic Chicken and Greek Chicken Meatballs. Keep the creativity flowing and your family will undoubtedly be impressed!
Kettle Chip Chicken Strips Recipe FAQs
What kind of kettle chips should I use for the chicken strips?
Absolutely! You can use any flavor of kettle chips that your family enjoys. Popular options include classic salted, BBQ, or even cheese-flavored chips for a fun twist. The flavor of the chips will significantly influence the final taste of your Kettle Chip Chicken Strips, so feel free to experiment!
How should I store leftover Kettle Chip Chicken Strips?
To keep your Kettle Chip Chicken Strips fresh, store them in an airtight container in the refrigerator for up to 3 days. This will maintain their taste and texture while preventing them from becoming soggy. If you’re looking to save them for longer, freeze the strips for up to 3 months in a single layer before transferring them to a freezer-safe container.
Can I freeze Kettle Chip Chicken Strips? How?
Certainly! To freeze your Kettle Chip Chicken Strips, first, let them cool completely after baking. Next, arrange them in a single layer on a baking sheet and freeze until solid, about 1 to 2 hours. Once they’re frozen, transfer them to an airtight container or freezer bag. This method helps avoid sticking and preserves their crunchy texture. When ready to enjoy, reheat directly from the freezer in the oven at 375°F (190°C) for about 10-12 minutes or until heated through.
What should I do if the coating falls off while baking?
Very! If you notice that some of the coating falls off your chicken strips during baking, it may be due to not enough binding. To prevent this, ensure each strip is thoroughly coated with flour, egg, and crushed kettle chips. Double-check that the egg wash isn’t too watery, and press down on the chips to help them stick better. Using a wire rack can also help maintain the crispy texture while baking.
Are Kettle Chip Chicken Strips safe for people with allergies?
When making Kettle Chip Chicken Strips, be mindful of any allergies. The recipe includes potential allergens such as chicken, eggs, and wheat flour, especially if you’re using regular flour. For gluten-free needs, substitute with a gluten-free flour blend, and you can use a flax egg instead of a regular egg for a vegan alternative. Always check the packaging of your kettle chips for potential allergens as well.
How long can the prepared chicken strips sit out?
The more the merrier! Your Kettle Chip Chicken Strips can be safely left at room temperature for up to 2 hours. If you’re serving them during a gathering, keep an eye on the time to ensure food safety. After two hours, it’s best to store any leftovers in the fridge to avoid any risk of spoilage.
Kettle Chip Chicken Strips That Will Wow Your Taste Buds
Ingredients
Equipment
Method
- Preheat your oven to 400°F (200°C) and line a baking sheet with parchment paper.
- Slice chicken breasts into 1-inch wide strips.
- Combine salt, black pepper, paprika, and garlic powder in a bowl. Season chicken strips evenly.
- Set up a dredging station with flour, beaten eggs, and crushed kettle chips.
- Dredge each chicken strip in flour, dip in eggs, and coat with kettle chips.
- Arrange coated chicken strips on the baking sheet, leaving space between each.
- Bake for 20-25 minutes until golden brown and internal temperature reaches 165°F (74°C).
- Let cool for a few minutes and serve with your favorite dipping sauces.
Leave a Reply