
The aroma of sizzling tortillas wafts through the kitchen, instantly transporting me to my favorite Tex-Mex eatery. Crispy Chicken Taquitos are my go-to recipe for those nights when I crave something comforting yet quick to whip up. In just 35 minutes, you can enjoy these delightful handheld delights, filled with tender shredded chicken and creamy cheeses that are undeniably satisfying. What I love most about this easy recipe is its versatility—feel free to customize the spices and textures to fit your taste. Whether you’re hosting friends for game night or simply trying to jazz up a busy weeknight meal, these taquitos are sure to impress. Curious about how to make this crispy treasure? Let’s dive in!
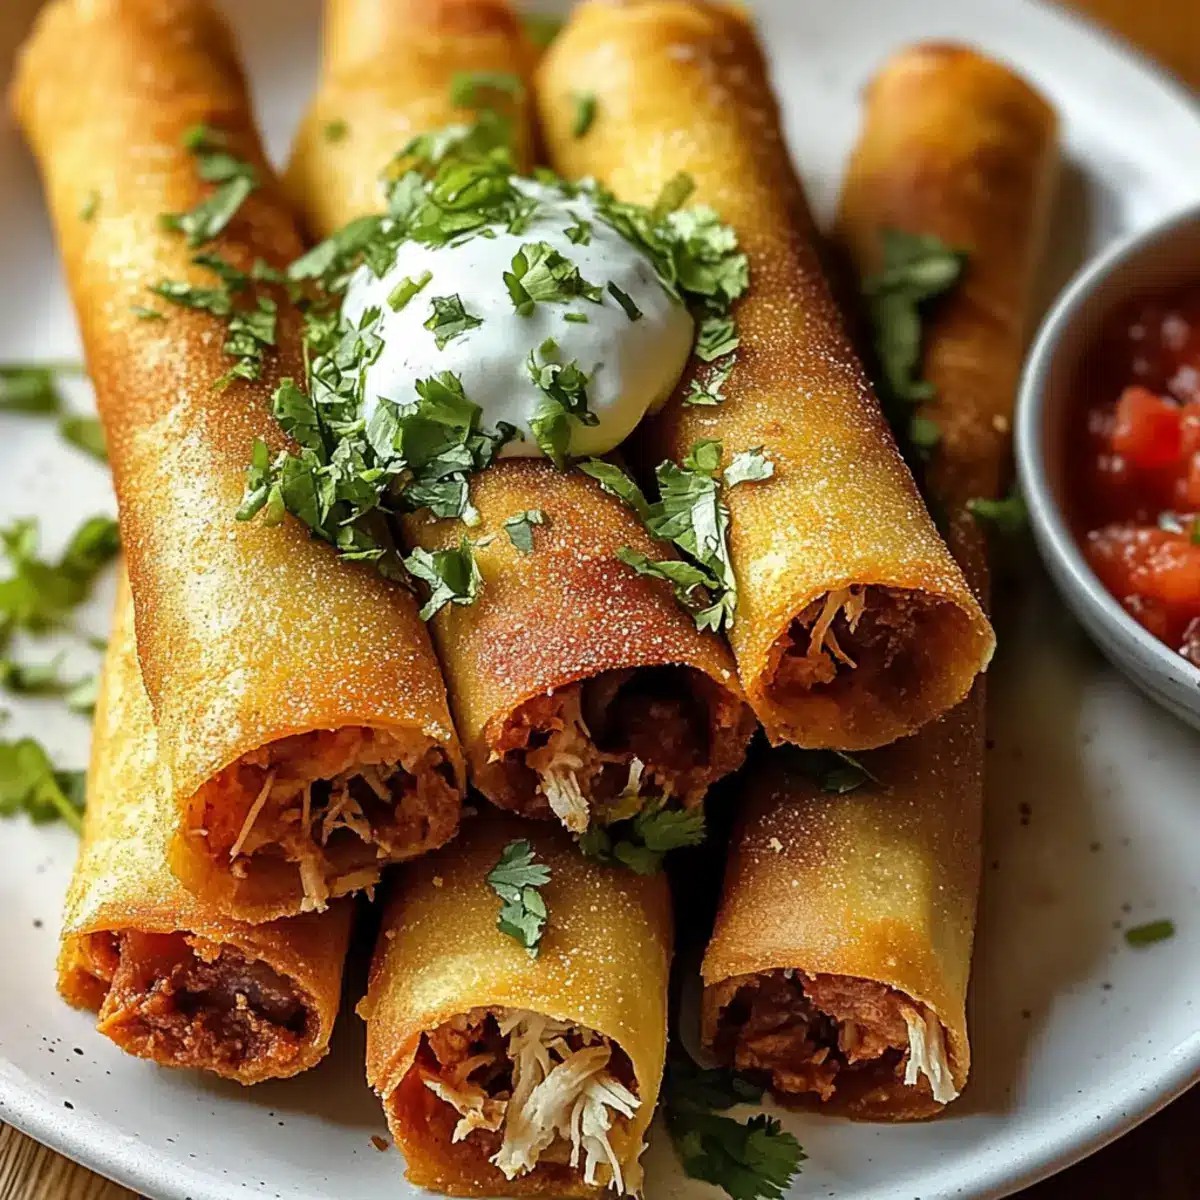
Why Are Crispy Chicken Taquitos a Must-Try?
Simplicity: This recipe is perfect for beginners and only takes 35 minutes from start to finish!
Customizable: You can easily adjust spices, cheese types, and toppings—make them just how you like!
Crowd-Pleaser: Serve them as an appetizer, snack, or main course; everyone loves crispy taquitos!
Deliciously Cheesy: The gooey combination of cheddar and cream cheese creates a mouthwatering filling.
Versatile: Pair with salsa, guacamole, or a fresh salad for a well-rounded meal. You can also try these taquitos alongside my Bang Bang Chicken for an irresistible Tex-Mex feast!
Get ready to elevate your dinner game!
Crispy Chicken Taquitos Ingredients
Discover the essential components for perfect crispy chicken taquitos!
For the Filling
• Cooked Shredded Chicken – Use leftover from previous meals or store-bought rotisserie chicken to save time.
• Shredded Cheddar Cheese – Melts beautifully to create gooey, cheesy pockets; feel free to swap for Monterey Jack if desired.
• Cream Cheese (1/2 cup) – Adds a silky, creamy texture that enhances the filling’s richness.
• Sour Cream (1/4 cup) – Provides moisture and a tangy kick; Greek yogurt is a lighter alternative.
• Garlic Powder (1/2 tsp) – Essential for flavor, adding depth without overwhelming the dish.
• Onion Powder (1/2 tsp) – Offers subtle sweetness that complements the garlic and cheese.
• Cumin (1/2 tsp) – A must for that earthy, warm flavor characteristic of Tex-Mex cuisine.
• Chili Powder (1/4 tsp) – Delivers a mild heat; adjust according to your spice preference.
• Salt and Pepper – Always season to taste for the perfect flavor balance.
For the Shell
• Small Flour Tortillas (10) – The perfect vessel for your filling; corn tortillas are a great gluten-free alternative.
• Vegetable Oil for Frying – Key for achieving that irresistible golden-brown exterior.
Optional Toppings
• Fresh Salsa – Enhances flavor and adds a refreshing touch.
• Guacamole – Creamy and delicious, it makes a great pairing!
• Sour Cream – Extra creaminess if you can’t get enough!
• Chopped Cilantro – A burst of freshness that rounds out the flavors beautifully.
With these Crispy Chicken Taquitos ingredients at your fingertips, you’re just moments away from a delightful dining experience!
Step‑by‑Step Instructions for Crispy Chicken Taquitos
Step 1: Prepare the Filling
In a large mixing bowl, combine 2 cups of cooked shredded chicken, 1 cup of cheddar cheese, 1/2 cup of cream cheese, and 1/4 cup of sour cream. Use a fork to mix the ingredients until smooth and creamy. The filling should have a luscious texture that will be easy to spread onto your tortillas, ensuring each crispy chicken taquito is generously packed.
Step 2: Season It Right
Now, sprinkle in the flavor boosters: 1/2 teaspoon of garlic powder, 1/2 teaspoon of onion powder, 1/2 teaspoon of cumin, 1/4 teaspoon of chili powder, and salt and pepper to taste. Stir thoroughly to incorporate all the spices evenly. This ensures every bite of your crispy chicken taquitos bursts with rich Tex-Mex flavor, creating a mouthwatering experience.
Step 3: Assemble the Taquitos
Lay a small flour tortilla flat on a clean surface. Spoon 2–3 tablespoons of the flavorful filling onto the lower third of the tortilla, ensuring to leave space on the edges for rolling. Fold the sides of the tortilla over the filling, then roll it away from you into a tight cylinder. Position each taquito seam-side down on a tray, ready for frying.
Step 4: Heat the Oil
In a large skillet, heat about one inch of vegetable oil over medium-high heat until it reaches 350°F to 375°F. To test if the oil is ready, drop a small piece of tortilla in; it should sizzle immediately. This well-heated oil is essential for achieving that perfect crispy exterior on your taquitos.
Step 5: Fry to Perfection
Carefully place your taquitos seam-side down into the hot oil, being sure not to overcrowd the pan. Fry them for 2–3 minutes until they are well-browned and crispy on one side. Using a pair of tongs, gently flip each taquito and fry again for another 2–3 minutes. The perfect crispy chicken taquitos should be a lovely golden brown all over.
Step 6: Drain Excess Oil
Once cooked, transfer the crisp taquitos to a paper towel-lined plate to drain any excess oil. This step ensures they maintain their crunchy texture without becoming greasy. Repeat the frying process with any remaining rolled taquitos, ensuring to keep them warm and crispy until you’re ready to serve.
Step 7: Serve with Joy
Your crispy chicken taquitos are now ready to be enjoyed! Serve them warm with an array of optional toppings such as fresh salsa, guacamole, sour cream, and chopped cilantro. The combination of crunchiness and rich flavors will surely make these taquitos a hit at any gathering or weeknight dinner.

Expert Tips for Crispy Chicken Taquitos
• Oil Temperature: Ensure the vegetable oil is preheated to 350°F to 375°F for the best crispy chicken taquitos. A small piece of tortilla should sizzle when dropped in.
• Don’t Overcrowd: Fry in small batches to prevent steaming your taquitos, allowing each to achieve that crunchy perfection.
• Filling Variations: Feel free to adapt your filling! Add black beans, corn, or shredded veggies for extra flavor and nutrition without losing the taquito essence.
• Baking Alternative: For a healthier option, bake at 400°F for 15-20 minutes, flipping halfway to achieve golden crispiness without frying.
• Resting Time: After frying, let taquitos rest on paper towels to drain excess oil. This step helps maintain their crisp texture.
Make Ahead Options
Crispy Chicken Taquitos are perfect for meal prep enthusiasts looking to save time during busy weeknights! You can prepare the filling—consisting of shredded chicken, cheese, and spices—up to 24 hours in advance. Simply mix everything together, transfer it to an airtight container, and refrigerate. You can also roll the taquitos, placing them seam-side down on a tray, and store them for up to 3 days in the refrigerator before frying. To maintain that signature crunch, fry them fresh just before serving; this way, your taquitos will be just as delicious as when they’re made fresh! Enjoy homemade convenience without sacrificing flavor!
How to Store and Freeze Crispy Chicken Taquitos
Fridge: Store leftover taquitos in an airtight container for up to 3 days. Be sure to layer parchment paper between them to prevent sticking.
Freezer: Place taquitos in a single layer on a baking sheet to freeze individually, then transfer to a freezer-safe bag for up to 3 months.
Reheating: For best results, reheat in a skillet over medium heat to preserve their crispy texture, about 3–5 minutes per side. You can also bake them at 375°F for 10-15 minutes until heated through.
Thawing: If frozen, thaw taquitos overnight in the fridge before reheating for a quicker cooking time and better texture. Enjoy your crispy chicken taquitos all over again!
What to Serve with Crispy Chicken Taquitos
Elevate your taquito experience with delightful sides that complement the rich flavors and textures of this favorite dish.
-
Mexican Rice: A fluffy side that adds a comforting base, balancing the crunch of taquitos beautifully. The warm spices will meld perfectly with the flavors of the filling.
-
Refried Beans: Creamy and savory, they provide a delightful contrast to the crispy texture. Top with cheese for an extra layer of indulgence!
-
Fresh Guacamole: Cool and creamy, guacamole adds a fresh, zesty finish that enhances every bite of your crispy chicken taquitos. It’s an unbeatable pairing!
-
Zesty Corn Salsa: Sweet corn mixed with tomatoes, cilantro, and lime juice brings a bright crunch that harmonizes with the taquitos’ flavors. Serve it on the side for a refreshing touch.
-
Crisp Mixed Salad: A light green salad with a tangy vinaigrette efficiently cuts through the richness of the taquitos, providing a refreshing balance.
-
Chilled Beer or Sangria: Mellow, crisp beverages that pair well with the tantalizing flavors, bringing out the festive spirit of your meal!
Transform your dining experience and make lasting memories with these perfect companions for your crispy chicken taquitos!
Variations & Substitutions for Crispy Chicken Taquitos
Feel free to explore your culinary creativity as you customize these crispy chicken taquitos to tantalize your taste buds!
-
Spicy Kick: Add chopped jalapeños to the filling for an extra layer of heat and flavor. The bright, sharpness of jalapeños makes your taquitos burst with Tex-Mex flair.
-
Citrusy Twist: A squeeze of fresh lime juice into the filling brightens up the flavors. It adds a citrusy zing that brings everything together beautifully.
-
Gluten-Free Option: Swap flour tortillas for corn tortillas to create a gluten-free alternative. This change retains the delightful crunch while catering to those with dietary restrictions.
-
Herb Infusion: Experiment by incorporating fresh herbs like cilantro or green onions into the filling. Fresh ingredients give the dish a refreshing twist and enhance its flavor.
-
Creamy Variation: Use cream cheese with herbs or even a flavored cheese spread for an exciting, herbaceous filling. This will create a creamy, flavorful experience that will delight your palate!
-
Baking Method: For a healthier take, bake the taquitos instead of frying. Place them on a lined baking sheet at 400°F for 15-20 minutes. This method still gives you crispy results, minus the oil!
-
Cheese Swap: Try Monterey Jack or a Mexican cheese blend in place of cheddar for different flavor profiles. Each cheese offers its unique characteristics to enhance the filling.
-
Extra Veggies: Add black beans or corn to the filling for extra nutrition and texture. This not only stretches the recipe further but adds a hearty element to every bite.
As you can see, these variations can turn your crispy chicken taquitos into countless delicious options! If you’re looking for more Tex-Mex inspiration, try pairing them with my Lemon Garlic Chicken or serve them alongside Chopped Chicken Bacon Ranch Sandwich for a delightful spread. Happy cooking!

Crispy Chicken Taquitos Recipe FAQs
How should I select ripe ingredients for the filling?
Absolutely! For the best flavor and texture in your Crispy Chicken Taquitos, ensure your cream cheese is fresh and smooth. Choose shredded cheddar cheese that’s not past its expiration date, and if you’re using fresh spices, check that they are aromatic. For chicken, using freshly cooked or high-quality rotisserie chicken is ideal for flavor.
What’s the best way to store leftover taquitos?
Very! Store leftover Crispy Chicken Taquitos in an airtight container in the fridge for up to 3 days. To prevent them from sticking together, layer parchment paper between each taquito. When ready to enjoy, simply reheat them in a skillet for that crispy texture we all love!
Can I freeze these taquitos, and how?
Yes, you can! To freeze, place the assembled taquitos in a single layer on a baking sheet to freeze individually for about 1–2 hours until solid. Then, transfer them to a freezer-safe bag. They can be frozen for up to 3 months. This method prevents them from sticking together and makes it easy to grab just what you need later!
What if my taquitos don’t come out crispy?
No worries! If your Crispy Chicken Taquitos are not achieving that desired crunch, check the oil temperature; it should be between 350°F to 375°F. Frying in small batches helps as well—overcrowding the pan can lead to steaming instead of frying. If you prefer a healthier option, try baking them at 400°F for 15-20 minutes, flipping halfway for even crispiness.
Can these taquitos be modified for dietary restrictions?
Absolutely! For gluten-free options, swap flour tortillas for corn tortillas. You can also use dairy-free cream cheese and cheese alternatives to accommodate lactose intolerance. If you’re watching your calories, consider using reduced-fat cheese and Greek yogurt instead of sour cream. Always tailor your spices and fillings according to your specific dietary needs.
Are there any allergies to consider when making these taquitos?
Very good question! These Crispy Chicken Taquitos contain common allergens such as dairy and gluten (in flour tortillas). If you are serving someone with a food allergy, be sure to check your ingredient labels. You can modify the recipe using gluten-free tortillas and plant-based dairy options to meet various dietary considerations. Always be cautious and inform your guests about the ingredients!

Crispy Chicken Taquitos That Will Make You Forget Fast Food
Ingredients
Equipment
Method
- Prepare the Filling: In a large mixing bowl, combine 2 cups of cooked shredded chicken, 1 cup of cheddar cheese, 1/2 cup of cream cheese, and 1/4 cup of sour cream. Use a fork to mix until smooth and creamy.
- Season It Right: Sprinkle in 1/2 teaspoon of garlic powder, 1/2 teaspoon of onion powder, 1/2 teaspoon of cumin, 1/4 teaspoon of chili powder, and add salt and pepper to taste. Stir thoroughly to incorporate evenly.
- Assemble the Taquitos: Lay a tortilla flat, spoon 2–3 tablespoons of filling on the lower third, fold sides, and roll tightly. Position seam-side down on a tray.
- Heat the Oil: Heat about one inch of vegetable oil in a large skillet over medium-high heat until it reaches 350°F to 375°F.
- Fry to Perfection: Carefully place taquitos seam-side down in the hot oil. Fry for 2–3 minutes until browned, then flip and fry another 2–3 minutes.
- Drain Excess Oil: Transfer cooked taquitos to a paper towel-lined plate to drain excess oil.
- Serve with Joy: Serve warm with optional toppings like fresh salsa, guacamole, sour cream, and chopped cilantro.
Leave a Reply