
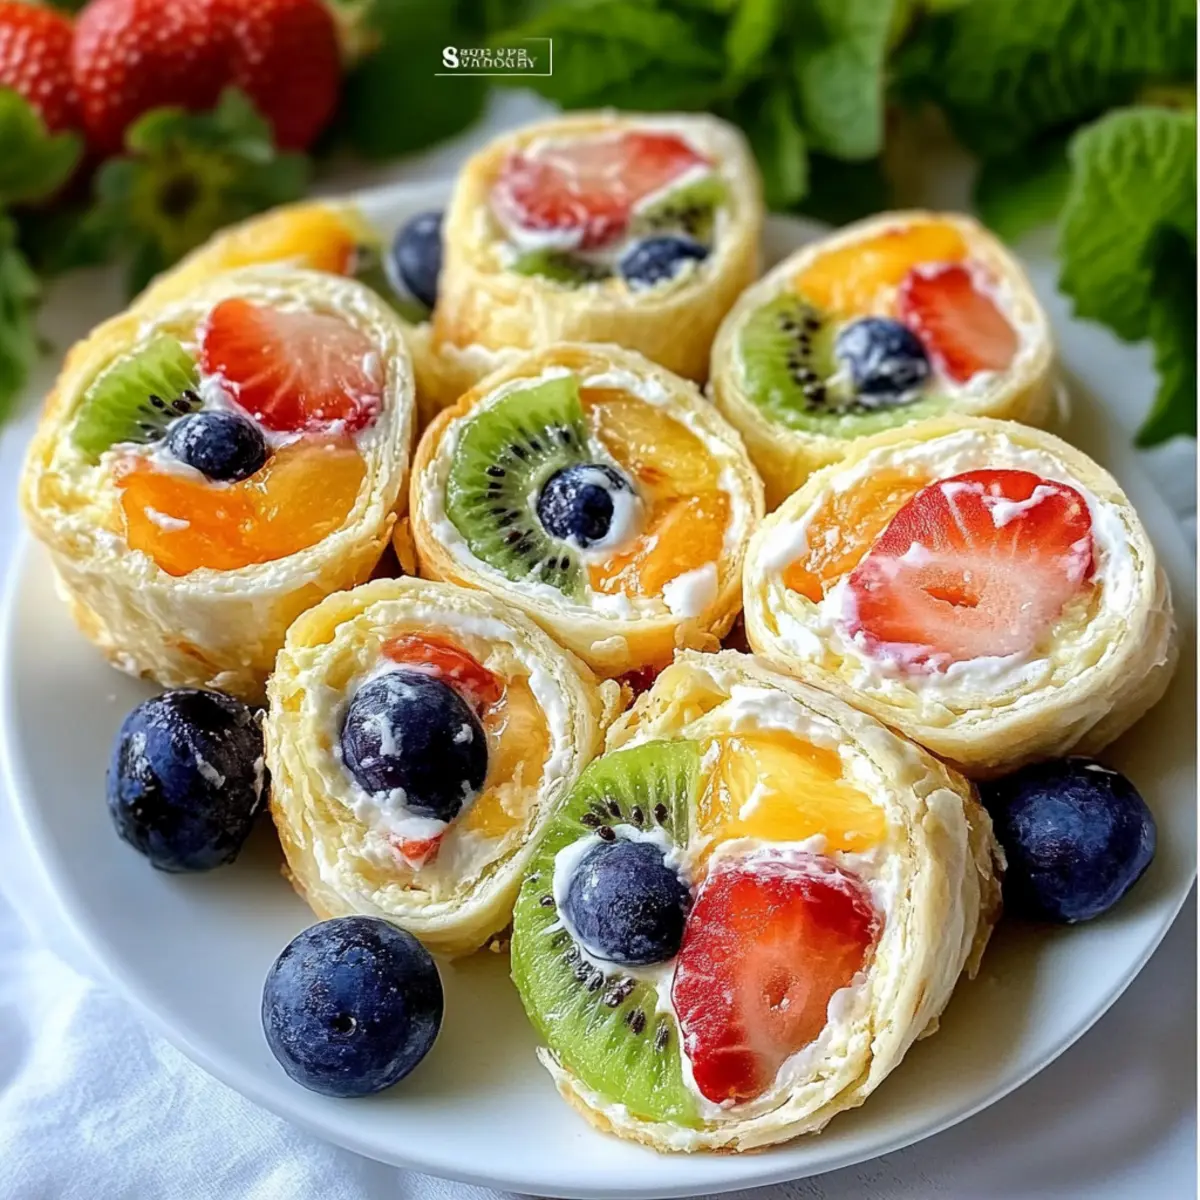
A burst of sunshine and sweetness awaits you in these Cheesecake Fruit Salad Roll Ups! With a creamy cheesecake filling wrapped snugly in soft tortillas, this no-bake delight is not only a lifesaver on busy days but also a versatile canvas for your favorite seasonal fruits. Whether you’re hosting a backyard barbecue or seeking a fun dessert for the kids, this recipe is your go-to answer for a crowd-pleasing treat without the fuss of baking. The best part? They’re a guilt-free indulgence that can easily adapt to cater to all taste preferences. Ready to explore how you can create your very own twist on this refreshing dessert? Let’s roll!

Why are these roll-ups so irresistible?
Simplicity in preparation: These Cheesecake Fruit Salad Roll Ups come together effortlessly, allowing you to enjoy homemade flavor without the hassle of baking.
Customizable delights: You can get creative with fillings and toppings, swapping in seasonal fruits or even adding chocolate chips for a sweet twist.
Crowd-pleasing treat: Perfect for summer picnics or birthday parties, these roll-ups are sure to impress guests, much like our Dumpling Salad Zesty.
Nutritious & satisfying: With fresh fruit and optional low-fat ingredients, they offer a guilt-free way to satisfy your sweet tooth.
Kid-friendly fun: Easy to make and even easier to eat, kids will love helping out and customizing their own roll-ups for family get-togethers.
Dive into these delightful treats this summer and enjoy the perfect blend of creaminess and fruitiness!
Cheesecake Fruit Salad Roll Ups Ingredients
For the Filling
• Cream Cheese – The base of the filling that provides creaminess; try low-fat cream cheese or Greek yogurt for a lighter option.
• Powdered Sugar – Sweetens the cheesecake filling; stick with powdered for the best texture.
• Vanilla Extract – Enhances flavor; opt for pure vanilla extract for the best taste.
For the Wrap
• Tortillas – The soft wrap for your roll-ups; use gluten-free tortillas for a suitable alternative.
For the Fruit
• Fresh Fruit (e.g. strawberries, kiwi) – Adds vibrant flavor and texture; choose ripe, seasonal fruits for maximum freshness.
• Chopped Nuts (optional) – Offers a delightful crunch; pecans or almonds work wonderfully, but feel free to omit for a nut-free option.
These Cheesecake Fruit Salad Roll Ups are as adaptable as they are delicious, allowing you to mix and match to your heart’s content!
Step‑by‑Step Instructions for Cheesecake Fruit Salad Roll Ups
Step 1: Prepare the Creamy Filling
In a medium mixing bowl, beat together 8 ounces of cream cheese, 1 cup of powdered sugar, and 1 teaspoon of vanilla extract using an electric mixer on medium speed. Mix until the mixture is smooth and fluffy, taking about 2-3 minutes. You’ll know it’s ready when there are no lumps, and it has a light, creamy texture that will be perfect for your Cheesecake Fruit Salad Roll Ups.
Step 2: Assemble the Tortillas
Lay out 4 tortillas on a clean surface or cutting board. Evenly spread 2-3 tablespoons of the cream cheese filling onto each tortilla, leaving about a half-inch border around the edges to prevent spills. Use a spatula or the back of a spoon to create a smooth, even layer, ensuring each tortilla is well-coated with the delicious filling, setting the foundation for your delectable roll-ups.
Step 3: Add Fresh Fruits
Next, take your selection of fresh fruits, such as sliced strawberries and kiwi, and scatter them evenly over the cream cheese layer on each tortilla. Aim for a colorful arrangement to enhance visual appeal. Make sure the fruits are ripe and juicy, as they will contribute freshness and flavor to your Cheesecake Fruit Salad Roll Ups.
Step 4: Optional Crunch Factor
For an extra layer of texture, sprinkle a handful of chopped nuts over the fruit layer on each tortilla if desired. Pecans or sliced almonds are wonderful options that will add a delightful crunch and contrast against the creamy filling. This step is optional, but it certainly elevates the overall experience of the roll-ups.
Step 5: Roll It Up
Starting from one edge, carefully roll each tortilla tightly away from you, keeping the filling and fruit snugly inside. Be gentle to prevent the filling from squeezing out, and ensure a beautiful cylindrical shape. The tight roll will help maintain the structure of your Cheesecake Fruit Salad Roll Ups, making them easier to slice later.
Step 6: Slice and Serve
Using a sharp knife, slice each rolled tortilla into 1 to 1.5-inch pieces, or leave them whole if you prefer. Arrange the slices on a platter for serving or refrigerate them for about 10-20 minutes to let them firm up slightly. The brief chill will help keep the filling intact when serving your delightful Cheesecake Fruit Salad Roll Ups, making them a satisfying treat anytime!

What to Serve with Cheesecake Fruit Salad Roll Ups
These delightful roll-ups create a perfect sweet end to a warm day!
-
Refreshing Fruit Salad: A mix of seasonal fruits complements the cheesecake filling, enhancing the fresh flavors already present. The bright colors and juicy bites create a visually stunning sidekick.
-
Creamy Yogurt Parfait: Layering yogurt with granola and berries can provide a light yet satisfying accompaniment to the roll-ups. This combination adds a creamy texture and crunch, balancing the sweetness of the dessert.
-
Zesty Lemonade: A glass of refreshing lemonade offers a tangy contrast to the rich flavors of the roll-ups, making it a delightful way to cleanse the palate between bites.
-
Chocolate Dipped Strawberries: Elevate your dessert experience by serving chocolate-dipped strawberries alongside your roll-ups. The combination of creamy cheesecake, fresh fruit, and indulgent chocolate is simply irresistible.
-
Fun Ice Cream Sundae Bar: Set up a sundae bar where guests can top their roll-ups with scoops of ice cream, sprinkles, or whipped cream. This interactive dessert option will definitely excite everyone!
-
Minted Iced Tea: A refreshing mint iced tea pairs perfectly, its herbal notes complementing the richness of the cheesecake and cooling you down on hot days.
For a well-rounded experience, consider serving up these pairings to make the most of your Cheesecake Fruit Salad Roll Ups!
Expert Tips for Cheesecake Fruit Salad Roll Ups
-
Don’t Overfill: Avoid excess filling to prevent the tortillas from tearing during rolling. A tablespoon or two is just right.
-
Chill Before Slicing: Refrigerate the filled roll-ups for 10-20 minutes before slicing. This helps firm them up for cleaner cuts.
-
Use Firm Fruits: Choose sturdy fruits to prevent sogginess and ensure a delightful crunch. Ripe, seasonal options yield the best flavor.
-
Try Different Tortillas: Experiment with various tortilla types like whole wheat or flavored options to switch up the flavor profile of your Cheesecake Fruit Salad Roll Ups.
-
Creative Mix-ins: Don’t hesitate to add chocolate chips or coconut flakes to the cream filling for a unique twist that everyone will love.
Make Ahead Options
These Cheesecake Fruit Salad Roll Ups are fantastic for meal prep, allowing you to enjoy a scrumptious dessert with minimal last-minute effort. You can prepare the creamy filling and spread it onto the tortillas up to 24 hours in advance; simply assemble and slice them just before serving. To maintain their freshness, store the prepared roll-ups in an airtight container in the refrigerator, ensuring they are tightly wrapped to prevent drying out. When ready to serve, give them a brief chill of 10-20 minutes to firm up, enhancing their delightful texture. With these make-ahead tips, you’ll save time while providing your family and guests with a delicious dessert!
Cheesecake Fruit Salad Roll Ups Variations
Get ready to personalize your Cheesecake Fruit Salad Roll Ups with delightful twists that will tickle your taste buds!
-
Dairy-Free: Use coconut cream in place of cream cheese for a vegan-friendly version that adds a tropical flair.
-
Seasonal Fruits: Swap in peaches or mangoes when they’re in season for a juicy, colorful spin that will brighten your plate.
-
Nut-Free: Omit chopped nuts or substitute sunflower seeds to maintain crunch without the allergens for a kid-friendly option.
-
Chocolate Lover’s Delight: Mix in mini chocolate chips with the cream cheese filling for a decadent, sweet twist that makes every bite irresistible.
-
Spiced Up: Add a pinch of cinnamon or nutmeg to the cream cheese filling for warming spices that elevate flavor and evoke cozy memories.
-
Extra Crunch: Use granola instead of nuts for added texture and a delightful crunch; it pairs beautifully with the creamy filling.
-
Gluten-Free/Tortilla Swap: Try using rice paper wraps for a unique texture and gluten-free option that’s quirky and fun to eat.
-
Zesty Citrus: Squeeze a bit of fresh lemon or lime juice into the cream cheese filling for a refreshing tang that complements the sweetness of the fruit.
Feel free to mix and match these delicious variations, just like you can with other recipes from our site, like the Soft Cinnamon Roll or a decadent Velvet Oreo Cheesecake. Each modification is sure to make your roll-ups uniquely yours!
Storage Tips for Cheesecake Fruit Salad Roll Ups
Fridge: Store leftover Cheesecake Fruit Salad Roll Ups in an airtight container in the refrigerator for up to 2 days. They are best enjoyed fresh for maximum flavor and texture.
Freezer: For longer storage, you can freeze the assembled roll-ups before slicing. Wrap each roll tightly in plastic wrap and place them in a freezer-safe bag for up to 1 month. Thaw in the fridge before serving.
Reheating: These roll-ups are best served cold or at room temperature. If you prefer them slightly warmed, briefly microwave them for about 10 seconds before enjoying.
Wrap Properly: Ensure the roll-ups are well-wrapped to avoid them drying out or absorbing other odors from the fridge.
Cheesecake Fruit Salad Roll Ups Recipe FAQs
Which fruits are best for Cheesecake Fruit Salad Roll Ups?
Absolutely! When selecting fruits, opt for ripe, seasonal produce for the best flavor. Strawberries, kiwi, peaches, and blueberries are all fantastic choices. Aim for fruits that aren’t too juicy to avoid sogginess.
How should I store leftover roll-ups?
Store any leftover Cheesecake Fruit Salad Roll Ups in an airtight container in the refrigerator. They will stay fresh for up to 2 days. For best taste and texture, enjoy them soon after making!
Can I freeze Cheesecake Fruit Salad Roll Ups?
Yes, you can! For freezing, wrap each assembled roll tightly in plastic wrap and place them in a freezer-safe bag. They can be frozen for up to 1 month. To serve, thaw them in the fridge overnight before enjoying.
What if my tortillas tear while rolling?
Very! If the tortillas tear, don’t worry. Simply use a new tortilla as a base and spread a thin layer of filling to help it stick. Another tip is to warm the tortillas slightly in the microwave (about 10 seconds) to make them more pliable before adding the filling.
Are these roll-ups suitable for people with nut allergies?
Certainly! You can easily make Cheesecake Fruit Salad Roll Ups nut-free by omitting the chopped nuts from the recipe. They still taste delightful and remain creamy and satisfying without them!
What if my cheesecake filling is too runny?
No problem! If your filling turns out too runny, you might have overmixed. To fix this, try adding a bit more powdered sugar until you achieve the right consistency. Chill in the fridge for about 15-20 minutes before spreading to help firm it up as well.

Cheesecake Fruit Salad Roll Ups Perfect for Easy Summer Treats
Ingredients
Equipment
Method
- In a medium mixing bowl, beat together cream cheese, powdered sugar, and vanilla extract using an electric mixer on medium speed until smooth and fluffy, about 2-3 minutes.
- Lay out the tortillas on a clean surface. Evenly spread the cream cheese filling onto each tortilla, leaving a half-inch border around the edges.
- Scatter your selection of fresh fruits evenly over the cream cheese layer on each tortilla.
- Sprinkle chopped nuts over the fruit layer on each tortilla if desired.
- Starting from one edge, roll each tortilla tightly away from you, keeping the filling and fruit snug inside.
- Using a sharp knife, slice each rolled tortilla into 1 to 1.5-inch pieces, or leave whole. Arrange the slices on a platter or refrigerate for 10-20 minutes.
Leave a Reply