
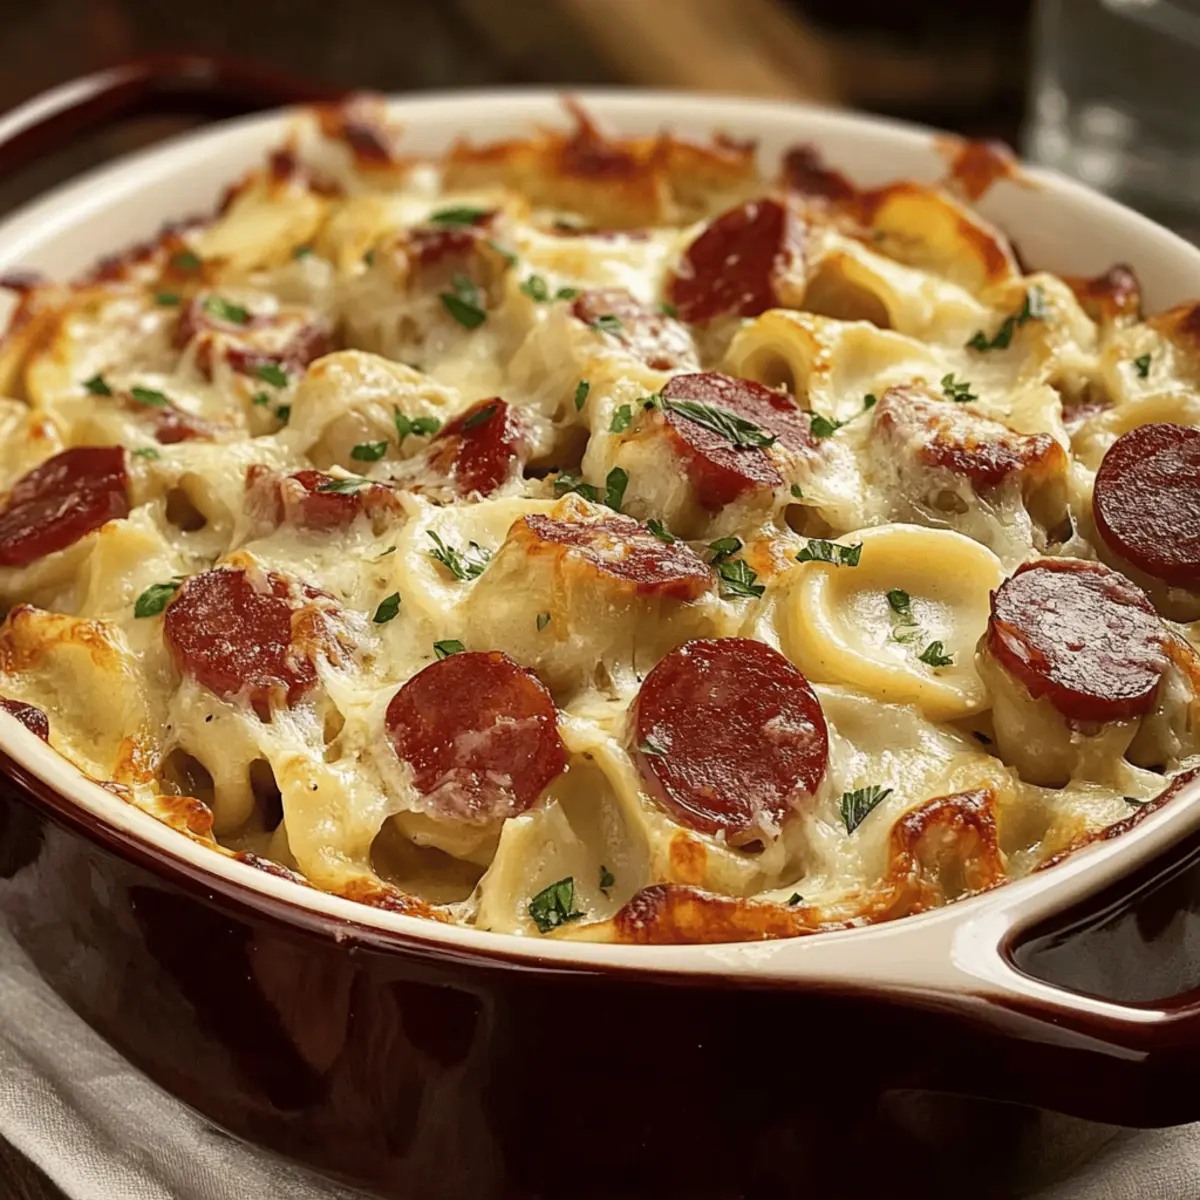
As I stirred the creamy sauce bubbling on the stove, the warm, smoky aroma of Kielbasa and Pierogi Bake filled my kitchen, instantly evoking memories of family gatherings and laughter. This comforting casserole marries flavorful Eastern European traditions with modern convenience, delivering a hearty meal that’s quick to assemble and utterly satisfying. Packed with protein and easy to customize, you can swap out ingredients for vegetarian options or boost the veggie content, making it appealing for everyone at the table. Whether you’re stirring up nostalgia or simply looking for a crowd-pleaser for your next weeknight dinner, this recipe promises to become a beloved staple in your home. Will you stick to the classic version, or take a creative twist on this comforting dish?

Why is Kielbasa and Pierogi Bake irresistible?
Comforting nostalgia: This dish brings back fond memories of family gatherings, making it a cherished choice for both kids and adults.
Endless customization: Easy to adapt with vegetarian substitutes like mushrooms or extra veggies for a healthier twist.
Savory satisfaction: The blend of smoky kielbasa and creamy pierogies creates layers of flavor that will make your taste buds dance.
Time-saving heavenly delight: Quick to assemble, making it perfect for busy weeknights when you crave a hearty meal without the fuss.
By trying this recipe, you won’t just be making a meal; you’ll be creating lasting memories around the table. For more comforting recipes, check out my posts on easy casseroles and homemade pierogies.
Kielbasa and Pierogi Bake Ingredients
• Here are the essentials to create your comforting casserole, packed with flavor and easy to customize.
For the Bake
- Kielbasa – Adds a rich, smoky flavor; opt for meat-free sausage or sautéed mushrooms for a vegetarian option.
- Frozen Pierogies – Provide a creamy, chewy texture; homemade versions can elevate the dish but frozen is convenient.
- Sour Cream – Creates a tangy, creamy sauce; low-fat options can help reduce calories and saturated fat.
- Cream Cheese – Enhances creaminess in the sauce; substitute with low-fat cream cheese or Greek yogurt for a lighter dish.
- Onions – Contribute natural sweetness and depth; white or yellow onions work well, or omit for a milder flavor.
- Cheddar Cheese – Offers a creamy, salty kick on top; try smoked gouda or Monterey Jack for a twist.
For Garnishing
- Fresh Parsley or Chives – Adds a touch of freshness; these are optional but brighten up the dish beautifully.
With these ingredients, you’re on your way to creating the delicious Kielbasa and Pierogi Bake that your family will adore!
Step‑by‑Step Instructions for Kielbasa and Pierogi Bake
Step 1: Preheat the Oven
Begin by preheating your oven to 350°F (175°C). This is essential for achieving that perfect, bubbly top on your Kielbasa and Pierogi Bake. While the oven heats, gather your baking dish and other ingredients, creating a smooth workflow for the assembly process.
Step 2: Brown the Kielbasa
In a large skillet over medium heat, add the sliced kielbasa. Cook for about 5-7 minutes, stirring occasionally until the slices are nicely browned and slightly crispy. This will enhance the smoky flavor of the kielbasa, making it a delicious addition to your bake.
Step 3: Prepare the Creamy Base
In a medium bowl, combine sour cream and cream cheese, mixing until smooth and creamy. Spread this delightful mixture evenly across the bottom of a greased baking dish. This creamy foundation will provide a tangy contrast to the savory kielbasa and pierogies, setting the stage for flavor.
Step 4: Layer the Pierogies
Next, arrange the frozen pierogies over the creamy layer, ensuring they are spread out evenly. This will allow them to cook through properly without overcrowding. The pierogies will absorb the flavors from the creamy base as they bake, resulting in a wonderful texture that complements the dish.
Step 5: Add the Kielbasa
Once the pierogies are in place, layer the browned kielbasa evenly over the top. Their rich smokiness will infuse the dish, bringing depth and heartiness to your Kielbasa and Pierogi Bake. Spread them out so every bite has a taste of this savory goodness.
Step 6: Top with Onions and Cheese
Now it’s time to add the flavor boosters! Evenly distribute the caramelized onions over the kielbasa, followed by a generous sprinkle of shredded cheddar cheese. The cheese will melt into a delicious, gooey layer, creating a golden, crispy top as it bakes.
Step 7: Bake the Dish
Cover the baking dish with aluminum foil and place it in the preheated oven. Bake for 25 minutes; this helps to steam the dish and cook the pierogies thoroughly. Then, remove the foil and return the dish to the oven for an additional 10-15 minutes, until the cheese is molten and golden brown.
Step 8: Garnish and Serve
Once baked, remove the dish from the oven and let it cool for a few minutes. Just before serving, garnish your Kielbasa and Pierogi Bake with freshly chopped parsley or chives to add a pop of color and flavor. Serve warm, and enjoy the comforting, savory goodness!

Kielbasa and Pierogi Bake Variations
Feel free to let your creativity shine as you customize this delightful dish to suit your tastes and dietary needs!
- Vegetarian Twist: Substitute kielbasa with sautéed mushrooms or meat-free sausage for a hearty vegetarian option. The rich umami flavors will make it just as satisfying.
- Extra Veggies: Boost nutrition by adding chopped spinach, bell peppers, or steamed broccoli. These colorful additions bring freshness and a pop of veggies to every bite.
- Creamy Alternatives: Swap sour cream with Greek yogurt or low-fat options for a lighter, tangy sauce. The difference in flavor is subtle yet delightful!
- Cheesy Variations: Experiment with different cheeses like smoked gouda or pepper jack for a unique flavor kick. Each cheese offers a different taste experience, adding to the excitement of the dish.
- Spicy Kick: Craving some heat? Opt for a spicy kielbasa or sprinkle crushed red pepper flakes for an extra layer of flavor that will warm your soul.
- Corny Goodness: Toss in some sweet corn alongside your pierogies for a burst of sweetness and texture. Corn complements the dish perfectly, enhancing both flavor and nutrition.
- Herb Infusion: Use fresh herbs like dill or thyme in addition to parsley for a fragrant twist. These herbs can elevate the dish, creating a delightful aromatic experience with every bite.
- Onion Alternatives: Omit the onions or switch to caramelized shallots for a milder, sweet flavor. They will provide a subtle depth to the creamy blend without overpowering it.
Your kitchen is your playground, so explore these options, or mix and match to discover your ultimate Kielbasa and Pierogi Bake! If you’re curious about more comforting flavors, visit my posts on easy casseroles and homemade pierogies for inspiration!
Expert Tips for Kielbasa and Pierogi Bake
-
Prevent Sogginess: Ensure pierogies are not overcrowded in the baking dish. This allows them to cook evenly and avoid becoming soggy.
-
Golden Topping: For a crispy, golden top, uncover the dish during the last few minutes of baking and switch on the broiler for 2-3 minutes.
-
Spice it Up: Want an extra kick? Add crushed red pepper flakes or opt for a spicy kielbasa to enhance the dish’s flavor profile.
-
Layering Tips: Spread cream cheese and sour cream mixture evenly to ensure every bite of the Kielbasa and Pierogi Bake is rich and creamy.
-
Storage Reminder: Leftovers can be stored in the fridge for up to 4 days. Consider freezing for longer storage; just use airtight containers!
-
Veggie Boost: Feel free to mix in chopped spinach, bell peppers, or any favorite veggies for added nutrition without losing the comforting feel of this dish.
Make Ahead Options
This Kielbasa and Pierogi Bake is perfect for meal prep enthusiasts looking to save time on busy weeknights! You can assemble the entire bake up to 24 hours in advance; simply cover it tightly with plastic wrap or aluminum foil and refrigerate to maintain freshness. The creamy base prevents the pierogies from becoming too soggy, ensuring just as delicious results when baked. When you’re ready to enjoy your comforting casserole, remove it from the fridge and bake as directed—covering it for the first 25 minutes and then uncovering for an additional 10-15 minutes. You’ll savor a hearty meal with minimal effort, allowing you to focus on what matters most—spending time with loved ones!
What to Serve with Kielbasa and Pierogi Bake
Pairing this delightful dish with complementary sides makes for a well-rounded meal that delights the senses.
- Crisp Green Salad: A fresh salad with a tangy vinaigrette adds a vibrant contrast to the creamy bake, refreshing your palate between bites.
- Roasted Brussels Sprouts: Their slight sweetness and nutty flavor create a beautiful balance alongside the smoky kielbasa. Toss with olive oil and garlic for extra zest.
- Garlic Bread: Crunchy, buttery garlic bread invites you to scoop up more of that delectable sauce and pierogi goodness. It’s an irresistibly comforting addition!
- Steamed Broccoli: Lightly steamed broccoli provides a pop of green and a wholesome crunch, making your plate more colorful and nutritious.
- Light Lager or Cider: A chilled light lager cuts through the richness of the dish, adding a pleasant refreshment, while a dry cider complements the flavors beautifully.
- Homemade Applesauce: This classic pairing introduces a sweet-tart component that pairs wonderfully with the savory notes in the bake; it’s a nostalgic finish many will love!
How to Store and Freeze Kielbasa and Pierogi Bake
Fridge: Store leftovers in an airtight container for up to 4 days. Reheat individual portions in the microwave or bake in the oven until warmed through.
Freezer: For longer preservation, freeze the Kielbasa and Pierogi Bake in airtight containers. It can be frozen for up to 3 months.
Thawing: To enjoy straight from the freezer, thaw overnight in the fridge before reheating. This ensures even heating and preserves the creamy texture of the dish.
Reheating: Reheat in the oven at 350°F (175°C) for about 25-30 minutes, or until heated through and bubbly, to maintain its delightful flavors.

Kielbasa and Pierogi Bake Recipe FAQs
What type of kielbasa should I use for this recipe?
Absolutely! A traditional Polish kielbasa is ideal for flavor, but any smoked sausage will work beautifully. If you prefer a vegetarian option, try meat-free sausage or sautéed mushrooms for a rich, savory taste without the meat.
How should I store leftovers of the Kielbasa and Pierogi Bake?
Store any leftovers in an airtight container in the fridge for up to 4 days. When ready to enjoy, simply reheat individual portions in the microwave for convenience or bake in the oven until warmed through. This way, you’ll still have that comforting taste!
Can I freeze Kielbasa and Pierogi Bake?
Yes, you can freeze it! To freeze, let the dish cool completely, then transfer it into airtight containers or wrap it tightly in foil. It will last for up to 3 months in the freezer. When you’re ready to enjoy it, thaw overnight in the fridge before reheating, which helps maintain its creamy texture.
What should I do if my pierogies become soggy after baking?
To prevent sogginess, make sure your pierogies are spread out evenly and not overcrowded in the baking dish. If they are overcrowded, they steam instead of baking. For a crispy finish, remove the foil during the last few minutes of baking and broil for an additional 2-3 minutes.
Is there a way to make this dish lighter?
Very much! You can substitute sour cream and cream cheese with low-fat versions or Greek yogurt for a lighter sauce. Also, consider using cauliflower-based or whole wheat pierogies. You can easily swap Kielbasa with grilled vegetables or zucchini to lower the fat without compromising that cozy comfort food vibe.
Can I add vegetables to the Kielbasa and Pierogi Bake?
Absolutely! This dish is incredibly versatile. Adding chopped spinach, bell peppers, or steamed broccoli not only boosts the nutrition but also enhances color and texture. For best results, sauté any fresh veggies before layering them in the bake, ensuring they integrate well with the other ingredients.
Kielbasa and Pierogi Bake: Comfort Food You'll Crave
Ingredients
Equipment
Method
- Preheat your oven to 350°F (175°C).
- In a large skillet over medium heat, brown the sliced kielbasa for about 5-7 minutes.
- In a medium bowl, mix sour cream and cream cheese until smooth, then spread in the bottom of a greased baking dish.
- Layer frozen pierogies evenly over the creamy mixture.
- Add the browned kielbasa over the pierogies.
- Top with caramelized onions and shredded cheddar cheese.
- Cover with foil and bake for 25 minutes, then remove foil and bake for an additional 10-15 minutes.
- Garnish with fresh parsley or chives before serving.
Leave a Reply