
The air is crisp, and whispers of Halloween excitement fill the atmosphere. As I dive into the festivities, I can’t help but think of how fun it is to whip up a batch of Easy Cauldron Cookies—a treat that not only satisfies cravings but also ignites creativity for the whole family. These delightful cookie cups, made from rich chocolate cake mix, are quick to prep and perfect for decorating, making them a must-have for any spooky gathering. Whether you’re hosting a party or looking for a fun activity to share with kids, these cookies bring both festivity and indulgence to your table. Are you ready to conjure up some sweet magic in your kitchen?
Why Are Easy Cauldron Cookies a Must-Try?
Epic Fun: These cookies are more than just a treat; they’re a festive activity! Kids will love getting involved in the decorating process, turning your kitchen into a delightful Halloween workshop.
Quick to Make: With simple ingredients and straightforward steps, you’ll have these delicious cauldrons ready in no time, allowing you to focus on the fun of the season.
Customizable: The options for fillings and decorations are endless! Switch up toppings or even try different cake mixes to create your unique version of these treats. Want other spooky ideas? Check out our Halloween-inspired desserts for more creative solutions.
Perfect for Gatherings: Whether it’s a classroom party, a family gathering, or Halloween night, these cookies are sure to impress! Their charming look and delicious flavor will have everyone talking.
Taste Bud Approved: With a rich chocolate flavor complemented by creamy buttercream frosting, each bite is an indulgent experience that’s irresistibly festive!
Easy Cauldron Cookies Ingredients
For the Cookie Cups
• Devil’s Food Cake Mix – Provides structure and sweetness; you can use any chocolate cake mix as a substitute.
• Large Eggs – Act as a binding agent; no substitutions recommended for this recipe.
• Canola or Vegetable Oil – Ensures moisture in the cookies; alternatively, melted butter can add a richer flavor.
• Black Food Coloring – Enhances color for Halloween vibes; feel free to omit or use other colors for a fun twist.
For the Buttercream Frosting
• Unsalted Butter – Serves as the creamy base for frosting; opt for dairy-free butter for a vegan alternative.
• Powdered Sugar – Adds sweetness and texture; no substitutions recommended to maintain frosting consistency.
• Vanilla Extract – Boosts flavor; almond extract can provide a unique twist if preferred.
• Salt – Balances sweetness; no substitutions recommended for the best results.
• Milk – Adjusts frosting consistency; dairy-free milk alternatives work beautifully here.
• Green Food Coloring – Used to tint the frosting for an enchanting look; any color can be used depending on your theme.
For Decoration
• Round Green Sprinkles – Great for a fun touch on top of frosting; get creative with Halloween sprinkles as alternatives!
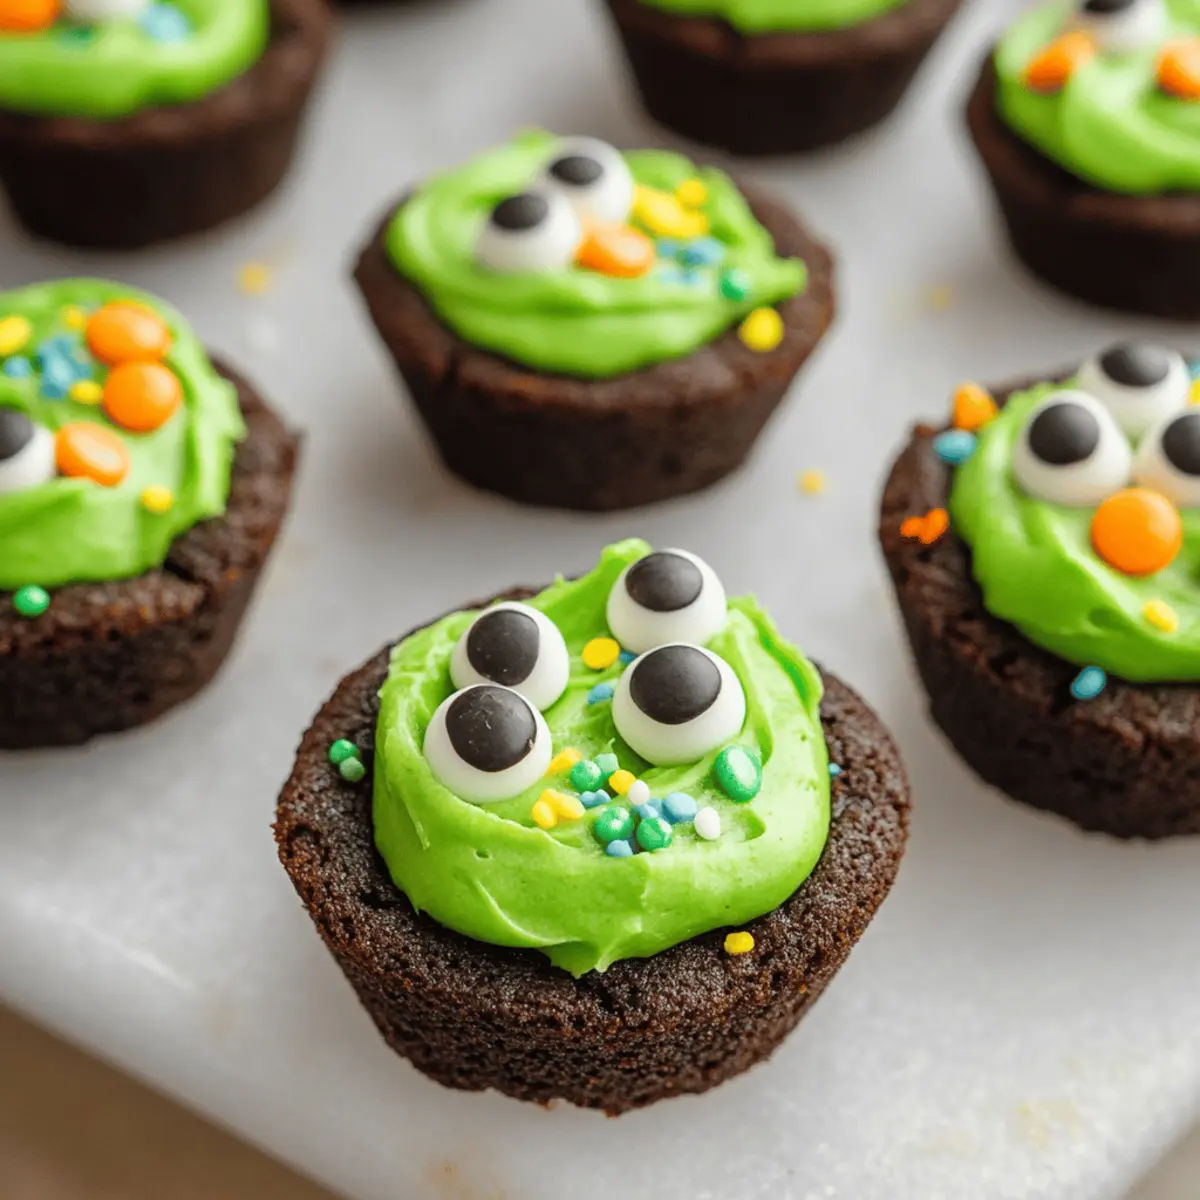
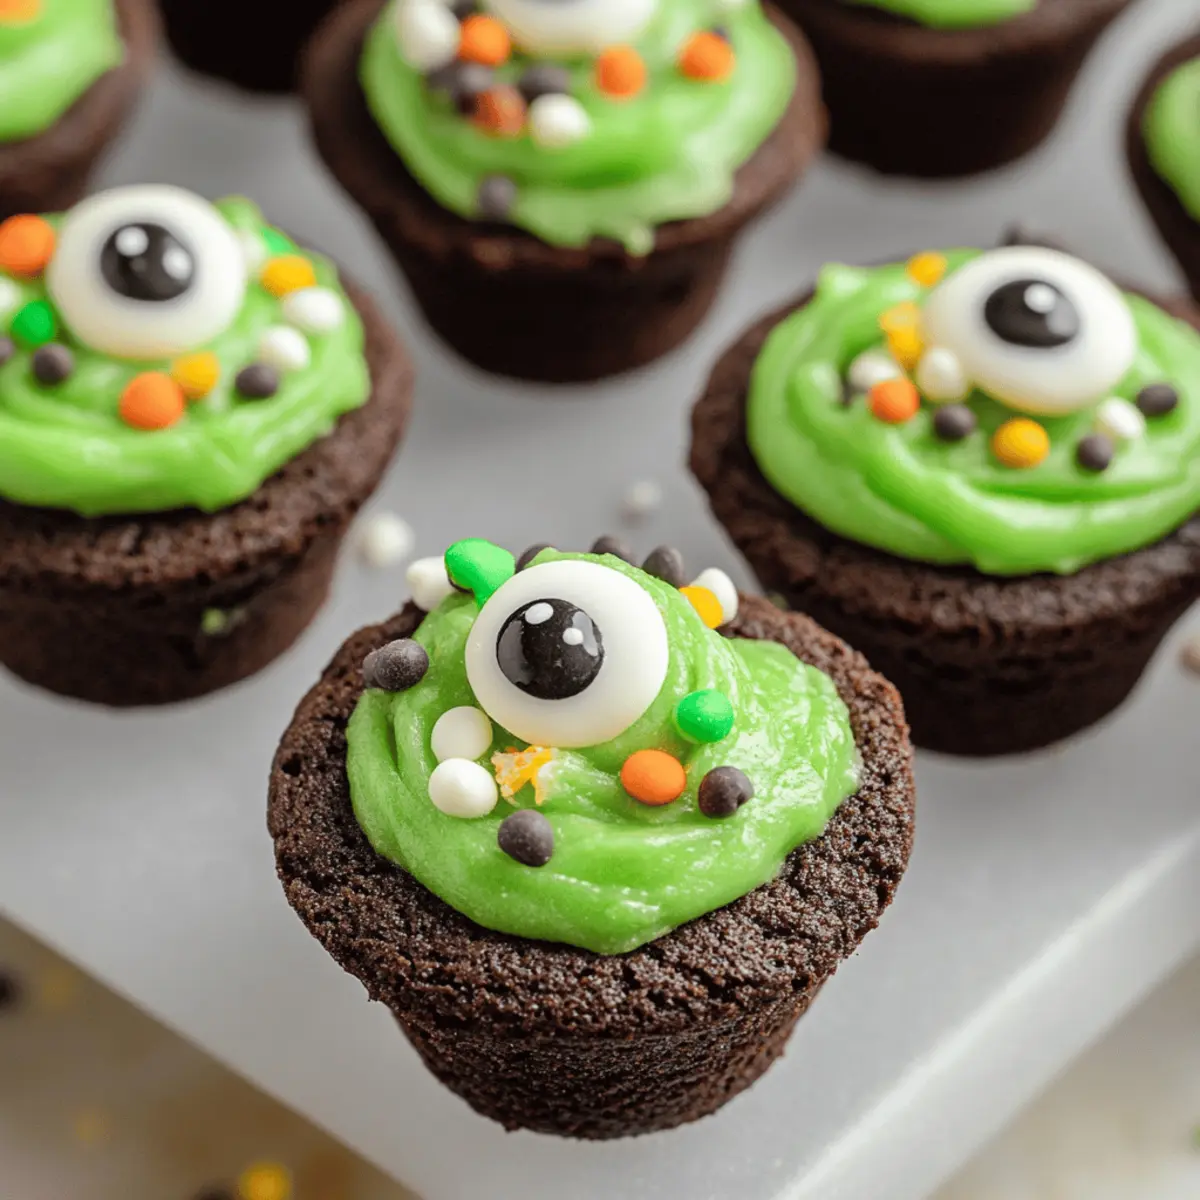
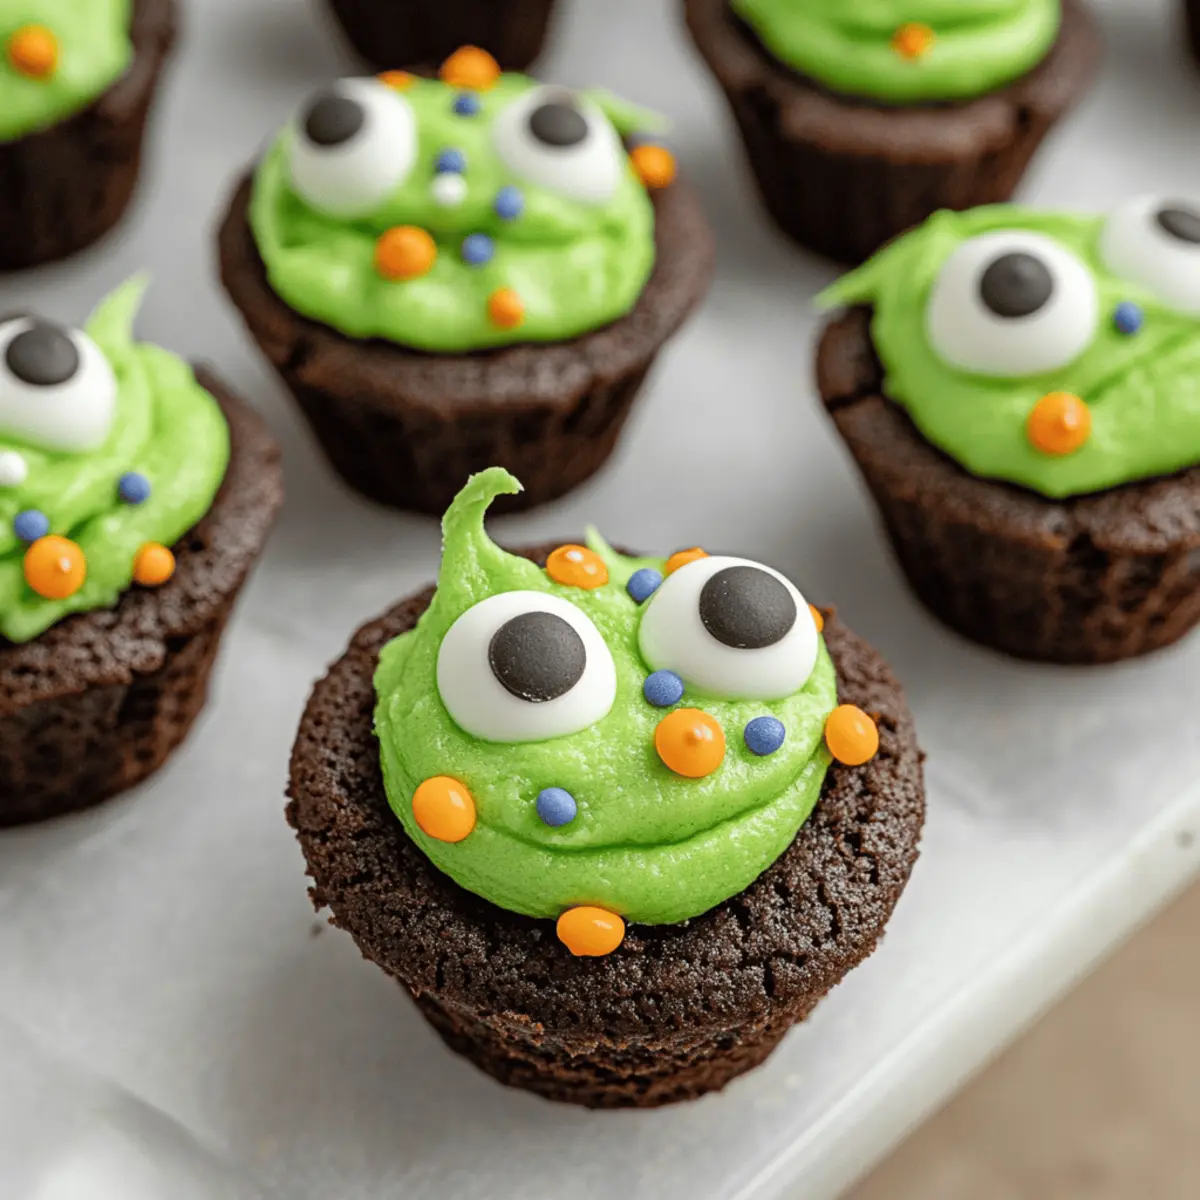
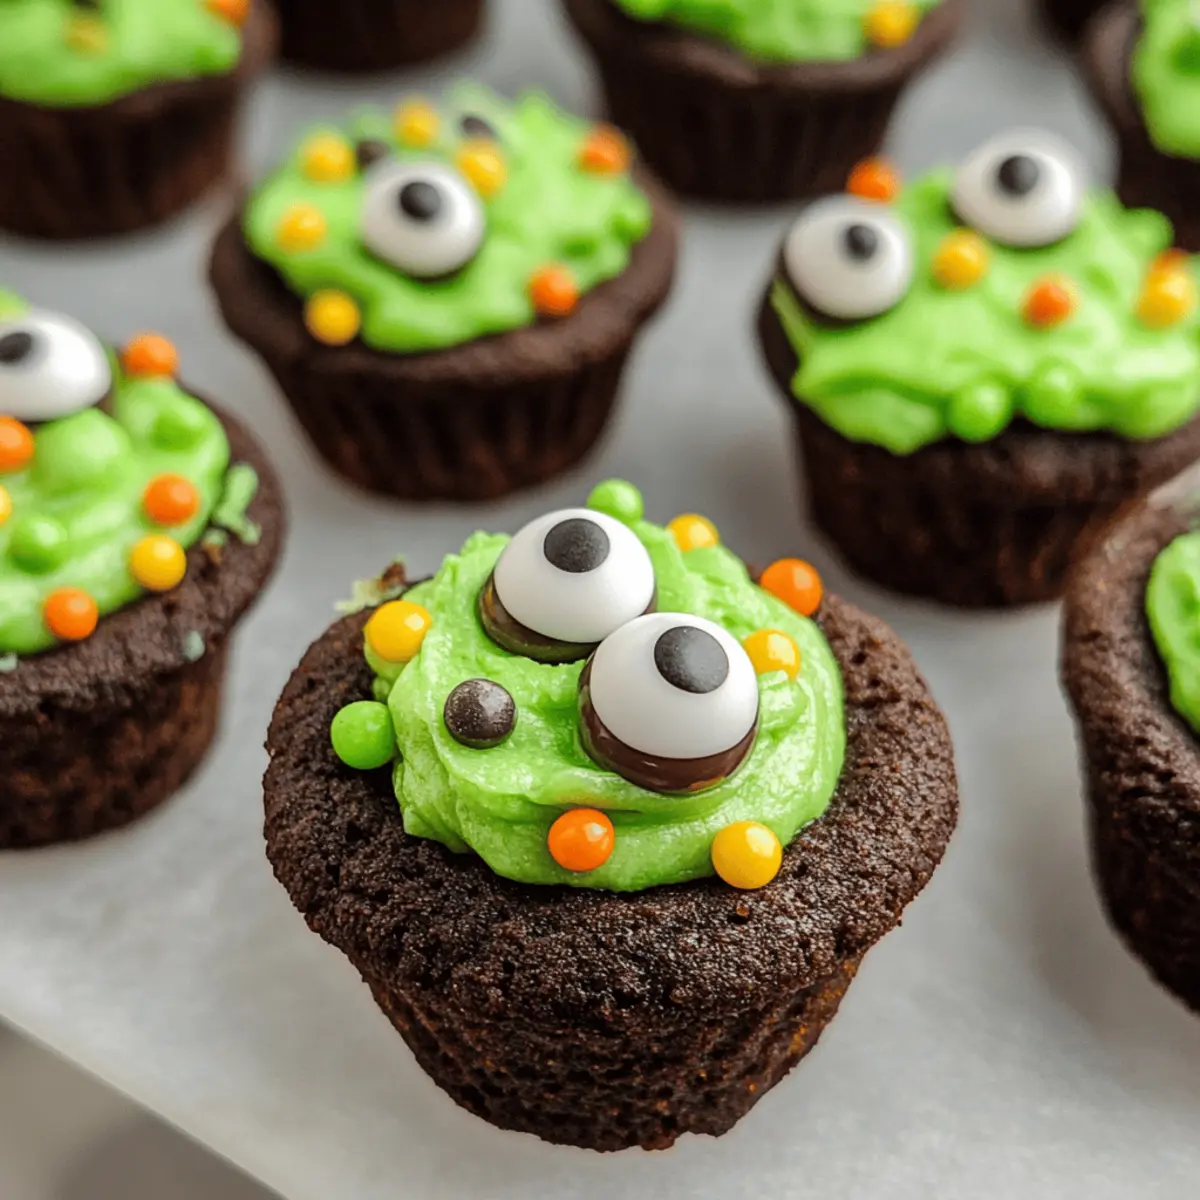
• Candy Eyeballs – Adds a spooky element that kids love; consider any themed decorations that fit your style.
• Pretzel Sticks – Serve as clever “stir sticks” for the cauldron effect; feel free to switch them out for other fun edible items.
Craft these Easy Cauldron Cookies as a delightful centerpiece for your Halloween festivities!
Step‑by‑Step Instructions for Easy Cauldron Cookies
Step 1: Preheat the Oven
Begin by preheating your oven to 350°F (175°C). While it warms up, gather your mini muffin pans and lightly grease them with cooking spray or butter to ensure the cookie cups release easily once baked. This step is crucial for achieving those adorable cauldron shapes that will hold your delicious frosting.
Step 2: Mix the Ingredients
In a large mixing bowl, combine the Devil’s Food Cake mix, large eggs, and canola oil. If you’re feeling festive, add a few drops of black food coloring to deepen the chocolate hue. Using a spatula or a whisk, mix all the ingredients until the batter is smooth and well-combined, which should take about 2 minutes.
Step 3: Prepare the Muffin Pans
Using a tablespoon, scoop out ½ tablespoon portions of the cookie dough and place them into the greased mini muffin pans. Gently flatten each portion with your fingers or the bottom of a glass to help form a cup shape as they bake. Make sure there’s enough space between them to allow for puffing up.
Step 4: Bake the Cookie Cups
Place the muffin pans in the preheated oven and bake for 8-10 minutes. The edges of the cookie cups should be set, while the centers may look slightly underbaked. Once they’re out, quickly press the back of a measuring spoon into the centers to create a well for the frosting, returning them to the oven for another minute if needed.
Step 5: Cool the Cookie Cups
Allow the cookie cups to cool in the pans for about 5 minutes before transferring them to a wire rack to cool completely. This step is essential; letting them cool fully will ensure your frosting doesn’t melt into the cups. The texture will firm up slightly for easy handling and decorating.
Step 6: Make the Buttercream Frosting
In a mixing bowl, beat the softened unsalted butter with an electric mixer until creamy and smooth. Gradually add in the powdered sugar, vanilla extract, salt, and a splash of milk until the frosting reaches a fluffy consistency. This process should take about 3-5 minutes, resulting in a sweet, rich topping for your Easy Cauldron Cookies.
Step 7: Color the Frosting
Once your buttercream is ready, add a few drops of green food coloring to the mixture. Stir well to incorporate the color evenly, adjusting the shade based on your festive preference. This vibrant green will mimic the look of a bubbling potion, adding to the playful Halloween theme of the Easy Cauldron Cookies.
Step 8: Frost the Cookies
Once the cookie cups have cooled completely, use a piping bag or a knife to fill each well with the cream-colored buttercream. Go for a whimsical swirl to create the illusion of a bubbling cauldron. This is the moment when your Easy Cauldron Cookies really start to come to life—let your creativity shine!
Step 9: Decorate with Fun Toppings
Finish off your cauldron cookies by decorating them with Halloween-themed sprinkles, candy eyeballs, and any additional touches you fancy. Use pretzel sticks as clever stirrers to enhance the cauldron effect. This step is where you can really get creative and have fun with your Easy Cauldron Cookies!
Step 10: Serve and Enjoy
Now that your Easy Cauldron Cookies are all decorated, it’s time to display them on a festive platter! These delightful treats are perfect for sharing at Halloween parties, classroom gatherings, or simply enjoying with family. Your delicious creations are not just treats but a celebration of creativity and festivity!
Expert Tips for Easy Cauldron Cookies
-
Cool Completely: Ensure the cookie cups cool entirely before frosting to prevent melting and maintain their structure.
-
Room Temperature Ingredients: Use room-temperature butter and eggs for better incorporation and a smoother batter.
-
Use the Right Oil: If substituting oil, ensure it’s neutral-flavored; too strong an oil could alter the delicious flavor of your Easy Cauldron Cookies.
-
Fun Decorating: Let kids unleash their creativity by customizing decorations; it’s a great way to bond and have fun together!
-
Avoid Freezing Decorated Cookies: To keep the beautiful decorations from bleeding, freeze undecorated cookie cups instead of mixing in frosting before freezing.
-
Taste Test Variations: Don’t hesitate to experiment with flavors or colorings in the frosting to make your Easy Cauldron Cookies uniquely yours!
What to Serve with Easy Cauldron Cookies?
As the aroma of these delightful cookies wafts through your home, you’re likely wondering how to elevate your Halloween celebration with perfect accompaniments.
-
Spooky Punch: A fruity and fizzy punch not only adds a festive flair but also quenches thirst as guests dive into sweet treats. Consider using vibrant colors and gummy worms for added fun!
-
Witch’s Brew Soup: Warm up the night with a spooky soup, like a creamy pumpkin or a vibrant green pea soup, which pairs beautifully with the sweetness of cookies. The contrasting flavors create a balanced menu.
-
Ghoulishly Green Salad: Incorporate fresh ingredients with a fun twist by adding green leafy veggies, avocado, and a tart vinaigrette. This salad brightens the meal and provides a crunchy contrast to rich cookies.
-
Chocolate Mousse Cups: For dessert lovers, rich chocolate mousse cups add an indulgent touch. Their smooth texture complements the cauldron cookies, making for a decadent post-treat experience!
-
Caramel Corn: A crunchy and sweet snack perfect for Halloween gatherings! Its decadent caramel flavor balances the soft, creamy cookies while inviting guests to snack casually throughout the evening.
-
Themed Charcuterie Board: A colorful board filled with cheeses, fruits, and Halloween-themed treats. This variety encourages mingling and snacking, perfectly harmonizing with the festive vibe of Easy Cauldron Cookies.
How to Store and Freeze Easy Cauldron Cookies
Room Temperature: Store undecorated cookie cups in an airtight container at room temperature for up to 4 days to maintain their softness and flavor.
Fridge: If you have decorated cookie cups, place them in an airtight container and refrigerate for up to 1 week, but keep in mind that the sprinkles may lose their texture over time.
Freezer: For long-term storage, freeze undecorated cookie cups for up to 3 months in a freezer-safe bag, ensuring they are well-wrapped to prevent freezer burn.
Reheating: If desired, reheat thawed cookie cups in a preheated oven at 300°F for about 5-7 minutes to restore their freshness before frosting.
Make Ahead Options
These Easy Cauldron Cookies are fabulous for busy home cooks looking to streamline their Halloween festivities! You can prepare the cookie cups up to 3 days in advance by baking them and storing them in an airtight container at room temperature. This allows the flavors to meld beautifully. When it’s time to assemble, simply whip up the buttercream frosting and fill each cup, decorating them just before serving to maintain that fresh look. For longer storage, you can freeze the undecorated cookie cups for up to 3 months; just thaw them before frosting. With this prep, you’ll save precious time while still delivering delightful, homemade treats!
Easy Cauldron Cookies Variations & Substitutions
Feel free to let your creativity shine as you explore fun twists and alternatives for these delightful cookies!
-
Brownie Base: Swap out the chocolate cookie cups for rich mini brownie bases for an even more decadent treat. Brownies offer a fudgier texture that complements the frosting beautifully.
-
Cream Cheese Frosting: Use cream cheese frosting instead of the classic buttercream for a tangy, rich flavor. This adds a unique twist that pairs perfectly with the chocolate!
-
White Chocolate Ganache Filling: Add a surprise filling of white chocolate ganache inside the cookie cups for an extra layer of flavor that will have everyone swooning.
-
Gluten-Free Option: Substitute the cake mix with a gluten-free chocolate cake mix to create treats everyone can enjoy without missing out on flavor or texture.
-
Alternative Colors: Use any desired food coloring for the frosting to match your Halloween theme. Orange, purple, or even glow-in-the-dark colors can provide a fun twist for your spooky celebrations.
-
Spicy Twist: Add a pinch of cayenne pepper or chili powder to the frosting for a surprising kick. It’s a fun way to intrigue your guests with unexpected flavors!
-
Nutty Crunch: Incorporate crushed nuts or cookie crumbles into the frosting for added texture and flavor. Almonds or hazelnuts can create a delightful crunch to each bite.
-
Themed Decorations: Get creative with decorations! Instead of pretzel sticks, consider candy corn or licorice strings for stirrers, making your treats even more festive. For more innovative decoration ideas, explore our guides on creative cake toppings to elevate your dessert game!
These variations will keep your Easy Cauldron Cookies exciting and unique, making every baking session a delightful adventure!
Easy Cauldron Cookies Recipe FAQs
What type of cake mix is best for Easy Cauldron Cookies?
I recommend using Devil’s Food Cake mix for its rich flavor, but you can substitute any chocolate cake mix if desired. Just ensure it’s a high-quality mix to achieve the best results.
How should I store my Easy Cauldron Cookies?
Store undecorated cookie cups in an airtight container at room temperature for up to 4 days. If you’ve decorated them, keep them in the fridge for up to a week. However, be aware that the sprinkles might lose their crunchiness over time.
Can I freeze Easy Cauldron Cookies?
Absolutely! You can freeze undecorated cookie cups for up to 3 months. Just ensure you wrap them well in a freezer-safe bag to prevent freezer burn. To use them, thaw overnight in the fridge, and then frost as normal.
What if my cookie cups seem too puffy after baking?
If your cookie cups puff up too much while baking, simply press down the centers with the back of a measuring spoon immediately after removing them from the oven. This will help create that perfect cup shape for frosting.
Are there any allergy considerations with this recipe?
Yes, this recipe contains eggs, dairy, and gluten. For a dairy-free option, use dairy-free butter and milk alternatives. If making for someone with gluten allergies, try a gluten-free chocolate cake mix. Always check labels for potential cross-contamination!
Can I involve kids in making these cookies?
Very much! This recipe is perfect for involving little hands. Let them help mix, scoop, and especially decorate the cookies. It’s a great way for them to express their creativity while you create delicious Halloween treats together!
Easy Cauldron Cookies that Make Halloween Extra Special
Ingredients
Equipment
Method
- Preheat your oven to 350°F (175°C) and prepare mini muffin pans with cooking spray or butter.
- In a mixing bowl, combine the cake mix, eggs, and oil, mixing until smooth. Optionally add black food coloring.
- Scoop ½ tablespoon of dough into the muffin pans, flattening each portion to form a cup shape.
- Bake for 8-10 minutes until set, then press a measuring spoon into the centers to create wells.
- Cool cookie cups in the pans for 5 minutes, then transfer to a wire rack to cool completely.
- Beat the unsalted butter until creamy, then gradually mix in powdered sugar, vanilla, salt, and milk until fluffy.
- Add green food coloring to the frosting, adjusting the shade to your liking.
- Frost cooled cookie cups with buttercream using a piping bag for a whimsical swirl.
- Decorate with sprinkles, candy eyeballs, and pretzel sticks to enhance the spooky look.
- Serve your decorated Easy Cauldron Cookies on a festive platter.
Leave a Reply