
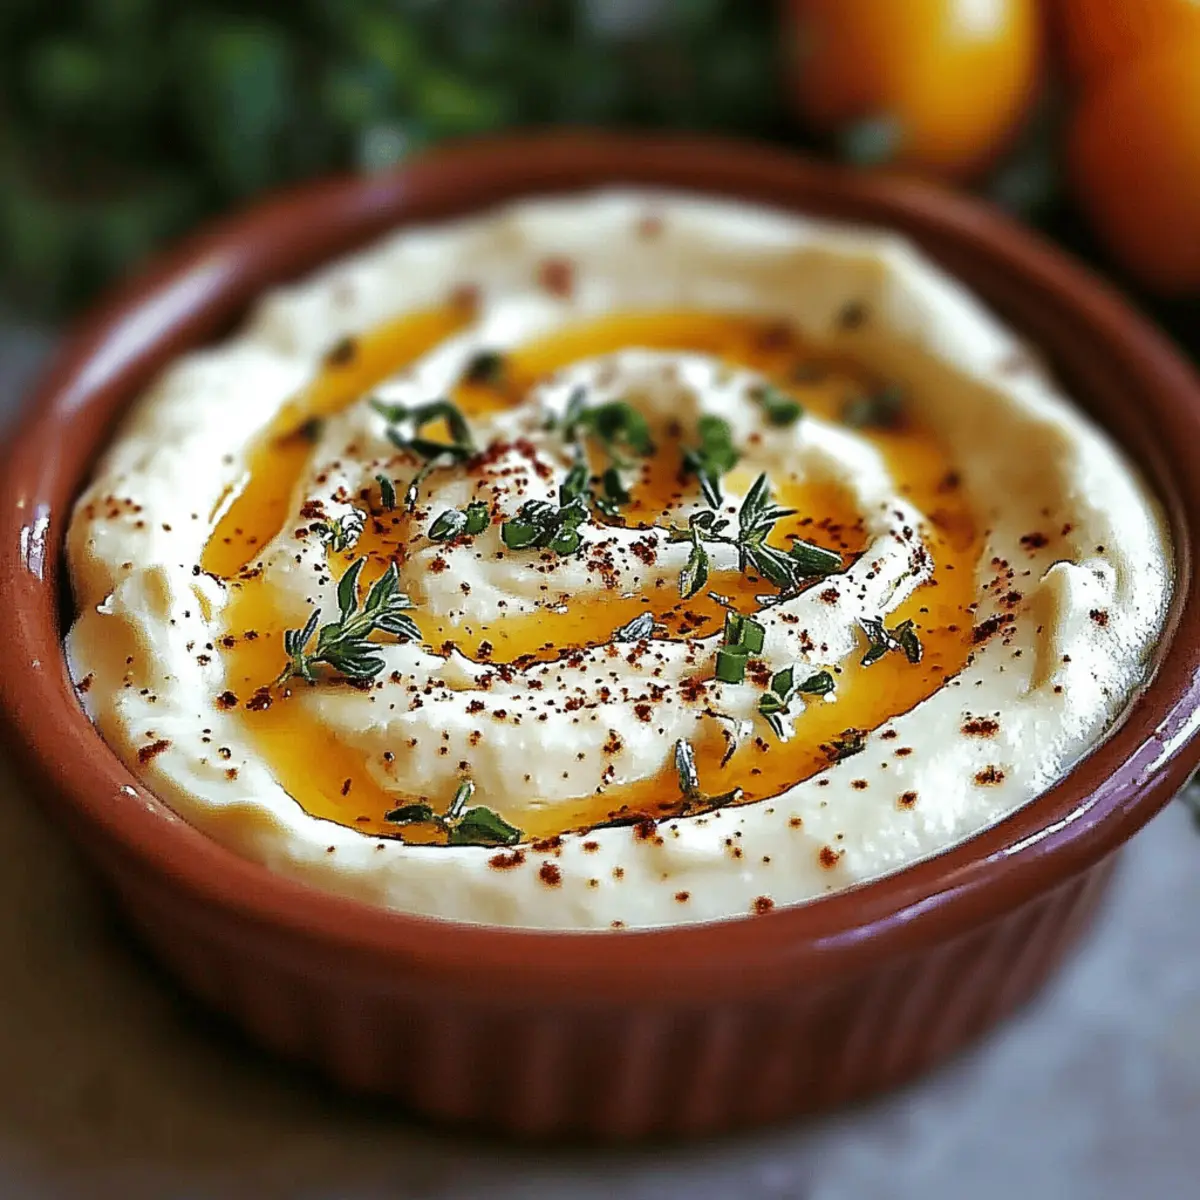
As the aroma of warm, gooey cheese fills the air, I can’t help but smile at the simple joys of great food. This Hot Honey Cream Cheese Dip transforms gatherings into unforgettable moments with its creamy base and a tantalizing kick from hot honey. Not only is this dish a crowd-pleaser, but it’s also incredibly quick to make, allowing more time to enjoy the company of friends and family. Imagine pairing it with your favorite crunchy dippers, or even mixing in your own spicy twist for a personalized touch. Ready to elevate your appetizer game and impress your guests? Let’s dive into this delightful recipe!
Why is Hot Honey Cream Cheese Dip a Must-Try?
Irresistible Flavor Fusion: This dip combines sweet and spicy elements, thanks to the hot honey, creating a unique taste that excites the palate.
Effortless Preparation: With just a few simple steps, you can have a creamy, cheesy delight ready in no time, leaving you plenty of moments to mingle.
Crowd-Pleasing Appeal: Perfect for parties or cozy nights in, this dip is sure to be a hit, making it comparable to other favorites like Peach Pecan Dip and Baked Brie Fig.
Versatile Dipper Options: Whether you choose crunchy chips, veggies, or warm bread, this dip pairs beautifully with a variety of dippers for everyone to enjoy.
Customizable Heat Levels: Feel free to adjust the heat by adding more hot honey or crushed red pepper, making each batch uniquely tailored to your taste!
Hot Honey Cream Cheese Dip Ingredients
For the Dip
- Cream Cheese – Provides a smooth and creamy base; must be softened for easy mixing.
- Sour Cream – Adds tanginess and creaminess; can substitute with Greek yogurt for a healthier option.
- Shredded Cheddar Cheese – Contributes a sharp flavor and enhances creaminess; use any cheese you prefer, such as Monterey Jack.
- Shredded Mozzarella Cheese – Offers a stretchy, gooey texture when melted; substitute with any mild cheese.
- Hot Honey – Imparts sweetness with a warm kick; a homemade version can be made from regular honey infused with red pepper flakes.
- Chopped Green Onions – Adds fresh onion flavor and vibrant color; chives can be used as an alternative.
- Garlic Powder – Provides a savory depth; fresh minced garlic can be used for a stronger flavor.
- Salt – Enhances all the flavors; remember to adjust to taste.
- Black Pepper – Adds depth and warmth; can be increased for a sharper bite.
- Crushed Red Pepper Flakes – Season the dip, adjust to taste for desired heat; increases the spicy element of the Hot Honey Cream Cheese Dip.
For Serving
- Dippers – Serve with crunchy tortilla chips, assorted vegetable sticks, or slices of warmed crusty bread to complement the creamy dip.
Step‑by‑Step Instructions for Hot Honey Cream Cheese Dip
Step 1: Beat the Cream Cheese
In a large mixing bowl, begin by beating the softened cream cheese with an electric mixer on medium speed for 1-2 minutes, or until it becomes creamy and smooth. This will serve as the luscious base for your Hot Honey Cream Cheese Dip, creating that irresistible texture everyone loves.
Step 2: Incorporate the Sour Cream
Once the cream cheese is smooth, add in the sour cream and mix on low speed until fully combined, about 30 seconds. The sour cream adds a delightful tanginess that balances the richness of the cream cheese, enhancing the overall flavor profile of your dip.
Step 3: Add the Cheeses
Now, sprinkle in the shredded cheddar and mozzarella cheeses. Mix well on low speed, allowing about 30-45 seconds for these cheeses to blend into the creamy mixture. The combination of cheeses will contribute to a rich, gooey texture when baked, making the Hot Honey Cream Cheese Dip even more scrumptious.
Step 4: Season the Mixture
Next, fold in the hot honey, chopped green onions, garlic powder, salt, black pepper, and crushed red pepper flakes using a spatula. Mix gently until evenly incorporated, ensuring every bite of your dip will be bursting with flavor. Adjust the seasoning as desired for an extra kick if you love heat!
Step 5: Preheat the Oven
Preheat your oven to 350°F (175°C) while you prepare the dip for baking. This step is crucial for achieving that golden, bubbly finish on your Hot Honey Cream Cheese Dip, so don’t skip it!
Step 6: Transfer to Baking Dish
Carefully transfer the dip mixture into a 9-inch baking dish, using a spatula to smooth the top evenly. This will create a consistent surface for baking, ensuring that each bite comes out perfectly melted and delicious.
Step 7: Add Extra Cheese Topping (Optional)
For an indulgent twist, consider sprinkling some additional shredded cheese on top of the dip before baking. This optional step will create a delightful cheese crust that adds even more flavor and visual appeal to your Hot Honey Cream Cheese Dip.
Step 8: Bake to Perfection
Place the baking dish in the preheated oven and bake for 20-25 minutes, or until the dip is bubbly and golden on top. You’ll know it’s ready when the edges start to slightly brown, releasing that irresistible aroma that will have everyone gathering around.
Step 9: Garnish and Serve
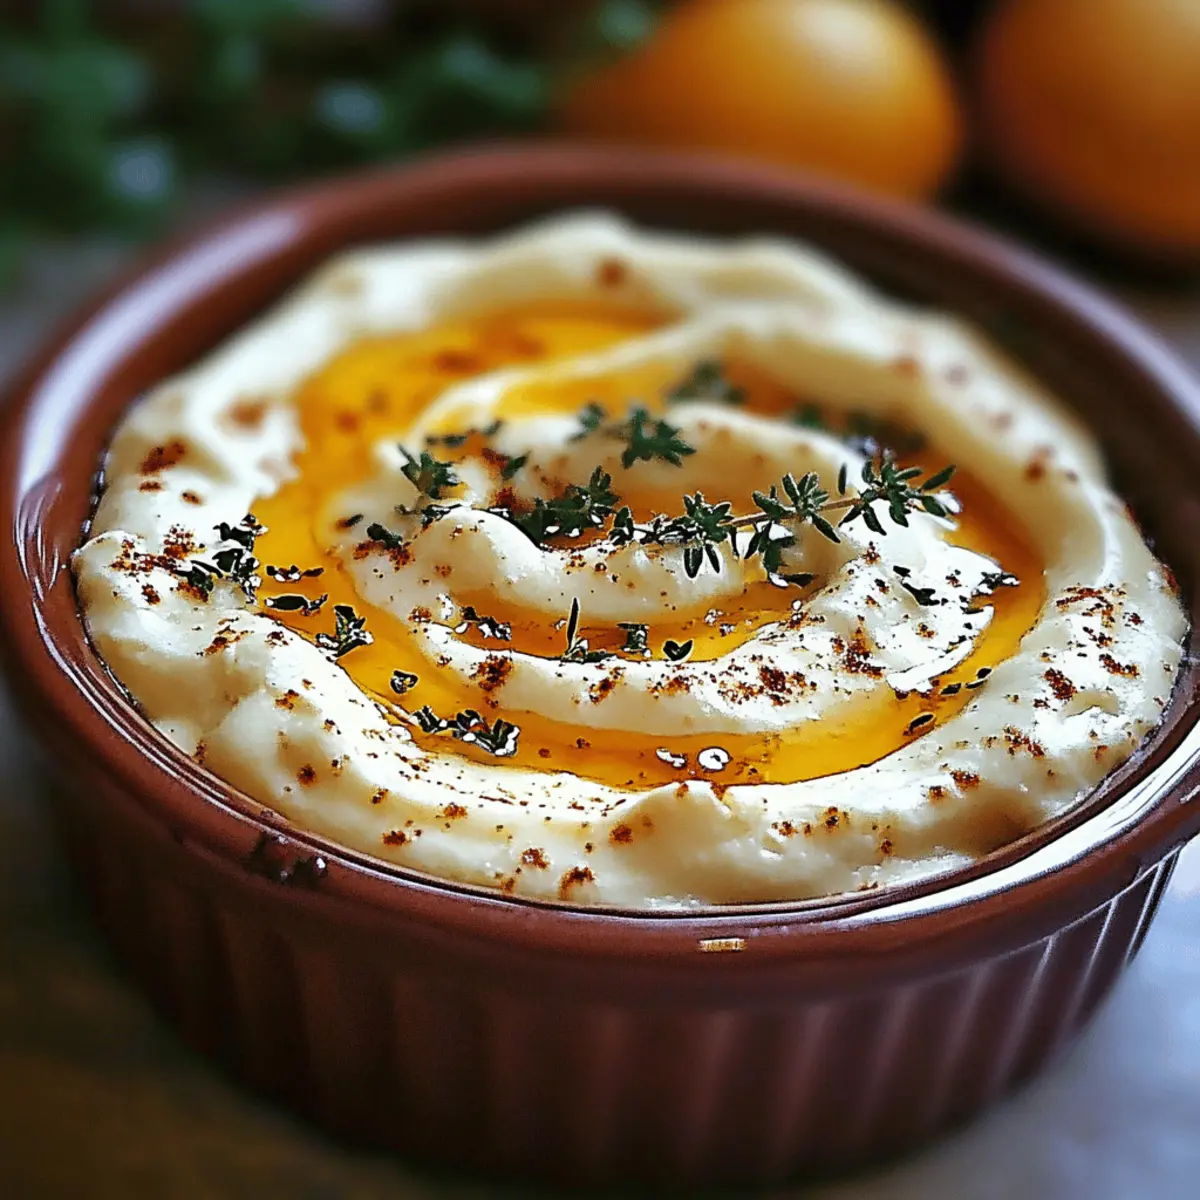
Once baked, remove the dip from the oven and let it cool for a few minutes. Garnish with additional chopped green onions for a pop of freshness before serving warm with your favorite dippers. Enjoy the creamy, sweet, and spicy goodness of your Hot Honey Cream Cheese Dip!
Hot Honey Cream Cheese Dip Variations
Feel free to get creative and customize this dip with your favorite twists and substitutions!
- Cheese Choices: Swap out the cheddar and mozzarella for Pepper Jack or smoked gouda for an added kick of flavor. A unique cheese blend can elevate your dip to new heights.
- Greek Yogurt: For a lighter option, substitute sour cream with Greek yogurt. This swap adds a tangy twist without compromising creaminess.
- Herb Infusion: Mix in fresh herbs like parsley or cilantro for a burst of freshness. These herbs brighten the dip and introduce new flavor complexities.
- Add Meat: Crumbled bacon or diced cooked chicken can enhance this dip with savory richness. Imagine a hearty bite that takes your dip to the next level!
- Heat it Up: If you prefer more heat, increase the crushed red pepper flakes or drizzle extra hot honey just before serving. Tailoring the spice will surely delight your guests.
- Topping Ideas: Consider sprinkling breadcrumbs or crushed tortilla chips on top before baking for an extra crunchy texture. It adds a delightful contrast to the creamy dip!
- Themed Dippers: Serve with Southern-style sides, like fried green tomatoes or pickles, for a fun twist that complements the dip’s flavors perfectly.
- Sweet Twist: For a dessert-inspired variation, add a drizzle of caramel sauce or a sprinkle of cinnamon. This can transform your dip into a unique sweet treat!
Explore these variations to make your Hot Honey Cream Cheese Dip your own! Don’t forget to enjoy with delightful accompaniments like crunchy tortilla chips or slices of warm crusty bread, and elevate your snacking experience even further, just like with Cheese Tortellini Butter or Hungarian Potato Cheese.
Expert Tips for Hot Honey Cream Cheese Dip
- Room Temperature Cream Cheese: Ensure your cream cheese is at room temperature before mixing. This helps achieve a smooth and creamy dip with no lumps.
- Adjust the Heat: If you like it spicier, don’t hesitate to increase the amount of crushed red pepper flakes or hot honey. Start small and taste as you go!
- Mix Gently: When adding ingredients, be careful not to overmix. This helps maintain a light and airy texture in your Hot Honey Cream Cheese Dip.
- Cheese Variations: Feel free to get creative with your cheeses! Mixing in smoked gouda or pepper jack can elevate the flavor profile even further.
- Prep Ahead: You can prepare the dip a day in advance and bake it just before serving. Store it in the refrigerator, covered, until you’re ready to pop it in the oven.
- Serving Temp: Serve warm for the best experience! The gooey texture and inviting aroma are part of what makes this dip a hit at any gathering.
Make Ahead Options
These Hot Honey Cream Cheese Dip is perfect for busy weeknights and parties because they can be prepped ahead to save you time! You can mix the dip ingredients (except for the hot honey) and store it in the refrigerator for up to 3 days before baking. To maintain quality and flavor, cover the dish tightly with plastic wrap or a lid. When you’re ready to serve, simply stir in the hot honey and bake at 350°F (175°C) for 20-25 minutes, until bubbly and golden. This way, you’ll enjoy restaurant-quality results with minimal effort, giving you more time to connect with your guests!
What to Serve with Hot Honey Cream Cheese Dip
Warm up your gatherings with savory delights that perfectly glide alongside your creamy dip creation.
- Crunchy Tortilla Chips: The crispy texture provides an enjoyable contrast to the creamy dip, making each bite a satisfying experience.
- Assorted Vegetable Sticks: Fresh carrots, celery, and cucumber offer a crisp and healthy balance to the rich, spicy flavors. Pairing these veggies creates a vibrant plate that tempts everyone to dive in.
- Sliced Crusty Bread: Warm, toasted bread complements the dip wonderfully, soaking up the deliciousness and adding a delightful chewiness. You could even use homemade garlic bread to amp up the flavor!
- Pretzel Bites: Their soft, chewy texture pairs beautifully with the warmth of the dip, and the slight saltiness will make them a favorite among guests.
- Cheese Platter: Create an array of cheeses that echo the flavors of your Hot Honey Cream Cheese Dip, enhancing the theme of creamy indulgence across your gathering.
- Sparkling Wine: A light, bubbly option like Prosecco can lift the flavors and cleanse the palate, complementing the richness of the dip perfectly.
- Homemade Pickles: Their tangy crunch adds an unexpected zing that counters the richness, making for an exciting bite.
- Fresh Fruit: Sweet fruits like apple slices or grapes can add a refreshing contrast, cooling the heat while accentuating the sweet notes from the dip.
Each of these options invites everyone to gather around the table and share in the joy of good food and great company!
Storage Tips for Hot Honey Cream Cheese Dip
-
Fridge: Store leftover dip in an airtight container in the refrigerator for up to 3 days. Allow it to cool completely before sealing to prevent condensation.
-
Freezer: For longer storage, freeze the dip in an airtight container for up to 2 months. Thaw overnight in the fridge before reheating.
-
Reheating: To reheat, place the defrosted dip in an oven-safe dish and warm it in the oven at 350°F (175°C) for about 15-20 minutes, until heated through and bubbly.
-
Make-Ahead Tip: Prepare the dip a day in advance, store it in the fridge, and bake just before your gathering for a fresh and delicious Hot Honey Cream Cheese Dip!

Hot Honey Cream Cheese Dip Recipe FAQs
How do I select the best ingredients for Hot Honey Cream Cheese Dip?
Absolutely! When selecting cream cheese, look for a block rather than spreadable versions, as it holds up better to mixing. It’s essential to use softened cream cheese for a smoother texture, so leave it out at room temperature for about 30 minutes before starting. For hot honey, find a brand with a perfect blend of sweetness and heat, or opt for homemade by infusing regular honey with red pepper flakes.
What’s the best way to store leftover Hot Honey Cream Cheese Dip?
Very good question! Store any leftovers in an airtight container in the refrigerator for up to 3 days. Allow it to cool completely before sealing to avoid condensation, which can alter the texture. When you’re ready to enjoy it again, you might want to reheat it in the oven to bring back that warm, gooey goodness!
Can I freeze Hot Honey Cream Cheese Dip?
Yes, you can! For longer storage, freeze your dip in an airtight container for up to 2 months. To freeze, make sure the dip is fully cooled and tightly sealed to prevent freezer burn. When you’re ready to enjoy it, simply thaw it overnight in the refrigerator, and then reheat in the oven at 350°F (175°C) for about 15-20 minutes until it’s heated through and bubbly.
What if my Hot Honey Cream Cheese Dip turns out too watery?
If you find your dip has more liquid than expected, it might be due to using too much sour cream or not mixing thoroughly. To fix this, try adding a bit more cheese to thicken it up or let it bake slightly longer until it reaches your desired consistency. If you need a faster fix, incorporating a small amount of cornstarch can help absorb some of the excess moisture.
Is this Hot Honey Cream Cheese Dip suitable for those with dietary restrictions?
If you have guests with dietary restrictions, you can absolutely tailor this dip! To make it gluten-free, stick to gluten-free dippers like veggie sticks or gluten-free crackers. For dairy allergies, you can try using dairy-free cream cheese and yogurt alternatives. Just check labels on all ingredients to ensure they meet dietary needs.
What can I use instead of hot honey?
If you’re out of hot honey or want a different twist, you can make your own by mixing regular honey with a pinch of crushed red pepper or cayenne pepper to achieve that sweet and spicy flavor. You could also use a store-bought spicy honey or sriracha for a different type of heat, each adding its unique flair to the dip!

Hot Honey Cream Cheese Dip: Sweet and Spicy Crowd-Pleaser
Ingredients
Equipment
Method
- In a large mixing bowl, beat the softened cream cheese with an electric mixer on medium speed for 1-2 minutes until creamy and smooth.
- Add in the sour cream and mix on low speed until fully combined, about 30 seconds.
- Sprinkle in the shredded cheddar and mozzarella cheeses, mixing on low speed for about 30-45 seconds.
- Fold in the hot honey, chopped green onions, garlic powder, salt, black pepper, and crushed red pepper flakes using a spatula.
- Preheat your oven to 350°F (175°C).
- Transfer the dip mixture into a 9-inch baking dish, smoothing the top evenly.
- Optionally, sprinkle additional shredded cheese on top before baking.
- Place the baking dish in the preheated oven and bake for 20-25 minutes, until bubbly and golden.
- Remove from the oven, let it cool for a few minutes, and garnish with additional chopped green onions before serving.
Leave a Reply