
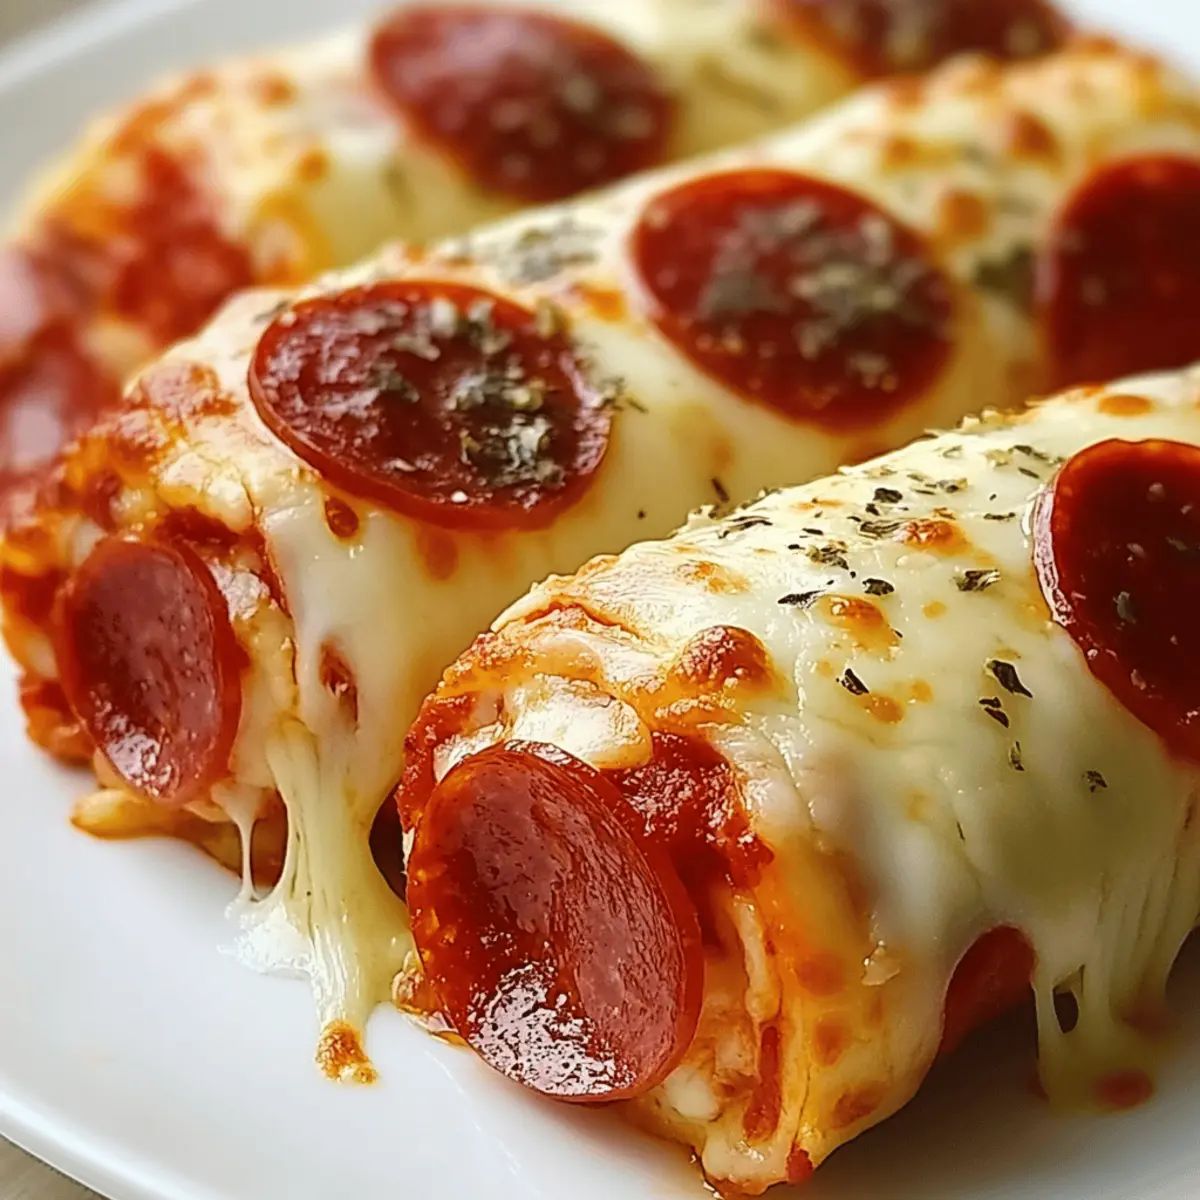
As I watched my kids eagerly eye the snack table at our last game night, I couldn’t help but feel a mini crisis coming on. Everyone was racing toward the same old unhealthy options, and I knew I had to step in with something exciting yet guilt-free. Enter my Cheesy Pepperoni Pizza Roll-Ups! These delicious bites are low-carb and packed with the gooey goodness of melted mozzarella alongside zesty pepperoni and tangy tomato sauce, making them a perfect quick snack or appetizer for any occasion. Not only are they easy to whip up in under 30 minutes, but they also bring all the flavors of pizza without the carbs. Whether you’re hosting friends or just want a satisfying treat, these roll-ups are sure to impress. What clever twist will you add to make them uniquely yours?

Why are these roll-ups a must-try?
Quick and Easy: Whipping up these Cheesy Pepperoni Pizza Roll-Ups takes less than 30 minutes! Perfect for weeknight dinners or unexpected guests.
Flavor-Packed: A delightful explosion of savory mozzarella and zesty pepperoni, making them irresistible to both kids and adults alike.
Versatile Options: Customize with different cheeses, proteins, or veggies to create your own unique twist—so everyone can enjoy!
Guilt-Free Indulgence: Low-carb and satisfying, these roll-ups let you indulge without the heavy guilt of traditional snacks.
Crowd-Pleaser: Ideal for any gathering, from game nights to casual get-togethers; pair them with spicy marinara for the ultimate dip!
With every bite, you’ll experience the joy of homemade flavor without the hassle. For more delicious ideas, check out our other quick snack recipes.
Cheesy Pepperoni Pizza Roll-Ups Ingredients
Get ready to make a delightful snack!
For the Roll-Ups
• Low-carb tortillas or wraps – These provide the perfect base for your roll-ups, making them easy to hold and enjoy.
• Shredded mozzarella cheese – Essential for that gooey, cheesy goodness; swap with cheddar or provolone for a fun variation.
• Pepperoni slices – Adds savory flavor and protein; consider using cooked sausage or crispy bacon for a different twist.
• Tomato sauce – Brings moisture and flavor; can be replaced with pesto or barbecue sauce for a unique flair.
For the Seasoning
• Italian seasoning – Elevates the overall flavor profile; combine oregano, basil, and thyme if you need a substitute.
• Garlic powder – Introduces aromatic depth; fresh minced garlic also works beautifully here.
Optional Add-ins
• Parmesan cheese – Boosts the cheesy flavor; sprinkle over the filling for an extra treat.
• Olives or bell peppers – Add these for more flavor and texture; customize according to your taste preferences!
Elevate your snack game with these Cheesy Pepperoni Pizza Roll-Ups—they’re not just delicious; they’re adaptable to create whatever your taste buds desire!
Step‑by‑Step Instructions for Cheesy Pepperoni Pizza Roll-Ups
Step 1: Preheat the Oven
Begin by preheating your oven to 375°F (190°C). While the oven heats up, line a baking sheet with parchment paper to prevent sticking, ensuring easy cleanup later on. This step sets the stage for baking your delicious Cheesy Pepperoni Pizza Roll-Ups to golden perfection.
Step 2: Prepare the Tortillas
Take your low-carb tortillas and spread a thin layer of tomato sauce over each one, leaving about half an inch around the edges. This helps lock in moisture and adds flavorful zest to every roll-up. As you prepare the tortillas, keep the sauce consistent to ensure a delightful taste in every bite!
Step 3: Add Cheese and Pepperoni
Evenly distribute a generous amount of shredded mozzarella cheese across the sauced tortillas, allowing for gooey goodness once baked. Next, layer pepperoni slices atop the cheese, making sure to cover all areas for that savory punch. Visualize the delightful layers stacking up, promising delicious bites ahead!
Step 4: Sprinkle Seasonings
Sprinkle Italian seasoning and garlic powder evenly over the cheese and pepperoni layers. This step enhances the flavor profile of your Cheesy Pepperoni Pizza Roll-Ups. A light, even dusting will impart delightful aromas and savory notes that will perfume your kitchen as they bake.
Step 5: Roll the Tortillas
Starting from one end of the tortilla, tightly roll it up to form a compact cylinder. Ensure that the fillings are well-contained, which helps maintain the shape during baking. Aim for a snug fit without squishing the ingredients — the tighter the roll, the better the presentation!
Step 6: Place on Baking Sheet
Transfer each rolled tortilla seam-side down onto the prepared baking sheet. This placement secures the roll and prevents it from unraveling during baking. Make sure to arrange them with sufficient space in between to allow for even cooking and browning on each roll-up.
Step 7: Repeat As Necessary
Continue the process for the remaining tortillas and filling. With each roll-up, relish the anticipation of tasting these delightful Cheesy Pepperoni Pizza Roll-Ups. As you finish rolling, glance at your prepared baking sheet, brimming with cheesy goodness ready for the oven!
Step 8: Bake to Perfection
Place the baking sheet in the preheated oven and bake for 12-15 minutes. Keep an eye on them — you’re looking for a golden-brown color and melted, bubbly cheese that beckons you closer. The aroma wafting through the air will build excitement for the delicious treat to come.
Step 9: Cool and Slice
Once the Cheesy Pepperoni Pizza Roll-Ups are out of the oven, allow them to cool slightly for about 5 minutes. This step helps set the cheese and make slicing easier. Using a sharp knife, cut them into bite-sized pieces, ready to share with family or keep for yourself!
Step 10: Serve Warm
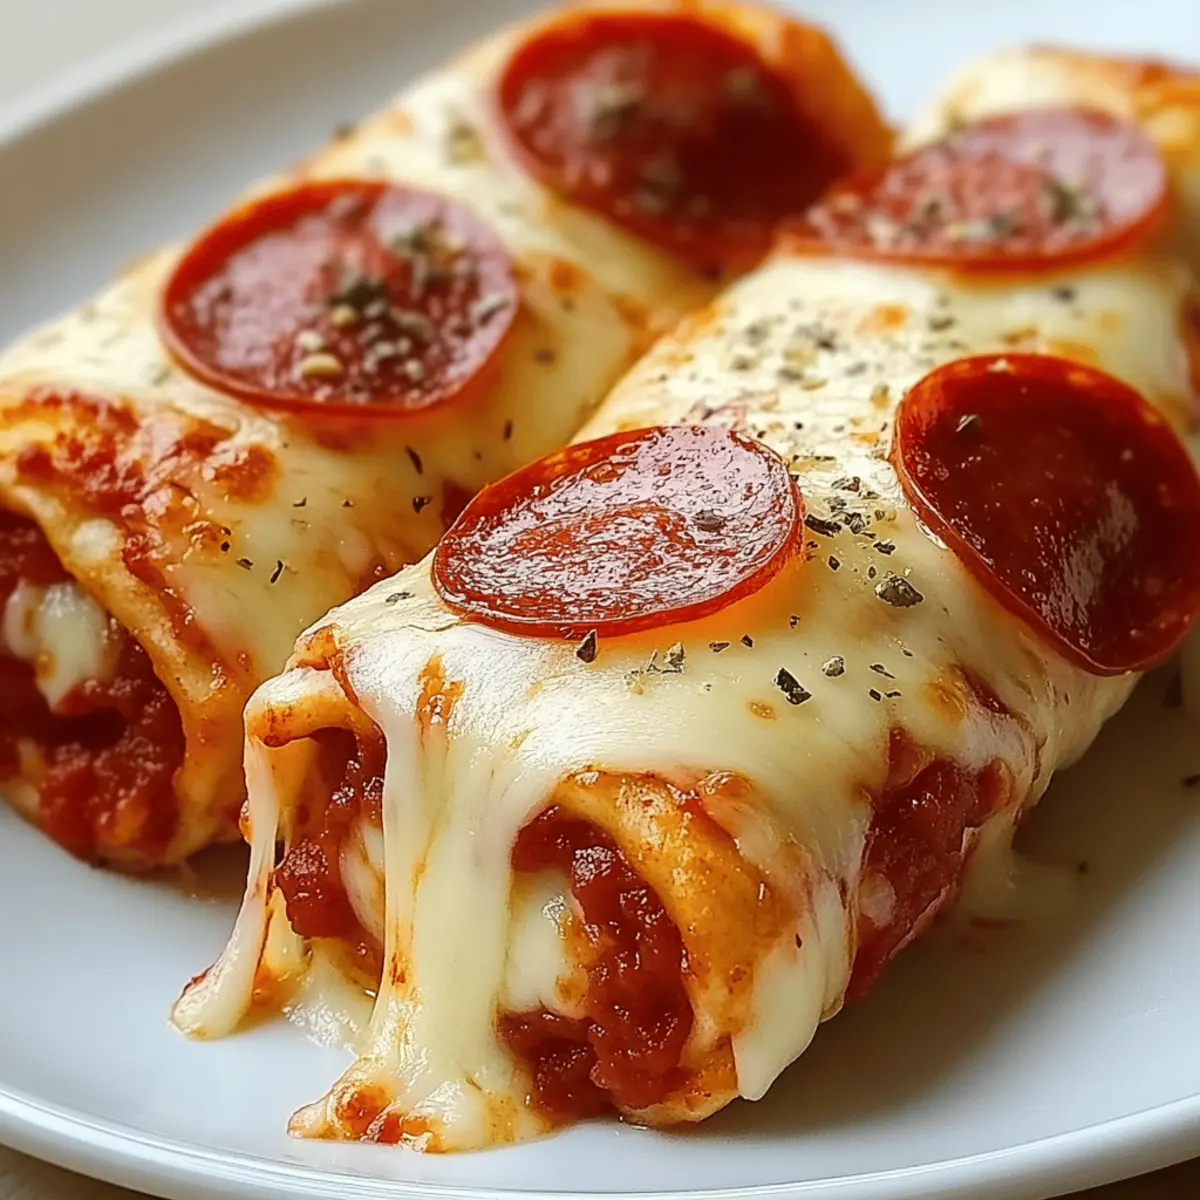
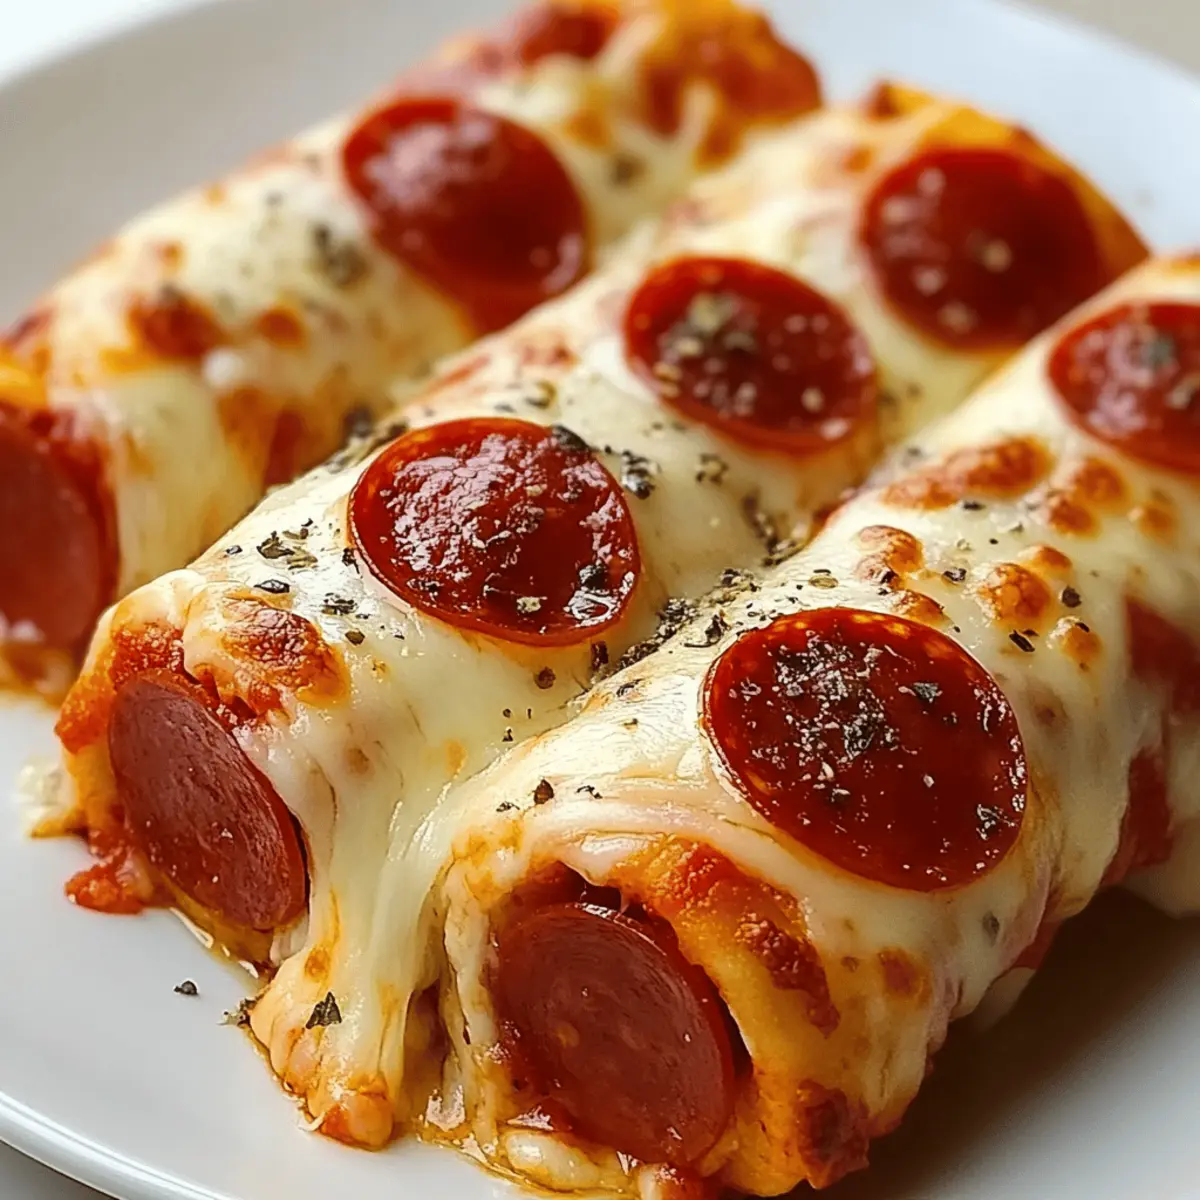
Arrange the warm roll-ups on a platter, ideal for snacking, sharing, or pairing with marinara for dipping. Embrace the moment as you enjoy your homemade Cheesy Pepperoni Pizza Roll-Ups, a perfect blend of flavors and textures ready to delight everyone.
What to Serve with Cheesy Pepperoni Pizza Roll-Ups
Elevate your snacking experience with delicious sides that perfectly complement these cheesy delights, creating a balanced feast.
-
Fresh Garden Salad: Crisp greens and vibrant veggies add a refreshing touch that balances the savory richness of the roll-ups. A light vinaigrette will elevate the flavors further.
-
Creamy Ranch Dip: Serve a side of homemade ranch dressing for dipping. Its cool, creamy texture provides a delightful contrast to the warm, cheesy roll-ups.
-
Spicy Marinara Sauce: This classic pairing enhances the Italian flavors, allowing you to dip each bite in a tangy sauce that complements the pepperoni and cheese beautifully.
-
Roasted Vegetable Sticks: Crunchy bell peppers, carrots, and zucchini sticks offer a healthy, colorful option that brings extra nutrients to your snack spread.
-
Garlic Bread: Slice into warm, buttery garlic bread for an indulgent side that echoes the delicious pizza flavors—perfect for pizza lovers!
-
Herbed Olive Oil: A small bowl of herbed olive oil for dipping invites a Mediterranean twist, encouraging everyone to savor each delicious morsel.
-
Homemade Coleslaw: A tangy cabbage slaw adds crunch and zing, balancing the warm, melted cheese with its crispness.
-
Sparkling Lemonade: Bright and refreshing, this drink option adds a fizzy touch to your snack time, enhancing those savory bites with a citrus pop.
-
Chocolate Chip Cookies: For a sweet finish, serve warm chocolate chip cookies. Their gooey texture provides a delightful contrast after enjoying the savory roll-ups.
Expert Tips for Cheesy Pepperoni Pizza Roll-Ups
Soft Tortillas: Ensure your low-carb tortillas are soft and pliable to avoid cracks while rolling, making the assembly smooth.
Crispier Texture: Brush the outside of the roll-ups lightly with olive oil before baking for a delightful crispy finish.
Layering Matters: Distribute the cheese and pepperoni evenly to ensure every bite of your Cheesy Pepperoni Pizza Roll-Ups is flavorful and balanced.
Make-ahead Option: Assemble the roll-ups ahead of time and refrigerate them for up to a day. Bake when ready for an effortless snack!
Watch the Bake: Keep an eye on them in the oven—remove when they’re golden brown and the cheese is perfectly melted for the best results.
Cheesy Pepperoni Pizza Roll-Ups Variations
Feel free to unleash your creativity and tailor these roll-ups to your taste—your kitchen will thank you!
- Dairy-Free: Use dairy-free cheese to make a vegan version that everyone can enjoy!
- Protein Swap: Substitute pepperoni with cooked sausage or crispy bacon for a different savory twist. Try combining proteins for an irresistible flavor medley!
- Veggie Boost: Add chopped olives, bell peppers, or mushrooms for a hearty crunch and extra nutrients, making these roll-ups a bit more colorful and satisfying.
- Spicy Kick: Incorporate jalapeño slices or a splash of hot sauce into the filling for those who crave a little heat—transforming your snack into a fiery delight.
- Sauce Alternatives: Swap out the tomato sauce for pesto or barbecue sauce for a unique flavor profile, making each bite a delightful surprise.
- Herb Infusion: Experiment by adding fresh herbs like basil or cilantro, giving your roll-ups a bright, aromatic touch that freshens up the classic flavors.
- Cheesy Layers: Mix in additional cheeses, like cheddar or pepper jack, for a melty, bold flavor combination that will elevate your roll-ups to new heights.
- Sweet Touch: Try adding a hint of honey or maple syrup to the sauce for a touch of sweetness—pairing surprisingly well with the savory elements!
With each variation, you can discover a new family favorite! Don’t forget to check out our other quick snack recipes for more delicious inspirations.
Make Ahead Options
These Cheesy Pepperoni Pizza Roll-Ups are perfect for busy home cooks looking to save time! You can assemble the roll-ups up to 24 hours in advance; just cover them tightly in plastic wrap and refrigerate to keep them fresh. This not only saves you precious time on hectic weeknights but also ensures that the flavors meld beautifully. When you’re ready to enjoy, simply bake straight from the fridge—it’s that easy! If you need even more flexibility, consider freezing the assembled (but uncooked) roll-ups. They can last in the freezer for up to 3 months. Just remember to increase the baking time by a few minutes when cooking from frozen, and you’ll have delicious, homemade snacks with minimal effort!
How to Store and Freeze Cheesy Pepperoni Pizza Roll-Ups
Fridge: Store leftover roll-ups in an airtight container in the refrigerator for up to 3 days. Reheat in the oven or microwave until warmed through to maintain their cheesy texture.
Freezer: For longer storage, freeze cooked roll-ups in a single layer until solid, then transfer them to a zip-top bag for up to 2 months. Reheat directly from frozen for a quick snack option.
Reheating: When reheating, place thawed roll-ups in the oven at 375°F (190°C) for about 10 minutes, or until hot and crispy.
Assembled but Unbaked: You can also prepare Cheesy Pepperoni Pizza Roll-Ups ahead of time. Store them in the fridge for up to 1 day before baking for an easy and delicious weeknight meal.
Cheesy Pepperoni Pizza Roll-Ups Recipe FAQs
How do I choose the best tortillas for my roll-ups?
Absolutely! Opt for soft, pliable low-carb tortillas to ensure they roll tightly without cracking. Look for options with a flexible texture rather than those that are dry or crumbly, as they make the assembly process more manageable and enjoyable.
How should I store leftovers, and how long will they last?
Store your Cheesy Pepperoni Pizza Roll-Ups in an airtight container in the refrigerator for up to 3 days. Reheating in the oven or microwave works well—just microwave for about 30-60 seconds until warmed through. If you want to savor them later, remember to avoid sogginess by reheating in the oven!
Can I freeze these roll-ups for later?
Yes! To freeze, place cooked roll-ups in a single layer on a baking sheet until solid, then transfer to a zip-top bag and seal tightly. They can be frozen for up to 2 months. When you’re ready to eat, reheat directly from frozen at 375°F (190°C) for about 10-12 minutes, or until hot and crispy.
What if my cheese doesn’t melt nicely? Any troubleshooting tips?
Very! If your cheese doesn’t melt as expected, there could be a couple of reasons. First, ensure you’re using fresh shredded mozzarella, as pre-shredded cheese often contains anti-caking agents that can hinder melting. Also, make sure your oven is preheated adequately—if it’s not hot enough, the cheese will take longer to melt. A light brush of olive oil on the roll-ups can help achieve that beautiful golden finish!
Are there any dietary considerations I should keep in mind?
Definitely! If you’re making these Cheesy Pepperoni Pizza Roll-Ups for someone with food allergies, always check the labels of your ingredients. Common allergens include gluten (in traditional tortillas), dairy (in mozzarella), and specific types of sausage if you opt for alternatives. For a gluten-free option, choose gluten-free tortillas, and for a dairy-free twist, consider plant-based cheese.
Can I prepare these roll-ups ahead of time?
Absolutely! You can assemble the Cheesy Pepperoni Pizza Roll-Ups in advance and store them in the refrigerator for up to 1 day before baking. This saves you time on busy weeknights while ensuring you have a tasty snack ready to go!
Cheesy Pepperoni Pizza Roll-Ups: Guilt-Free Indulgence Awaits
Ingredients
Equipment
Method
- Preheat your oven to 375°F (190°C) and line a baking sheet with parchment paper.
- Spread a thin layer of tomato sauce over each tortilla, leaving about half an inch around the edges.
- Evenly distribute shredded mozzarella cheese across the tortillas, then layer pepperoni slices on top.
- Sprinkle Italian seasoning and garlic powder over the cheese and pepperoni.
- Tightly roll each tortilla from one end to form a compact cylinder.
- Transfer each roll, seam-side down, onto the prepared baking sheet.
- Continue the process for the remaining tortillas and filling until complete.
- Bake for 12-15 minutes until golden brown and cheesy. Cool slightly before slicing into pieces.
- Serve warm on a platter, optionally paired with marinara for dipping.
Leave a Reply