
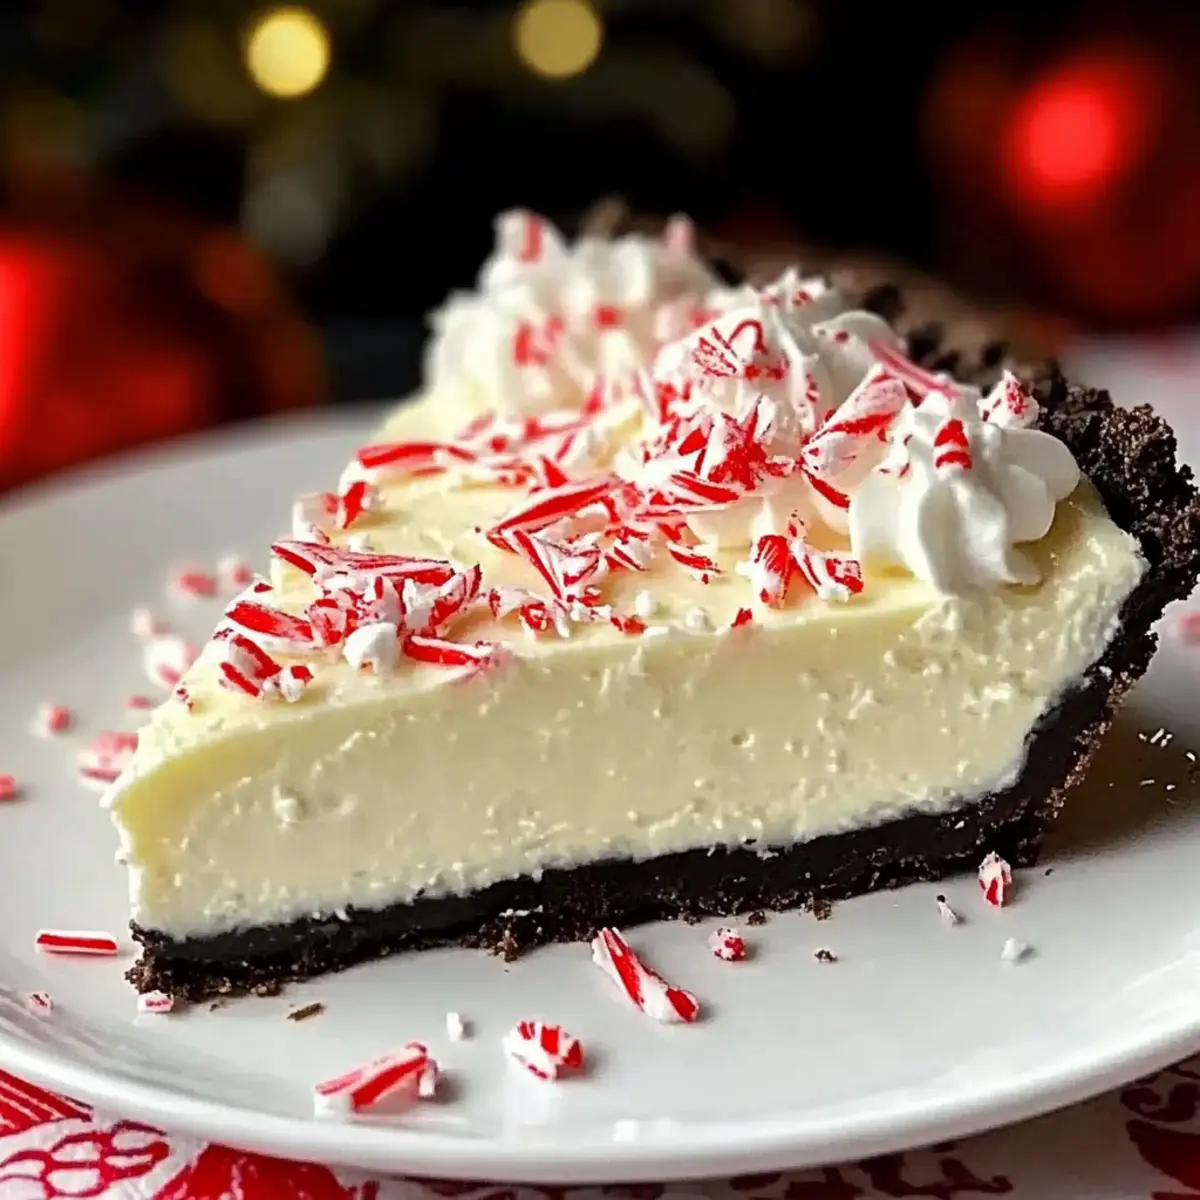
Every holiday season, I find myself on a delightful quest for the perfect dessert to impress family and friends. This year, I’m eager to share my recipe for a White Chocolate Peppermint Pie that captures all the magic of the season in a simple, no-bake form. With a rich Oreo crust and a light, creamy peppermint filling, this pie is not just a feast for the taste buds but also a stress-free solution for your holiday dessert table. It can be prepared ahead of time, allowing you more moments to bask in the festivities rather than being tied to the kitchen. Plus, it’s vegetarian-friendly and offers a fun twist on traditional desserts. Are you ready to dive into a slice of winter wonderland?
Why is this pie a holiday must-have?
Irresistible Flavor: The creamy peppermint filling paired with a rich Oreo crust creates a perfect balance that enchants every bite.
No-Bake Convenience: This dessert requires no baking, making it a stress-free option that fits seamlessly into your holiday preparations.
Crowd-Pleasing Treat: It’s not just a pie; it’s a showstopper that ensures everyone at your holiday gathering will be asking for seconds!
Versatile Variations: Whether you stick to the classic or opt for alternatives like raspberry or vanilla, this recipe is easily customizable to suit any palate.
Make-Ahead Magic: Prepare it in advance and spend your time enjoying the festivities. It stays fresh in the fridge and can also be frozen for later!
Dive into this White Chocolate Peppermint Pie and find out why it’s the season’s favorite!
White Chocolate Peppermint Pie Ingredients
For the Crust
• 25 chocolate cream-filled cookies (Oreos) – Provides the crust structure; substitution: use gluten-free cookies for a gluten-free version.
• 4 tablespoons unsalted butter, melted – Binds the cookie crumbs together; no substitutions necessary, as butter enhances flavor.
For the Filling
• 8-ounce block cream cheese, softened – Forms the base of the cheesecake filling; use Neufchâtel cheese for a lower-fat option.
• 1 1/2 cups white chocolate chips, melted – Adds sweetness and richness to the filling; substitution: use semi-sweet chocolate for a darker flavor.
• 1 teaspoon peppermint extract – Gives the filling a refreshing taste; start with less and adjust to personal preference.
• 8-ounce container frozen whipped topping, thawed – Lightens the filling texture; substitution: whipped cream can be made from scratch.
For the Topping
• 1 cup heavy whipping cream – Used to make whipped cream for topping; no substitutions for desired creaminess.
• 1/4 cup powdered sugar – Sweetens the whipped cream; substitution: use a sugar alternative if desired.
• 1/4 teaspoon peppermint extract (or vanilla extract) – For additional flavor in whipped cream; use vanilla if you prefer a more subtle taste.
• 1/4 cup crushed peppermint candies – For garnish and added texture; substitution: can use crushed nuts or chocolate shavings instead.
• White chocolate shavings (optional) – Enhances visual appeal and adds flavor; not necessary; can omit.
Step‑by‑Step Instructions for White Chocolate Peppermint Pie
Step 1: Prepare the Crust
Start by preheating your oven to 350°F (175°C). In a food processor, crush the 25 chocolate cream-filled cookies until they resemble fine crumbs. Combine the crumbs with 4 tablespoons of melted unsalted butter, ensuring they are well mixed. Press this mixture firmly into the bottom and up the sides of a 9-inch pie plate. Bake the crust for 8-10 minutes until slightly set, then let it cool completely.
Step 2: Make the Filling
In a large mixing bowl, beat the 8-ounce block of softened cream cheese using an electric mixer until smooth and creamy. Gradually add in 1 1/2 cups of melted white chocolate and 1 teaspoon of peppermint extract, mixing thoroughly until well combined. Carefully fold in an 8-ounce container of thawed whipped topping, creating a light and fluffy filling for your White Chocolate Peppermint Pie.
Step 3: Combine and Chill
Pour the creamy peppermint filling into the cooled crust, spreading it evenly with a spatula for a smooth surface. Cover the pie with plastic wrap or foil, then refrigerate for at least 2 hours, allowing it to set properly. This chilling time will help achieve a firm texture that holds its shape when sliced.
Step 4: Prepare Whipped Cream Topping
While the pie sets, whip 1 cup of heavy whipping cream with 1/4 cup of powdered sugar and 1/4 teaspoon of peppermint extract in a chilled bowl. Use an electric mixer to beat it until stiff peaks form, which indicates a light and fluffy topping. Once ready, spread or pipe this whipped cream over the chilled pie, adding a delightful contrast in texture.
Step 5: Garnish
Finish your gorgeous White Chocolate Peppermint Pie by scattering 1/4 cup of crushed peppermint candies over the whipped topping for a festive crunch. If desired, add white chocolate shavings for an elegant touch. This beautiful garnish will not only enhance the look but also bring an extra layer of festive flavor to your dessert.
How to Store and Freeze White Chocolate Peppermint Pie
Fridge: Store the pie in an airtight container in the refrigerator for up to 5 days. This keeps it fresh while maintaining the delightful creamy texture.
Freezer: To freeze, wrap the pie tightly in plastic wrap and then in aluminum foil. It can be frozen for up to 2 months. Thaw in the refrigerator before serving for the best texture.
Serving from Frozen: If serving straight from the freezer, allow the pie to soften at room temperature for about 15-20 minutes before slicing. This helps achieve the perfect slice of your White Chocolate Peppermint Pie.
Reheating: There is no need to reheat this pie, as it is best enjoyed chilled or slightly softened after freezing. Enjoy the cool, refreshing flavors!
White Chocolate Peppermint Pie Variations
Feel free to get creative and make this delightful pie your own with these tempting variations!
-
Vanilla Twist: Substitute peppermint extract with vanilla for a subtly sweet flavor that complements the white chocolate beautifully.
-
Berry Swirl: Swirl in raspberry sauce into the filling for a vibrant, fruity contrast that adds both color and deliciousness.
-
Gluten-Free Delight: Use gluten-free cookies for the crust to make this a suitable treat for those with dietary restrictions.
-
Nutty Crunch: Instead of crushed peppermint candies, top the pie with crushed nuts or toffee bits for a delightful crunch that enhances texture.
-
Dairy-Free Option: Use coconut cream and dairy-free chocolate chips to create a rich yet non-dairy dessert everyone can enjoy.
-
Add Some Heat: Sprinkle in a dash of cayenne pepper for a surprising kick that beautifully balances the sweetness of the pie.
-
Minty Chocolate Layer: Create a dark chocolate ganache layer atop the filling for an indulgent twist that will impress chocolate lovers!
-
Holiday Spirit: Add a pinch of ground cinnamon to your whipped cream for a festive touch that warms the flavors on chilly nights.
As you embark on this culinary adventure, consider pairing your pie with a warm mug of homemade hot cocoa or group it with other seasonal desserts like my scrumptious Gingerbread Cookies. Each unique variation will not just bring your family together but also bring holiday cheer to your table!
What to Serve with White Chocolate Peppermint Pie
Elevate your holiday gatherings with delightful pairings that complement the creamy, dreamy essence of this seasonal treat.
-
Hot Cocoa: The rich, chocolatey flavor paired with a hint of peppermint in the pie enhances the same notes in a warm cup of cocoa, creating a cozy atmosphere.
-
Fresh Berries: Sweet and tart berries like raspberries or strawberries are a refreshing contrast that balances the richness of the pie and adds a vibrant splash of color to your dessert plate.
-
Coffee: A warm cup of coffee offers a delightful bitter contrast to the sweet, creamy pie, making it a perfect pairing that rounds out your holiday meal.
-
Vanilla Ice Cream: A scoop of creamy vanilla ice cream adds extra indulgence and a coolness that complements the peppermint chill in the pie.
-
Crushed Nuts: Sprinkling some chopped walnuts or almonds on top of each slice offers a satisfying crunch, adding both texture and a nutty depth that elevates the overall flavor experience.
-
Chocolate Mint Cookies: Enhance the peppermint theme by serving alongside these chewy treats, creating a cohesive, festive dessert spread that your guests will adore.
With these thoughtful pairings, your White Chocolate Peppermint Pie becomes the star of a memorable holiday feast!
Expert Tips for White Chocolate Peppermint Pie
• Peppermint Precision: Start with a smaller amount of peppermint extract in the filling; you can always add more to taste.
• Clean Cuts: Warm your knife under hot water before slicing the pie to achieve smoother, cleaner cuts.
• Chill Time Matters: Chill the pie for at least 2 hours to ensure it sets properly; this keeps the creamy filling from being too soft when sliced.
• Garnish Alternatives: If you’re out of peppermint candies, consider using crushed nuts or chocolate shavings for a different flavor profile on your White Chocolate Peppermint Pie.
• Make-Ahead Magic: This pie can be made up to 5 days ahead. Store in the refrigerator or freeze for longer-lasting enjoyment.
• Tip for Texture: For a frozen twist, allow the pie to chill longer and serve it slightly softened for an ice cream-like experience!
Make Ahead Options
Making the White Chocolate Peppermint Pie ahead of time is a game changer for your holiday festivities! You can prepare the crust up to 24 hours in advance by baking it and storing it covered at room temperature, which keeps it crisp. Additionally, the creamy peppermint filling can be made up to 3 days before serving; simply store it in the refrigerator in an airtight container. When you’re ready to serve, pour the filling into the cooled crust, refrigerate for a couple of hours until set, and top it with freshly whipped cream right before presenting. This way, you’re guaranteed a truly delicious dessert that tastes just as splendid as if it were made fresh that day!
White Chocolate Peppermint Pie Recipe FAQs
What type of cookies should I use for the crust?
I recommend using 25 chocolate cream-filled cookies, such as Oreos, for the crust. They provide the perfect structure and flavor. If gluten-free is your goal, feel free to substitute with gluten-free chocolate cookies!
How long can I store the pie in the refrigerator?
You can store your White Chocolate Peppermint Pie in an airtight container in the refrigerator for up to 5 days. Just be sure to keep it covered to maintain its freshness and creamy texture!
Can I freeze the pie?
Absolutely! To freeze your pie, wrap it tightly in plastic wrap and then in aluminum foil to prevent freezer burn. It can be stored in the freezer for up to 2 months. When you’re ready to enjoy, simply thaw it in the refrigerator for several hours or overnight for best results.
What if I don’t like peppermint?
If peppermint isn’t your thing, you can easily switch it up! Use vanilla extract instead of peppermint for a milder flavor. Another fun idea is to swirl in raspberry sauce into the filling before chilling for a fruity twist!
Any tips for achieving perfect slices?
To achieve smooth, clean slices, warm your knife by dipping it in hot water before cutting the pie. This little trick helps you get through the creamy filling with ease without making a mess.
What should I do if I’m serving this at a gathering?
Since this White Chocolate Peppermint Pie is a no-bake wonder, you can prepare it ahead of time and store it in the fridge. This means more time to mingle and enjoy the festivities! Just remember to top it with the whipped cream and garnish just before serving for the best presentation.
Dreamy White Chocolate Peppermint Pie for Holiday Bliss
Ingredients
Equipment
Method
- Start by preheating your oven to 350°F (175°C). In a food processor, crush the 25 cookies until they resemble fine crumbs. Combine with melted butter and press into a 9-inch pie plate. Bake for 8-10 minutes and let cool completely.
- In a large mixing bowl, beat the cream cheese until smooth. Gradually add melted white chocolate and peppermint extract, mixing until well combined. Fold in the thawed whipped topping.
- Pour the creamy filling into the cooled crust, spreading evenly. Cover and refrigerate for at least 2 hours.
- While the pie sets, whip the heavy cream with powdered sugar and peppermint extract until stiff peaks form. Spread over the chilled pie.
- Garnish with crushed peppermint candies and optional white chocolate shavings before serving.
Leave a Reply