
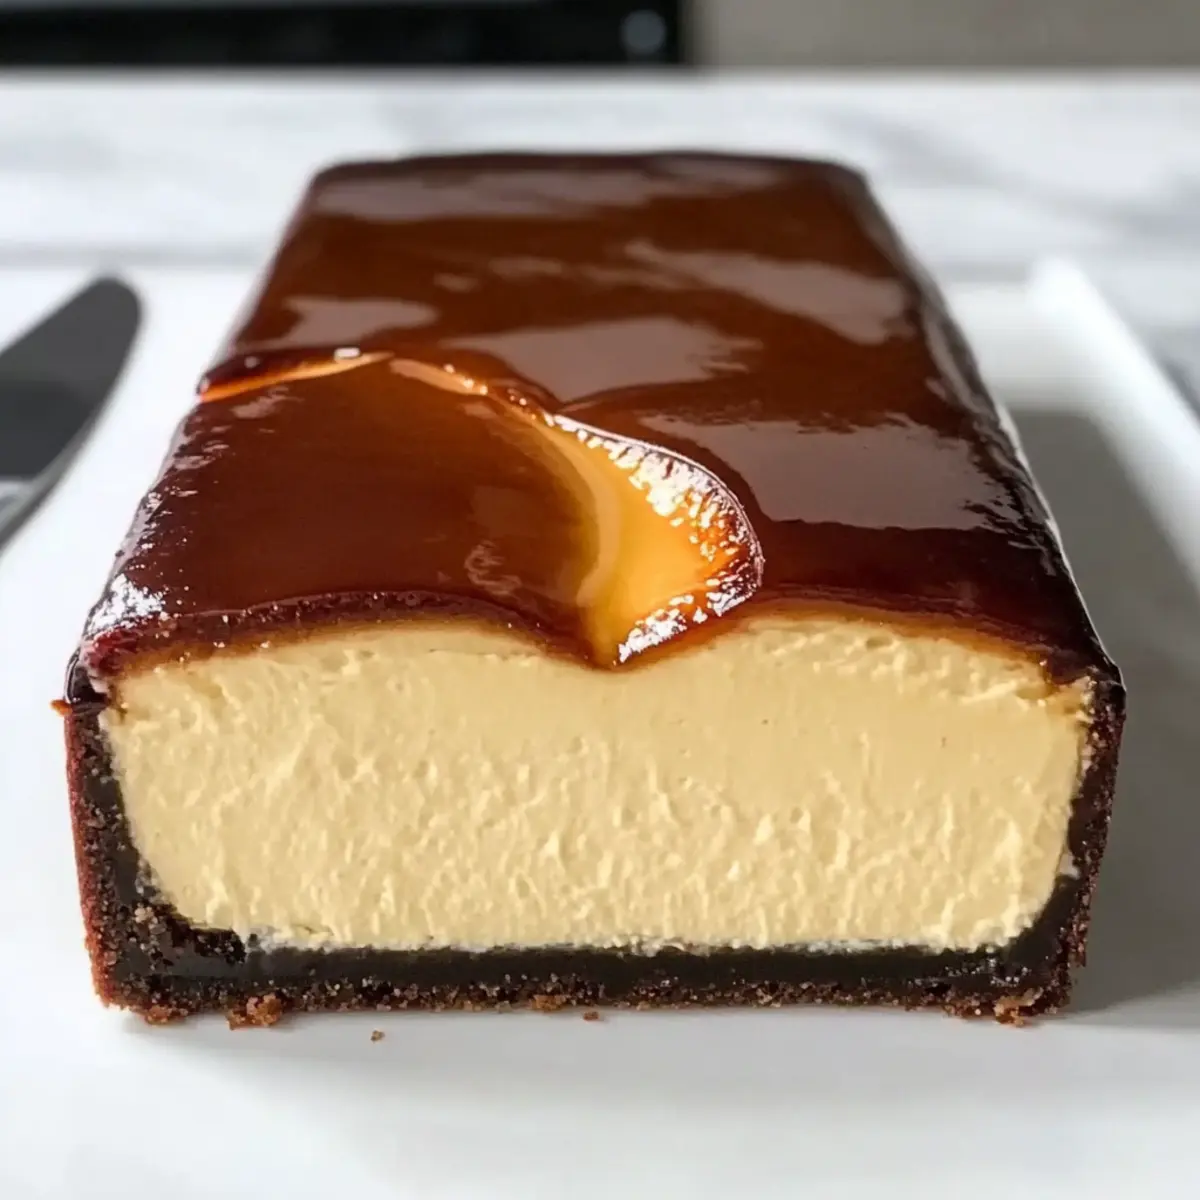
With its striking appearance, the Burnt Basque Cheesecake is not just a dessert; it’s a showstopper. This Spanish delight boasts a beautifully charred top that surprises everyone with its luscious, creamy interior, just waiting to melt in your mouth. What I love most about this cheesecake is how incredibly easy it is to whip up—minimal ingredients lead to a maximum flavor impact, making it perfect for both casual dinners and special celebrations. Plus, with gluten-free options available, it’s an indulgence that everyone can enjoy. Are you ready to unlock the secrets of this luxurious treat and impress your friends and family with your baking prowess? Let’s dive in!
Why is Burnt Basque Cheesecake Unforgettable?
Indulgent Flavor: The Burnt Basque Cheesecake is a rich blend of creamy, custard-like filling with a perfectly charred top that creates a delightful contrast.
Easy to Make: With just a handful of ingredients, this recipe makes baking a breeze, perfect for busy home chefs who love simple yet delectable desserts.
Versatile Serving Options: Whether served plain or with fruits, drizzles, or toppings like in this Velvet Oreo Cheesecake, it’s customizeable for any occasion.
Crowd-Pleasing Delight: This showstopping dessert will wow your guests, making it an ideal choice for gatherings and celebrations.
Gluten-Free Adaptable: Easily swap out the all-purpose flour for a gluten-free blend, ensuring that everyone can indulge in this decadent treat!
Burnt Basque Cheesecake Ingredients
For the Cheesecake:
- Full-Fat Cream Cheese – Essential for a rich texture; always use fresh for the best flavor.
- Granulated Sugar – Sweetens the cheesecake and helps caramelize the top for a lovely contrast.
- Large Eggs – These provide structure and creaminess; beat them well for optimal incorporation.
- All-Purpose Flour – Stabilizes the cheesecake; substitute with a gluten-free blend for dietary needs.
- Salt – Elevates the overall flavor; just a pinch goes a long way.
- Vanilla Extract – Adds a warm, aromatic note that enhances the dessert experience.
Feel the excitement build as you gather these simple yet key ingredients to create your Burnt Basque Cheesecake!
Step‑by‑Step Instructions for Burnt Basque Cheesecake
Step 1: Prep the Loaf Pan
Preheat your oven to 400°F (200°C). While it warms, generously butter a 9×5 inch loaf pan and line it with parchment paper, allowing the paper to overhang the edges. This will make removing your Burnt Basque Cheesecake a breeze once it’s baked.
Step 2: Mix Ingredients
In a large mixing bowl, use an electric mixer to beat the cream cheese until it’s luxuriously smooth, about 2 minutes. Gradually add the granulated sugar, mixing thoroughly before incorporating the eggs one at a time, ensuring each is fully blended before proceeding. The batter should be rich and creamy without any lumps.
Step 3: Add Dry Ingredients
Gently fold the all-purpose flour and a pinch of salt into the creamy mixture, taking care not to overmix. Once combined, stir in the aromatic vanilla extract to infuse the batter with warmth. This step is essential for capturing the essence of the Burnt Basque Cheesecake, ensuring a wonderful flavor throughout.
Step 4: Bake
Pour the luscious batter into your prepared loaf pan, smoothing the top with a spatula for an even finish. Carefully place it in the preheated oven and bake for approximately 45 minutes. You’ll know it’s ready when the top is a deep golden brown and the center is still slightly jiggly—this will yield that delightful custard-like texture.
Step 5: Cool and Chill
Once baked, turn off the oven and crack the door, allowing the cheesecake to cool gradually inside for about 30 minutes. This helps prevent the cheesecake from sinking. Afterward, transfer it to room temperature before refrigerating for at least 4 hours, though overnight chilling is recommended for optimal taste and consistency.
Step 6: Serve
When you’re ready to serve, gently lift the cheesecake from the pan using the parchment overhang. Slice the Burnt Basque Cheesecake into generous pieces and enjoy. It can be served chilled or at room temperature, paired beautifully with fresh berries or a drizzle of caramel for an extra touch of indulgence.
What to Serve with Burnt Basque Cheesecake
Elevate your dessert experience with delightful pairings that enhance the rich flavors of this iconic Spanish treat.
-
Fresh Berries: Ripe raspberries or strawberries add a fruity, tart contrast, balancing the sweet creaminess beautifully.
-
Light Whipped Cream: A dollop of lightly sweetened whipped cream creates a fluffy texture that complements the cheesecake’s density.
-
Chocolate Ganache: Drizzle rich chocolate ganache for a decadent touch. The bittersweet chocolate perfectly harmonizes with the cheesecake’s caramel notes.
-
Espresso or Coffee: A bold espresso or warm coffee enriches the dessert experience, providing a delightful contrast to the cheesecake’s sweetness.
-
Caramel Sauce: Homemade caramel drizzled over each slice adds depth and an alluring sweetness, enhancing the overall flavor profile.
-
Nutty Biscotti: Crispy biscotti gives a satisfying crunch that contrasts with the creamy cheesecake, perfect for dipping.
-
Prosecco or Sweet Wine: A glass of bubbly Prosecco or sweet dessert wine brightens the palate and complements the cheesecake’s richness with its effervescence.
Pair these delightful options with Burnt Basque Cheesecake to create a memorable dessert experience that delights and impresses your loved ones!
How to Store and Freeze Burnt Basque Cheesecake
Fridge: Store your Burnt Basque Cheesecake in an airtight container for up to 5 days to maintain its delightful creaminess and flavor.
Freezer: For longer storage, wrap individual slices tightly in plastic wrap, then place in a freezer bag; they can last up to 2 months.
Thawing: When ready to enjoy, thaw the slices overnight in the refrigerator to restore their luscious texture before serving.
Reheating: If you prefer to enjoy your cheesecake warmed, let it come to room temperature before placing in a low oven (around 250°F) for a few minutes.
Make Ahead Options
Preparing your Burnt Basque Cheesecake in advance is not only possible but also a clever way to save time on busy days! You can mix all the ingredients and pour the batter into the prepared loaf pan up to 24 hours before baking. Just cover it tightly with plastic wrap and refrigerate to maintain freshness. When you’re ready to bake, simply take it out, let it sit at room temperature for 30 minutes, and pop it in the oven, ensuring that it bakes to that perfect golden top and creamy center. Whether you want to impress guests or just need a treat during the week, preparing ahead guarantees a delicious dessert with minimal effort on the day you serve it!
Burnt Basque Cheesecake Variations
Explore the many delightful ways to personalize your Burnt Basque Cheesecake. Let your culinary creativity shine as you enhance flavors and textures!
- Gluten-Free: Substitute all-purpose flour with a gluten-free blend for a deliciously inclusive dessert.
- Fruit Toppings: Serve alongside fresh berries like strawberries or blueberries for a burst of natural sweetness and vibrant color.
- Chocolate Drizzle: Add a decadent touch by drizzling melted chocolate or a rich chocolate ganache over the cheesecake.
- Coffee Infusion: Mix in a tablespoon of instant espresso powder for an invigorating coffee flavor that pairs beautifully with the cheesecake’s richness.
- Citrus Zest: Brighten the flavor profile by folding in fresh lemon or orange zest for a refreshing twist.
- Caramel Swirl: Create a stunning visual by swirling homemade caramel sauce through the batter before baking for an enticing caramel flavor.
- Seasonal Spices: Experiment with spices like cinnamon or nutmeg to evoke warm, comforting vibes during the fall or holiday seasons.
- Whipped Cream: Top each slice with a dollop of whipped cream for added creaminess and a luxurious feel, reminiscent of traditional cheesecakes.
Whether you stick to any of these variations or explore your ideas, remember that every adaptation brings a lovely new experience to the table! And if you’re interested in something whimsical, check out my Velvet Oreo Cheesecake for another delightful, crowd-pleasing treat!
Expert Tips for Burnt Basque Cheesecake
-
Check the Oven Temperature: Using an oven thermometer ensures your cheesecake bakes evenly; a too-hot oven can scorch the top too quickly.
-
Avoid Overmixing: When adding the flour, fold gently to maintain the cheesecake’s airy texture; overmixing can lead to a dense result.
-
Perfect Jiggly Center: Remember, it’s okay for the center to jiggle slightly when you take it out; this is key for the creamy consistency of your Burnt Basque Cheesecake.
-
Cool Gradually: Letting the cheesecake cool in the oven with the door ajar helps prevent cracks and sinking; it’s worth the wait for a beautiful finish.
-
Flavor Enhancements: For a twist, consider adding lemon zest or a splash of liqueur to the batter for an extra layer of flavor in your Burnt Basque Cheesecake.
Burnt Basque Cheesecake Recipe FAQs
How can I ensure my cream cheese is at the right temperature?
Absolutely! For the richest texture, let your full-fat cream cheese sit at room temperature for 30 to 45 minutes before mixing. This allows it to soften perfectly, ensuring a lump-free batter that’ll yield that creamy center.
How should I store my Burnt Basque Cheesecake?
You can store your Burnt Basque Cheesecake in an airtight container in the fridge for up to 5 days. Make sure it’s cooled completely before sealing. This will help maintain its rich flavor and creamy texture.
Can I freeze Burnt Basque Cheesecake?
Yes, you can! To freeze, wrap individual slices well in plastic wrap and place them in a freezer bag. They can stay fresh for up to 2 months. When you’re ready to enjoy, simply thaw them overnight in the refrigerator for the best texture.
What do I do if my cheesecake cracks on top?
Very! Cracking can happen, especially if it cools too quickly. To avoid this, let your cheesecake cool gradually in the oven with the door slightly ajar for about 30 minutes after baking. This will help prevent sudden temperature changes that lead to cracks.
Is this recipe suitable for those with gluten sensitivities?
You bet! Simply swap the all-purpose flour with a gluten-free flour blend, and everyone can enjoy this decadent Burnt Basque Cheesecake without worry. Make sure to check that your other ingredients, like the vanilla extract, are also gluten-free.
How long should I chill the cheesecake for the best results?
For optimal flavor, I recommend chilling your cheesecake for at least 4 hours, but overnight is even better! This waiting period allows the flavors to meld beautifully, giving you that melt-in-your-mouth satisfaction when you finally slice and serve.
Decadent Burnt Basque Cheesecake That Melts in Your Mouth
Ingredients
Equipment
Method
- Preheat your oven to 400°F (200°C). Butter a 9x5 inch loaf pan and line it with parchment paper, letting it overhang.
- In a large mixing bowl, beat the cream cheese until smooth. Gradually add sugar, mixing thoroughly, then incorporate the eggs one at a time.
- Gently fold in the flour and a pinch of salt, then stir in the vanilla extract.
- Pour the batter into the prepared pan, smoothing the top. Bake for 45 minutes until the top is golden brown and the center is slightly jiggly.
- Turn off the oven and crack the door, let it cool for 30 minutes, then refrigerate for at least 4 hours or overnight.
- Lift the cheesecake from the pan using the parchment, slice, and serve.
Leave a Reply