
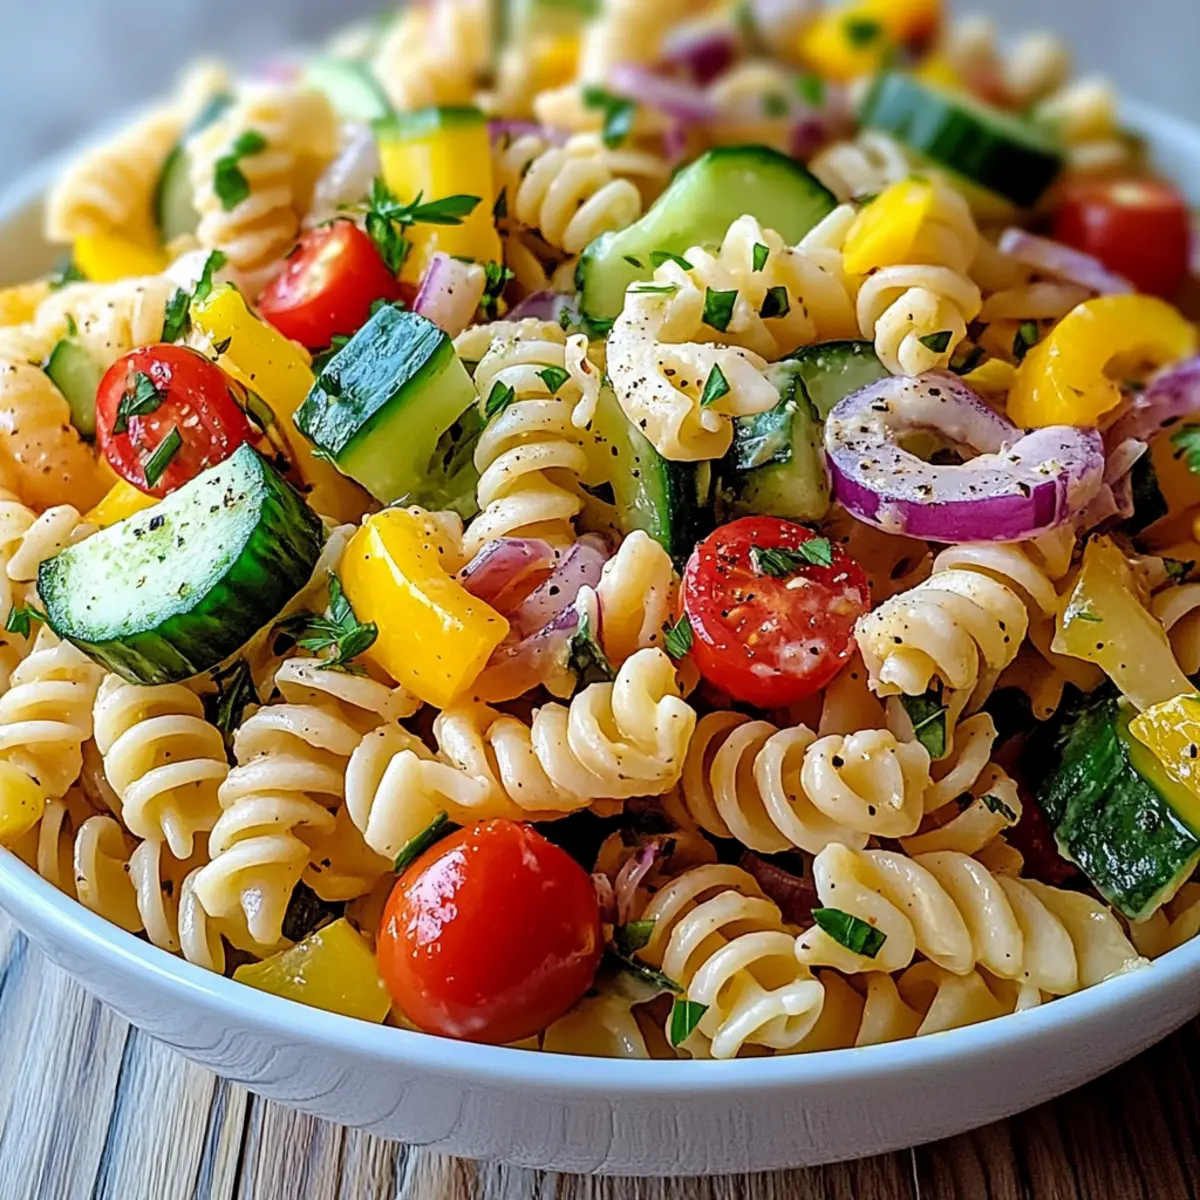
As I tossed together the vibrant hues of ripe cherry tomatoes and crisp cucumbers, I couldn’t help but smile at how the California Pasta Salad captures the essence of sunny days and carefree gatherings. This salad isn’t just a colorful feast for the eyes; it’s a versatile dish that’s perfect for potlucks or a refreshing lunch, easily customizable to suit any palate. With the convenience of make-ahead prep and the ability to accommodate dietary preferences—like gluten-free or vegan options—this recipe embraces the joy of creative cooking. Dive into a bowl of delightful crunch, creamy cheddar, and zesty dressing that harmonize beautifully! What twist will you put on your California Pasta Salad today?
Why is California Pasta Salad a Favorite?
Vibrant Colors: The California Pasta Salad is visually stunning, showcasing a rainbow of fresh ingredients that brighten your table.
Endless Customization: Easily adapt this recipe to fit your dietary needs! From vibrant seasonal veggies to protein-packed additions like grilled chicken or chickpeas, the choices are limitless.
Make-Ahead Magic: Perfect for meal prep, you can whip this up ahead of time and store it in the fridge for up to three days without losing flavor.
Crowd-Pleaser: This dish is a guaranteed hit at gatherings—great as a side or main! Don’t forget to try it alongside a refreshing Dumpling Salad Zesty for an extra burst of flavor.
Quick and Easy: Whip it up in under 30 minutes, making it a fantastic option for busy weeknights or last-minute parties!
California Pasta Salad Ingredients
Let’s gather everything you need for a delicious California Pasta Salad that’s as fresh as it is satisfying!
For the Pasta
• Rotini Pasta – The sturdy base of the salad that holds the dressing well; gluten-free pasta can be used for those avoiding gluten.
For the Vegetables
• Cherry Tomatoes – Adds a sweet burst of flavor and vibrant color; feel free to swap in grape tomatoes if desired.
• Cucumber – Bright and crunchy, perfect for hydration; substitute with bell peppers for a different texture experience.
• Red Onion – Provides a sharp bite that balances the flavors; green onions can be used for a milder taste.
• Black Olives – Adds a briny depth; omit if you prefer a milder salad.
• Bell Pepper – Offers additional sweetness and crunch; any color of bell pepper works beautifully here.
For the Creaminess
• Sharp Cheddar Cheese – Gives creaminess and a punch of flavor; for a vegan version, choose a dairy-free cheese alternative.
For the Dressing
• Italian Salad Dressing – A zesty layer that ties all the elements together; consider making your own for a healthier twist.
For Garnish
• Fresh Parsley – Brings a touch of brightness and freshness; basil makes a fragrant substitute if that’s what you prefer.
• Salt and Pepper – Essential to elevate the flavors; don’t forget to season to taste!
Get ready to enjoy your California Pasta Salad, bursting with flavors and perfect for any occasion!
Step‑by‑Step Instructions for California Pasta Salad
Step 1: Cook the Pasta
Begin by bringing a large pot of salted water to a boil over high heat. Once boiling, add the rotini pasta and cook according to package instructions for about 8 to 10 minutes until al dente. Stir occasionally to prevent sticking, and keep an eye on the pasta for a firm but tender texture.
Step 2: Drain and Cool the Pasta
After draining the pasta in a colander, rinse it under cold water to halt the cooking process and cool it down. This step not only prevents the pasta from becoming mushy but also makes it easier to incorporate into your California Pasta Salad later. Let it sit in the colander to drain thoroughly.
Step 3: Combine the Ingredients
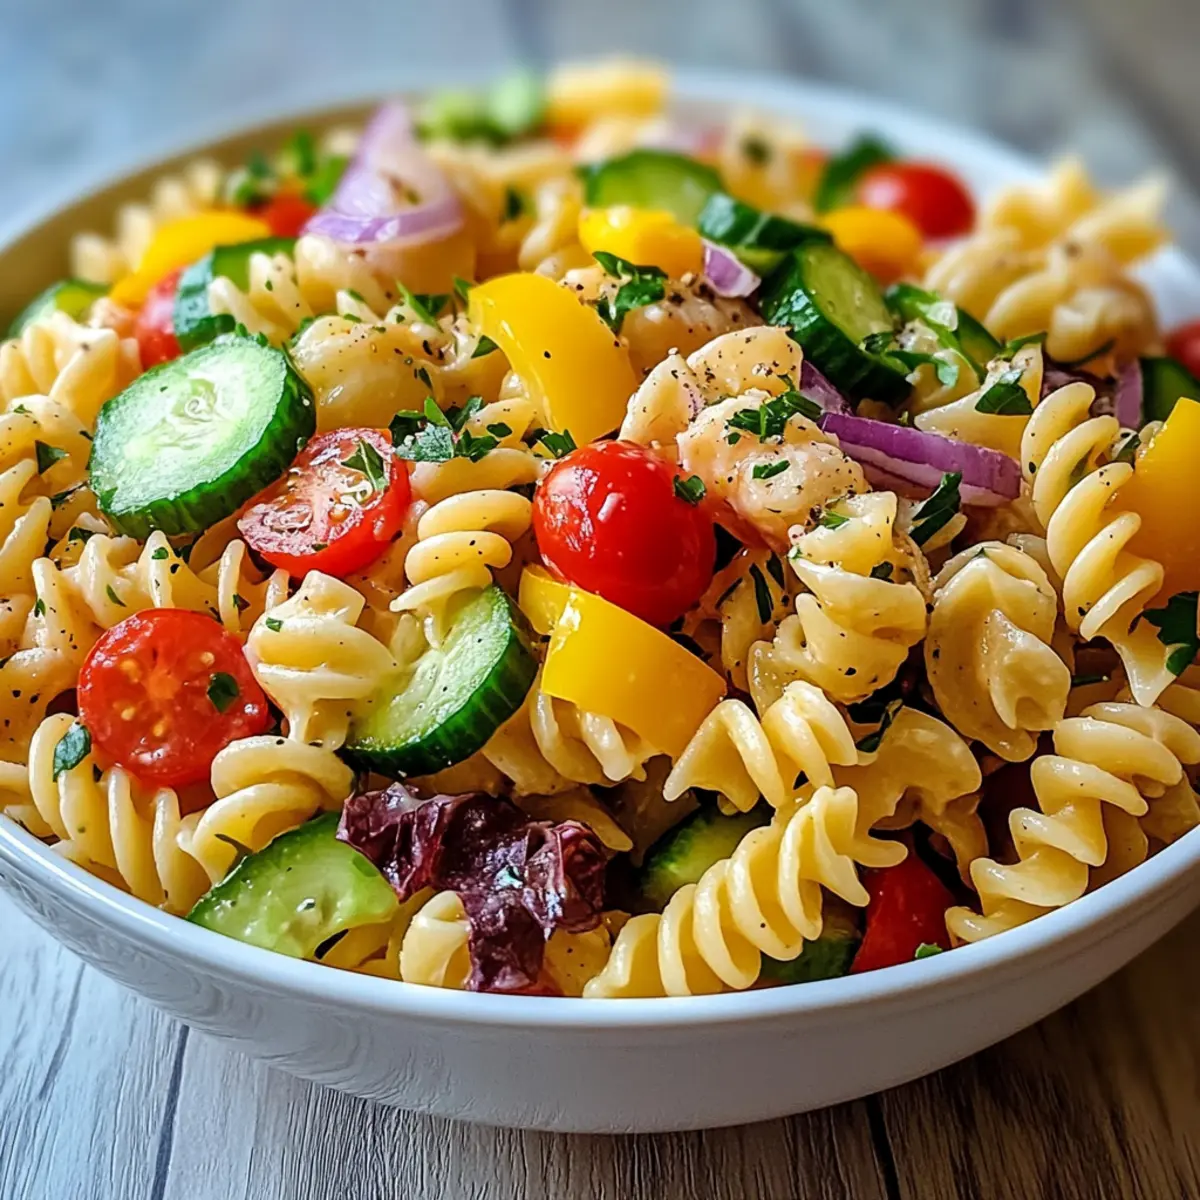
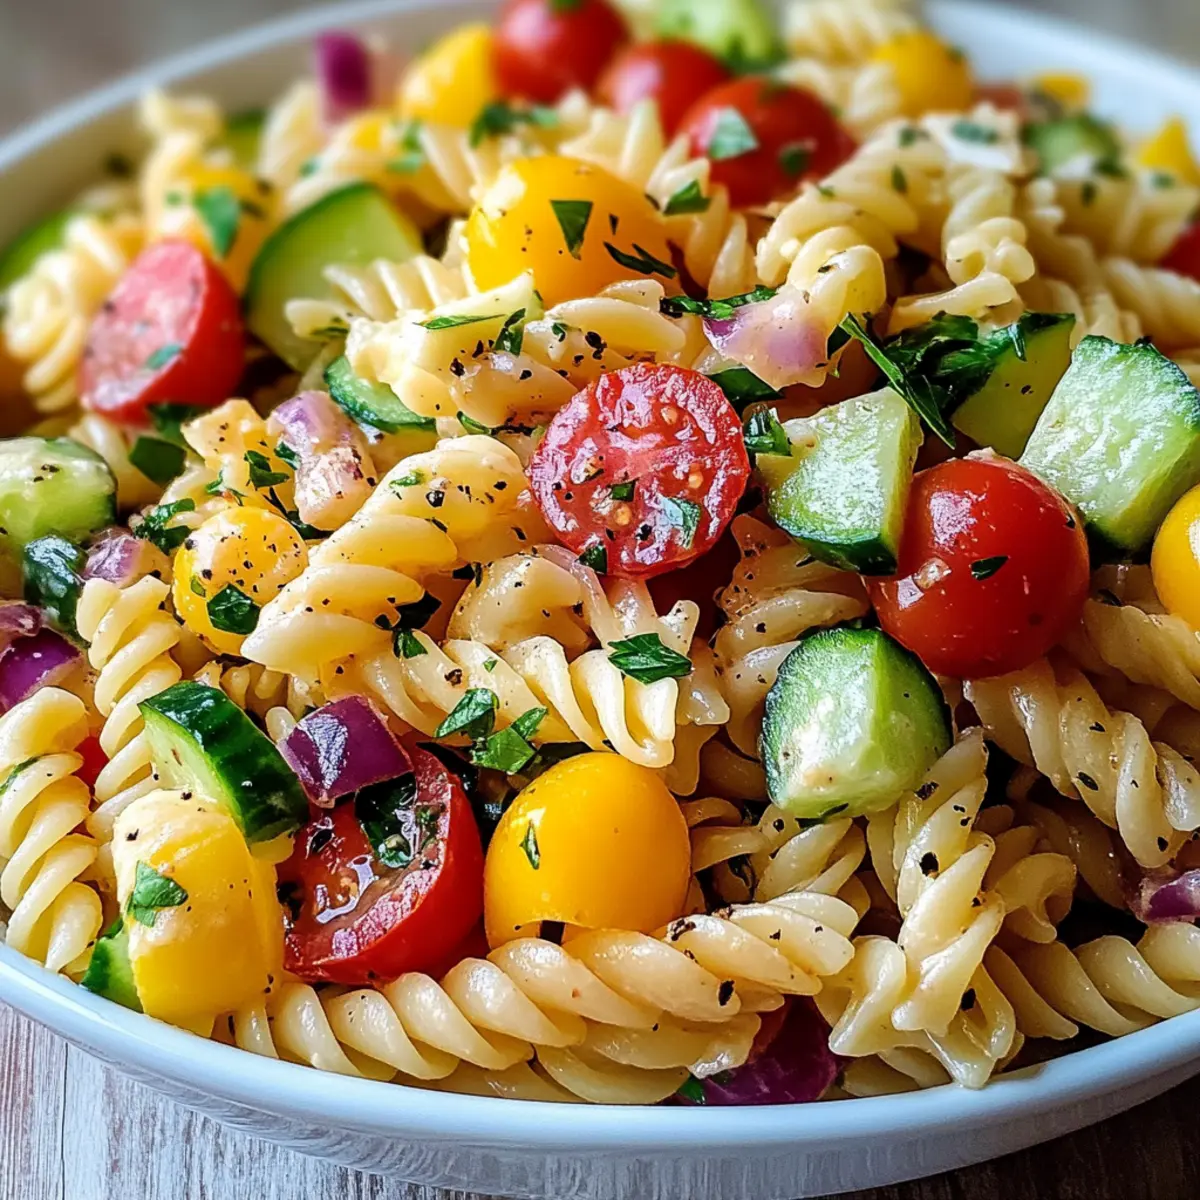
In a large mixing bowl, add the cooled rotini pasta, along with the vibrant cherry tomatoes, refreshing cucumber, sharp red onion, briny black olives, sweet bell pepper, and creamy sharp cheddar cheese. Toss everything gently with your hands or a spoon until the ingredients are combined to create a colorful base for your salad.
Step 4: Dress the Salad
Pour a generous amount of Italian salad dressing over the pasta and vegetable mixture, ensuring all ingredients are evenly coated. Use a spoon to gently toss the salad again, making sure that each piece is drizzled with dressing. The California Pasta Salad should start to glisten, indicating it’s well-dressed.
Step 5: Season and Garnish
Sprinkle salt and pepper over the salad to enhance the flavors, and taste to adjust the seasoning as needed. Finish by adding freshly chopped parsley for a burst of color and fresh flavor, tossing lightly once more to distribute the herbs throughout the salad for a delightful finish.
Step 6: Chill Before Serving
Cover the bowl with plastic wrap or a lid and refrigerate the California Pasta Salad for at least 30 minutes. This chilling allows the flavors to meld beautifully, making each bite even more delicious and refreshing. When ready to serve, give it a final toss and enjoy!
What to Serve with California Pasta Salad
If you’re looking to create a delightful meal experience, there are plenty of complementary dishes that can elevate your California Pasta Salad into a full feast.
-
Grilled Chicken: Juicy, tender chicken adds a hearty protein element, complementing the salad’s fresh flavors while keeping your meal satisfying.
-
Garlic Bread: Warm, buttery garlic bread brings a comforting, crispy texture that pairs wonderfully with the salad and makes it perfect for sharing.
-
Fruit Salad: A refreshing fruit salad introduces sweetness and a burst of color, balancing the zesty notes of your California Pasta Salad beautifully.
-
Caprese Skewers: These skewers of ripe tomatoes, fresh basil, and mozzarella offer a delightful, fresh bite that matches the salad’s vibrant charm.
-
Chilled White Wine: A crisp, chilled Sauvignon Blanc enhances the flavors of the salad, providing a refreshing contrast to the zesty dressing.
-
Chocolate Mousse: End your meal on a sweet note with a light, airy dessert like chocolate mousse, creating a delightful finish to this colorful feast.
Think about how these dishes can enhance your dining experience—the California Pasta Salad truly shines as part of a well-curated meal!
Make Ahead Options
These California Pasta Salad preparations are perfect for busy weeknights and meal prep! You can cook and cool the rotini pasta up to 24 hours in advance, and chop your vegetables (cherry tomatoes, cucumber, red onion, bell pepper) up to 3 days ahead. Store the pasta and veggies separately in airtight containers in the refrigerator to maintain their freshness and texture. When you’re ready to serve, simply combine the prepped ingredients, toss with the Italian dressing, and season as desired. This way, you’ll have a delicious, flavorful salad ready with minimal effort, just as delightful as if you had made it all at once!
How to Store and Freeze California Pasta Salad
Fridge: Store leftover California Pasta Salad in an airtight container for up to 3 days. The flavors deepen with chilling, making it even tastier on day two!
Freezer: While not recommended for optimal texture, if needed, freeze the salad in a freezer-safe container for up to 1 month. Thaw overnight in the fridge before serving.
Reheating: If you’ve frozen the salad, gently mix it after thawing; serve cold for the best experience! If any ingredients seem wilted, add a fresh touch of veggies or herbs.
Make-Ahead: Enjoy the convenience of making your salad a day in advance; just remember to add fresh toppings just before serving for the best crunch!
Expert Tips for California Pasta Salad
-
Perfect Pasta: Cook your rotini pasta al dente to prevent it from becoming mushy. Overcooked pasta can ruin the texture of your California Pasta Salad.
-
Chill Time: Refrigerate the salad for at least 30 minutes; it allows the flavors to meld and enhances the overall taste of the dish.
-
Fresh Ingredients: Use the freshest vegetables available, as they contribute to both the flavor and vibrant colors of your California Pasta Salad.
-
Dress Wisely: Don’t skimp on the dressing! Ensure all ingredients are well-coated for the best flavor. Consider making your own for healthier adjustments.
-
Mix and Match: Feel free to swap in seasonal vegetables or add proteins to suit your preferences—this adaptability is the heart of the California Pasta Salad!
California Pasta Salad Variations
Feel free to unleash your creativity and make this California Pasta Salad truly yours—each variation brings a unique twist to the dish!
- Protein-Packed: Add grilled chicken or shrimp to make it a satisfying meal. Pair it with a vibrant Mushroom Pasta Soup for a delightful feast.
- Vegan Delight: Omit the cheddar cheese and use a vegan dressing to cater to plant-based eaters. Enjoy the creamy texture with avocado instead!
- Seasonal Veggies: Incorporate asparagus in spring or roasted butternut squash in fall for a seasonal flair. Embrace the changing flavors and colors throughout the year!
- Herb Explosion: Swap parsley for fresh basil or dill for a burst of aromatic goodness. These herbs will make your salad feel like a fresh garden in every bite!
- Zesty Dressings: Experiment with different dressings! Try a tangy lemon-oregano vinaigrette or a spicy chipotle-lime dressing for an exciting kick that will leave everyone asking for more.
- Cheesy Choices: Go for crumbled feta cheese instead of cheddar for a briny taste that complements the veggies beautifully. Add a sprinkle of olives for an extra punch!
- Crunch Factor: Toss in some sunflower seeds or chopped nuts for a delightful crunch that contrasts nicely with the creaminess of the cheese. It’s a little surprise in every forkful!
California Pasta Salad Recipe FAQs
How do I choose ripe cherry tomatoes for my California Pasta Salad?
Absolutely! Look for cherry tomatoes that are bright and firm with no dark spots or blemishes. When you squeeze them gently, they should feel slightly soft but not mushy. The vibrant color signifies ripeness, indicating they’ll be sweet and flavorful in your salad!
What’s the best way to store leftover California Pasta Salad?
Very! Transfer your leftover California Pasta Salad into an airtight container and store it in the refrigerator for up to 3 days. It’s a great make-ahead option, and the flavors will actually improve as they meld together during storage. Just be sure to give it a gentle toss before serving again!
Can I freeze California Pasta Salad?
Yes, although freezing isn’t ideal due to the texture of the vegetables. If you decide to freeze it, use a freezer-safe container and ensure it’s sealed tightly. It can last for about 1 month. When you’re ready to enjoy, thaw it in the refrigerator overnight and stir it well before serving, perhaps adding some fresh vegetables for a crispy touch!
What can I do if my California Pasta Salad seems too dry?
No worries! If it feels a bit dry after being refrigerated, you can simply drizzle in more Italian dressing to bring back moisture. Mix gently until everything is coated evenly. You could also add a splash of olive oil or a squeeze of fresh lemon juice for a flavor boost.
Is California Pasta Salad suitable for vegetarians and those with gluten intolerance?
Absolutely! California Pasta Salad is not only vegetarian-friendly but can also be easily made gluten-free by substituting traditional rotini pasta with a gluten-free variety. Just ensure all additional ingredients, including the dressing, are gluten-free to accommodate any dietary needs. Enjoy the deliciousness with peace of mind!

California Pasta Salad: Your Go-To for Fresh, Easy Meals
Ingredients
Equipment
Method
- Begin by bringing a large pot of salted water to a boil over high heat.
- Once boiling, add the rotini pasta and cook according to package instructions for about 8 to 10 minutes until al dente.
- After draining the pasta in a colander, rinse it under cold water to halt the cooking process and cool it down.
- In a large mixing bowl, add the cooled rotini pasta, along with the vibrant cherry tomatoes, refreshing cucumber, sharp red onion, briny black olives, sweet bell pepper, and creamy sharp cheddar cheese.
- Pour a generous amount of Italian salad dressing over the pasta and vegetable mixture, ensuring all ingredients are evenly coated.
- Sprinkle salt and pepper over the salad to enhance the flavors, and finish by adding freshly chopped parsley.
- Cover the bowl with plastic wrap or a lid and refrigerate the California Pasta Salad for at least 30 minutes.
Leave a Reply