
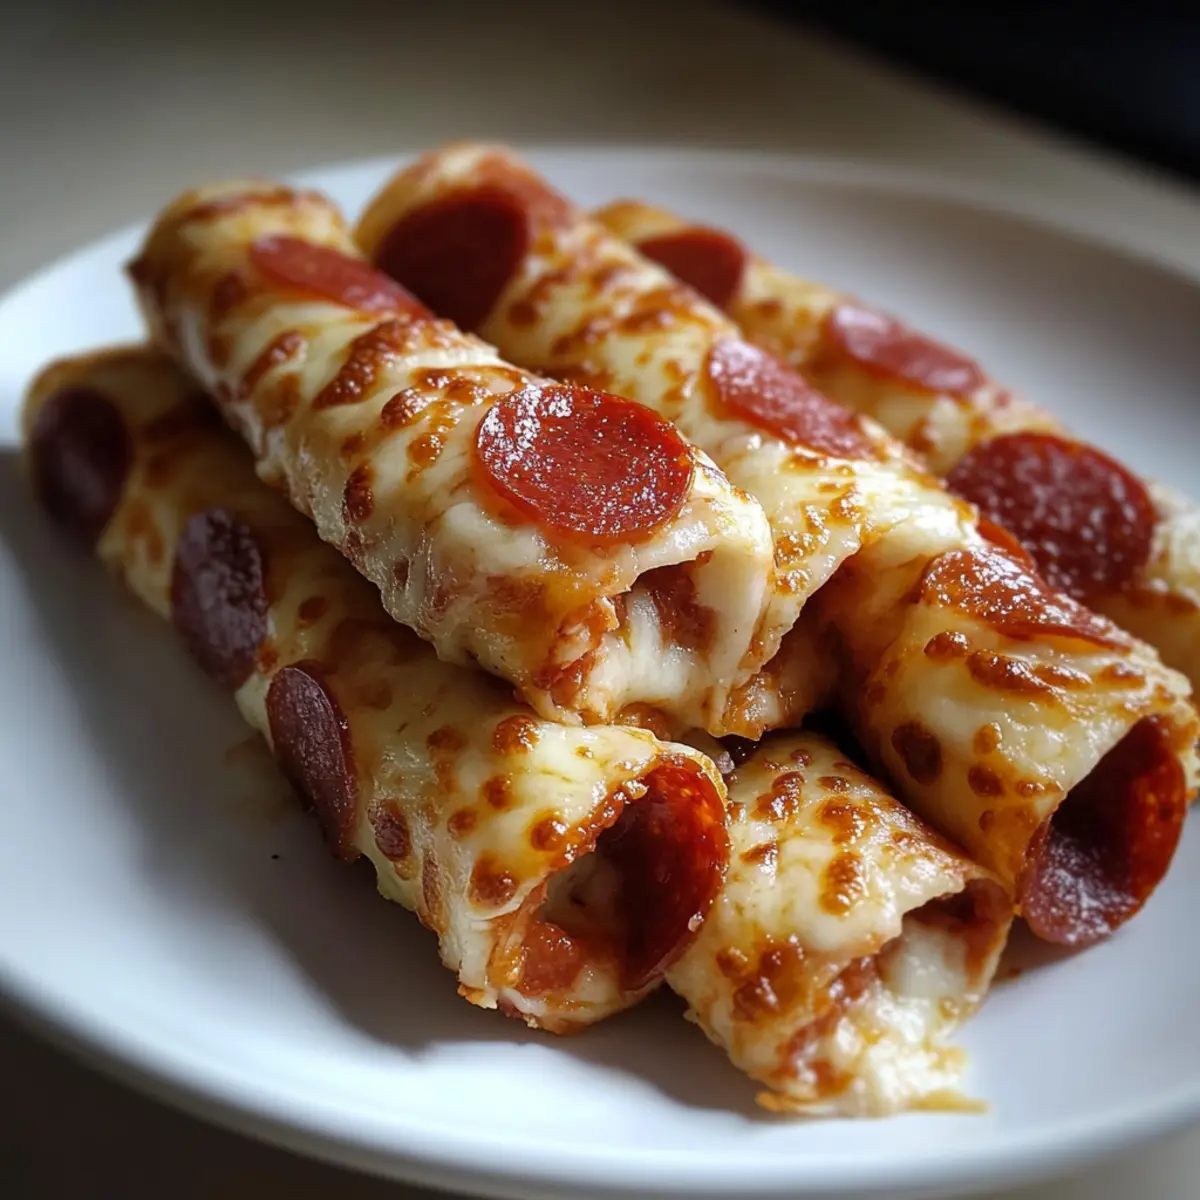
As I rolled the tortillas around the gooey cheese and pepperoni, memories of pizza nights flooded back—a culinary embrace that I could savor guilt-free. These Cheesy Pepperoni Pizza Roll Ups are not only a quick snack, ready in just 11 minutes, but they’re also a perfect low-carb indulgence for those craving comfort without the carbs. With melty mozzarella and a crispy exterior, they’re bound to elevate your next movie marathon or game night. Plus, they’re endlessly customizable! Whether you swap in your favorite toppings or keep it classic, these pizza rolls promise a satisfying bite every time. Curious about how to whip up this deliciousness? Let’s dive in!
Why Will You Love These Roll Ups?
Satisfying cravings has never been easier! These Cheesy Pepperoni Pizza Roll Ups combine a crispy exterior with a melty, gooey center, creating a delightful contrast that will have your taste buds dancing. Quick and effortless, ready in just 11 minutes, they fit seamlessly into your busy lifestyle without sacrificing flavor. Versatile options allow you to swap ingredients for a personalized twist—try vegetarian, gluten-free, or spicy variations! Guilt-free indulgence means you can enjoy a tasty treat while sticking to your low-carb goals. Perfect for sharing at gatherings or savoring alone, these roll ups are bound to become a crowd favorite!
Cheesy Pepperoni Pizza Roll Ups Ingredients
For the Roll Ups
• Low-Carb Tortillas – The perfect base for that crispy texture; choose quality brands like Mission for the best results.
• Marinara Sauce – Adds a zesty flavor; be sure to limit to 2 tablespoons per tortilla to keep them from getting soggy.
• Mozzarella Cheese – Provides that heavenly gooeyness; freshly shredded cheese melts beautifully for the ultimate experience.
• Pepperoni Slices – Brings a spicy kick; arrange evenly and pat dry to reduce excess grease.
• Olive Oil – Brush on the outside for delightful crispiness and enhance the golden finish during baking.
Feel free to explore variations by switching up the ingredients to suit your taste! These Cheesy Pepperoni Pizza Roll Ups are sure to become your new favorite low-carb snack.
Step‑by‑Step Instructions for Cheesy Pepperoni Pizza Roll Ups
Step 1: Preheat the Oven
Begin by preheating your oven to 375°F (190°C). This crucial step ensures that your Cheesy Pepperoni Pizza Roll Ups bake evenly, developing that desired golden color and crispy texture. As the oven warms up, gather your ingredients and prepare the workspace for quicker assembly.
Step 2: Prepare the Tortillas
Lay out the low-carb tortillas flat on a clean surface. Take 2 tablespoons of marinara sauce and spread it evenly over each tortilla, ensuring you leave a half-inch border around the edges. This allows the roll-ups to seal properly and prevents the sauce from leaking during baking.
Step 3: Add Cheese and Pepperoni
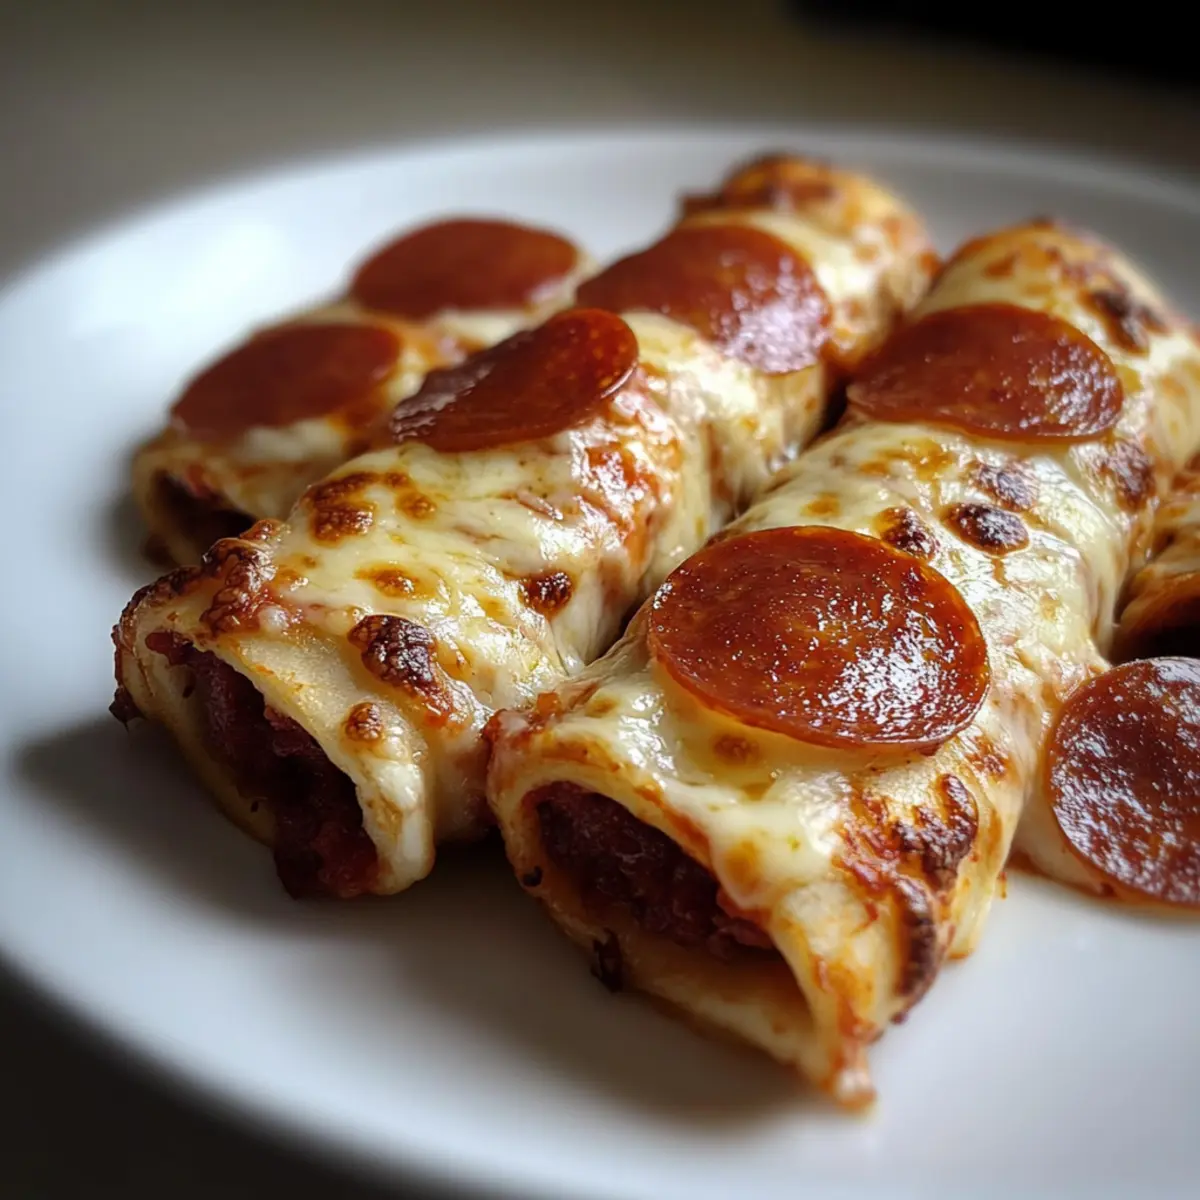
Sprinkle a generous amount of freshly shredded mozzarella cheese over the marinara sauce, since that gooey texture is key to these Cheesy Pepperoni Pizza Roll Ups. Then, arrange the pepperoni slices evenly on top; this ensures every bite is packed with flavor. Avoid overlapping too much to allow even melting.
Step 4: Roll the Tortillas
Starting from one end, carefully roll each tortilla tightly, being mindful not to tear it. This ensures that all the delicious ingredients stay enclosed. Once rolled, brush the outside with olive oil to enhance browning and crispiness—this step is vital for that irresistible crunch!
Step 5: Bake for Golden Perfection
Place the rolled tortillas seam-side down on a baking sheet lined with parchment paper. Bake in the preheated oven for 10 to 12 minutes, or until they turn golden brown and the cheese is bubbly. Keep an eye on them to ensure they do not over-bake, aiming for that perfect crispy texture.
Step 6: Cool and Slice
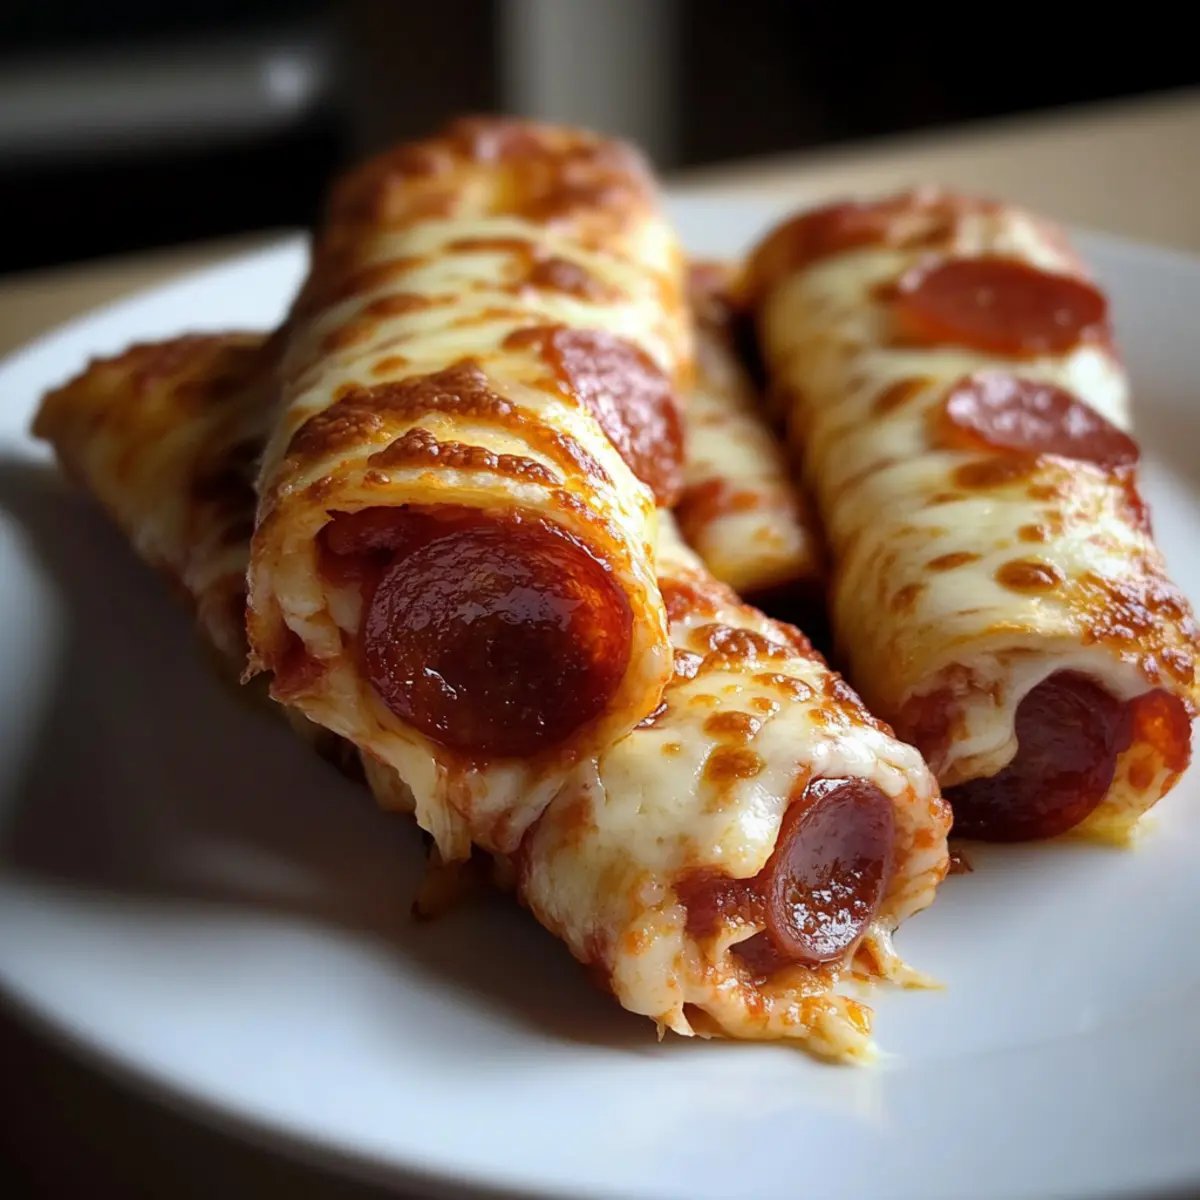
Once baked, remove the Cheesy Pepperoni Pizza Roll Ups from the oven and let them cool slightly on the baking sheet for a couple of minutes. This brief cooling period helps the cheese set, making them easier to slice. Then, cut into bite-sized pieces for serving, showcasing that gooey filling!
Step 7: Serve and Enjoy
Serve the roll-ups warm with additional marinara sauce on the side for dipping—this adds an extra layer of flavor! Gather your family or friends to share these delightful Cheesy Pepperoni Pizza Roll Ups, perfect for any casual gathering or snack time at home.

Expert Tips for Cheesy Pepperoni Pizza Roll Ups
-
Tortilla Choice: Use high-quality low-carb tortillas for the best texture. They should crisp up perfectly while holding all that delicious filling.
-
Sauce Control: Limit marinara sauce to 2 tablespoons per tortilla. Too much sauce can lead to soggy roll ups, diminishing that delightful crunch.
-
Cheese Options: Always opt for freshly shredded mozzarella for ultimate gooeyness. Pre-packaged cheese may not melt as well, resulting in a less satisfying bite.
-
Pepperoni Prep: Pat pepperoni slices dry with a paper towel to reduce excess grease. This ensures your Cheesy Pepperoni Pizza Roll Ups are not overly oily.
-
Air Frying Alternative: Try cooking them in an air fryer at 375°F for 6-8 minutes, flipping halfway for that extra crispiness without the oven wait.
-
Cooling Time: Allow the roll ups to cool slightly before slicing. This helps the cheese set, preventing spills and keeping every bite packed with flavor.
Storage Tips for Cheesy Pepperoni Pizza Roll Ups
-
Room Temperature: Let the roll ups cool completely before storing. They can stay at room temperature for up to 2 hours if not consumed immediately.
-
Fridge: Store the Cheesy Pepperoni Pizza Roll Ups in an airtight container in the fridge for up to 3 days. This keeps them fresh while preventing moisture buildup.
-
Freezer: For longer storage, freeze the cooled roll ups in a single layer on a baking sheet, then transfer them to a freezer-safe container. They can be frozen for up to 2 months.
-
Reheating: To enjoy leftovers, reheat in the oven at 350°F for about 5 minutes or until warmed through. This restores their crispiness and melts the cheese perfectly!
Make Ahead Options
These Cheesy Pepperoni Pizza Roll Ups are ideal for meal prep, making busy weeknights a breeze! You can assemble the roll ups up to 24 hours in advance; simply prepare them through Step 4, then wrap tightly in plastic wrap and refrigerate. This helps maintain their freshness and prevents the tortillas from drying out. When you’re ready to enjoy them, just remove from the fridge and place them directly on a baking sheet, brushing with olive oil before baking at 375°F for 10-12 minutes until golden and crispy. This way, you’ll savor the same delicious, cheesy goodness with minimal effort, making snack time effortless!
What to Serve with Cheesy Pepperoni Pizza Roll Ups
As you indulge in these delightful roll-ups, imagine complementing them with tasty sides that enhance their mouthwatering flavors.
- Fresh Garden Salad: A crisp salad with mixed greens and a zesty vinaigrette adds freshness, balancing the richness of the roll-ups.
- Roasted Vegetables: Roasted bell peppers and zucchini bring sweetness and a hearty touch, creating a satisfying contrast.
- Garlic Breadsticks: Soft, buttery garlic breadsticks offer a comforting side that echoes classic pizza nights, perfect for dipping!
- Homemade Marinara Dipping Sauce: Serve with an extra side of marinara for dipping; it elevates the flavor and keeps each bite exciting.
- Stuffed Mushrooms: Savory stuffed mushrooms provide umami goodness, pairing perfectly with the cheesy, pepperoni-filled delights.
- Sparkling Lemonade: A refreshing, fizzy drink that cuts through the richness; its bright flavors will keep your palate dancing.
- Chocolate Chip Cookies: For dessert, warm cookies complement the savory roll-ups with their sweet bite, creating a perfect finish.
Cheesy Pepperoni Pizza Roll Ups Variations
Feel free to get creative with these roll ups and customize them to fit your taste buds!
-
Vegetarian Option: Swap pepperoni for sliced bell peppers and black olives for a delightful meatless treat. This will add a colorful twist bursting with fresh flavors.
-
Gluten-Free: Use almond flour tortillas instead of traditional low-carb tortillas. They work beautifully, ensuring everyone can enjoy these cheesy delights without compromising the taste.
-
Herb-Infused: Add fresh basil or oregano before rolling for an aromatic touch that brightens up each bite. Fresh herbs will elevate the savory flavor profile, pleasing your palate.
-
Spicy Kick: Mix in crushed red pepper flakes for an extra layer of heat. Adjust to your spice level preference, and you’ll have a delightful fiery twist to your snack.
-
Cheese Variety: Experiment with different cheeses like pepper jack or cheddar for a unique flavor. Each cheese brings its own personality, making every roll up a new adventure!
-
Breakfast Version: Fill with scrambled eggs, cheese, and spinach for a delightful breakfast twist. Perfect for busy mornings when you need something quick yet satisfying.
-
Dipping Sauces: Serve with a variety of dipping sauces, like ranch or pesto, to broaden the flavor experience. This allows everyone to personalize their enjoyment of each cheesy bite.
-
Baking Alternatives: Try using an air fryer for crispy roll ups with faster prep time. Cooking them at 375°F for about 6-8 minutes ensures crunchiness without traditional baking.
These delightful variations invite you to explore new flavors while keeping your beloved Cheesy Pepperoni Pizza Roll Ups front and center on the snack table! For more ideas, don’t forget to check out our easy vegetarian pizza options or our guide on making gluten-free snacks. Enjoy your culinary adventure!
Cheesy Pepperoni Pizza Roll Ups Recipe FAQs
What type of tortillas should I use for the roll ups?
Absolutely! I highly recommend using low-carb tortillas, such as those from Mission. They provide the best texture and crispiness once baked. Look for ones that are pliable yet sturdy to hold all the delicious fillings without tearing.
How long can I store the Cheesy Pepperoni Pizza Roll Ups in the fridge?
You can store these roll ups in an airtight container in the fridge for up to 3 days. Just ensure they cool completely before sealing them up, as this helps maintain their freshness and prevents sogginess!
Can I freeze the roll ups, and if so, how?
Yes, you can freeze the Cheesy Pepperoni Pizza Roll Ups! Start by letting them cool completely, then arrange them in a single layer on a baking sheet and freeze until solid—this prevents them from sticking together. Once frozen, transfer them to a freezer-safe container or a zip-top bag. They can be stored for up to 2 months. When you’re ready to enjoy, simply bake from frozen at 375°F for approximately 12-15 minutes or until heated through.
What can I do if the roll ups become soggy?
Very good question! To avoid soggy roll ups, it’s essential to limit the marinara sauce to 2 tablespoons per tortilla. Another tip is to pat the pepperoni slices with a paper towel to reduce excess grease. If your roll ups are soggy after baking, simply pop them back in the oven for a few minutes to help crisp them up again.
Are these roll ups safe for pets or those with allergies?
When it comes to pets, it’s best to keep these rolls away from them. Ingredients such as cheese and pepperoni may not sit well with dogs or cats. For those with allergies, be cautious of the specific brands of tortillas and sauces you choose, as they can contain allergens. Always opt for products that align with dietary needs, and explore alternatives like dairy-free cheese for those with lactose intolerance!
Can I customize the filling for the pizza roll ups?
The more the merrier! Feel free to swap out the pepperoni for your favorite toppings. You can try sliced bell peppers, black olives, or even add fresh herbs like basil for an aromatic touch. Experimenting with crushed red pepper flakes can also spice things up!
Cheesy Pepperoni Pizza Roll Ups
Ingredients
Equipment
Method
- Preheat your oven to 375°F (190°C).
- Lay out the low-carb tortillas flat. Spread 2 tablespoons of marinara sauce evenly on each.
- Sprinkle mozzarella cheese over the sauce and arrange pepperoni slices evenly on top.
- Roll each tortilla tightly and brush the outside with olive oil.
- Bake on a parchment-lined baking sheet for 10-12 minutes until golden brown.
- Let them cool slightly before slicing into bite-sized pieces.
- Serve warm with additional marinara sauce on the side.
Leave a Reply