
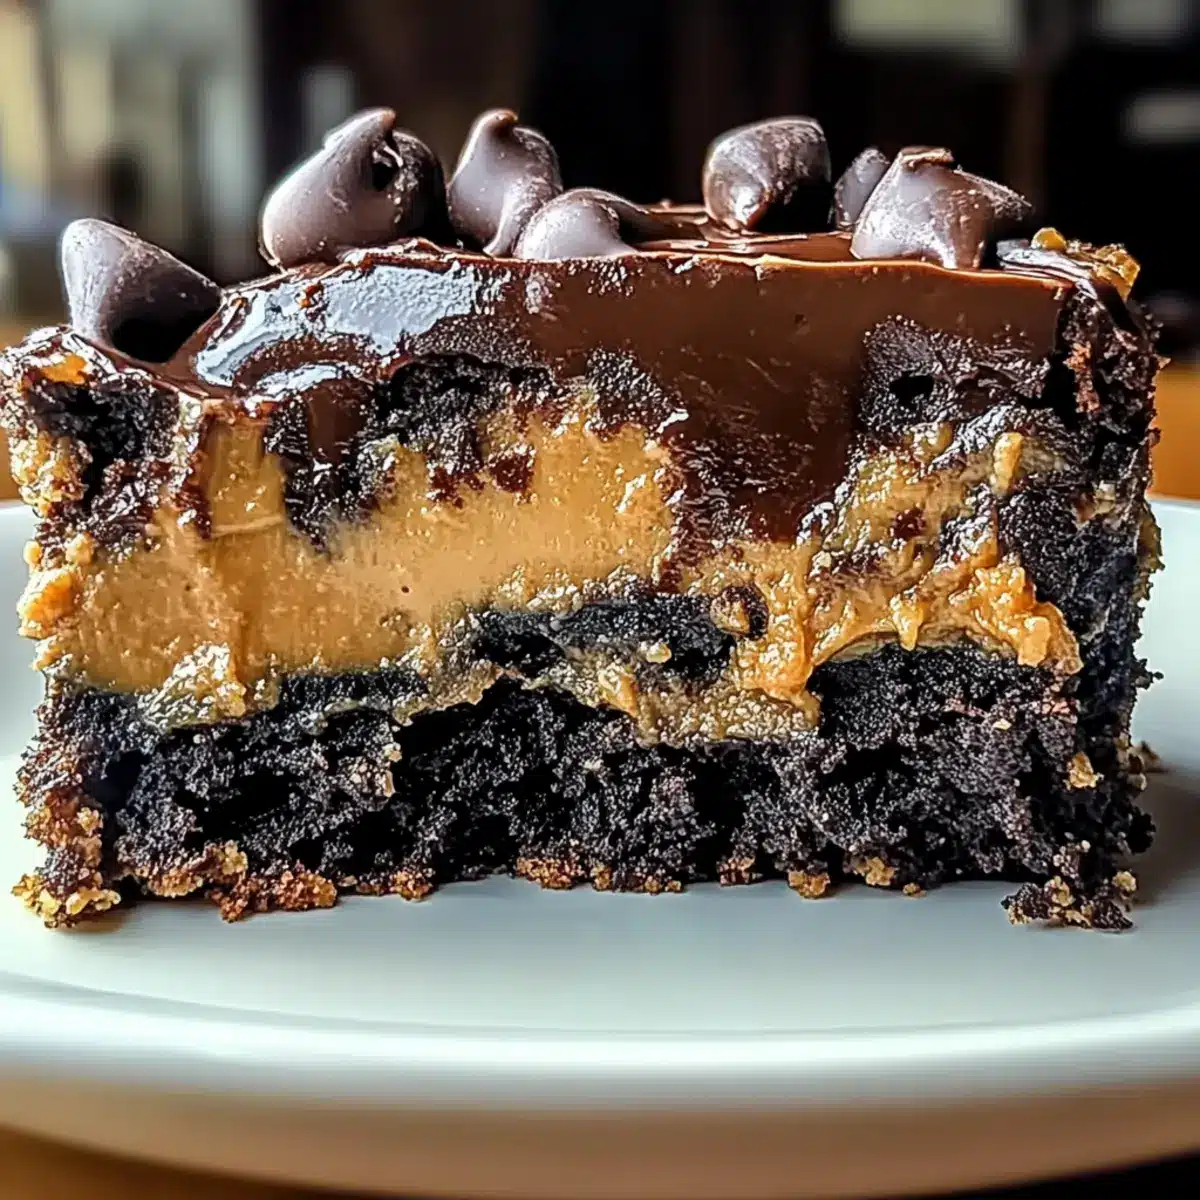
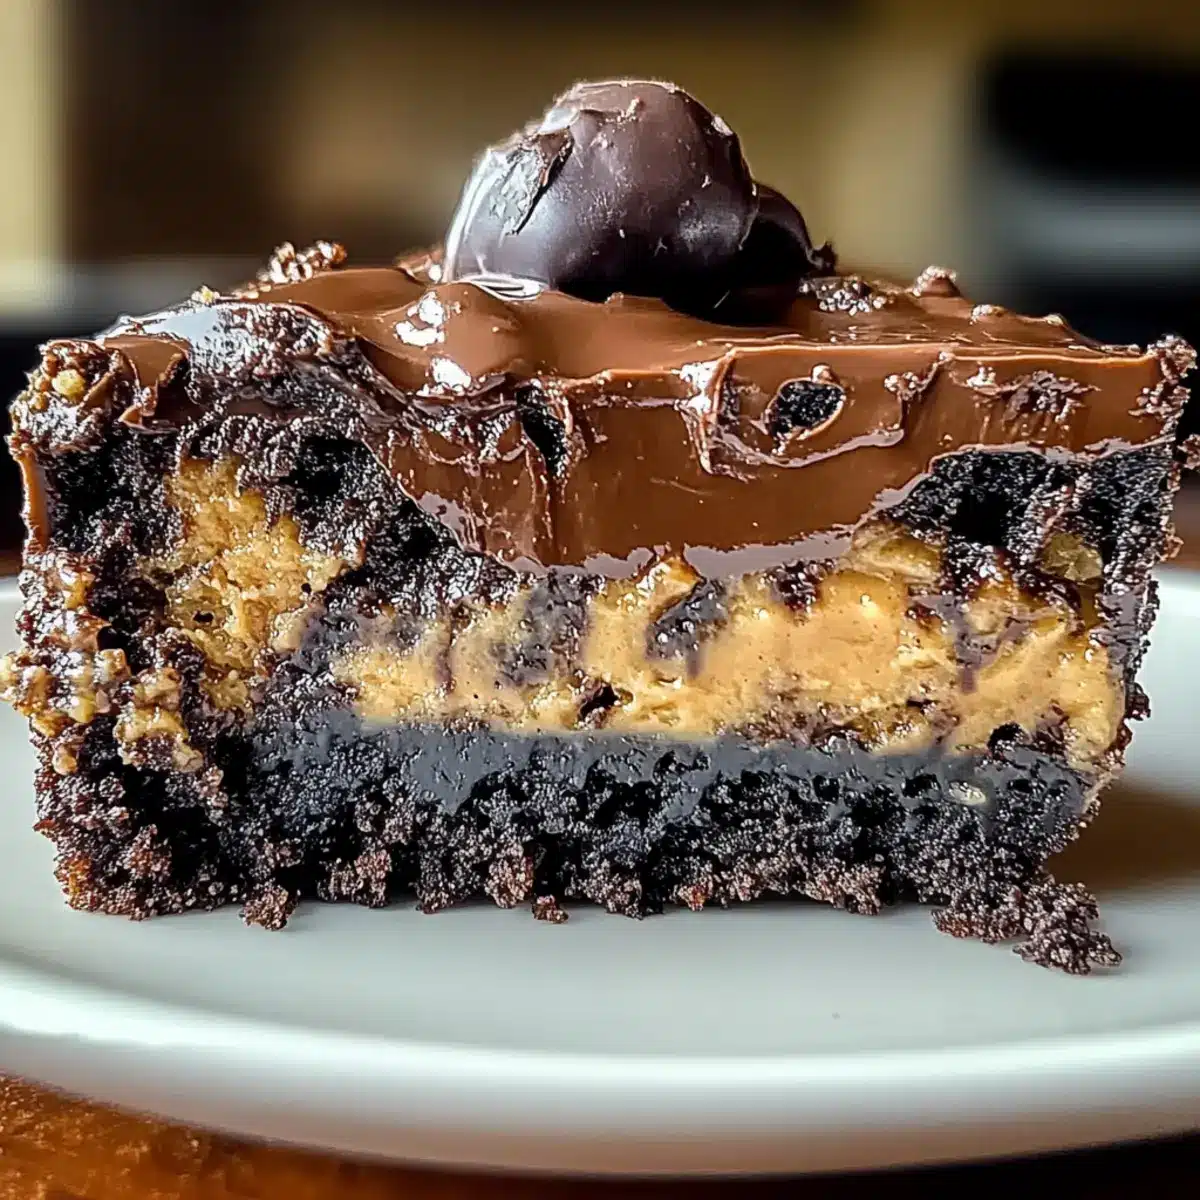
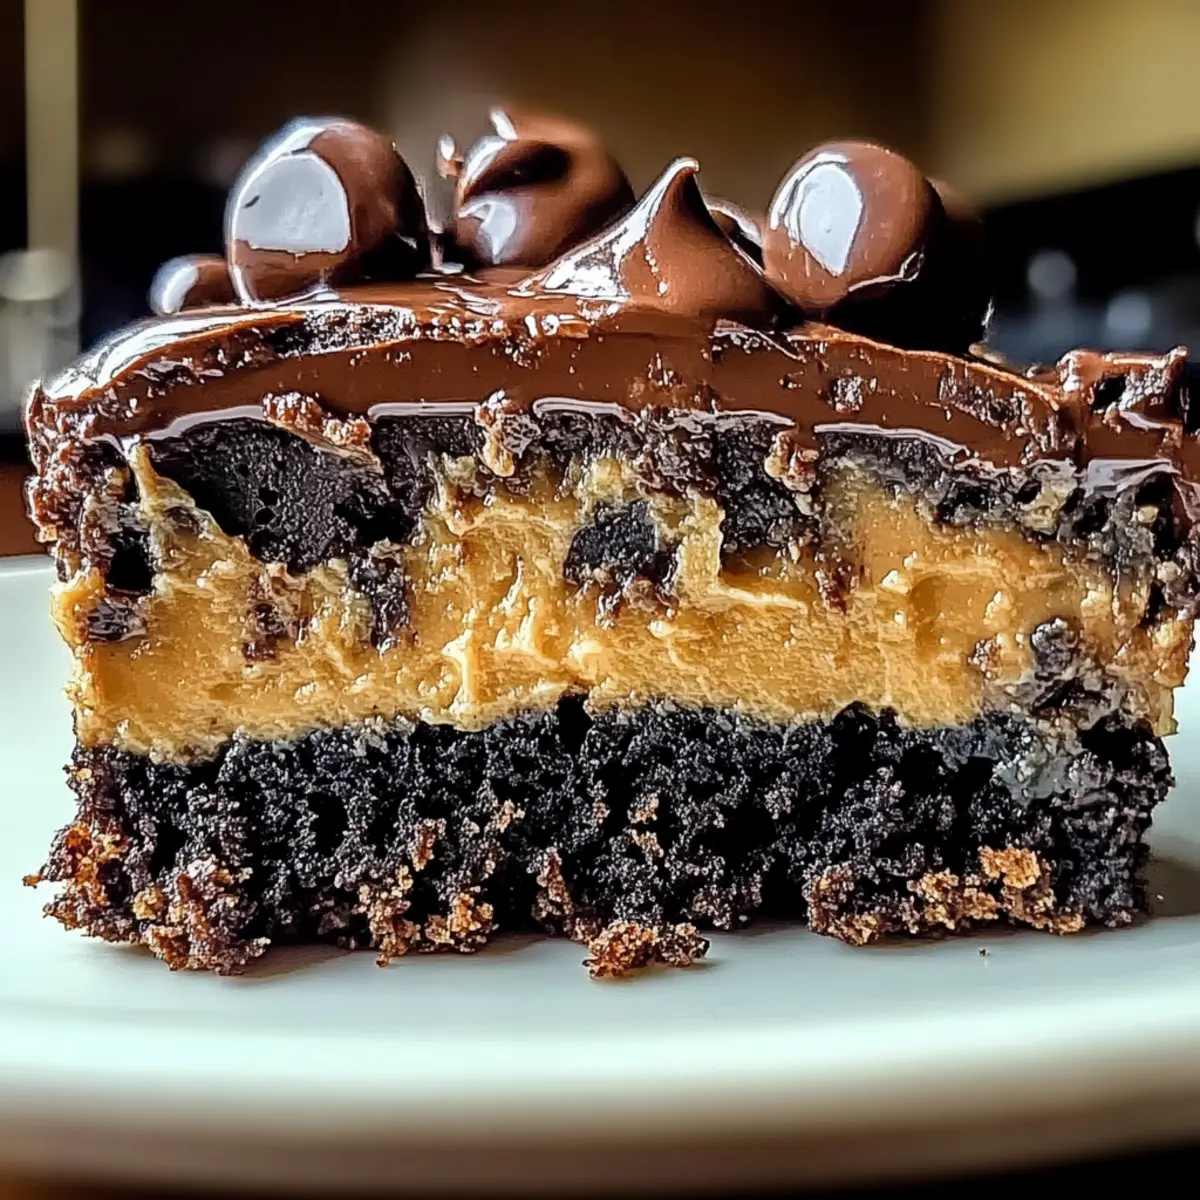
As I was flipping through my favorite dessert cookbook, a mouthwatering memory struck me: the warm, gooey goodness of a Chocolate Peanut Butter Dump Cake. This tantalizing dessert is a delightful blend of rich chocolate and creamy peanut butter, all coming together with just five simple ingredients. Perfect for those of us who crave something sweet but don’t have time to spend hours in the kitchen, this easy dessert is a true crowd-pleaser that will steal the show at any gathering. Whether you’re entertaining guests or satisfying a late-night sweet tooth, this recipe offers a quick baking solution that delivers on flavor and comfort. Curious to create this irresistible treat? Let’s dive into the delicious world of Chocolate Peanut Butter Dump Cake!

Why is Chocolate Peanut Butter Dump Cake a Must-Try?
Irresistible Flavor: The combination of rich chocolate and creamy peanut butter creates an unforgettable dessert that tantalizes your taste buds.
Five Simple Ingredients: With only five pantry staples needed, this recipe is perfect for busy cooks craving something sweet without the hassle.
Quick Baking: In less than an hour, you’ll have a delicious dessert that’s ready to impress family and friends at any gathering.
Gooey Texture: The signature gooey center is reminiscent of a decadent brownie, making it a comforting treat everyone will love.
Endless Variations: Feel free to get creative! Swap in dark chocolate chips or top with your favorite nuts to elevate your Chocolate Peanut Butter Dump Cake experience.
If you’re looking for more quick and delightful desserts, check out my Apple Cider Cupcakes or dive into some Homemade Chocolate Chip Cookies for more crowd-pleasing options!
Chocolate Peanut Butter Dump Cake Ingredients
For the Cake
- Milk – Provides moisture for the cake; substitute with almond or soy milk for a dairy-free version.
- Chocolate Chips – Adds rich chocolate flavor; opt for dark or milk chocolate based on personal preference.
- Creamy Peanut Butter – Contributes creaminess and nutty flavor; natural peanut butter can be used but may alter texture.
- Dry Cake Mix – Forms the base of the cake; any brand will work, but a gluten-free mix is perfect for those with dietary restrictions.
- Unsalted Butter – Adds richness; use salted butter to enhance flavor or coconut oil for a dairy-free alternative.
Step‑by‑Step Instructions for Chocolate Peanut Butter Dump Cake
Step 1: Preheat the Oven and Prepare the Dish
Begin by preheating your oven to 350°F (175°C). While it’s heating, grab a 9×13-inch baking dish and lightly grease it with non-stick spray or a pat of butter. This ensures your Chocolate Peanut Butter Dump Cake will easily release once baked, creating a perfectly gooey dessert that is easy to serve.
Step 2: Add the Milk
Pour the milk evenly into the bottom of the prepared baking dish. The milk will provide essential moisture that helps create the luscious texture of the cake. Take a moment to ensure the milk spreads evenly across the base, as this step sets the foundation for the delightful layers you’re about to build.
Step 3: Sprinkle the Chocolate Chips
Next, evenly sprinkle the chocolate chips on top of the milk. Ensure a generous layer covers the surface, as these will melt beautifully during baking, melding with the milk to create a rich chocolatey layer. You can use dark or milk chocolate chips, depending on your preference for sweetness and richness.
Step 4: Add Peanut Butter Dots
Now, take spoonfuls of creamy peanut butter and drop them over the chocolate chips. It’s important not to spread the peanut butter; just let the spoonfuls sit there. This will give your Chocolate Peanut Butter Dump Cake delightful pockets of creamy goodness once baked, adding to the cake’s decadent texture.
Step 5: Layer the Dry Cake Mix
Evenly sprinkle the dry cake mix over the peanut butter and chocolate layers. Avoid mixing or stirring the ingredients at this point; keeping the layers intact is crucial to achieving the unique texture of a dump cake. The dry mix will form a sumptuous topping that combines wonderfully with the moist underlayers.
Step 6: Pour on the Melted Butter
Melt your butter and pour it evenly over the dry cake mix. This will saturate the mix, creating a lovely moisture as it bakes. Ensure that the butter covers the dry mix thoroughly; it’s this rich butter layer that helps fuse all the flavors together into the wonderful Chocolate Peanut Butter Dump Cake you’re creating.
Step 7: Bake the Cake
Place the dish in your preheated oven and bake for 35-40 minutes. You’ll know it’s ready when you see bubbly edges and a mostly set top—don’t worry if some gooeyness remains. A toothpick inserted into the center should come out mostly clean, indicating that your Chocolate Peanut Butter Dump Cake is perfectly cooked yet indulgently moist.
Step 8: Cool and Serve
Once baked, remove the cake from the oven and allow it to cool for about 15 minutes. This cooling period lets the flavors meld together while slightly firming up the gooey center, making serving easier. Enjoy your warm Chocolate Peanut Butter Dump Cake on its own or top with a scoop of ice cream for a delightful treat!
Make Ahead Options
These Chocolate Peanut Butter Dump Cakes are a fantastic choice for meal prep, making them perfect for busy cooks! You can prepare the layers up to 24 hours in advance by assembling the cake (steps 1-6) without baking. Just cover the dish tightly with plastic wrap and store it in the refrigerator to maintain freshness. When you’re ready to enjoy this easy dessert, simply pour melted butter over the top and bake according to the instructions (step 7). This make-ahead option allows you to save time and serve a gooey, delicious treat that’s just as delightful, ensuring you’re always ready to indulge when the craving strikes!
Chocolate Peanut Butter Dump Cake Variations
Feel free to get creative and make this delightful cake your own with these fun twists!
-
Dairy-Free: Substitute milk with almond or soy milk and use coconut oil in place of butter for a vegan-friendly dessert.
-
Dark Chocolate Delight: Swap in dark chocolate chips for a richer, deeper flavor that will take the cake to a whole new level.
-
Nutty Add-Ins: Add chopped nuts like walnuts or pecans on top for a satisfying crunch and an extra layer of flavor.
-
Berry Boost: Toss in fresh or frozen berries between the layers for a fruity twist that perfectly balances the rich chocolate.
-
Spicy Heat: Sprinkle a pinch of cayenne pepper into the batter for a surprising kick that complements the sweetness beautifully.
-
Cake Mix Variety: Experiment with different flavors of cake mix, such as chocolate, red velvet, or even funfetti, to create unique variations.
-
Toppings Galore: After baking, top your cake with whipped cream, a drizzle of chocolate or caramel sauce, or even a scoop of your favorite ice cream for an irresistible treat.
If you want more delightful desserts, try out these Brown Butter Biscoff Blondies for a rich, buttery flavor, or enjoy a classic Cheese Tortellini with Butter, Mushrooms, and Crispy Sage for a comforting pasta dish that also shines at gatherings!
Helpful Tricks for Chocolate Peanut Butter Dump Cake
-
Layering Is Key: For the best texture, don’t stir the ingredients. Letting the layers remain intact creates the signature gooeyness of the dump cake.
-
Adjust Baking Time: Ovens vary in temperature, so keep a close eye on your cake as it bakes. Check for bubbly edges and a mostly set top, adapting time as needed.
-
Use Fresh Ingredients: To enhance flavor, ensure your baking essentials, like chocolate chips and cake mix, are fresh. Stale ingredients can affect taste and texture.
-
Experiment with Flavors: Don’t hesitate to personalize this chocolate peanut butter dump cake! Try adding nuts or swapping chocolate types to tailor it to your taste buds.
-
Serving Temperature Matters: Serve your cake warm for the best experience. The gooey center shines when enjoyed straight from the oven, complemented by a scoop of ice cream.
How to Store and Freeze Chocolate Peanut Butter Dump Cake
-
Room Temperature: Keep any leftover Chocolate Peanut Butter Dump Cake covered at room temperature for up to 2 days to maintain its gooey goodness.
-
Fridge: Store the cake in an airtight container in the refrigerator for up to 5 days. You can reheat slices in the microwave for a warm treat anytime!
-
Freezer: For longer storage, wrap individual portions in plastic wrap and then foil, freezing for up to 3 months. Thaw overnight in the fridge before reheating.
-
Reheating: To enjoy your frozen cake, simply reheat slices in the microwave for about 20-30 seconds or until warmed through.
What to Serve with Chocolate Peanut Butter Dump Cake
Indulging in a warm slice of Chocolate Peanut Butter Dump Cake creates a moment of pure bliss, especially when paired with delightful sides and drinks.
-
Vanilla Ice Cream: The creamy, cold ice cream contrasts beautifully with the warm, gooey cake, enhancing every bite with its sweetness.
-
Whipped Cream: Light and fluffy, a dollop of whipped cream adds airy texture and balances the richness of chocolate and peanut butter.
-
Fresh Berries: Juicy strawberries or raspberries provide a refreshing tartness that cuts through the sweetness; they add a pop of color and freshness.
-
Chocolate Sauce Drizzle: For the chocolate lovers, a drizzle of rich chocolate sauce ups the decadence and makes every slice even more irresistible.
-
Caramel Sauce: The sweetness of caramel complements the salty notes of peanut butter, creating a delightful contrast that’s hard to resist.
-
Coffee or Espresso: A warm cup of coffee or a shot of espresso enhances the chocolatey flavor, offering a comforting contrast to the sweetness of the cake.
-
Milkshake: Pairing a decadent milkshake adds an extra layer of indulgence, making for a playful dessert experience that everyone will enjoy.
-
Nutty Topping: Crushed nuts, such as peanuts or walnuts, offer a delightful crunch, complementing the soft texture of the cake and providing an exciting flavor boost.
Chocolate Peanut Butter Dump Cake Recipe FAQs
What type of milk should I use for the Chocolate Peanut Butter Dump Cake?
You can use regular milk, but for a dairy-free option, almond or soy milk work wonderfully too! It’s essential to pour it evenly in the bottom of the baking dish to create that luscious moist base.
How long can I store my leftover Chocolate Peanut Butter Dump Cake?
Keep your leftover cake covered at room temperature for up to 2 days. If you store it in an airtight container in the refrigerator, it can last up to 5 days. Reheating it in the microwave will bring back its gooey goodness!
Can I freeze Chocolate Peanut Butter Dump Cake?
Absolutely! To freeze it, wrap individual slices tightly in plastic wrap, then in foil, and pop them in the freezer for up to 3 months. When you’re ready to indulge, simply thaw overnight in the fridge and reheat in the microwave for 20-30 seconds.
What should I do if my Chocolate Peanut Butter Dump Cake turns out dry?
If your cake isn’t as gooey as you’d hoped, it might have been overbaked. Keep a close eye on it during the last few minutes of baking. Additionally, adding back a little butter on top when serving can restore some moisture!
Is the Chocolate Peanut Butter Dump Cake safe for pets?
While humans may enjoy it, it’s important to keep this cake away from pets. Ingredients like chocolate and peanut butter can be harmful to dogs. Always be cautious with what you share from your dessert table!
What are some variations I can try with this recipe?
The more the merrier! Consider swapping in dark chocolate chips for a deeper flavor or even adding chopped nuts like walnuts or pecans for a delightful crunch. You can also mix in some berries for a fruity twist!
Irresistible Chocolate Peanut Butter Dump Cake in Minutes
Ingredients
Equipment
Method
- Preheat your oven to 350°F (175°C) and grease a 9x13-inch baking dish.
- Pour the milk evenly into the bottom of the prepared baking dish.
- Evenly sprinkle the chocolate chips on top of the milk.
- Drop spoonfuls of creamy peanut butter over the chocolate chips.
- Evenly sprinkle the dry cake mix over the peanut butter and chocolate layers.
- Melt the butter and pour it over the dry cake mix.
- Bake for 35-40 minutes until bubbly edges and a mostly set top.
- Allow to cool for 15 minutes before serving warm.
Leave a Reply