
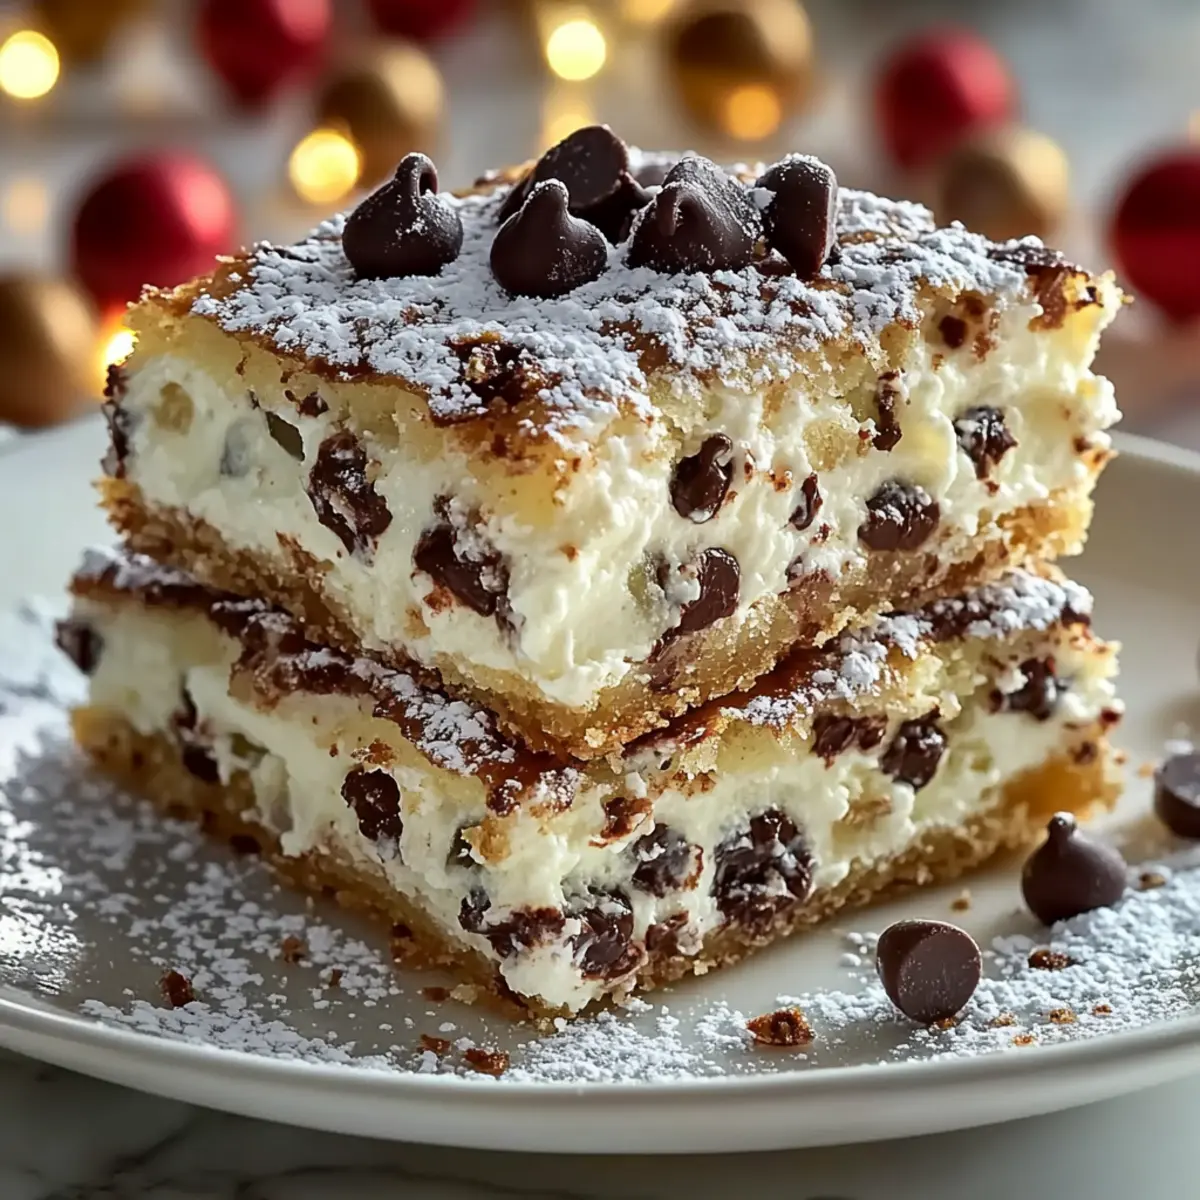
As I stood in my kitchen, the sweet aroma of cinnamon mingling with the scent of baking pie crust took me back to my grandmother’s cozy home on a rainy Sunday afternoon. The delightful nostalgia inspired me to recreate a favorite treat: Classic Cannoli Squares. This straightforward dessert brings together the rich, creamy filling of traditional cannoli, but in a fun, square format, making it an easy crowd-pleaser perfect for any gathering. With minimal prep time and a deliciously flaky crust, these squares are a delightful homage to Italian flavors that everyone can enjoy. So, why not bring a taste of Italy to your table today? What will you serve with these delicious squares?
Why are Classic Cannoli Squares irresistible?
Simplicity at Its Finest: Crafting these Classic Cannoli Squares requires minimal effort, making it approachable for bakers of all levels. Creamy Indulgence: The ricotta filling is luxuriously smooth, bringing that authentic cannoli flavor to life. Perfect for Gatherings: Whether it’s a family picnic or a dinner party, these squares are sure to impress. Customizable Flavors: Add your spin with optional garnishes like pistachios or extra chocolate chips, or even swap in mascarpone for a richer touch. If you love comforting desserts, check out this Chicken Cordon Bleu or this Beef Bourguignon Comforting for more crowd-pleasing ideas!
Classic Cannoli Squares Ingredients
• Here’s everything you need to whip up these delightful treats!
For the Filling
- Ricotta Cheese – Provides creaminess and richness; for a richer texture, use whole milk.
- Powdered Sugar – Adds sweetness and ensures a smooth filling; coconut sugar is a great healthier alternative.
- Vanilla Extract – Enhances the flavor; stick with pure vanilla extract for authenticity.
- Cinnamon – Introduces warmth and spice; can be omitted for a more classic filling.
- Mini Chocolate Chips – Offer sweetness and a delightful texture; consider dark chocolate chips for a richer flavor.
For the Crust
- Pre-Made Pie Crusts – A convenient shortcut for quick preparation; opt for homemade for a traditional touch.
- Egg (beaten) – Used for the egg wash; it adds a shiny finish to the crust.
- Sugar (for sprinkling) – Enhances sweetness and visual appeal; can be left out for a less sweet finish.
Optional Garnishes
- Chopped Pistachios – Adds a delightful crunch and vibrant color; perfect for elevating presentation.
- Maraschino Cherries – Provides a sweet, nostalgic touch; great for a pop of color on top.
- Extra Chocolate Chips – Amp up the chocolatey goodness; sprinkle on top before serving for added flair.
These Classic Cannoli Squares are sure to be a hit at your next gathering!
Step‑by‑Step Instructions for Classic Cannoli Squares
Step 1: Prepare the Filling
In a mixing bowl, combine 15 ounces of ricotta cheese, 1 cup of powdered sugar, 1 teaspoon of vanilla extract, and ½ teaspoon of cinnamon. Blend the ingredients until the mixture is smooth and creamy, ensuring there are no lumps. Stir in ½ cup of mini chocolate chips for added sweetness and texture. This rich filling will be the heart of your Classic Cannoli Squares, so take your time to mix it well!
Step 2: Preheat the Oven
Set your oven to preheat at 375°F (190°C). This temperature is ideal for creating a perfectly golden-brown crust that will encase the creamy filling. While the oven heats, you can move on to prepping the pie crust, making sure you have everything ready for assembly.
Step 3: Roll Out the Pie Crust
Take a pre-made pie crust and gently press it into a 9×9-inch baking dish, ensuring that it covers the bottom evenly without any cracks. The crust should slightly overhang the edges; this will help create a beautiful seal with the top layer later. Once pressed in, set the baking dish aside while you prepare the filling.
Step 4: Add the Filling
Spread the ricotta mixture evenly over the prepared crust, leaving a small border along the edges. Ensuring an even layer will create a lovely balance between the flaky crust and creamy filling, so take your time to smooth it out. This is the moment you start to see your Classic Cannoli Squares take form!
Step 5: Prepare the Top Crust
Roll out a second pie crust and carefully place it over the filling, sealing the edges by pinching them together. This will lock in all the delicious flavors. Brush the top with a beaten egg, which will give the crust a shiny, appealing finish. Sprinkle a little sugar on top to enhance its sweetness and visual appeal.
Step 6: Bake
Place the assembled dish in the preheated oven and bake for 30-35 minutes. Keep an eye on it; you want the crust to achieve a lovely golden-brown color while the filling becomes warm and set. A perfect bake will fill your kitchen with a warm, inviting aroma and signal that your Classic Cannoli Squares are nearing completion.
Step 7: Cool and Serve
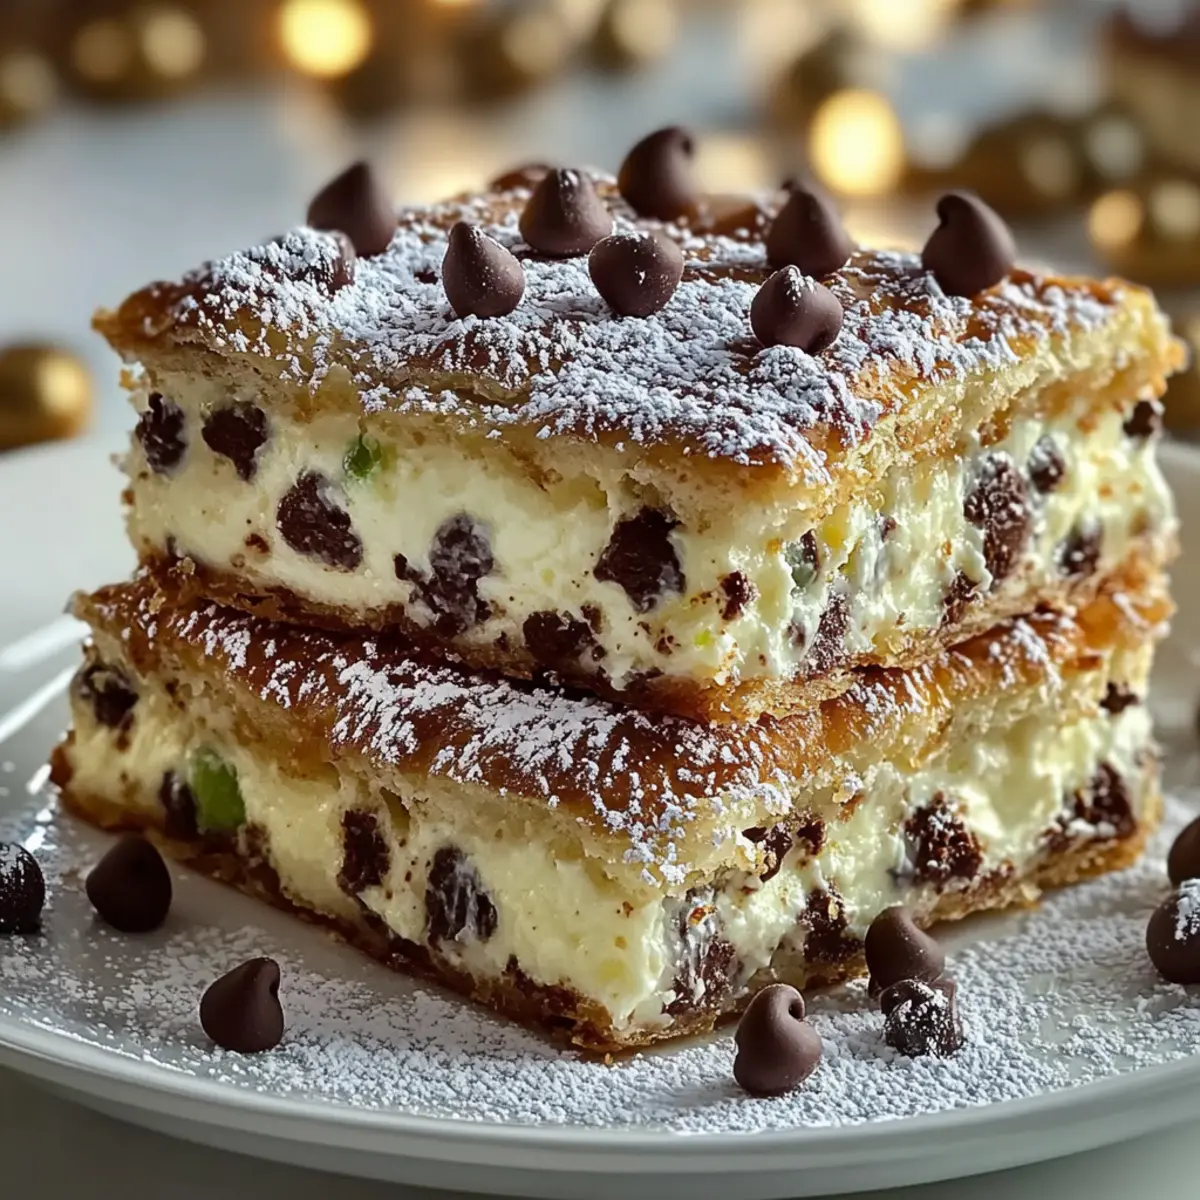
Once baked, remove the dish from the oven and let it cool at room temperature for at least 30 minutes. This cooling time allows the filling to set and makes it easier to cut into squares. When ready, slice into even squares and serve them with optional garnishes like chopped pistachios or maraschino cherries to add color and texture.
Expert Tips for Classic Cannoli Squares
-
Moisture Matters: Drain excess moisture from the ricotta using a fine-mesh sieve for a thicker filling. This prevents a soggy dessert.
-
Watch the Oven: Keep a close eye on your squares while baking. Aim for a golden brown crust to avoid over-browning that can ruin your Classic Cannoli Squares.
-
Cooling Time: Allow your dessert to cool for at least 30 minutes after baking. This helps the filling firm up, making it easier to cut clean squares.
-
Crust Sealing: When assembling, pinch the edges of the top crust firmly to the bottom. This locking mechanism ensures no filling leaks out during baking.
-
Customization Options: Feel free to experiment with flavors by incorporating lemon zest or swapping ricotta for mascarpone for an even creamier texture in your Classic Cannoli Squares.
Classic Cannoli Squares Variations & Substitutions
Feel free to get creative with these Classic Cannoli Squares and make them your own!
-
Richer Filling: Substitute ricotta with mascarpone for an indulgently creamy texture that elevates the flavors to new heights. This little change can transform your treats into dazzling desserts.
-
Lighter Option: Use cottage cheese blended until smooth instead of ricotta. This swap adds a lighter spin while still retaining that delightful creaminess; perfect for those watching their waistlines!
-
Zesty Twist: Incorporate lemon zest or almond extract into the filling for an unexpected flavor kick. A hint of citrus can brighten up the flavor profile, making every bite a surprise!
-
Nutty Crunch: Add chopped pistachios to the filling for a delightful crunch. Not only do they enhance the texture, but they also provide a beautiful pop of color on your squares.
-
Choco-Boost: Replace mini chocolate chips with dark chocolate chips or even white chocolate for a different sweetness level. Each variation creates a unique flavor experience, ensuring no two servings are the same!
-
Gluten-Free Crust: Look for pre-made gluten-free pie crusts or create your own using almond or coconut flour. It’s a simple substitution that allows everyone to enjoy your Classic Cannoli Squares.
-
Extra Sweetness: Drizzle a bit of chocolate or caramel sauce over the squares before serving. It adds a decadent finish that’s perfect for special occasions!
If you’re looking for more delightful recipes to inspire your culinary journey, consider trying this comforting Beef Bourguignon Comforting or the savory and creamy Chicken Cordon Bleu. Enjoy experimenting!
Storage Tips for Classic Cannoli Squares
Fridge: Store leftovers in an airtight container in the refrigerator for up to 5 days to maintain their freshness and creamy texture.
Freezer: For longer storage, you can freeze sliced squares wrapped tightly in plastic wrap and then in aluminum foil for up to 3 months.
Thawing: When ready to enjoy, thaw in the refrigerator overnight before serving. This helps retain the delicate balance of flavors in your Classic Cannoli Squares.
Reheating: For the best experience, eat your squares chilled or at room temperature. If you prefer them warm, gently heat in the oven at low temperature for a few minutes.
Make Ahead Options
These Classic Cannoli Squares are ideal for meal prep, allowing you to savor the delightful flavors of this classic dessert with ease! You can prepare the filling up to 24 hours in advance by mixing the ricotta, powdered sugar, vanilla, cinnamon, and mini chocolate chips, then storing it in an airtight container in the refrigerator. To maintain the crust’s freshness, assemble the squares and keep them unbaked in the fridge for up to 3 days. When you’re ready to enjoy, simply bake them as instructed, and they will taste just as delicious as if made fresh that day! With this prep method, you’ll have a fantastic dessert ready to impress with minimal last-minute effort.
What to Serve with Classic Cannoli Squares?
Indulge your senses and create a delightful meal experience that complements the creamy, sweet flavors of these beloved squares.
-
Espresso Coffee: The bold, rich taste of freshly brewed espresso cuts through the sweetness, enhancing the overall dessert experience.
-
Italian Almond Biscotti: These crunchy cookies add a satisfying crunch and a nutty flavor, making them a perfect companion for coffee or tea.
-
Fresh Berries: A medley of raspberries and strawberries adds a refreshing burst of flavor and a vibrant touch to your dessert plate.
-
Zesty Citrus Salad: A light citrus salad dressed with a hint of honey brightens the palate and balances the richness of the cannoli squares nicely.
-
Gelato Affogato: Drizzling a shot of hot espresso over a scoop of indulgent gelato creates a heavenly dessert pairing that diners will adore.
-
Warm Vanilla Sauce: Drizzling a smooth, vanilla-infused sauce over the cannoli squares adds a luxurious touch and enhances their sweetness.
For a fun twist, why not go ahead and pair these squares with a classic lemon sorbet for a refreshing end to your meal? Your guests are sure to be delighted!
Classic Cannoli Squares Recipe FAQs
What type of ricotta cheese should I use?
I recommend using whole milk ricotta for the richest and creamiest filling. If you’re looking for a lighter option, low-fat ricotta still provides a nice texture. Just ensure you drain any excess moisture using a fine-mesh sieve to achieve the perfect creamy consistency!
How should I store my Classic Cannoli Squares?
To keep your delicious squares fresh, store them in an airtight container in the refrigerator for up to 5 days. This will help maintain their texture and flavor. If you have extras, you can freeze sliced squares wrapped tightly in plastic wrap and then in aluminum foil for up to 3 months.
Can I freeze Classic Cannoli Squares?
Absolutely! To freeze, wrap each square individually in plastic wrap and then place them in a freezer-safe bag or container. Be sure to label them with the date. When you’re ready to enjoy them, simply thaw in the refrigerator overnight for the best results.
What if my filling is too runny?
If you find your filling is too runny, it could be due to excess moisture in the ricotta. Make sure to drain it well prior to preparation! If it’s already mixed, try adding a bit more powdered sugar to help thicken it up or consider including a tablespoon of cornstarch to stabilize the filling.
Are there any dietary considerations for making these squares?
If you’re concerned about dietary restrictions, you can easily adapt this recipe! For a gluten-free version, use gluten-free pie crusts. Also, if someone has dairy allergies, consider using a dairy-free cream cheese alternative, but keep in mind this may alter the flavor and texture slightly. Always check ingredient labels for potential allergens.
What should I do if my crust becomes too dark while baking?
If you notice that your crust is browning too quickly, cover it loosely with aluminum foil during the last 10-15 minutes of baking. This will help shield it from direct heat while still allowing the filling to set perfectly. Remember, a great crust should be golden brown, not burnt!

Irresistibly Creamy Classic Cannoli Squares You'll Love
Ingredients
Equipment
Method
- In a mixing bowl, combine ricotta cheese, powdered sugar, vanilla extract, and cinnamon. Blend until smooth and creamy. Stir in mini chocolate chips.
- Preheat the oven to 375°F (190°C).
- Press a pre-made pie crust into a 9x9-inch baking dish, ensuring an even cover.
- Spread the ricotta mixture evenly over the prepared crust, leaving a small border along the edges.
- Roll out a second pie crust and place it over the filling, sealing the edges together. Brush with beaten egg and sprinkle with sugar.
- Bake in the preheated oven for 30-35 minutes until golden brown.
- Let the dish cool for at least 30 minutes before slicing into squares.
Leave a Reply