
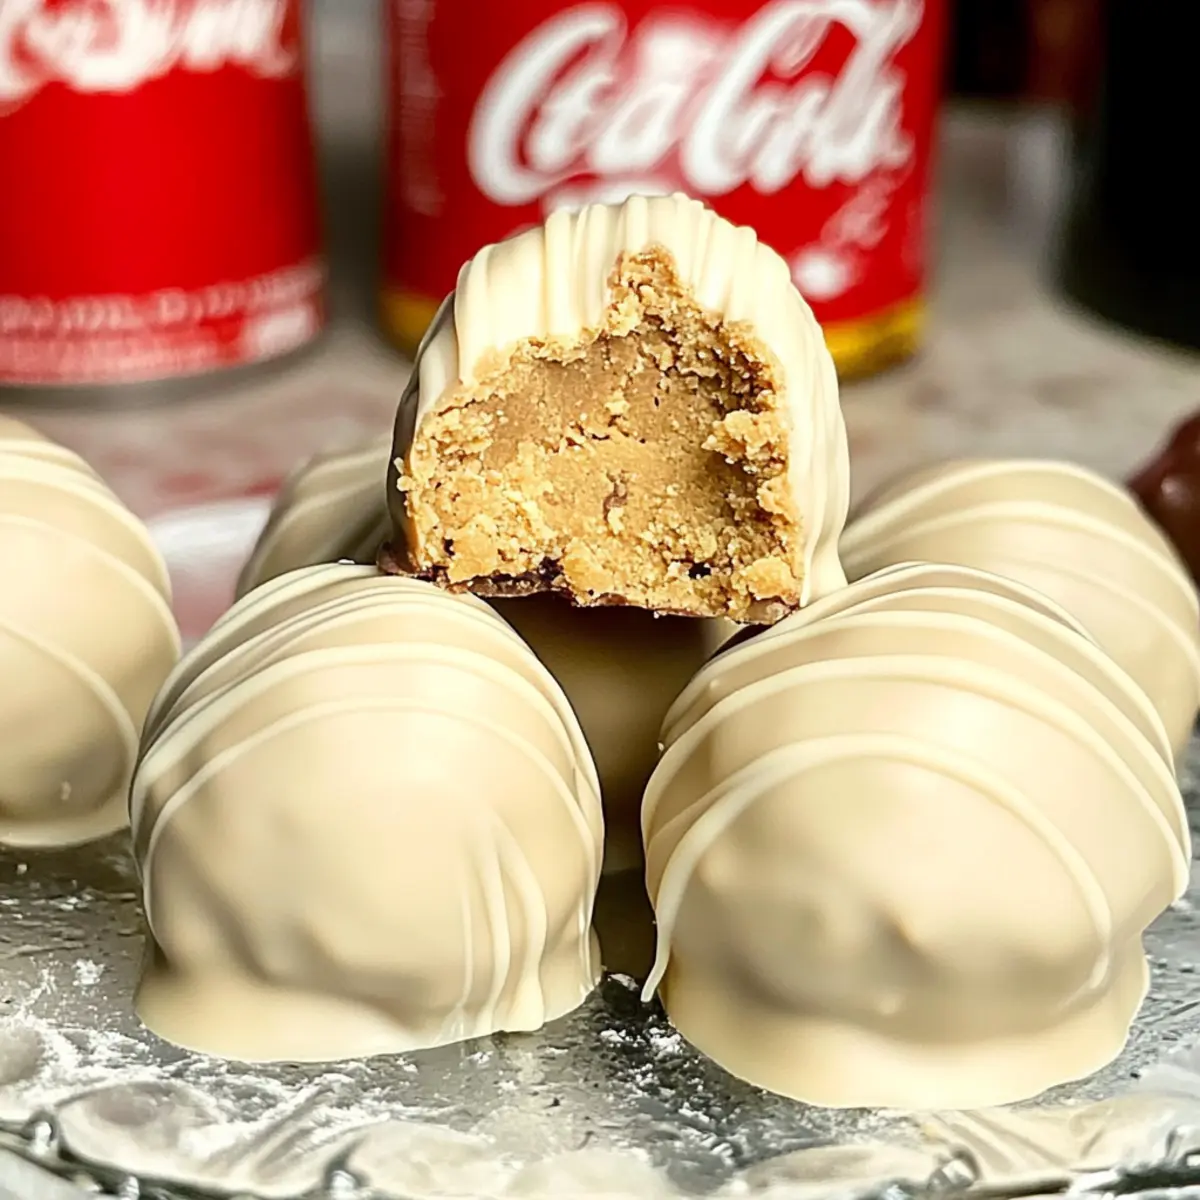
Think desserts have to be complicated to impress? Let me introduce you to my delightful no-bake Cookie Butter Truffles! These creamy, spiced treats are dipped in velvety white chocolate and drizzled with even more cookie butter, making them a crave-worthy indulgence that anyone can whip up. With their easy preparation and no-bake charm, these truffles are perfect for last-minute gifts or a sweet addition to any gathering. Plus, you’ll love how they satisfy your dessert cravings without the fuss of traditional baking! Ready to elevate your dessert game? Let’s make some magic with these tasty truffles!

Why are Cookie Butter Truffles a Must-Try?
Irresistible Flavor: The unique combination of cookie butter and creamy cream cheese brings a delightful taste sensation that’s truly one-of-a-kind.
No-Bake Convenience: With just a few simple steps, you can enjoy a truly decadent dessert without the time-consuming hassle of baking.
Crowd-Pleasing Treat: Perfect for parties or as gifts, these truffles are sure to impress friends and family—just like my other easy desserts!
Versatile Options: Swap out nuts or try different chocolate coatings for a fun twist. With so many variations, you’ll never get bored!
Quick & Easy: From mixing to chilling, these truffles come together in no time—ideal for last-minute cravings or celebrations.
Gifting Perfect: Pack them in stylish boxes for a thoughtful homemade treat—a present that’s as delightful as it is delicious!
Cookie Butter Truffles Ingredients
• Everything you need for dreamy bites!
For the Truffle Base
- White Cake Mix – A great base for truffle texture; substitute with sponge cake crumbs for a gluten-free option.
- Cream Cheese – Adds creaminess and binds the mixture together; opt for full-fat for a richer flavor.
- Cookie Butter – Provides the signature, delightful flavor; feel free to use Speculoos or another favorite brand.
For the Coating
- White Chocolate – A sweet coating that adds aesthetic appeal; dark chocolate makes for a richer alternative if preferred.
For Drizzling
- Melted Cookie Butter – Perfect for enhancing flavor and visual appeal; extra white chocolate can be used for drizzling as well.
Step‑by‑Step Instructions for Cookie Butter Truffles
Step 1: Mix the Base
In a mixing bowl, combine 1 cup of white cake mix and 8 oz of softened cream cheese. Use a handheld mixer or spoon to blend until the mixture is smooth and well-combined, with no lumps remaining. This only takes about 2-3 minutes. You should achieve a creamy consistency that will serve as the delightful base for your cookie butter truffles.
Step 2: Incorporate Cookie Butter
Gradually mix in 1 cup of cookie butter into the cream cheese and cake mix mixture. Stir gently with a spatula until the cookie butter is fully integrated, creating a thick and luscious truffle mixture. This will take another 2-3 minutes. You’ll know it’s ready when every bit of the cookie butter is evenly distributed, giving the mixture a warm, inviting aroma.
Step 3: Shape the Truffles
Using a cookie scoop or your hands, scoop out tablespoons of the mixture and roll them into bite-sized balls. Aim for a diameter of about 1 inch. Place the formed truffles on a parchment-lined baking sheet, ensuring there’s enough space between each ball to prevent sticking. You should be able to make around 24-30 truffles with this mixture, perfect for sharing!
Step 4: Chill the Truffles
Once all the truffles are rolled, transfer the baking sheet to the freezer and chill for about 30 minutes. This will firm up the truffles, making them easier to coat with chocolate later. Keep an eye on them; they should become slightly firmer, ensuring they hold their shape during the coating process, which adds to the beauty of your cookie butter truffles.
Step 5: Melt the White Chocolate
While the truffles are chilling, melt 10 oz of white chocolate in a microwave-safe bowl. Heat it in 30-second intervals, stirring in between, until completely melted and smooth—this usually takes about 1.5 to 2 minutes. The chocolate should be glossy but not too hot to touch; if it’s too hot, let it cool slightly to avoid melting your truffles.
Step 6: Coat the Truffles
Carefully dip each chilled truffle into the melted white chocolate, using a fork or toothpick for easy handling. Allow any excess chocolate to drip off before placing the coated truffles back onto the parchment paper. Aim for an even coating to achieve that luxe finish, and ensure each cookie butter truffle is well covered and looks irresistible.
Step 7: Drizzle with Cookie Butter
Next, take a small amount of melted cookie butter and drizzle it over each truffle for that extra touch of flavor and decoration. You can melt the cookie butter slightly if needed to achieve a more pourable consistency. This step adds a lovely finish and further enhances the deliciousness of your cookie butter truffles.
Step 8: Final Chill and Serve
Once all the truffles are coated and drizzled, place the baking sheet back in the refrigerator to set the chocolate for about 30-45 minutes. The coating should be firm before serving. After that, your cookie butter truffles are ready to be enjoyed—add them to a festive platter or pack them beautifully for gifting!
Cookie Butter Truffles Variations & Substitutions
Feel free to customize your truffles with these delightful twists to make them even more irresistible!
-
Gluten-Free: Use gluten-free cake mix or homemade sponge cake crumbs instead of regular cake mix. This allows everyone to indulge without worry.
-
Dairy-Free: Swap cream cheese for dairy-free cream cheese and choose a vegan white chocolate alternative. Now everyone can enjoy these divine treats!
-
Nutty Texture: Incorporate crushed almonds or hazelnuts in the truffle mixture for a satisfying crunch. They add a lovely depth to the flavor and texture.
-
Flavor Boost: Try adding a teaspoon of cinnamon or vanilla extract to the truffle mixture for an exciting flavor enhancement. It adds warmth and makes every bite even more comforting.
-
Chocolate Coating Surprise: Use milk or dark chocolate instead of white chocolate for a richer flavor. This small change can completely transform your truffles!
-
Spicy Kick: Add a dash of cayenne pepper to the truffle mix for a sweet-heat surprise. It gives the truffles an unexpected, delightful zing that will leave your taste buds dancing.
-
Fruit Infusion: Fold in a handful of dried cranberries or chopped apricots for a fruity contrast. The tartness beautifully balances out the sweetness of the truffles, making them extra special.
-
Sea Salt Finish: Sprinkle a pinch of flaky sea salt on top of the drizzled cookie butter for that sweet-salty combo. This finishing touch elevates the overall flavor experience!
If you’re interested, don’t forget to explore using different varieties of chocolate in your truffles, or check out my recipe for no-bake cheesecake for even more sweet inspiration!
Make Ahead Options
These Cookie Butter Truffles are a fantastic option for meal prep enthusiasts! You can prepare the truffle mixture and roll the balls up to 24 hours in advance. Simply follow the first three steps of the recipe, then chill the rolled truffles in the freezer for about 30 minutes before refrigerating them. When you’re ready to enjoy, melt the white chocolate and coat the truffles as instructed. If you have some extra time, drizzling them with cookie butter can be done on the day of serving to keep their flavors bright and delicious. Just remember to store any prepared truffles in an airtight container in the fridge for the best taste and texture!
What to Serve with Cookie Butter Truffles?
Indulging in these rich, no-bake treats is only half the fun—let’s build the perfect sweet spread around them!
-
Lightly Whipped Cream: A dollop of airy whipped cream adds a fluffy texture that complements the dense truffles perfectly. It’s a delightful contrast that will make each bite even more enjoyable.
-
Fresh Berries: The tartness of strawberries, raspberries, or blueberries brightens up the flavors, while their juiciness adds a refreshing touch to balance the sweetness of the truffles. Pair them together for a beautiful presentation!
-
Coffee or Espresso: The bold flavors of coffee enhance the warm spices in the cookie butter, creating a sophisticated pairing that’s perfect for afternoon treats or after-dinner delights. Just imagine the aroma!
-
Chocolate-Covered Pretzels: For a sweet and salty crunch, chocolate-covered pretzels bring an exciting texture and flavor contrast to the creamy truffles, making for a fun snack platter.
-
Caramel Sauce: Drizzling warm caramel sauce over the truffles creates an indulgent touch that both enhances their richness and adds a gooey texture. Your guests won’t be able to resist!
-
Mini Cheesecakes: Serving these alongside mini cheesecakes provides a delightful variety of flavors and textures. Options like lemon or vanilla-infused cheesecakes will tantalize taste buds and make for an unforgettable dessert table.
-
Milk or Milkshakes: A glass of cold milk is a classic pairing that brings back fond memories, while a cookie butter milkshake can elevate the experience even further, making each truffle taste more divine!
-
Chocolate Mousse: The richness of chocolate mousse adds a luxurious ambiance, and its light texture provides a stunning contrast to the velvety cookie butter truffles. Your dessert spread just got sophisticated!
-
Nut Clusters: Crunchy nut clusters bring texture and a hint of saltiness, balancing the sweetness of the truffles while adding a wholesome element to your dessert offerings.
Expert Tips for Cookie Butter Truffles
-
Mix Thoroughly: Ensure to blend the cream cheese and white cake mix until completely smooth; lumps can lead to truffles falling apart.
-
Chill Before Coating: Don’t skip chilling the truffles; it helps them hold their shape during the coating process, making your cookie butter truffles look gorgeous.
-
Watch the Chocolate Temperature: Melting chocolate should be warm, not hot, to prevent the truffles from melting. Let it cool slightly before dipping.
-
Use Proper Tools: Utilizing forks or toothpicks for coating helps keep your hands clean and allows for a smoother coating on the truffles.
-
Experiment with Flavors: Feel free to try different chocolate coatings or mix-ins; this adds variety to your cookie butter truffles and keeps things exciting!
Storage Tips for Cookie Butter Truffles
- Room Temperature: Keep the truffles at room temperature for up to 2 hours if serving at parties; beyond that, it’s best to refrigerate to maintain their creamy texture.
- Fridge: Store in an airtight container in the refrigerator for up to 2 weeks; this prevents the truffles from drying out while keeping them fresh and delicious.
- Freezer: For longer storage, freeze cookie butter truffles for up to 3 months; place them in a single layer on a baking sheet, then transfer to an airtight container once hardened.
- Reheating: If frozen, allow truffles to thaw in the fridge for several hours before serving; avoid microwaving as this could melt the chocolate coating.

Cookie Butter Truffles Recipe FAQs
How do I choose the right cookie butter?
Absolutely! When selecting cookie butter, look for a brand that has a creamy texture and a balance of spices. I often recommend Speculoos for its classic flavor, but feel free to explore other brands for unique twists. Just ensure the cookie butter is smooth, as chunky variations might affect the texture of your truffles.
What’s the best way to store Cookie Butter Truffles?
Be sure to keep your truffles in an airtight container in the refrigerator to maintain their creamy texture. They’ll stay delicious for up to 2 weeks. If you want to keep them longer, you can freeze them for up to 3 months. Just lay them out on a baking sheet in a single layer to harden, then transfer to an airtight container, separating layers with parchment paper to avoid sticking.
Can I use other types of chocolate for coating?
Very! While white chocolate gives that classic sweet flavor, feel free to swap it for milk or dark chocolate for a richer taste. If you choose dark chocolate, just be mindful of the melting process—it might not melt as easily as white chocolate, so take extra care when microwaving or using a double boiler.
What if my truffles are falling apart?
If your truffles are falling apart, don’t worry! This usually happens if the mixture isn’t combined well or is too warm. To remedy, return the mixture to the mixing bowl, add a little more cream cheese to bind it together, and chill the mixture again for at least 10 minutes before re-rolling them into balls. Remember to ensure everything is well-blended to achieve a smooth consistency.
Can pets eat Cookie Butter Truffles?
Not at all! These truffles contain ingredients like chocolate and sugar that aren’t safe for pets. When preparing treats at home, always make sure they’re stored safely away from your furry friends and opt for pet-friendly treats specifically designed for them instead.
How long can I keep the truffles at room temperature?
So glad you asked! You can keep your truffles at room temperature for about 2 hours during parties, but after that, it’s best to refrigerate them. Keeping them chilled will help retain their delightful creamy texture, making every bite as pleasurable as the first!

Irresistible Cookie Butter Truffles: Easy No-Bake Bliss
Ingredients
Equipment
Method
- In a mixing bowl, combine 1 cup of white cake mix and 8 oz of softened cream cheese until smooth and well-combined.
- Gradually mix in 1 cup of cookie butter until fully integrated.
- Scoop out tablespoons of the mixture and roll into bite-sized balls, placing them on a parchment-lined baking sheet.
- Chill the baking sheet with truffles in the freezer for about 30 minutes.
- Melt 10 oz of white chocolate in a microwave-safe bowl, heating it in 30-second intervals until smooth.
- Dip each chilled truffle into the melted white chocolate and let excess chocolate drip off.
- Drizzle melted cookie butter over each truffle for extra flavor and decoration.
- Place the baking sheet back in the refrigerator to set the chocolate for about 30-45 minutes before serving.
Leave a Reply