
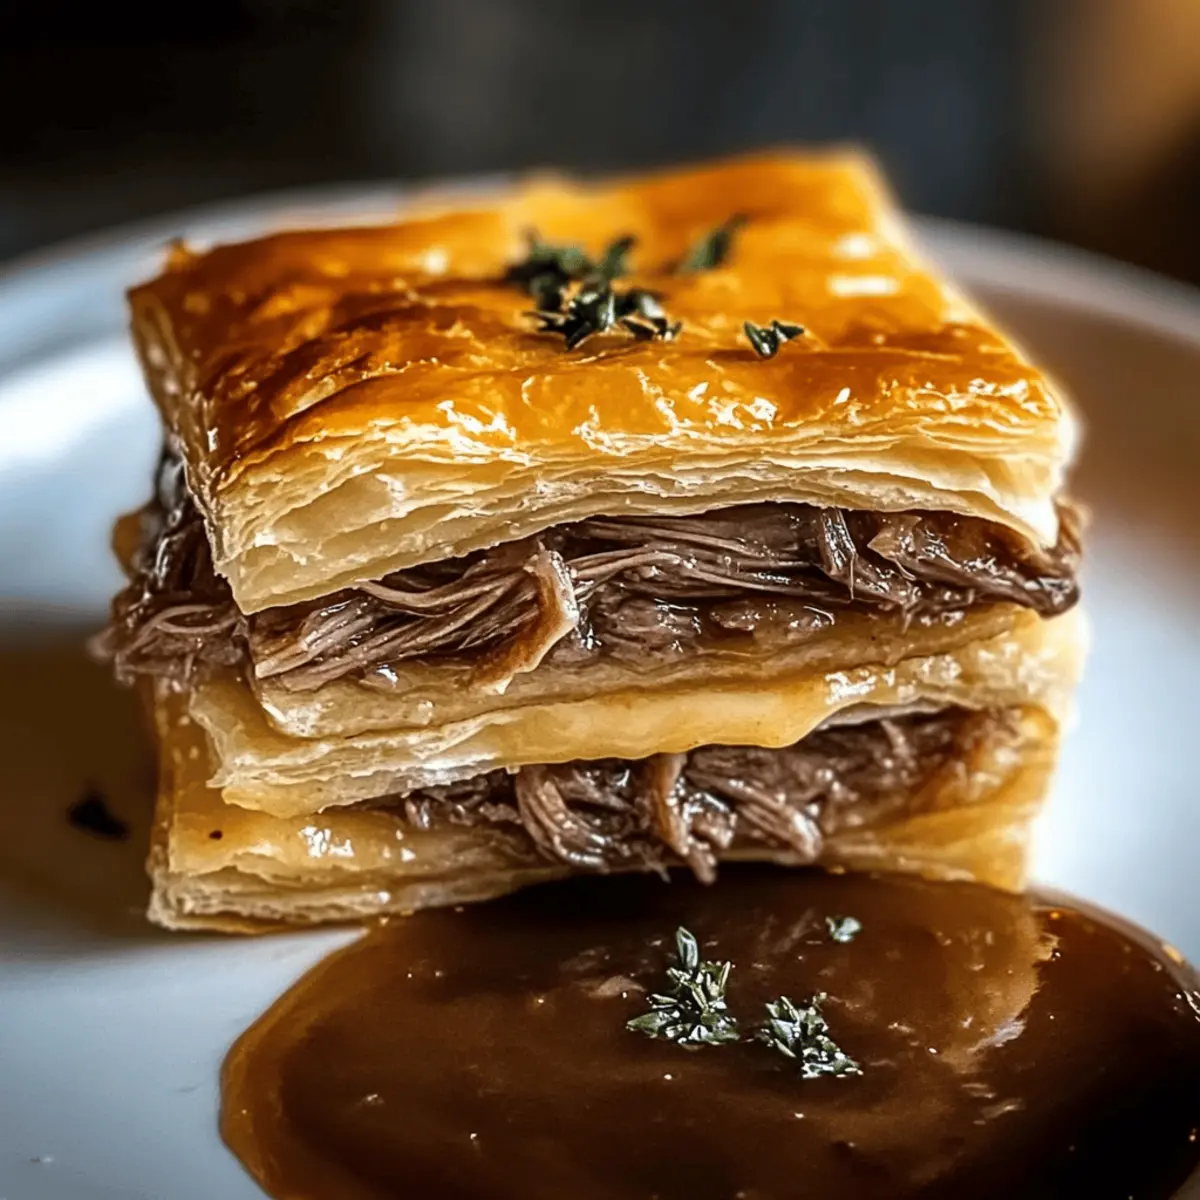
As I stood in my kitchen, the aroma of sizzling roast beef and gooey melted cheese filled the air, instantly transporting me back to my favorite deli. Today, I’m excited to share my take on this classic comfort food with my Easy French Dip Squares, a delightful twist that transforms the familiar sandwich into a shareable casserole. This recipe combines buttery crescent rolls, tender deli roast beef, and Swiss cheese, making it not only an irresistible party dish but also an ideal weeknight meal. With minimal prep and maximum flavor, it’s perfect for impressing friends and family, whether they’re just stopping by or gathering for game night. Are you ready to bite into this cozy creation? Let’s dive into the deliciousness together!
Why are French Dip Squares a Must-Try?
Ease of Preparation: This recipe is incredibly straightforward, making it perfect for novice cooks and experienced chefs alike.
Savory Comfort: With layers of tender roast beef and gooey Swiss cheese, every bite delivers that delightful, hearty flavor you crave.
Party-Ready: Ideal for gatherings, these squares are not only shareable but also visually appealing, turning any dinner party into a feast.
Versatile Options: Feel free to customize with different cheeses or proteins, such as turkey or ham, to suit everyone’s taste. Need some ideas? Check out our tips for substituting meats and cheeses.
Quick to Bake: With just 20 minutes in the oven, you can have a delicious dish ready while you catch up with friends.
Dipping Delight: Paired with a warm beef broth for dipping, this dish brings the classic French Dip experience to your table in a fun, new way!
French Dip Squares Ingredients
• • Line 1: A tempting combo of flavors and textures awaits you.
For the Base
- Refrigerated Crescent Rolls – Provide a flaky crust that is easy to handle and bake.
- Butter – Enhances richness and helps brown the top layer of dough.
For the Filling
- Deli Roast Beef – This savory protein ensures tenderness and a satisfying flavor in every bite.
- Swiss Cheese – Melts beautifully to create that ooey-gooey texture we crave in French Dip Squares.
- Dry Onion Soup Mix – Adds a depth of savory onion flavor that perfects the dish.
- Worcestershire Sauce – Introduces a delightful umami kick that elevates the overall taste.
- Garlic Powder – Imparts a subtle yet flavorful punch that enhances the dish.
For Dipping
- Beef Broth – A warm dipping broth that complements the French Dip experience, adding moisture and richness.
Each ingredient plays a vital role in creating the ultimate comfort food experience with these French Dip Squares. Enjoy the journey to flavor bliss!
Step‑by‑Step Instructions for French Dip Squares
Step 1: Preheat Your Oven
Begin by preheating your oven to 375°F (190°C). This temperature will ensure that your French Dip Squares bake perfectly while developing a golden, flaky crust. As your oven warms, gather your ingredients and prepare your baking area, ensuring that everything is within reach for a smooth cooking experience.
Step 2: Prepare the Baking Dish
Spray a 9×13 inch baking dish with non-stick cooking spray. This step is crucial as it will keep your French Dip Squares from sticking, allowing for easy removal once they are baked. Ensure the entire base of the dish is coated evenly to promote a golden crust at the bottom.
Step 3: Layer the Base
Unroll one can of refrigerated crescent rolls directly into your prepared baking dish. As you lay out the dough, gently pinch the seams together to create an even layer. This will form the cozy base for your filling, maintaining moisture while baking and providing a delightful texture to the finished French Dip Squares.
Step 4: Add the Beef and Cheese
Next, layer the deli-sliced roast beef evenly over the crescent roll dough. Follow this with a generous sprinkling of Swiss cheese on top of the beef. The combination of the savory roast beef and melted cheese will create a deliciously satisfying filling that is reminiscent of the classic French Dip experience.
Step 5: Prepare the Savory Sauce
In a small bowl, mix together the dry onion soup mix, melted butter, Worcestershire sauce, and garlic powder. Drizzle this flavorful mixture evenly over the cheese layer. This sauce enhances the overall taste of your French Dip Squares, providing depth and complexity that pairs beautifully with the rich filling.
Step 6: Top with Dough
Unroll the second can of crescent rolls and carefully cover the filling with the dough. Pinch the seams together just like you did with the base to seal in all those delicious flavors. This top layer will bake to a lovely golden color, creating a warm and inviting crust that ties the whole dish together.
Step 7: Bake to Perfection
Place your assembled French Dip Squares in the preheated oven and bake for 15 to 20 minutes. Keep an eye on the baking progress; you’re looking for a perfectly golden brown top, signaling that the dough is done and the filling is heated through to its savory best.
Step 8: Prepare the Dipping Broth
While the squares are baking, warm beef broth in a small pot over medium heat. This will be your dipping sauce, adding an extra layer of richness to the French Dip Squares when served. Stir occasionally until the broth is hot but not boiling, ensuring a comforting accompaniment for your dish.
Step 9: Cool and Serve
Once baked, allow the French Dip Squares to cool for 5-10 minutes before cutting into squares. This cooling time helps the cheese set slightly, making for cleaner slices. Serve warm alongside the beef broth for dipping, and enjoy every cheesy, savory bite of your delicious creation!
French Dip Squares Variations & Substitutions
Feel free to get creative with these delicious twists that will make your French Dip Squares uniquely yours.
-
Cheese Swap: Use cheddar or provolone for a different flavor profile that still melts beautifully.
This can add a delightful sharpness or creaminess that complements the savory beef. -
Meat Choices: Replace roast beef with turkey or ham for a lighter or different protein option.
Both alternatives bring a unique twist, making them a family-friendly dish. -
Vegetarian Option: Use sautéed mushrooms and spinach for a satisfying meat-free alternative.
These ingredients add an earthy flavor that pairs wonderfully with the rich cheese and dough. -
Extra Veggies: Add caramelized onions or bell peppers for a sweet and savory flavor explosion.
These additions elevate the dish’s complexity and provide an added layer of texture. -
Heat Level: Spice things up by adding jalapeños or pepper jack cheese for a kick.
Just a hint of heat can turn these cozy squares into a flavor adventure! -
Herby Infusion: Incorporate fresh herbs like thyme or rosemary into your filling for a fragrant lift.
This subtle change can make a world of difference, bringing freshness to every bite. -
Dipping Sauce Variation: Mix in some horseradish or Dijon mustard into your beef broth for an extra zing.
These bold flavors enhance the overall experience while staying true to the classic dipping sauce. -
Make it Ahead: Prepare the filling a day in advance and let the flavors meld in the fridge for an intensified taste.
Simply assemble and bake before serving for ultimate convenience without sacrificing flavor.
With these variations, your French Dip Squares will always be special and tailored to your loved ones’ tastes. For more creative ideas, don’t forget to check out our tips for substituting meats and cheeses!
What to Serve with French Dip Squares
There’s nothing quite like combining the comfort of warm, cheesy squares with delightful side dishes to create the perfect meal experience.
-
Crispy Green Salad: A light, refreshing salad with mixed greens and a zesty vinaigrette balances the richness of the squares beautifully.
-
Garlic Bread: The buttery, crispy texture of garlic bread complements the savory filling while adding an extra layer of flavor to your meal.
-
Roasted Potatoes: Seasoned and roasted until golden brown, these hearty potatoes provide a satisfying crunch that pairs wonderfully with the soft dough of French Dip Squares.
-
Vegetable Medley: A colorful assortment of sautéed seasonal vegetables adds freshness and brightness, enhancing the overall presentation and taste of your meal.
-
Coleslaw: A tangy coleslaw adds a crunchy bite that counters the soft richness of the squares, creating a delightful texture contrast.
-
Creamy Potato Salad: This dish rounds out the meal with its smooth, savory flavors that complement the cheesiness of the French Dip Squares, perfect for gatherings.
-
Warm Beef Broth: Enhance the dipping experience by serving extra beef broth to complement each bite, making the dish even more comforting.
How to Store and Freeze French Dip Squares
Fridge: Store cooked French Dip Squares in an airtight container for up to 3 days, keeping their delightful flavors intact and ready for enjoyable leftovers.
Freezer: For longer storage, freeze baked squares in a single layer on a baking sheet, then transfer to airtight containers or freezer bags for up to 2 months.
Reheating: Reheat in a preheated oven at 350°F (175°C) for about 15-20 minutes until heated through. For a melty cheese texture, cover with foil to prevent over-browning.
Make-Ahead: You can also prepare the French Dip Squares ahead of time, assembling and refrigerating them for up to 24 hours before baking.
Expert Tips for Making French Dip Squares
Seam Sealing: Press the seams of the crescent rolls firmly to avoid leaks during baking. This will keep your filling intact and ensure a deliciously satisfying bite.
Watch Your Oven: Every oven is unique; if your squares start browning too quickly, cover with foil. This way, you’ll achieve that perfect golden crust without undercooked filling.
Cooling Time: Allow the French Dip Squares to cool for 5-10 minutes before slicing. This step helps to set the melted cheese, ensuring cleaner cuts and delightful presentation.
Flavor Variations: Don’t hesitate to swap Swiss cheese for cheddar or provolone based on personal preference. Experimenting with different meats can also elevate your French Dip Squares to new heights!
Make Ahead: If you want to save time, assemble your French Dip Squares a day in advance, cover, and refrigerate before baking. Just remember to increase the baking time slightly if they’re cold from the fridge.
Make Ahead Options
These French Dip Squares are perfect for busy home cooks looking to save time during the week! You can assemble the entire dish up to 24 hours in advance; simply cover it tightly with plastic wrap and refrigerate. This ensures the crescent rolls remain fresh while the flavors meld together beautifully. For best results, skip baking until you’re ready to serve—just pop them in the oven straight from the fridge and adjust the baking time if necessary. Alternatively, you can bake and store leftovers in an airtight container for up to 3 days, reheating them in the oven for delicious, cheesy bites that are just as mouthwatering as when first made!
French Dip Squares Recipe FAQs
How do I select the best deli roast beef for French Dip Squares?
Absolutely! Look for roast beef that has a vibrant color and a nice marbling of fat. This will ensure tenderness and flavor. I recommend choosing freshly sliced roast beef from your deli rather than pre-packaged options, as you’ll enjoy a richer, more authentic taste in each bite of your French Dip Squares.
What is the best way to store leftover French Dip Squares?
Store your cooked French Dip Squares in an airtight container in the fridge for up to 3 days. To maximize flavor retention, let them cool completely before transferring to a container. If you’re looking to keep them for a longer period, freezing is a fantastic option!
Can I freeze French Dip Squares, and how do I do it properly?
Absolutely! To freeze, allow the baked French Dip Squares to cool completely. Then, cut them into individual squares. Place them in a single layer on a baking sheet and freeze for about an hour. Once frozen, transfer them to airtight containers or freezer bags to prevent freezer burn. They can be stored for up to 2 months. For best results, reheat in a preheated oven at 350°F (175°C) for 15-20 minutes, covered with foil to keep the cheese melty!
What are common mistakes to avoid when making French Dip Squares?
One of the most common mistakes is not sealing the seams of the crescent rolls well. If the seams are not pinched together, the filling can leak out during baking, leading to messy squares. Make sure to press them firmly before baking. Additionally, keep an eye on your squares as they bake; if they appear to be browning too quickly, cover them with foil to ensure even cooking and prevent burning.
Are there any dietary considerations I should keep in mind when making these squares?
Very! If you or your guests have dietary restrictions, consider using low-fat deli meats and cheeses for a lighter version of the French Dip Squares. For a gluten-free option, you could try using gluten-free crescent rolls. Always double-check labels for allergens, especially since the recipe includes dairy and processed meats.
Can I add my own twist to the French Dip Squares?
The more the merrier! Feel free to get creative with your French Dip Squares by adding caramelized onions or sautéed mushrooms to the filling for extra flavor. You might even consider experimenting with different cheeses, such as cheddar or provolone, or swapping the roast beef with turkey or ham for a unique twist. Enjoy the journey of flavor!
Savory French Dip Squares That Will Wow Your Guests
Ingredients
Equipment
Method
- Preheat your oven to 375°F (190°C).
- Spray a 9x13 inch baking dish with non-stick cooking spray.
- Unroll one can of refrigerated crescent rolls into your prepared baking dish and pinch seams together.
- Layer the deli-sliced roast beef over the crescent roll dough, then sprinkle Swiss cheese on top.
- In a small bowl, mix together the dry onion soup mix, melted butter, Worcestershire sauce, and garlic powder. Drizzle over the cheese layer.
- Unroll the second can of crescent rolls and cover the filling, pinching seams together.
- Bake in the preheated oven for 15 to 20 minutes until golden brown.
- While baking, warm beef broth in a small pot over medium heat.
- Allow the French Dip Squares to cool for 5-10 minutes before cutting into squares.
Leave a Reply