
As I peered into my fridge, a lightbulb moment struck: what if I could enjoy cheesecake guilt-free? Enter my Easy High Protein Cheesecake Jars—a luscious, no-bake dessert that delivers the creaminess and richness we all crave without derailing your health goals. These portable snacks are not only perfect for on-the-go indulgence but also packed with protein, making them an ideal choice for anyone looking to fuel their day with something satisfying yet nutritious. Plus, with a smooth texture that allows you to get creative with flavors, you’ll find yourself reaching for these jars long after the cravings kick in. Curious about how to whip up this delightful treat? Let’s dive into the recipe that promises to be both a crowd-pleaser and a fitness-friendly option!
Why Make High Protein Cheesecake Jars?
Guilt-Free Indulgence: Enjoy the creamy texture of cheesecake without the extra calories, making it perfect for your health-conscious lifestyle.
High-Protein Boost: Each jar is infused with protein-rich ingredients like Greek yogurt and protein powder, helping to keep you satisfied longer.
No-Bake Convenience: Forget the oven! These jars are quick and easy to prepare, making them a fantastic option for busy schedules.
Endless Flavor Possibilities: Customize your cheesecake jars with flavors like chocolate, strawberry, or fruity purees to keep things exciting.
Portable Delight: Pack them up for snacks on-the-go or a post-workout treat, and they’ll be a hit at any gathering.
Versatile Treat: Perfect as a dessert or a filling snack, these jars cater to various occasions, ensuring you’re never without a tasty option.
High Protein Cheesecake Jar Ingredients
Curious about what goes into these delightful jars? Here’s everything you need.
For the Crust
- Almond Flour – A gluten-free option that gives your cheesecake a nutty flavor; replace with crushed graham crackers for a more traditional taste.
- Melted Butter – Binds the crust ingredients together and adds richness; coconut oil is a great dairy-free substitute.
For the Filling
- Greek Yogurt – The star ingredient that makes this a high protein cheesecake jar; feel free to swap in low-fat cottage cheese for a different texture.
- Cream Cheese – Adds that classic cheesecake richness; opt for reduced-fat cream cheese to keep calories in check.
- Protein Powder – Boosts the protein content; choose your favorite flavor, like vanilla or chocolate, for added taste.
- Honey or Maple Syrup – Naturally sweetens the filling; use agave syrup for a vegan alternative.
- Vanilla Extract – Essential for elevating flavor; don’t skip this important ingredient!
- Salt – Just a pinch to balance the sweetness and enhance the overall flavor.
With these simple ingredients, you’re on your way to making scrumptious high protein cheesecake jars that fit perfectly into your health-focused lifestyle!
Step‑by‑Step Instructions for High Protein Cheesecake Jars
Step 1: Prepare the Crust
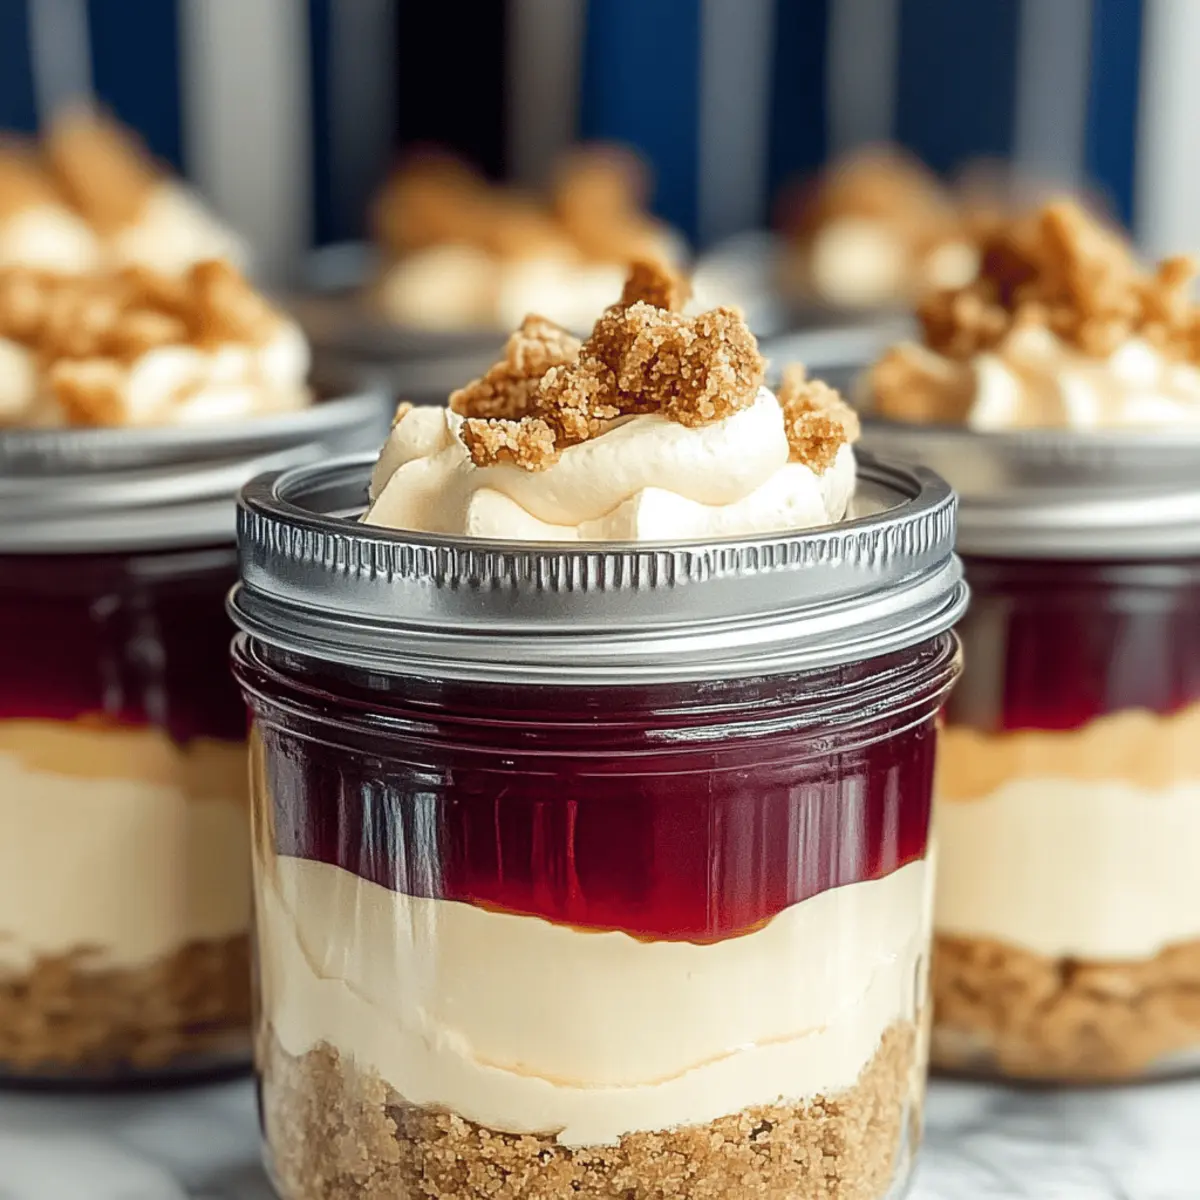
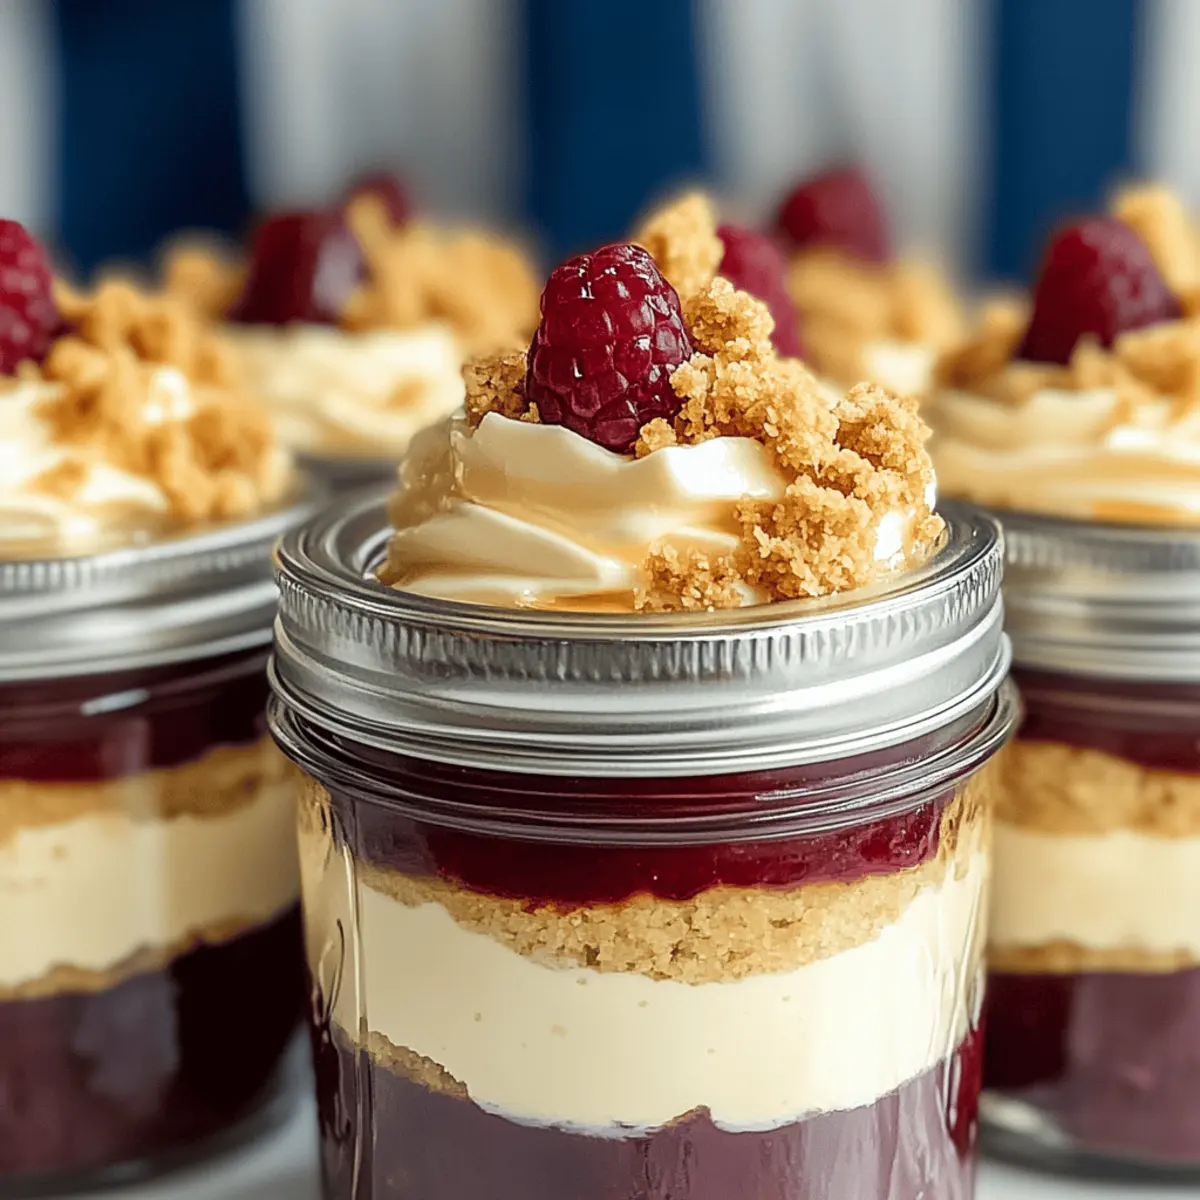
In a mixing bowl, combine almond flour and melted butter until they form a crumbly texture. This should take about 2 minutes of mixing. Next, evenly press the mixture into the bottom of each jar, ensuring a firm base. Aim for a slight compactness to hold its shape when chilled.
Step 2: Make the Cheesecake Filling
In a separate bowl, whisk together Greek yogurt, cream cheese, protein powder, honey, and vanilla extract until smooth, about 3-5 minutes. This is crucial for eliminating lumps, so don’t rush! The mixture should be creamy and fully blended, emitting a delightful aroma of vanilla.
Step 3: Fill the Jars
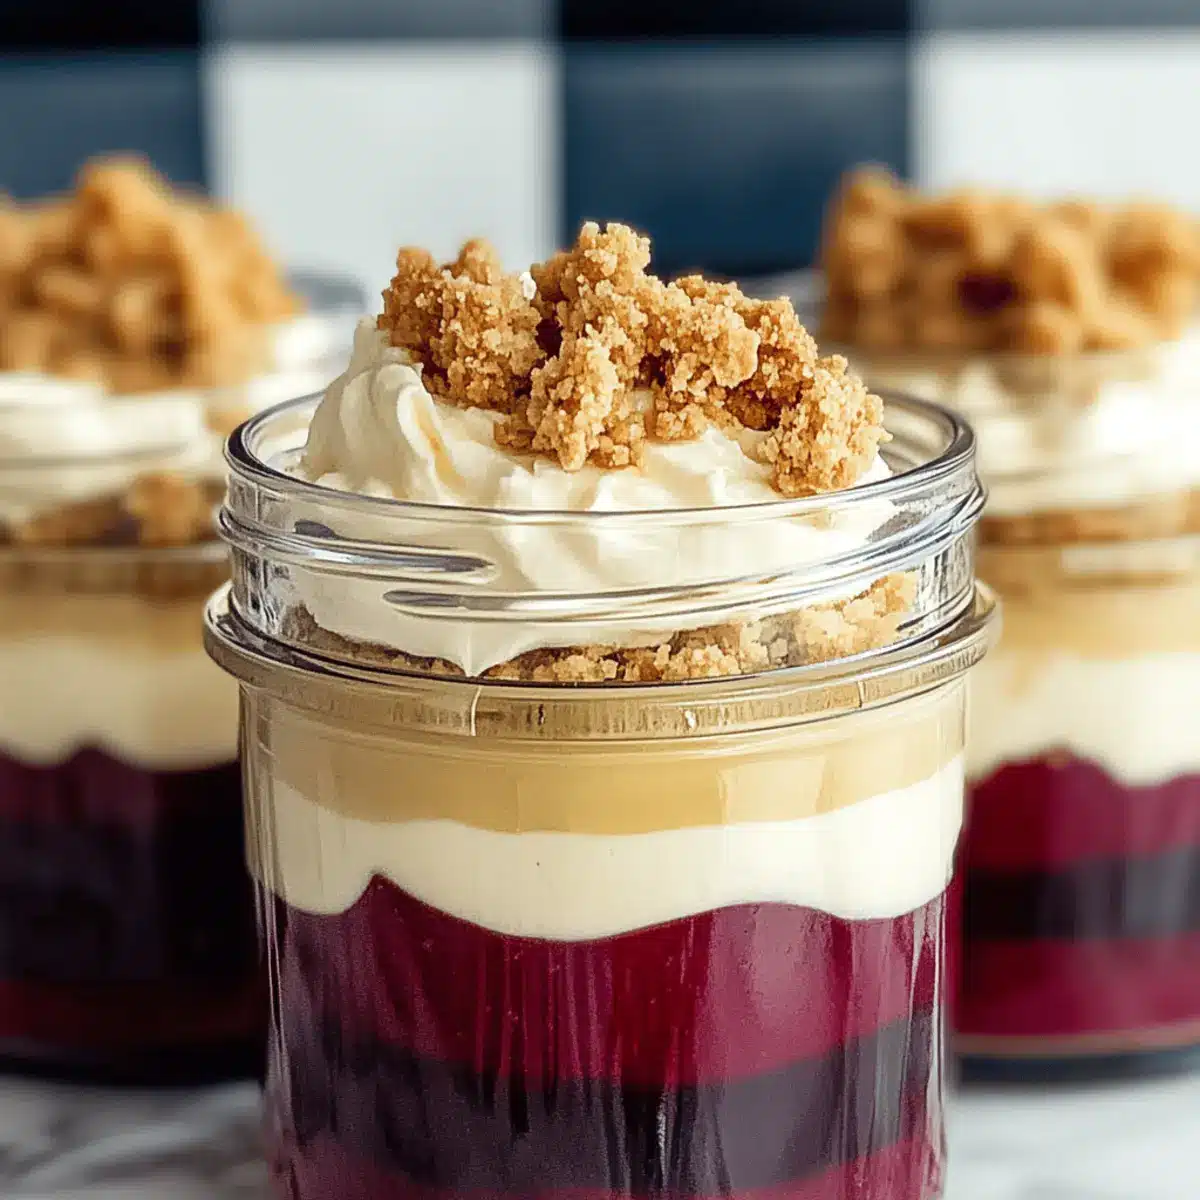
Spoon the luscious cheesecake filling over the crust layer in each jar. Smooth the tops gently with a spatula to achieve even distribution, creating a lovely presentation. Aim for approximately the same height in each jar to ensure consistent serving sizes, making these High Protein Cheesecake Jars look as good as they taste.
Step 4: Chill to Set
Cover the jars with lids or plastic wrap and refrigerate for at least 2 hours, or until they feel firm to touch. This chilling time is essential for allowing the cheesecake to set up perfectly. When finished, they should feel solid and creamy, ready for enjoyment.
Step 5: Serve and Enjoy
Once chilled, your High Protein Cheesecake Jars are ready to serve! If you’d like, add toppings like fresh fruit, a drizzle of honey, or nuts for an extra touch. This delightful dish will satisfy your sweet tooth while keeping it healthy, perfect for a post-workout treat or a guilt-free indulgence.
High Protein Cheesecake Jars Variations
Feel free to take your creativity to new heights with these delightful twists, adding your personal touch while savoring every spoonful!
-
Graham Cracker Crust: Swap almond flour for crushed graham crackers for a classic taste that’s reminiscent of traditional cheesecake. The crispy texture complements the creamy filling beautifully.
-
Berry Swirl: Swirl in your favorite fruit puree, like raspberry or blueberry, for a bright, refreshing flavor that adds a fruity zing to your cheesecake jars. Imagine the burst of sweet and tart flavors in every bite!
-
Chocolate Indulgence: Incorporate cocoa powder into your filling or use chocolate-flavored protein powder for a rich, chocolatey experience. Top with chocolate shavings for an extra touch of decadence.
-
Nutty Delight: Add a handful of chopped nuts, like almonds or walnuts, for an extra crunch and boost of healthy fats. The delightful contrast of textures will elevate your cheesecake jars to a whole new level!
-
Matcha Magic: Incorporate matcha powder into the filling for an earthy flavor and a stunning green hue. Not only does it taste good, but it’s also packed with antioxidants!
-
Spice It Up: Add a dash of cinnamon or pumpkin spice for a warm, comforting flavor that’s especially great during fall. This subtle twist brings a touch of seasonal cheer to your high protein treat.
-
Vegan Version: Replace Greek yogurt and cream cheese with silken tofu and a plant-based cream cheese alternative for a fully vegan dessert. Your friends will never guess these jars are dairy-free!
-
Citrus Zest: Add lemon or orange zest to brighten up the flavor profile of your filling, giving the cheesecake a refreshing zing that balances the richness perfectly.
You can also explore complementary options to serve alongside these jars, such as Greek yogurt parfaits for a wholesome breakfast or protein smoothies for a post-workout boost!
How to Store and Freeze High Protein Cheesecake Jars
Fridge: Keep your High Protein Cheesecake Jars in the refrigerator for up to 5 days, carefully sealed with lids or plastic wrap to maintain freshness.
Freezer: For longer storage, freeze the jars for up to 2 months. Make sure they are airtight to prevent freezer burn, and allow them to thaw in the fridge overnight before serving.
Reheating: These jars are best enjoyed cold, so no reheating is necessary. Just grab one from the fridge or freezer for a quick, nutritious snack!
Expert Tips for High Protein Cheesecake Jars
-
Ingredient Temperature: Ensure all ingredients are at room temperature before mixing to avoid lumps in your High Protein Cheesecake Jars. This step creates a smooth filling.
-
Chill for Success: Don’t rush the chilling process! Allow your jars to set for at least 2 hours; this is crucial for achieving the right texture and firmness.
-
Mixing Technique: Be careful not to over-mix the filling. While it’s important to combine everything thoroughly, overdoing it can lead to a denser texture that’s less desirable.
-
Experiment with Flavors: Feel free to get creative! Adding unique ingredients like matcha powder, crushed cookies, or citrus zest can make each batch of cheesecake jars a new, exciting experience.
-
Perfect Portion Size: Use clear jars to serve these cheesecake treats; it not only looks appealing but also helps with portion control, making it easier to enjoy guilt-free snacks on-the-go.
What to Serve with Easy High Protein Cheesecake Jars
Looking to create a complete and delightful meal around your indulgent yet guilt-free cheesecake jars?
-
Fresh Berries: Juicy strawberries, blueberries, or raspberries add a burst of freshness and color, beautifully complementing the creamy texture of the cheesecake. Their natural sweetness pairs perfectly with the rich filling.
-
Crumbled Granola: A sprinkle of crunchy granola on top provides a satisfying contrast to the smooth cheesecake, adding texture and nutty flavors that elevate each spoonful.
-
Nut Butter Drizzle: A light drizzle of almond or peanut butter adds a rich, nutty flavor and enhances the protein profile of your dessert. It transforms the jars into a delightful treat worth savoring.
-
Herbal Tea or Infused Water: Pair these cheesecake jars with a soothing herbal tea, like chamomile or peppermint, for a calming finish. Alternatively, opt for refreshing infused water with citrus or mint to cleanse your palate.
-
Chocolate Shavings: A sprinkle of dark chocolate shavings offers a decadent touch, balancing the sweetness of the jars with a hint of bitterness—it’s heaven in every bite!
-
Coconut Whipped Cream: Light and fluffy coconut whipped cream adds a tropical twist while enhancing the creaminess of the dessert. Each spoonful will feel like a mini-vacation!
-
Matcha Green Tea: This delicate, earthy beverage ties in beautifully with the fresh flavors of cheesecake. It’s an energizing sip that complements the indulgence of your jars, making your meal feel balanced and wholesome.
-
Ice Cream Scoop: For an extra treat, a small scoop of protein-packed ice cream alongside your cheesecake jars adds richness. Choose a light version to keep it healthy without skimping on flavor!
Make Ahead Options
These Easy High Protein Cheesecake Jars are a dream come true for busy home cooks looking to save time without compromising on flavor! You can prepare the crust (almond flour mixed with melted butter) and filling (Greek yogurt, cream cheese, protein powder, sweetener, and vanilla extract) up to 24 hours in advance. Simply store each component separately in the refrigerator in airtight containers to maintain freshness and prevent the crust from getting soggy. When you’re ready to enjoy your cheesecake jars, layer the filling over the crust, chill for at least 2 hours, and then serve! This way, you’ll have a delicious, nutritious dessert ready to go whenever you need a quick pick-me-up!
High Protein Cheesecake Jars Recipe FAQs
What kind of protein powder should I use for these jars?
Absolutely! You can use any flavor of protein powder you prefer, such as vanilla, chocolate, or strawberry. If you enjoy a fruity cheesecake, vanilla is a safe bet to keep flavors harmonious. Just ensure that it mixes well with the other ingredients for the best texture.
How long can I store the cheesecake jars in the fridge?
Very! Your High Protein Cheesecake Jars can be stored in the refrigerator for up to 5 days. Be sure to keep them sealed with lids or plastic wrap, ensuring maximum freshness throughout the week.
Can I freeze the cheesecake jars for later?
Absolutely! For longer storage, you can freeze your High Protein Cheesecake Jars for up to 2 months. Be sure to seal them tightly in an airtight container or freezer bags to avoid freezer burn. When you’re ready to enjoy, simply thaw them in the refrigerator overnight. This keeps them fresh without affecting the creamy texture!
What if my cheesecake filling is too lumpy?
No need to worry! If you find lumps in your filling, it’s likely due to cold ingredients. To achieve a silky-smooth consistency, ensure all ingredients, like cream cheese and Greek yogurt, are at room temperature before mixing. If you still end up with lumps after mixing, you can use a hand mixer for an additional 1-2 minutes on medium speed until it’s completely smooth.
Are these jars safe for those with allergies?
Great question! The ingredients are generally safe, but always check for potential allergens. The recipe includes dairy products (Greek yogurt, cream cheese), and almond flour, which may not be suitable for those with nut allergies. For a nut-free version, you can replace almond flour with gluten-free oats or graham crackers and choose dairy-free substitutes. Always read labels and consult your doctor if you’re unsure!
Can I make these cheesecake jars vegan?
Certainly! To make your High Protein Cheesecake Jars vegan, substitute Greek yogurt and cream cheese with plant-based alternatives, like vegan yogurt and cream cheese, and use maple syrup as your sweetener. Make sure to choose a vegan protein powder too. This way, you can enjoy a delicious, guilt-free treat that fits your dietary preferences!

Delicious High Protein Cheesecake Jars for Guilt-Free Indulgence
Ingredients
Equipment
Method
- Prepare the crust by mixing almond flour and melted butter until crumbly, then press into the bottom of each jar.
- Make the filling by whisking together Greek yogurt, cream cheese, protein powder, honey, and vanilla until smooth.
- Fill the jars with the cheesecake filling, smoothing the tops for even presentation.
- Chill the jars in the refrigerator for at least 2 hours to allow them to set.
- Serve and enjoy, optionally adding toppings like fruit, honey, or nuts.
Leave a Reply