
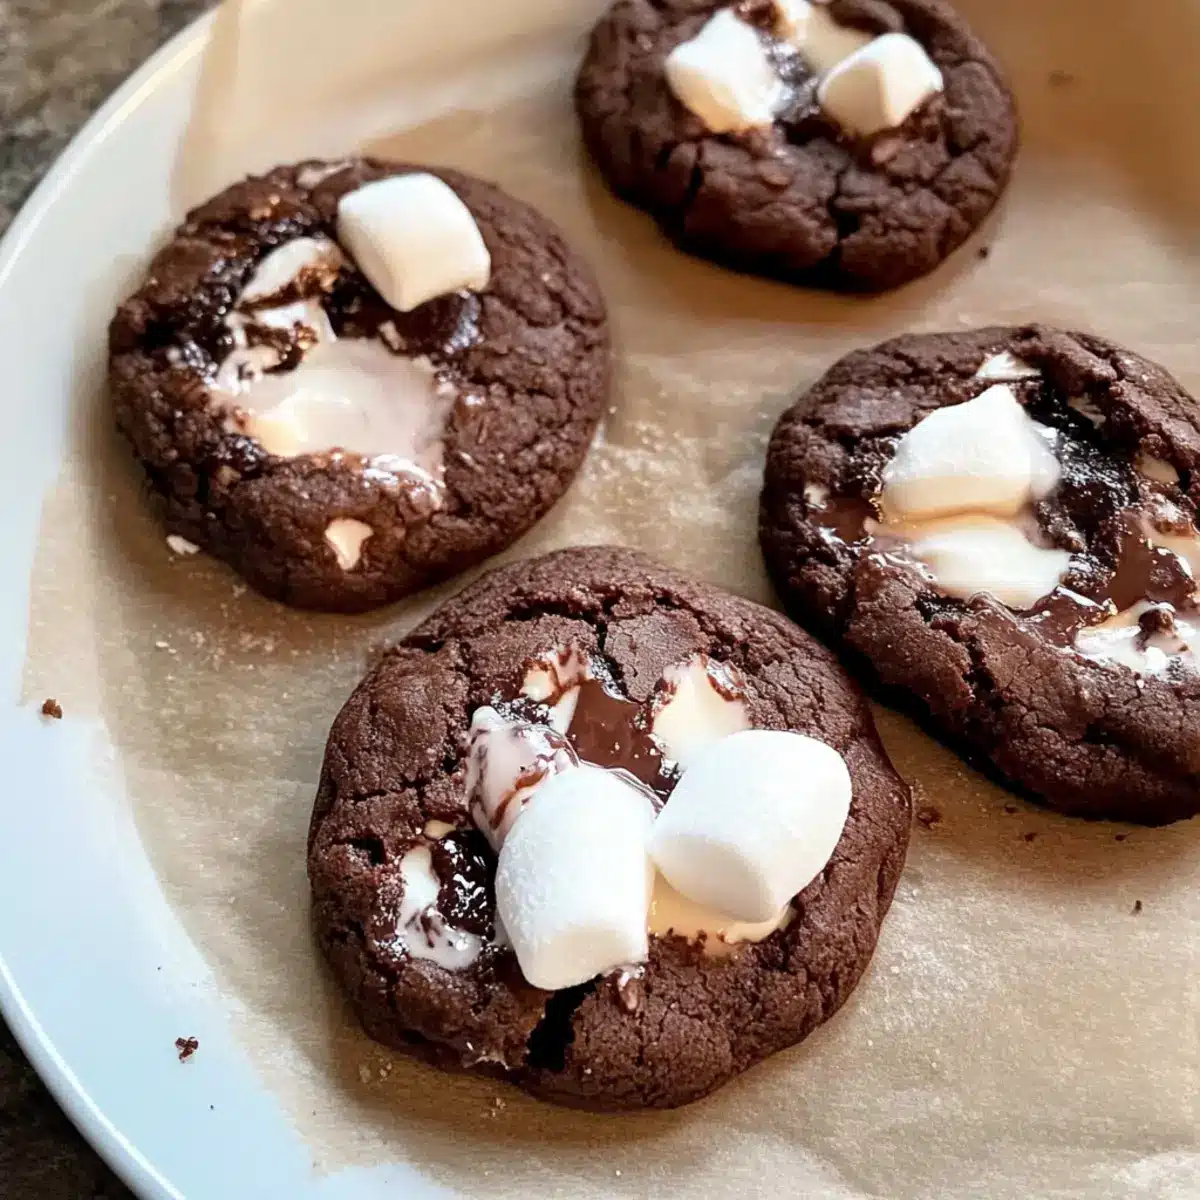
As I pulled my favorite baking sheet from the cupboard, the cozy scent of cocoa filled the air, whisking me back to holiday kitchens of my childhood. Today, I’m diving into the delightful world of Hot Chocolate Protein Cookies—where nostalgia meets nutrition. These easy treats are not just tasty; they’re a high-protein, gluten-free, and dairy-free dream come true, perfect for anyone craving a wholesome snack without the guilt. Whipping these up is a breeze, making them ideal for busy days or last-minute gatherings. The soft and chewy texture, interspersed with gooey marshmallows, turns each bite into a warm hug on a chilly day. Curious about how to create this delightful combination of health and indulgence? Let’s make some magic in the kitchen!
Why Are These Cookies So Irresistible?
High-Protein Delight: Each cookie is packed with protein, making them a fantastic post-workout snack or afternoon treat.
Guilt-Free Indulgence: Enjoy the rich chocolate flavor without dairy or gluten, so everyone can savor this sweet treat.
Simple Substitutes: With various nut butter and protein powder options, you can easily customize these cookies to fit your dietary needs.
Quick and Easy: Whip these cookies up in no time, ideal for busy schedules or unexpected guests!
Crowd-Pleasing Treat: The mix of chewy, gooey textures and chocolatey goodness will leave everyone asking for more! For a delightful pairing, consider serving them with a warm cup of Protein Hot Chocolate.
Hot Chocolate Cookie Ingredients
For the Cookie Base
- Chocolate Protein Powder – Provides the primary protein content; for a lighter cookie, opt for grass-fed beef isolate.
- Gluten-Free Oats – Adds structure; make sure to use certified gluten-free oats to prevent contamination.
- Unsweetened Cocoa Powder – Delivers rich chocolate flavor; you can substitute with cacao powder for a different depth.
- Natural Peanut Butter – Adds creaminess and healthy fats; almond butter can be swapped in for a unique taste.
- Maple Syrup – Offers natural sweetness; real maple syrup is preferred for its rich flavor.
- Milk – Enhances moisture; feel free to use any milk type, including non-dairy options like chocolate almond milk.
- Vanilla Extract – Adds warmth and a hint of depth to the overall flavor.
- Baking Powder & Sea Salt – These are essential for the cookies to rise and provide flavor balance.
For the Gooey Goodness
- Mini Marshmallows – Incorporated into the dough for delightful sweetness; consider adding festive candy cane pieces for a seasonal twist.
- Large Marshmallows – Placed on top before baking for a melty finishing touch that elevates the cookie experience.
Feel the magic of flavors that these Hot Chocolate Cookies will bring into your home!
Step‑by‑Step Instructions for Hot Chocolate Cookies
Step 1: Preheat the Oven
Start by preheating your oven to 350°F (175°C) and lining a baking sheet with parchment paper. This step ensures that your Hot Chocolate Cookies bake evenly and don’t stick to the pan, allowing for easy cleanup. Having your oven ready before you mix the ingredients will help the cookies rise perfectly.
Step 2: Mix the Dry Ingredients
In a large mixing bowl, combine the chocolate protein powder, gluten-free oats, unsweetened cocoa powder, baking powder, and sea salt. Stir these dry ingredients well until they are evenly mixed, creating a rich cocoa-colored blend. This is the foundation of your Hot Chocolate Cookies, so ensure there are no clumps and everything is well incorporated.
Step 3: Add the Wet Ingredients
Next, add the natural peanut butter, maple syrup, milk, and vanilla extract to the bowl. Use a sturdy spatula or wooden spoon to mix everything until a thick, dough-like batter forms. The mixture should be glossy and cohesive, with the delicious aroma of chocolate filling the air as you blend the wet and dry ingredients together.
Step 4: Fold in the Mini Marshmallows
Gently fold in the mini marshmallows into the cookie dough. Take care to distribute them throughout the batter without overmixing, as you want those gooey surprises in every bite of your Hot Chocolate Cookies. The marshmallows will create a delightful texture contrast when baked, adding a touch of sweetness to each cookie.
Step 5: Scoop and Shape the Dough
Use an ice cream scoop to portion out the cookie dough, making three dough balls per scoop. Place them evenly on the prepared baking sheet and slightly flatten each ball with your palm. For an extra treat, top each dough ball with a large marshmallow, ensuring they are centered, which will create a melty topping when baked.
Step 6: Bake the Cookies
Bake the cookies in the preheated oven for 8-10 minutes until they are set and the edges start to turn golden. Keep an eye on them; if your cookies aren’t set yet, don’t hesitate to refrigerate them for about 5 minutes to firm up instead of overbaking. This will help maintain the soft, chewy texture you’re aiming for with these Hot Chocolate Cookies.
Step 7: Cool and Enjoy
Once baked, remove the cookies from the oven and let them cool on the baking sheet for a few minutes. This allows them to firm up while still retaining their soft, gooey interior. Transfer them to a wire rack to cool completely, and enjoy these delightful Hot Chocolate Cookies warm or at room temperature!
Expert Tips for Hot Chocolate Cookies
Quality Matters: Use high-quality chocolate protein powder for the best texture and flavor; avoid whey protein to prevent crumbly cookies.
Oat Care: Always choose certified gluten-free oats if necessary to avoid cross-contamination, ensuring everyone can enjoy these treats.
Nut Butter Switch: When substituting peanut butter, consider the binding properties; if using almond or sunflower butter, adjust the oats to maintain consistency.
Don’t Overbake: Keep an eye on your cookies to prevent drying out; if they aren’t set, refrigerate for 5 minutes instead of continuing to bake.
Customization Fun: Feel free to add festive flavors like peppermint or nuts. Tailor these Hot Chocolate Cookies to suit your taste buds!
Hot Chocolate Cookie Variations
Feel free to get creative with your Hot Chocolate Protein Cookies—substitutions can elevate these treats even further!
-
Nut-Free Delight: Substitute peanut butter with sunflower seed butter for a delicious allergy-friendly option, perfect for kids’ lunchboxes.
-
Vegan Twist: Use a plant-based protein powder and dairy-free milk to keep everything vegan-friendly. This slight change makes them just as tasty!
-
Flavor Boost: Add a dash of peppermint extract for a refreshing taste. This simple variation will create a festive spirit in every bite.
-
Chocolatey Richness: Swap in cacao powder for an extra depth of chocolate flavor. Just be sure to adjust the sweetness level.
-
Festive Mix-Ins: Fold in chopped nuts like walnuts or pecans, or dried fruits like cranberries for a delicious texture and flavor boost. They can provide a lovely crunch and tartness.
-
Soft & Chewy: For even chewier cookies, increase the oats slightly. This will adjust the texture while maintaining the yummy flavor.
-
Lower Sugar: Reduce maple syrup and substitute with a sugar-free sweetener to make them even friendlier for those watching their sugar intake.
-
Spicy Kick: Add a pinch of cayenne pepper for a warm heat that perfectly balances the sweetness. Get ready for a delightful surprise in every bite!
These variations give your Hot Chocolate Cookies new life, ensuring every batch can be a unique and delightful experience. Pair them with a warm cup of Protein Hot Chocolate for a cozy treat!
What to Serve with Hot Chocolate Protein Cookies
Elevate your warm, gooey cookie experience with delightful pairings that balance texture and flavors!
-
Creamy Nut Butter Spread: A dollop of almond or peanut butter on the side enhances the nutty notes in the cookies, making each bite richer.
-
Fruity Smoothie: A banana and berry smoothie provides a refreshing contrast. The creaminess of the smoothie complements the chewy texture of the cookies beautifully.
-
Whipped Coconut Cream: Light and fluffy whipped coconut cream offers a tropical sweetness that pairs perfectly with the chocolatey delight.
-
Fresh Berries: A handful of juicy strawberries or raspberries on the plate adds a bright burst of flavor and a pop of color!
-
Hot Almond Milk: Serve with warm almond milk infused with cinnamon and vanilla for a cozy drink that brings out the cookies’ chocolate flavor.
-
Vanilla Ice Cream: A scoop of vanilla ice cream on the side creates a delightful combination for a decadent dessert experience.
-
Homemade Protein Hot Chocolate: For the ultimate indulgence, a cup of Protein Hot Chocolate aligns perfectly, merging chocolate flavors for a wholesome treat.
-
Chocolate-Dipped Fruit: Strawberry or banana slices dipped in melted dark chocolate make a fun, sweet side that echoes the cookies’ richness.
Storage Tips for Hot Chocolate Cookies
Room Temperature: Store your Hot Chocolate Cookies in an airtight container at room temperature for up to 7 days, keeping them soft and chewy.
Fridge: If you prefer a firmer texture, place the cookies in the fridge for up to 2 weeks; just be sure to use a container that prevents moisture buildup.
Freezer: For longer storage, freeze the cookies in a single layer on a baking sheet, then transfer them to an airtight bag or container for up to 3 months.
Reheating: To enjoy warm, simply reheat your Hot Chocolate Cookies in the microwave for 10-15 seconds, allowing the marshmallows to soften and melt again.
Make Ahead Options
These Hot Chocolate Protein Cookies are a fantastic treat for meal prep! You can prepare the cookie dough up to 24 hours in advance. Simply mix all your ingredients, fold in the mini marshmallows, and shape the dough into balls. Cover the baking sheet with plastic wrap, and refrigerate until you are ready to bake. This helps maintain the chewy texture while keeping the marshmallows gooey. When you’re ready to bake, place the dough on a baking sheet, top each cookie with a large marshmallow, and bake as instructed. Enjoy the convenience of having these delicious cookies ready for busy days ahead!
Hot Chocolate Protein Cookies Recipe FAQs
How do I select the right chocolate protein powder?
Absolutely! For the best results, I recommend using high-quality chocolate protein powder, such as grass-fed beef isolate, which provides an ideal texture and flavor. If you’re looking for a vegan option, pea protein works too, but keep in mind it may yield denser cookies.
How should I store my Hot Chocolate Protein Cookies?
To keep your cookies fresh, store them in an airtight container at room temperature for up to 7 days. If you’d like them to last longer, you can refrigerate them for up to 2 weeks, using a container that prevents moisture buildup.
Can I freeze these cookies for later?
Yes, indeed! To freeze, lay the cookies in a single layer on a baking sheet and pop them in the freezer until solid. Then, transfer them to an airtight bag or container, and you can enjoy them for up to 3 months! When you’re ready to indulge, just reheat in the microwave for 10-15 seconds to bring back that soft, gooey texture.
What can I do if my cookies come out too dry?
If your Hot Chocolate Protein Cookies turn out dry, it might have been due to overbaking. Keep a close eye on the timer—8-10 minutes is ideal, and if they’re not quite set, refrigerate for 5 minutes instead of baking longer. Additionally, ensure your wet ingredients, particularly the nut butter and milk, are measured accurately as they help keep the cookies moist.
Are there any dietary considerations I should be aware of?
Very! If you or someone you’re baking for has nut allergies, consider using sunflower seed butter instead of peanut or almond butter. And if you’re gluten-sensitive, ensure your oats are certified gluten-free to avoid cross-contamination. These adjustments allow everyone to enjoy the deliciousness of your Hot Chocolate Protein Cookies!

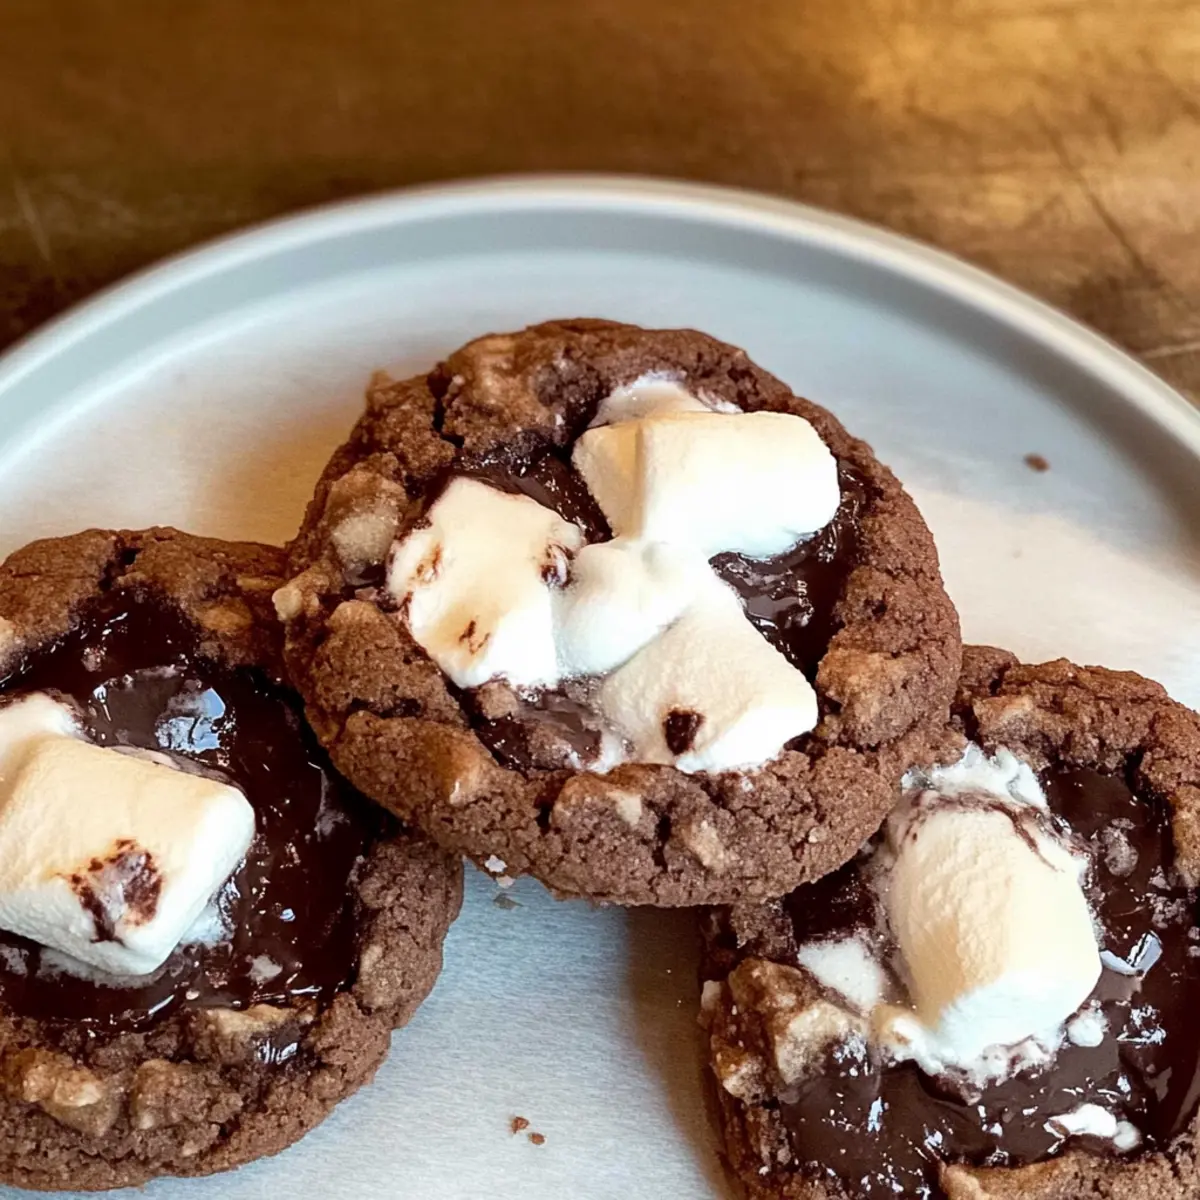
Indulgent Hot Chocolate Cookies for a Cozy Treat
Ingredients
Equipment
Method
- Preheat your oven to 350°F (175°C) and line a baking sheet with parchment paper.
- Mix the dry ingredients: chocolate protein powder, gluten-free oats, unsweetened cocoa powder, baking powder, and sea salt in a large mixing bowl.
- Add the wet ingredients: natural peanut butter, maple syrup, milk, and vanilla extract, and mix until a thick batter forms.
- Fold in the mini marshmallows gently into the dough.
- Scoop the dough onto the baking sheet, flatten each ball, and top with a large marshmallow.
- Bake in the preheated oven for 8-10 minutes until set and edges are golden.
- Remove the cookies from the oven and let them cool on the baking sheet before transferring to a wire rack.
Leave a Reply