
While scrolling through my favorite foodie blog, I stumbled upon a recipe that caught my eye: Japanese Katsu Bowls with Tonkatsu Sauce. Just the thought of crispy chicken katsu nestled atop a fluffy bed of rice, adorned with fresh vegetables and drizzled with a savory sauce, had me daydreaming of cozy dinners. This delightful dish is both a quick meal and cherished comfort food, perfect for a busy weeknight or an enticing weekend feast. Plus, with the flexibility to swap proteins, it caters to all tastes—whether you prefer chicken, pork, or a vegetarian twist with tofu. Are you ready to transform your kitchen into a comforting Japanese eatery? Let’s dive into this deliciously simple recipe together!
Why choose Japanese Katsu Bowls?
Comforting and hearty, this recipe highlights the joys of homemade meals over fast food, offering a delightful escape in every bite.
Versatile ingredients mean you can easily swap chicken for pork, tofu, or eggplant, making it adaptable for various diets.
Quick preparation allows for a satisfying dinner in under 30 minutes, perfect for busy weeknights.
Crowd-pleaser appeal ensures family and friends will rave about this dish, just like they do for my Baked Brie Puff.
Fresh and colorful, the vibrant vegetables not only enhance the presentation but add crunch and nutrition, balancing the rich flavors of tonkatsu sauce.
Japanese Katsu Bowls Ingredients
• Transform your kitchen into a comforting Japanese eatery with these ingredients!
For the Chicken Katsu
- Chicken Breasts – The star ingredient, delivering tender and flavorful protein.
- Salt and Black Pepper – Elevates the overall taste; adjust according to preference.
- All-Purpose Flour – Creates an initial coating to help the breadcrumbs adhere; substitute with gluten-free flour if needed.
- Eggs (Beaten) – Essential for binding the breadcrumbs to the chicken.
- Panko Breadcrumbs – Provides a light and crispy texture; swap for gluten-free panko if required.
- Vegetable Oil – Necessary for frying, giving that perfect crispiness to your chicken katsu.
For the Tonkatsu Sauce
- Ketchup – Adds sweetness, making it the base of the sauce.
- Worcestershire Sauce – Infuses depth and umami flavor into the sauce.
- Soy Sauce – Provides a salty kick; opt for gluten-free soy sauce or tamari if needed.
- Sugar – Balances the acidity and adds a hint of sweetness.
- Mirin – Introduces a subtle sweetness and complexity to the sauce.
- Dijon Mustard – Imparts a tangy note, enhancing the sauce’s flavor profile.
- Garlic Powder – Brings a savory aroma and taste to the sauce.
For the Bowl Assembly
- Cooked White Rice – Serves as the comforting base; short-grain or sushi rice works best for texture.
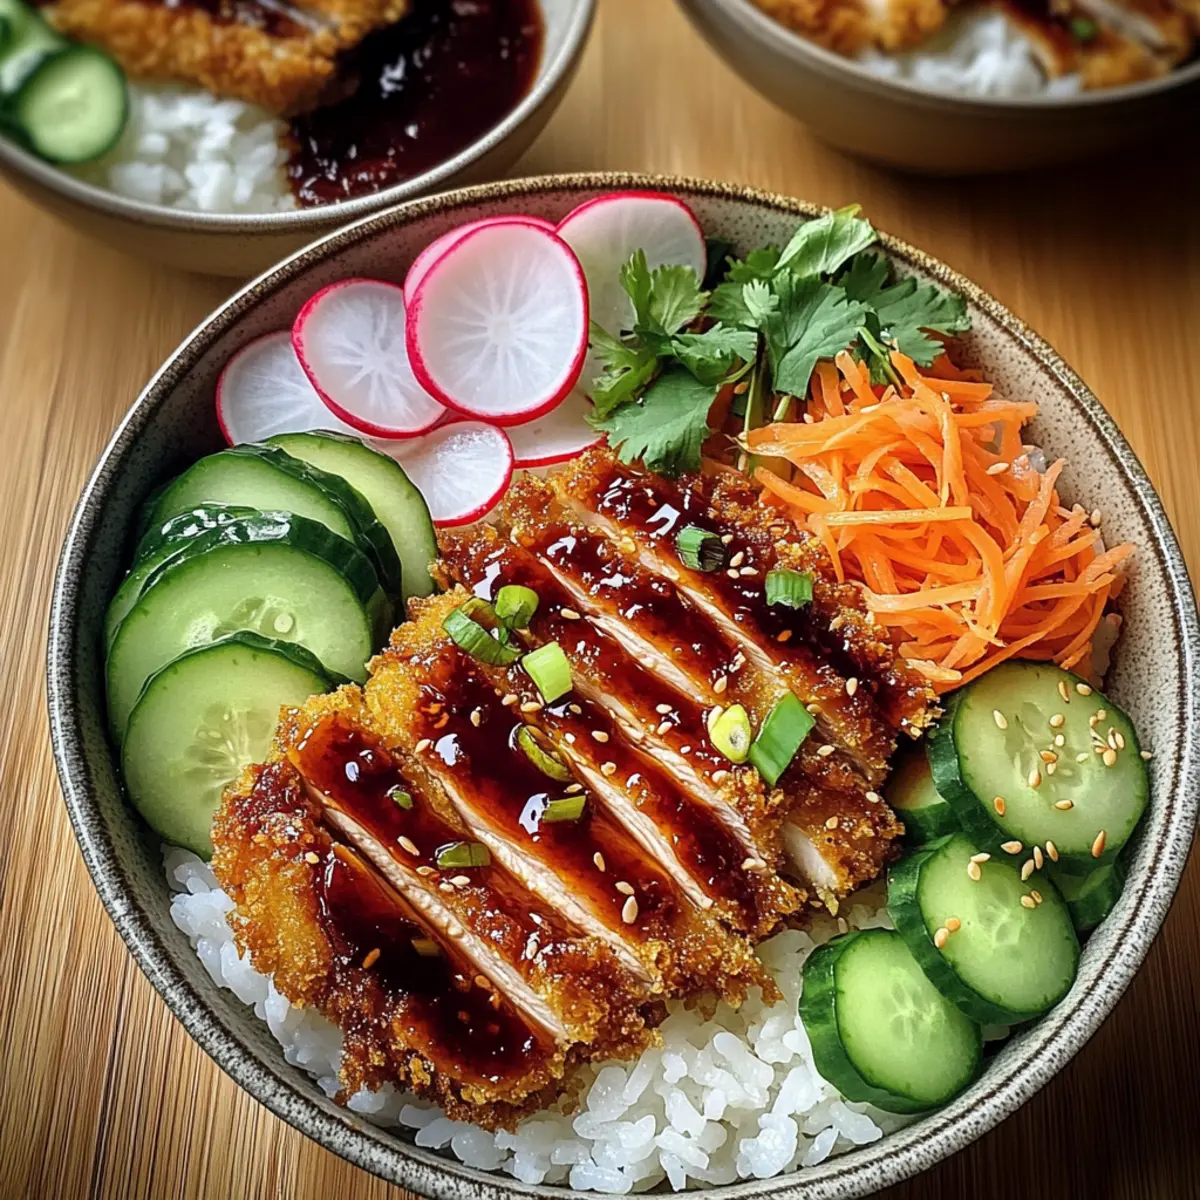
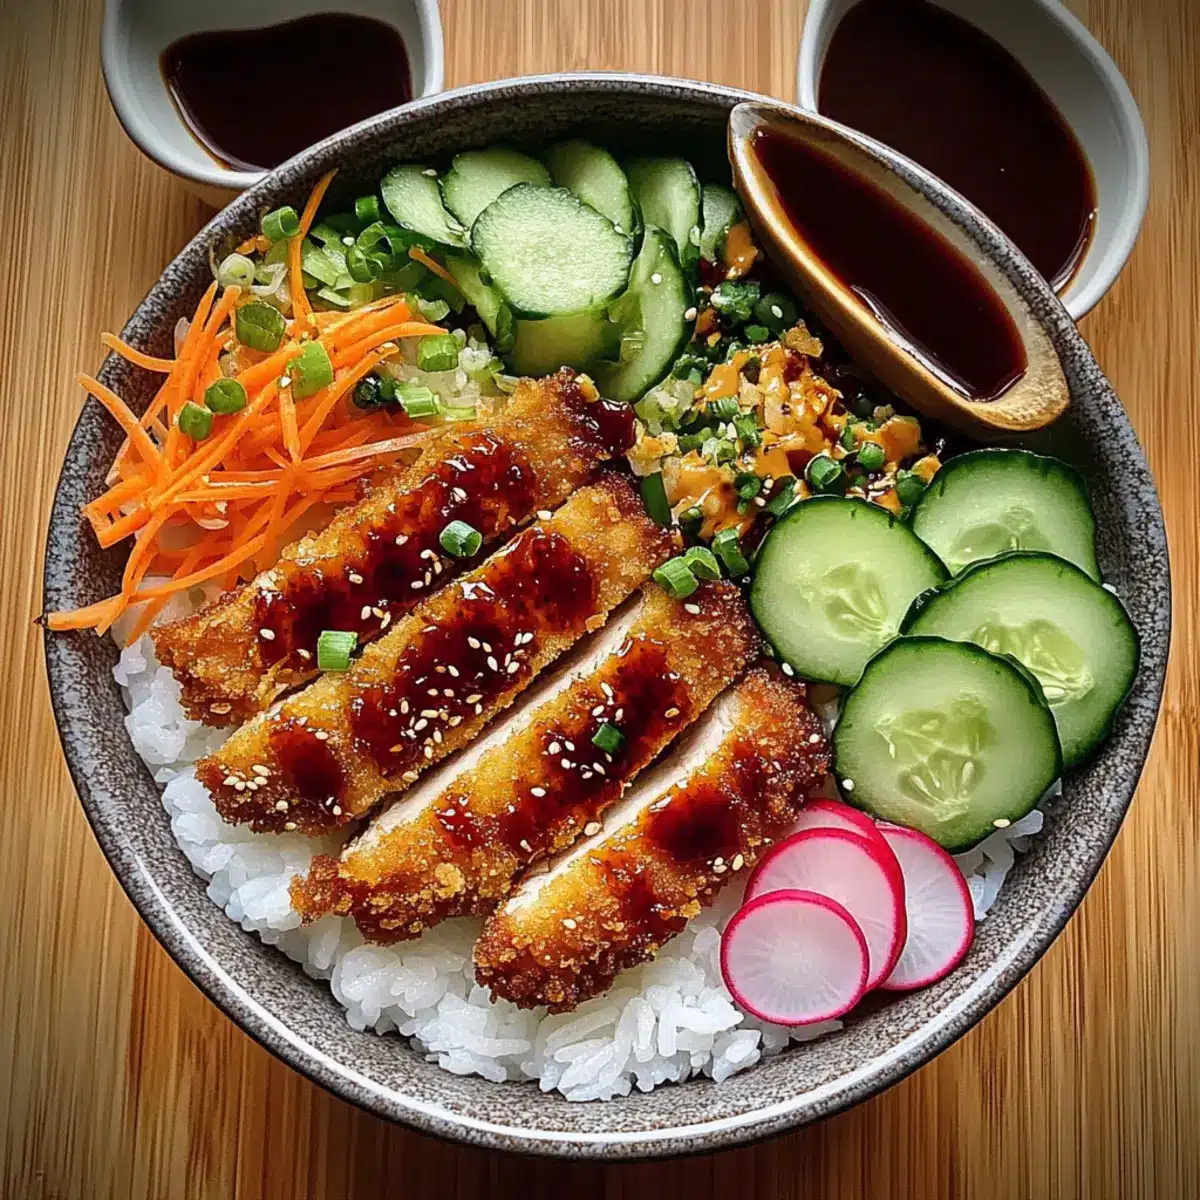
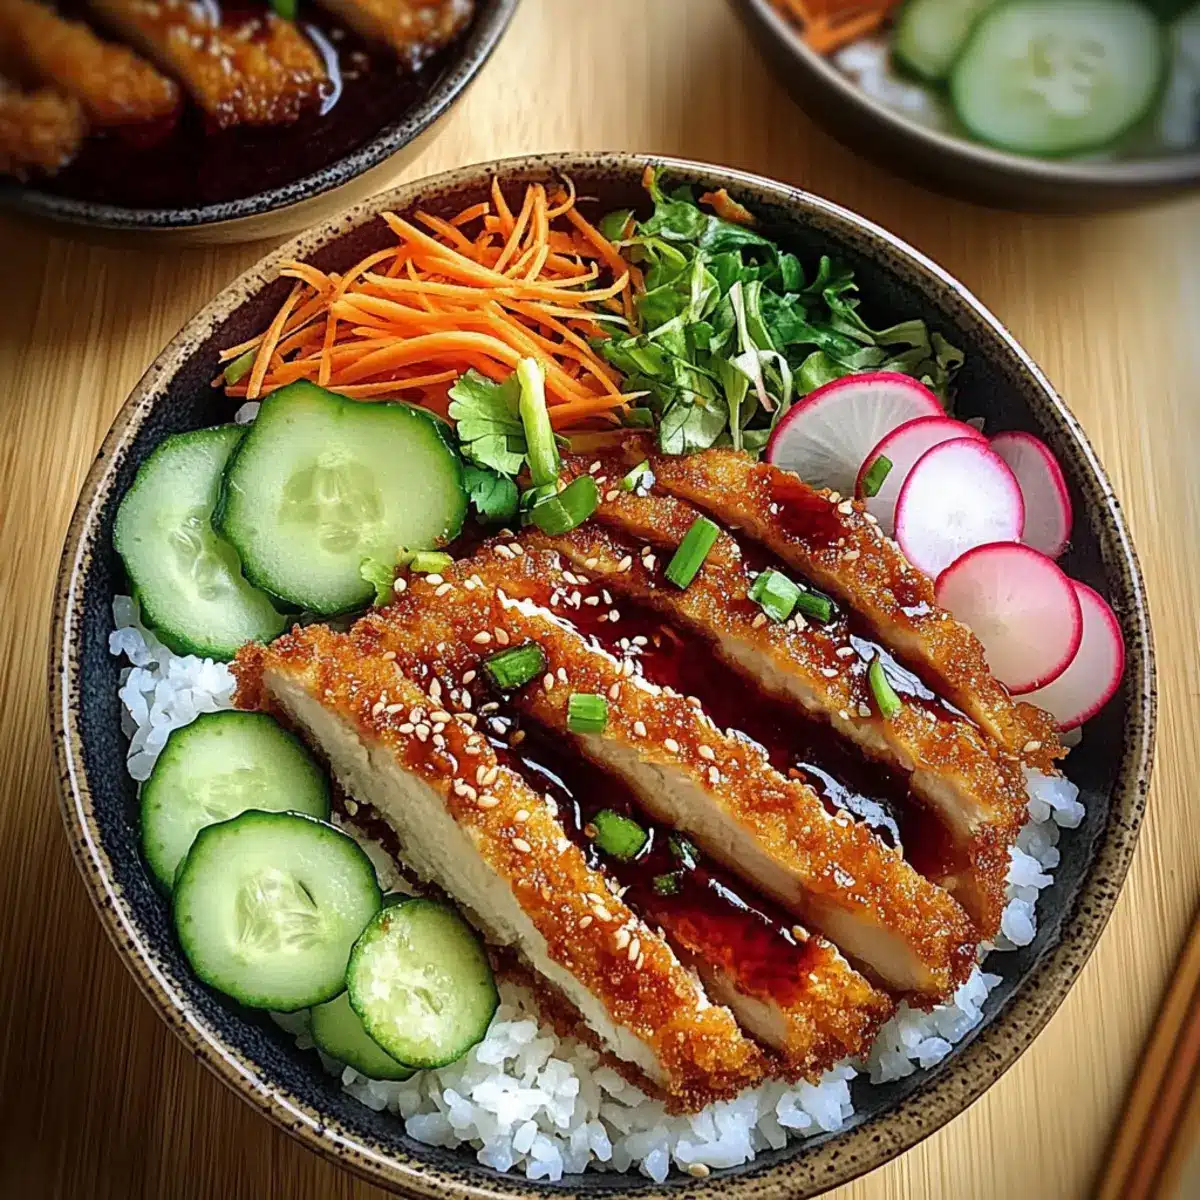
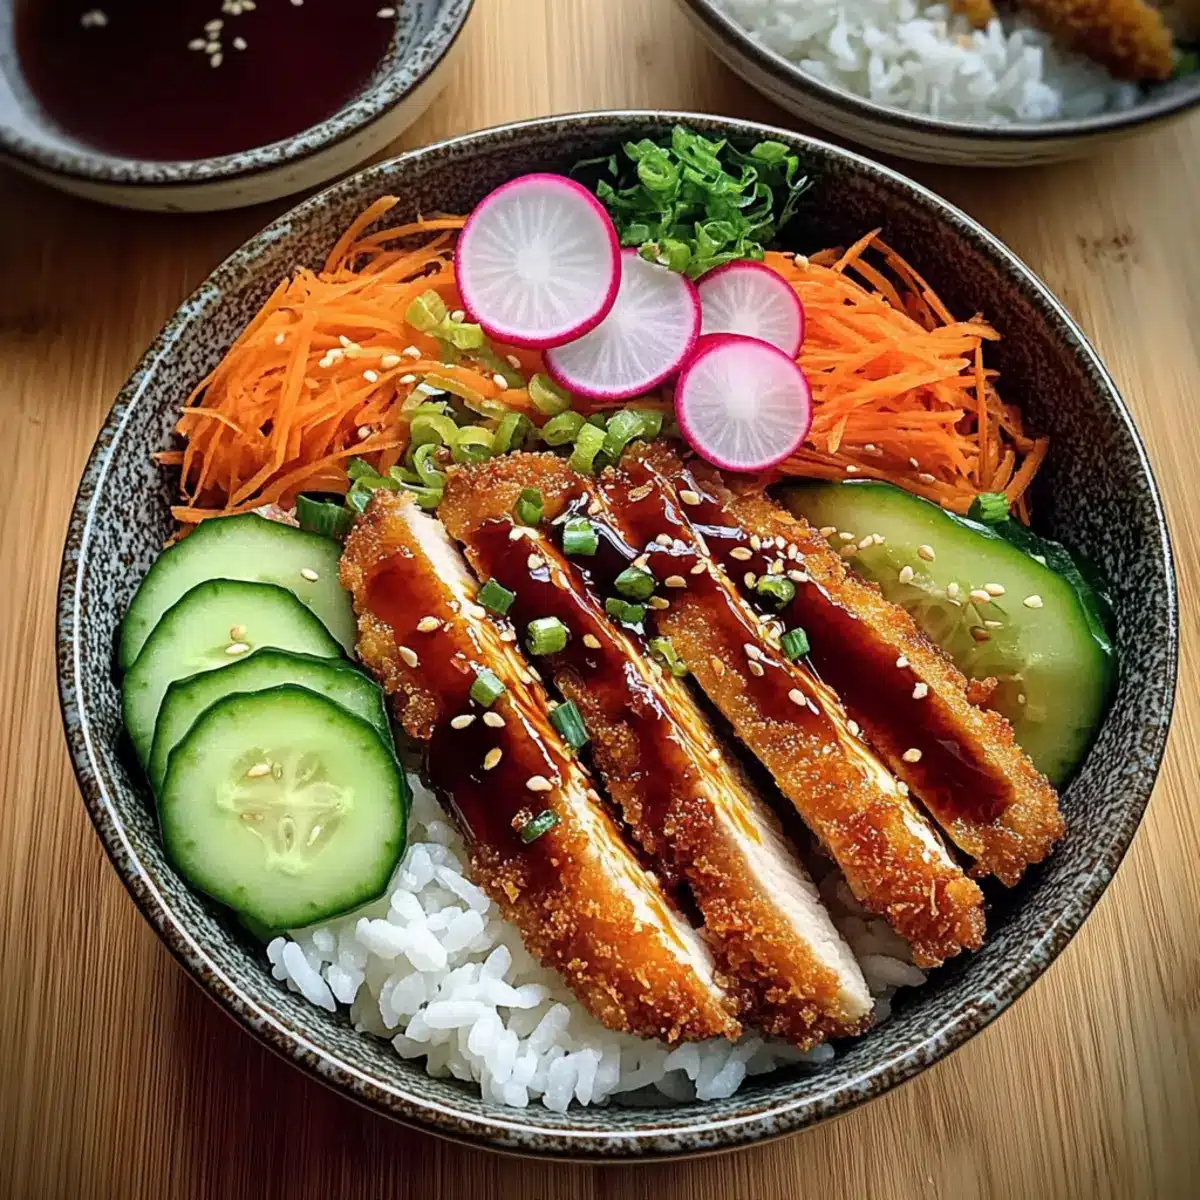
- Shredded Cabbage, Sliced Cucumber, Sliced Radishes, Sliced Carrots – Fresh and crunchy vegetables that add color and nutrients to your bowl.
- Chopped Green Onions and Sesame Seeds – Perfect garnishes that introduce freshness and a slight nuttiness.
With these ingredients ready, you’re just a few steps away from enjoying delightful Japanese Katsu Bowls with Tonkatsu Sauce!
Step‑by‑Step Instructions for Japanese Katsu Bowls with Tonkatsu Sauce
Step 1: Prep Chicken
Pound the chicken breasts to an even thickness of about ½ inch between sheets of plastic wrap to ensure uniform cooking. Season both sides generously with salt and black pepper, creating a flavorful base for your Japanese Katsu Bowls. Allow the seasoned chicken to rest while you prepare the breading station.
Step 2: Set Up Breading Station
Arrange three shallow bowls in a line for the breading process while inspiring your culinary creativity. In the first bowl, add all-purpose flour; the second should contain beaten eggs; and the third filled with crispy panko breadcrumbs. This organized setup will help ensure a smooth and efficient coating for your chicken, setting the stage for golden, crunchy katsu.
Step 3: Breading Process
Coat each chicken breast carefully in the flour, ensuring it is fully covered before dipping it into the beaten eggs. This step helps the breadcrumbs adhere better. Next, press the chicken breast into the panko, coating it thoroughly for that iconic crispy texture. Repeat this process for all pieces, setting them aside on a plate as you prepare to fry.
Step 4: Fry Chicken
Heat about ½ inch of vegetable oil in a large frying pan over medium-high heat until shimmering. Carefully add the coated chicken breasts to the hot oil, frying for 4-5 minutes on each side or until they turn a lovely golden brown. Use a meat thermometer to confirm an internal temperature of 165°F (74°C) for perfect doneness before transferring the chicken to a paper towel-lined plate to drain excess oil.
Step 5: Make Tonkatsu Sauce
In a mixing bowl, combine the ketchup, Worcestershire sauce, soy sauce, sugar, mirin, Dijon mustard, and garlic powder. Whisk together until smooth, blending these ingredients into a deliciously tangy and sweet sauce that will complement your crispy chicken perfectly. Set aside your homemade tonkatsu sauce as you assemble the bowls.
Step 6: Assemble Bowls
Start by slicing your perfectly fried chicken katsu into desired strips. In serving bowls, create a base with cooked white rice, which acts as a comforting foundation for your meal. Layer shredded cabbage, sliced cucumber, radishes, and carrots on the rice. Finally, arrange the sliced chicken atop the vibrant vegetables, and generously drizzle the savory tonkatsu sauce over the entire dish, garnishing with chopped green onions and sesame seeds.
Storage Tips for Japanese Katsu Bowls
Fridge: Store leftover chicken katsu in an airtight container for up to 3 days. Each piece should be placed in a single layer to maintain its crispiness.
Freezer: You can freeze the cooked chicken katsu wrapped tightly in plastic wrap and aluminum foil for up to 2 months. Thaw in the refrigerator before reheating to retain moisture.
Reheating: To reheat, place chicken katsu in an oven or air fryer at 350°F (175°C) for about 10-15 minutes until hot and crispy. Avoid using a microwave to prevent sogginess.
Tonkatsu Sauce: Store any remaining tonkatsu sauce in the fridge in a sealed container for up to two weeks. Enjoy it for dipping or drizzling on future Japanese Katsu Bowls!
Japanese Katsu Bowls Variations & Substitutions
Feel free to make this dish your own! With a few simple swaps, you can create exciting variations that cater to your taste buds and dietary needs.
-
Pork Cutlets: Swap chicken for tender pork cutlets, deliciously juicy and perfect for katsu.
This variation marries well with the tonkatsu sauce, offering a twist on the traditional dish. -
Tofu Delight: Replace chicken with firm tofu for a vegetarian option.
Simply press and coat the tofu to achieve the same delightful crunch while keeping everything plant-based! -
Eggplant Katsu: Use sliced eggplant as a starchy substitute for meat lovers.
Bread and fry the eggplant using the same process for a unique, hearty option that’s full of flavor. -
Gluten-Free Swap: Choose gluten-free flour and panko for a gluten-free katsu.
Your comfort food cravings can still be satisfied without sacrificing texture or taste! -
Chili Flakes: Add a sprinkle of chili flakes to the tonkatsu sauce for a spicy kick.
This little twist elevates the flavor profile, perfect for those who enjoy a little heat in their meals. -
Mix It Up: Experiment with vegetables like bell peppers or snap peas for added crunch.
These veggies not only boost nutrition but also brighten up your bowl, making every bite visually appealing. -
Crispy Mushrooms: Use crispy fried mushrooms for a meat-free option packed with umami.
They’ll add a delightful chewiness and depth to your Katsu Bowls, appealing to both vegans and omnivores.
For other yummy inspirations, consider pairing your Japanese Katsu Bowls with a side of Miso Soup or some sweet Mascarpone Stuffed Dates for a truly delightful meal. Happy cooking!
Expert Tips for Japanese Katsu Bowls
- Temperature Matters: Ensure the oil is hot enough before frying; too cold will result in soggy katsu, while too hot can burn the coating.
- Double Dipping: For an extra crispy texture, consider double dipping the chicken in flour, egg, and panko before frying.
- Rest Before Slicing: Allow the fried chicken to rest for a couple of minutes before slicing to keep the juices inside for a moist bite.
- Flavor Balance: Taste the tonkatsu sauce as you mix; you may want to adjust the sweetness or saltiness based on your preference for perfectly balanced Japanese Katsu Bowls.
- Vegetable Variety: Feel free to add seasonal vegetables for crunch; options like bell peppers or snow peas can elevate the freshness of the dish.
What to Serve with Japanese Katsu Bowls with Tonkatsu Sauce
Transform your meal into a delightful feast by pairing these bowled wonders with complementary sides and flavors.
-
Miso Soup: A warm, umami-rich soup that enhances the overall Japanese dining experience, offering comfort and warmth in every sip.
-
Steamed Edamame: Lightly salted and bursting with flavor, these soybeans provide a fresh and crunchy contrast to the crispy chicken.
-
Cucumber Salad: Refreshing and crisp, a simple cucumber salad tossed with sesame dressing balances the richness of the katsu bowls.
-
Vegetable Tempura: Lightly battered and fried vegetables bring an exciting crunch and another layer of texture to your meal.
-
Pickled Ginger: Adding this tangy and zesty side amplifies the flavors, providing a delightful palate cleanser between bites.
-
Chilled Sake: Enjoy this traditional Japanese drink to complement the savory notes of the tonkatsu sauce; its clean finish pairs beautifully.
-
Black Sesame Ice Cream: For dessert, this creamy treat offers a sweet and nutty alternative to round off your meal, delighting your taste buds.
By thoughtfully putting these elements together, your Japanese Katsu Bowls with Tonkatsu Sauce will shine even brighter!
Make Ahead Options
These Japanese Katsu Bowls with Tonkatsu Sauce are fantastic for meal prep! You can prepare the chicken katsu up to 24 hours in advance by breading the chicken, then refrigerating it uncooked until you’re ready to fry. The tonkatsu sauce can also be made ahead and stored in the refrigerator for up to two weeks, allowing the flavors to meld beautifully. To maintain the chicken’s quality, make sure to keep it covered and chilled. When it’s time to serve, simply fry the breaded chicken for 4-5 minutes per side until golden brown, slice, and assemble your bowls with the fresh vegetables and sauce. Enjoy a comforting meal with minimal effort on busy weeknights!
Japanese Katsu Bowls with Tonkatsu Sauce Recipe FAQs
How do I select the right chicken for my katsu?
Absolutely! Choose chicken breasts that are plump and free from dark spots, which may indicate spoilage. The best chicken for katsu should be fresh, and look for cuts that are uniform in size to ensure even cooking. If you prefer a different protein, go for pork cutlets or even tofu for a vegetarian option!
How should I store leftover katsu?
Very! Leftover chicken katsu should be stored in an airtight container in the fridge, where it will stay fresh for up to 3 days. To maintain that crunch, place each piece in a single layer. If you’re saving the tonkatsu sauce, it can be refrigerated in a sealed container for up to two weeks.
Can I freeze the chicken katsu?
Absolutely! To freeze your cooked chicken katsu, wrap each piece tightly in plastic wrap and then in aluminum foil to prevent freezer burn. It will stay fresh for up to 2 months. When you’re ready to enjoy it, simply thaw it in the refrigerator overnight to retain moisture, then reheat in the oven or air fryer for about 10-15 minutes at 350°F (175°C) until it’s crispy again!
What if my chicken katsu comes out soggy?
Ah, that’s a common issue! Ensure your oil is at the right temperature; a good test is to drop a breadcrumb in—if it sizzles immediately, you’re good to go. If the coating is soggy after frying, it might mean that the oil was too cold, causing the crust to absorb excess oil. To prevent this, use a thermometer to check the oil temperature, aiming for around 350°F (175°C).
Are there any dietary concerns with this recipe?
Yes, indeed! If you’re cooking for those with gluten sensitivities or celiac disease, simply swap out all-purpose flour and panko breadcrumbs for gluten-free varieties. Also, check that your Worcestershire sauce and soy sauce are labeled gluten-free. This way, everyone can savor these delicious Japanese Katsu Bowls with Tonkatsu Sauce!
Ultimate Japanese Katsu Bowls with Tonkatsu Sauce Bliss
Ingredients
Equipment
Method
- Pound the chicken breasts to an even thickness of about ½ inch between sheets of plastic wrap.
- Season both sides generously with salt and black pepper.
- Prepare the breading station with flour, beaten eggs, and panko breadcrumbs.
- Coat each chicken breast in flour, dip into beaten eggs, then coat in panko breadcrumbs.
- Heat vegetable oil in a large frying pan over medium-high heat until shimmering.
- Fry chicken breasts for 4-5 minutes on each side until golden brown.
- Combine ketchup, Worcestershire sauce, soy sauce, sugar, mirin, Dijon mustard, and garlic powder to make the tonkatsu sauce.
- Slice fried chicken and assemble the bowls with rice, vegetables, and sauce.
Leave a Reply