
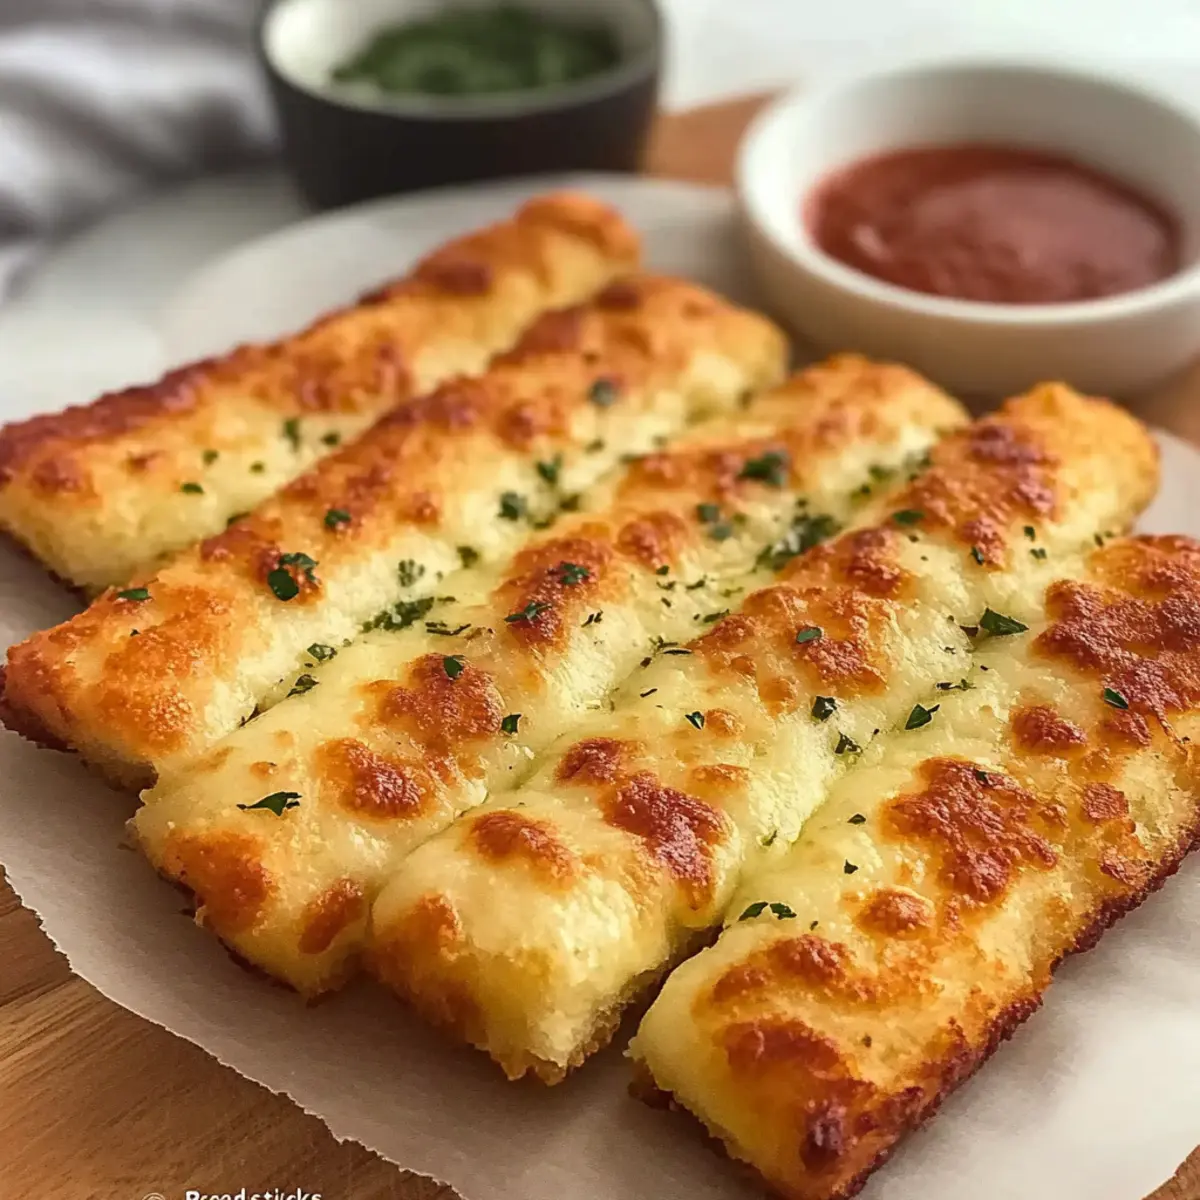
Nothing beats the delightful aroma of garlic wafting through your kitchen, especially when it’s combined with gooey cheese! These KETO Cheesy Garlic “Breadsticks” are my go-to when I’m craving that comforting taste of traditional garlic bread, minus the carbs. With just four easy-to-find ingredients, this recipe makes whipping up this tasty treat a breeze—perfect for any home chef looking to switch things up. Not only can these scrumptious breadsticks be ready in under 20 minutes, but they’re also completely gluten-free! Imagine serving these warm with your favorite dipping sauce, creating a cozy, satisfying snack or side that everyone will love. Are you ready to bring a taste of comfort back into your keto kitchen?
Why Are These Breadsticks So Irresistible?
Gooey Cheese Delight: The blend of mozzarella and parmesan creates a melty, cheesy heaven that satisfies your cravings without the carbs.
Quick and Easy: With only four ingredients and just 20 minutes of prep time, these KETO Cheesy Garlic “Breadsticks” fit perfectly into busy schedules.
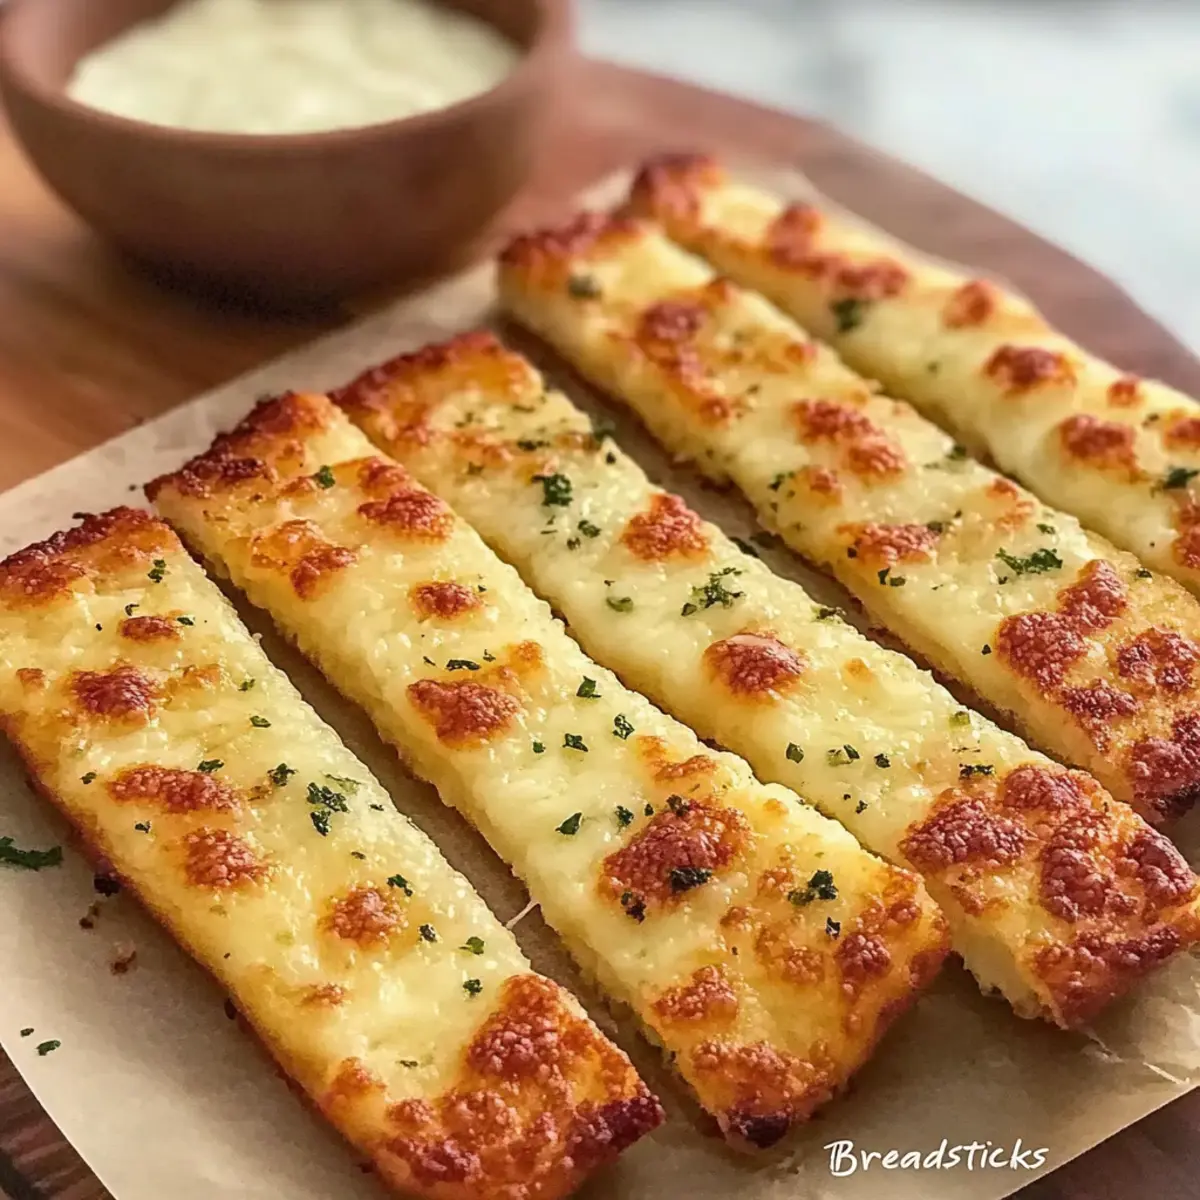
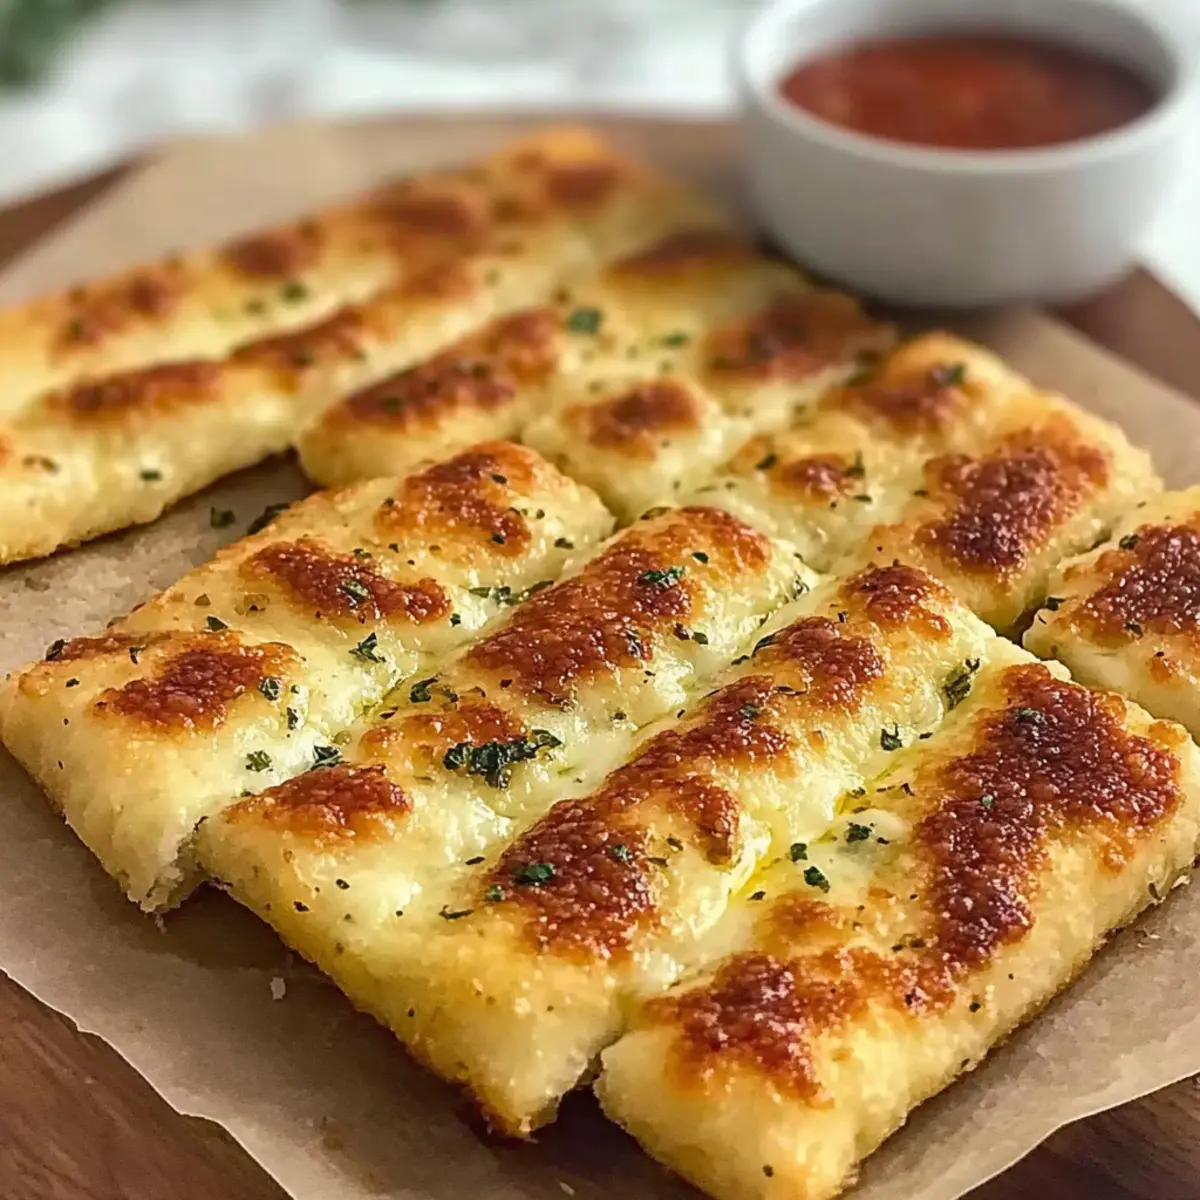
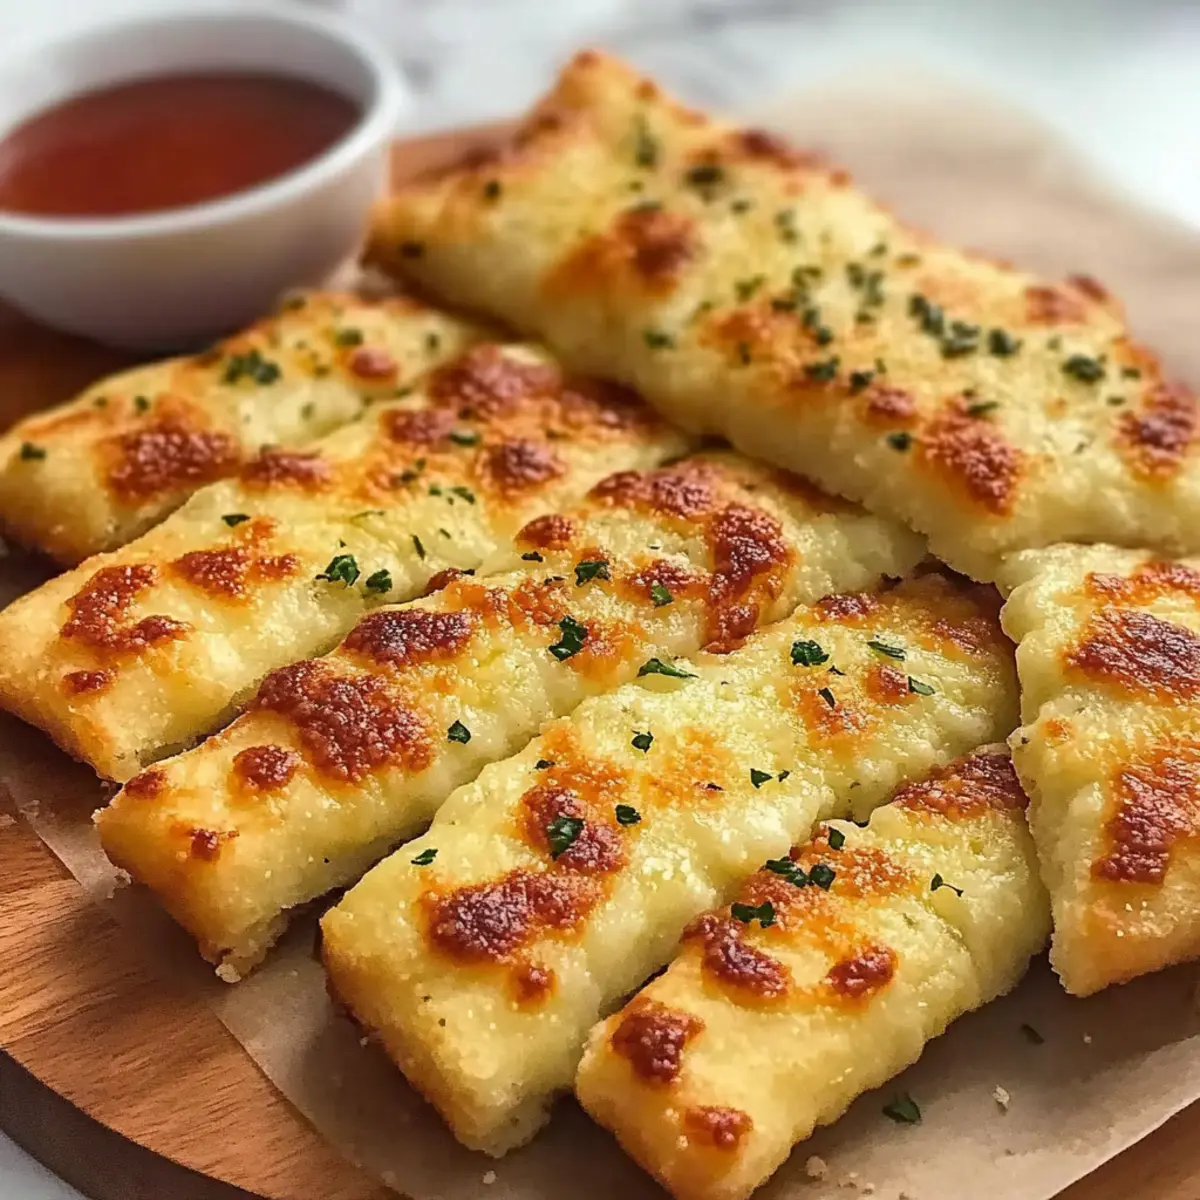
Versatile Pairing: They shine as an appetizer with your favorite dipping sauces, like marinara or sugar-free pizza sauce, or as a side to a hearty meal.
Crowd-Pleasing Flavor: Everyone, regardless of dietary preferences, will enjoy these flavorful breadsticks, making them a hit at family gatherings or dinner parties.
Gluten-Free Goodness: Feel good about indulging with this recipe, which is not only low-carb but also caters to those seeking gluten-free options. Try serving them alongside our Lemon Garlic Chicken for a complete keto meal!
KETO Cheesy Garlic “Breadsticks” Ingredients
• Get ready to whip up a cheesy low-carb delight!
For the Breadsticks
- Mozzarella Cheese – Provides that stretchy, gooey texture that makes these breadsticks irresistible; feel free to use cheddar for a twist!
- Parmesan Cheese – Adds a sharp, salty kick that elevates the flavor; choose a high-quality brand for the best results.
- Egg – Acts as a binder to keep everything together; you can skip it if you’re looking to lower the fat content.
- Garlic Powder – Gives the essential savory garlic flavor; fresh minced garlic works too, but use less to avoid overpowering.
These KETO Cheesy Garlic “Breadsticks” are simple, quick, and full of flavor that everyone will love!
Step‑by‑Step Instructions for KETO Cheesy Garlic “Breadsticks”
Step 1: Preheat and Prepare
Begin by preheating your oven to 350°F (175°C). While the oven warms up, line a baking sheet with parchment paper to prevent the breadsticks from sticking and to ensure a crispy bottom. The parchment will help maintain the ideal texture, making them easy to remove once baked.
Step 2: Mix Ingredients
In a large mixing bowl, combine 1 cup of shredded mozzarella cheese, ½ cup of grated parmesan cheese, 1 egg, and 1 teaspoon of garlic powder. Stir vigorously until the mixture is thick and sticky. This step builds the cheesy base for your KETO Cheesy Garlic “Breadsticks,” so ensure all ingredients are well incorporated.
Step 3: Shape the Breadsticks
Scoop the cheese mixture onto the prepared baking sheet, using a spatula to flatten it into a rectangle. Aim for your desired thickness; remember, thinner breadsticks yield crispier edges while thicker ones remain soft in the middle. Spread it evenly, ensuring the shape is uniform for even baking.
Step 4: Bake Until Golden
Place the baking sheet in the preheated oven and bake for about 15 minutes. Keep an eye on your KETO Cheesy Garlic “Breadsticks” during this time; they should become bubbly and golden around the edges, creating that irresistible crunchy texture everyone loves.
Step 5: Broil for Extra Crispiness
If you desire an extra crispy top, switch your oven to broil and allow the breadsticks to cook for an additional 2-3 minutes. Be vigilant during this step, as broiling can quickly turn from golden brown to burnt. The cheese should bubble and become slightly crisp as it finishes cooking.
Step 6: Cool and Slice
Once baked to perfection, remove the breadsticks from the oven and allow them to cool slightly—about 5 minutes. This cooling period helps with slicing. Use a sharp knife to cut into strips; the result will be delicious KETO Cheesy Garlic “Breadsticks” that are warm and ready to dip into your favorite sauce.
Make Ahead Options
These KETO Cheesy Garlic “Breadsticks” are perfect for meal prep, allowing you to enjoy your favorite snack even on the busiest days! You can prepare the cheese mixture up to 24 hours in advance—simply combine 1 cup of mozzarella, ½ cup of parmesan, 1 egg, and 1 teaspoon of garlic powder, then store it in an airtight container in the refrigerator. When you’re ready to bake, let the mixture sit at room temperature for about 15 minutes before scooping and flattening it onto the baking sheet to ensure a proper bake. This method retains their delightful cheesy texture and flavor, making it just as delicious as when freshly made. Enjoy warm with your favorite dipping sauce for restaurant-quality results at home!
Storage Tips for KETO Cheesy Garlic “Breadsticks”
- Room Temperature: Store leftover KETO Cheesy Garlic “Breadsticks” at room temperature for up to 1 day, but keep them in an airtight container to maintain freshness.
- Fridge: Place any uneaten breadsticks in an airtight container in the refrigerator, where they can stay fresh for up to 4 days. Reheat in the oven for the best texture.
- Freezer: For longer storage, freeze the breadsticks in a sealed freezer bag or container for up to 2 months. Thaw in the fridge before reheating.
- Reheating: For the crispiest results, reheat the breadsticks in a preheated oven at 350°F (175°C) for 5–7 minutes until warmed through.
Expert Tips for KETO Cheesy Garlic “Breadsticks”
-
Thickness Matters: Thinner breadsticks bake crispier; adjust your spreading technique for the texture you desire.
-
Customize Flavors: Add Italian seasoning or crushed red pepper flakes to elevate the flavor profile—experimenting enhances your KETO Cheesy Garlic “Breadsticks”!
-
Perfectly Cool: Let the breadsticks cool a few minutes before slicing to avoid a messy cut; this ensures clean, beautiful pieces.
-
Quality Cheese Counts: Use good quality mozzarella and parmesan for the best melting and flavor. Avoid low-fat options; they can affect texture.
-
Gluten Awareness: Always ensure the cheese is labeled gluten-free if serving to someone with dietary restrictions to maintain safety.
KETO Cheesy Garlic “Breadsticks” Variations
Feel free to get creative with these delicious breadsticks—there’s a world of flavor waiting for you!
-
Cheddar Swap: Replace mozzarella with sharp cheddar for a tangy twist that adds a whole new depth of flavor.
-
Fresh Garlic: Use fresh minced garlic instead of powder for a more potent garlic punch; just be mindful of the quantity!
-
Herb Boost: Mix in some dried oregano or basil for an aromatic boost that will fill your kitchen with delightful scents.
-
Spicy Kick: Add crushed red pepper flakes for an unexpected heat; it pairs beautifully with the cheesy goodness!
-
Zesty Citrus: Incorporate a squeeze of lemon juice or some lemon zest into the cheese mixture for a refreshing zing that brightens every bite.
-
Cream Cheese Texture: Blend in some softened cream cheese with the other cheeses for a richer, creamier texture that’s oh-so-indulgent.
-
Parmesan Crust: Sprinkle extra grated parmesan on top before baking for a lovely crunchy, cheesy crust that everyone will adore.
-
Low-Sodium Option: For a healthier version, use low-sodium cheese options to control salt intake without sacrificing flavor.
When serving, try pairing these KETO Cheesy Garlic “Breadsticks” with a side of Country French Garlic for a cozy dinner or dip them into Garlic Parmesan Focaccia sauce for an extra indulgent experience. Whatever variations you choose, these breadsticks are sure to delight!
What to Serve with KETO Cheesy Garlic “Breadsticks”
Imagine indulging in comforting flavors that perfectly complement the warm, cheesy goodness of these delightful breadsticks.
-
Marinara Sauce: This classic pairing enhances each bite with a tangy splash that balances the richness of the cheese.
-
Zucchini Noodles: Light and healthy, they create a delightful contrast, making for a satisfying low-carb meal that’s bursting with freshness. Toss them with olive oil and garlic for extra flavor.
-
Garden Salad: Crisp greens sprinkled with your favorite veggies and a zesty vinaigrette provide a refreshing crunch, pairing beautifully with the cheesy breadsticks.
-
Italian Meatballs: Tender, savory meatballs offer a hearty option that harmonizes with the flavors of the breadsticks—perfect for a satisfying dinner.
-
Cauliflower Rice: This fluffy, low-carb alternative adds substance to your meal while soaking up delicious sauces. Season it with herbs for an extra burst of flavor.
-
Sugar-Free Iced Tea: A chilled drink that refreshes your palate between bites, its subtle sweetness contrasts with savory elements and enhances your overall dining experience.
-
Cheesy Broccoli Bake: A warm, cheesy veggie dish makes a wonderful side that echoes the flavors of the breadsticks while adding a nutritious element to your plate.
-
Chocolate Avocado Mousse: For dessert, this creamy, rich treat rounds out the meal beautifully with its indulgent texture and luscious chocolate flavor—guilt-free and delicious!
KETO Cheesy Garlic “Breadsticks” Recipe FAQs
What type of mozzarella cheese should I use for the best results?
Absolutely! Use full-fat shredded mozzarella for the best melt and stretchy texture in your KETO Cheesy Garlic “Breadsticks.” Low-fat versions can yield a chewier result, which might not be as enjoyable. Brands might vary in quality, so opt for a trusted brand to ensure delicious outcomes.
How should I store leftover KETO Cheesy Garlic “Breadsticks”?
To keep your leftovers fresh, store them in an airtight container in the fridge for up to 4 days. I recommend placing parchment paper between layers if you’re stacking them to avoid sticking. For longer storage, they can be frozen in a sealed freezer bag for up to 2 months. Just thaw in the fridge before reheating for that fresh-baked taste!
Can I freeze KETO Cheesy Garlic “Breadsticks”?
Yes, you can absolutely freeze them! To freeze, allow the breadsticks to cool completely after baking, then wrap them tightly in plastic wrap or foil, and place in a freezer-safe container or bag. For the best texture when reheating, I suggest thawing them in the fridge overnight and then reheating in the oven at 350°F (175°C) for 5-7 minutes.
What if my breadsticks turn out too soft?
If your KETO Cheesy Garlic “Breadsticks” come out too soft, you might not have baked them long enough or they may be too thick. Ensure to bake until the edges are golden and bubbly. For future attempts, try flattening the mixture thinner to achieve more crispy edges and enhance the texture!
Are these breadsticks safe for people with gluten allergies?
Definitely! The ingredients in these KETO Cheesy Garlic “Breadsticks” are naturally gluten-free. Just ensure that the mozzarella and parmesan cheeses you use are labeled gluten-free. It’s always a good idea to double-check product packaging, especially if serving someone with celiac disease or gluten sensitivity.
Can I add additional seasonings to the recipe?
Very! Feel free to customize your KETO Cheesy Garlic “Breadsticks” by adding Italian seasoning, dried oregano, or crushed red pepper flakes for a spicy kick. You can mix these seasonings into the cheese mixture before baking to infuse flavor thoroughly. It’s a wonderful way to elevate the dish to your personal tastes!
Delicious KETO Cheesy Garlic “Breadsticks” Ready in 20 Minutes
Ingredients
Equipment
Method
- Preheat your oven to 350°F (175°C) and line a baking sheet with parchment paper.
- In a large mixing bowl, combine 1 cup of shredded mozzarella cheese, ½ cup of grated parmesan cheese, 1 egg, and 1 teaspoon of garlic powder. Stir until thick and sticky.
- Scoop the mixture onto the prepared baking sheet and flatten it into a rectangle.
- Bake for about 15 minutes, until bubbly and golden around the edges.
- For extra crispiness, switch to broil and cook for an additional 2-3 minutes.
- Remove from the oven and cool slightly for 5 minutes before slicing.
Leave a Reply