
The kitchen filled with the warm, inviting aroma of sweet nostalgia—it’s magical how a simple treat can transport us back to cherished moments. Meet the Enchanted Magic Cookie Bars, a sweet creation that gracefully balances rich chocolate, creamy textures, and a satisfying crunch. These bars are not just a dessert; they’re the perfect solution for those cozy family gatherings or joyful celebrations where flavors draw everyone together. With minimal prep time and the ability to cater to various dietary needs, these Magic Cookie Bars are bound to become a favorite. Whether you’re cutting them into shareable squares for a party or indulging in a late-night snack, you’ll find that they fit any occasion beautifully. Curious how a few simple ingredients can create such a delightful experience? Let’s dive into the recipe!

Why Are These Magic Cookie Bars So Special?
Easy to Make: The preparation for these bars is a breeze, requiring only a handful of pantry staples. You can whip them up in no time, making them perfect for last-minute gatherings.
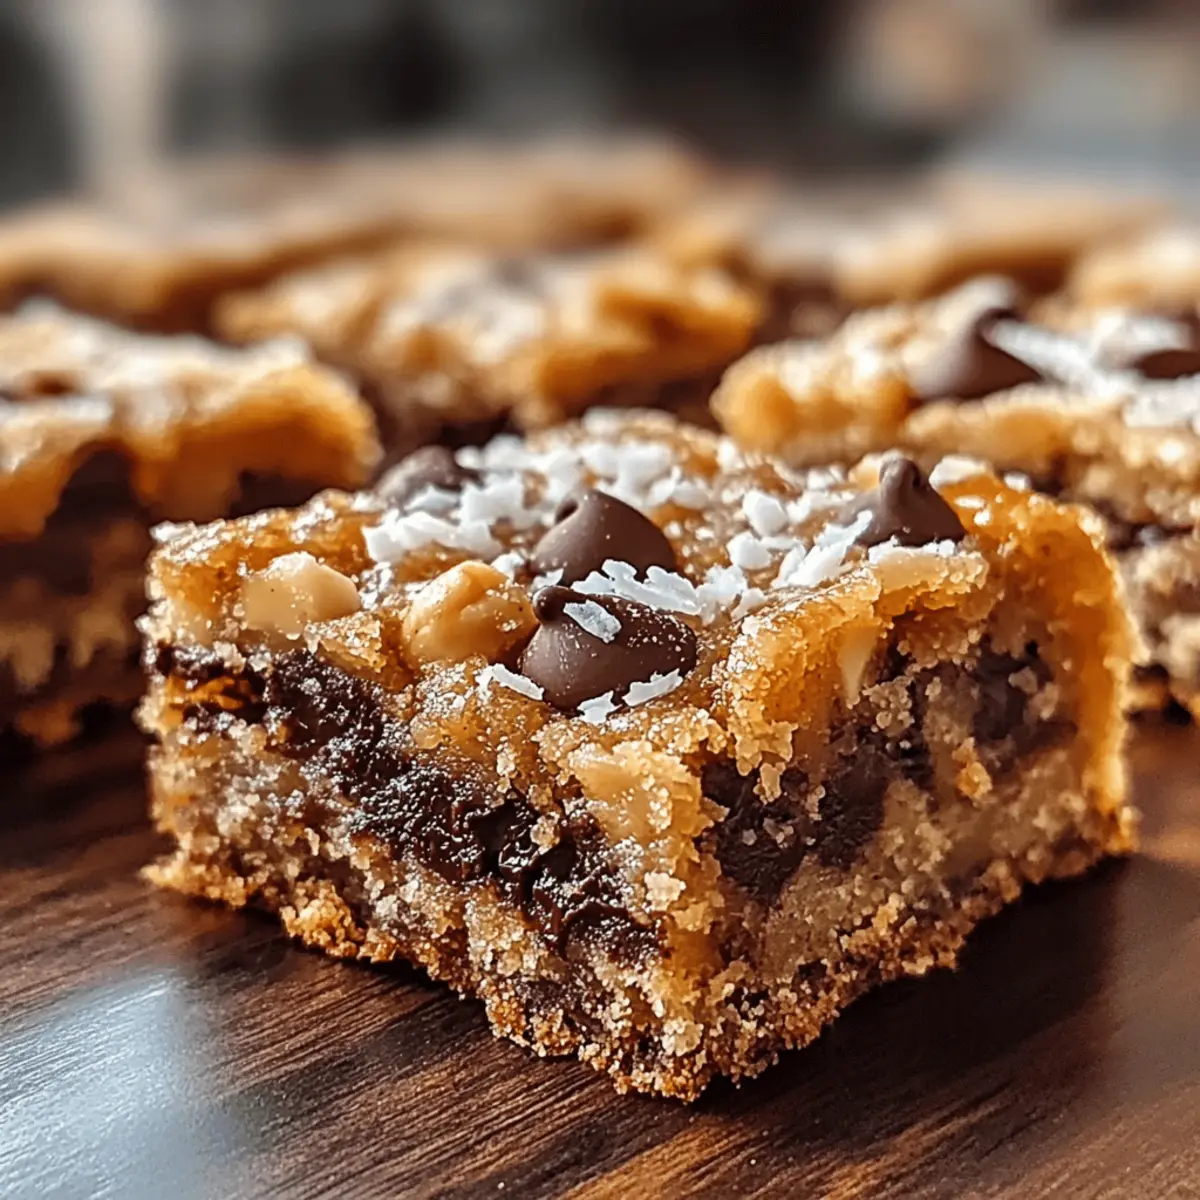
Irresistible Flavors: With layers of chocolate, butterscotch, and rich coconut, every bite is a delicious explosion of taste that pleases everyone—kids and adults alike!
Adaptable for All Diats: Want them gluten-free or vegan? No problem! You can easily modify the ingredients to accommodate various dietary preferences, allowing everyone to indulge.
Perfect for Sharing: Rich and satisfying, these bars are ideal for potlucks, picnics, or any social gathering, ensuring they’ll be a hit wherever you take them.
Sweet Nostalgia: Reminiscent of classic dessert bars, each square is packed with the warm and fuzzy feelings of childhood treats, making them a delightful addition to your dessert repertoire.
So why wait? You’ll be amazed at how such simple ingredients can create magic in your kitchen with these Magic Cookie Bars!
Magic Cookie Bars Ingredients
For the Crust
- Unsalted Butter – Binds the crust and enhances flavor; use salted butter sparingly to avoid overpowering saltiness.
- Graham Cracker Crumbs – Provides structure and a crunchy base; gluten-free options are available for those with dietary restrictions.
For the Filling
- Sweetened Shredded Coconut – Adds chewiness and a hint of tropical flavor; can be omitted for a simpler treat.
- Semi-Sweet Chocolate Chips – Delivers classic chocolate taste, melting beautifully; feel free to substitute with dark or white chocolate for a twist.
- Butterscotch Chips – Introduces rich sweetness; can be exchanged with extra chocolate chips for more chocolatey goodness.
- Sweetened Condensed Milk – Acts as a creamy binding agent, ensuring richness and moisture in every bite; essential for these Magic Cookie Bars.
- Chopped Nuts (walnuts or pecans) – Adds crunch and depth of flavor; optional based on your guests’ dietary preferences.
- Pinch of Salt – Balances sweetness and enhances overall flavor for a prominent taste experience.
Step‑by‑Step Instructions for Magic Cookie Bars
Step 1: Preheat the Oven and Prepare the Pan
Start by preheating your oven to 350°F (175°C). While the oven warms, grab a 9×13 inch baking dish and grease it lightly with butter or non-stick spray. This step ensures your Enchanted Magic Cookie Bars won’t stick, allowing for easy removal when they’re perfectly baked.
Step 2: Make the Crust
In a mixing bowl, combine ½ cup of melted unsalted butter with 1 ½ cups of graham cracker crumbs. Stir until well-mixed, and the crumbs resemble wet sand. Carefully press this mixture evenly into the bottom of the prepared baking dish, creating a solid base. This crust will provide a delicious foundation for your magic cookie bars.
Step 3: Layer the Fillings
Now it’s time to add the fun! Begin by sprinkling 1 cup of sweetened shredded coconut evenly over the crust. Then, layer 1 cup each of semi-sweet chocolate chips and butterscotch chips on top of the coconut. This creates a visually appealing and delicious arrangement that promises delightful flavors in every bite.
Step 4: Pour the Condensed Milk
If you’re using nuts, sprinkle ½ cup of chopped walnuts or pecans over the chocolate layers. Then take 1 can (14 ounces) of sweetened condensed milk and evenly pour it over the entire mixture. This binding agent will bring your Magic Cookie Bars together, creating a rich, moist texture that’s hard to resist.
Step 5: Add Final Touches
Sprinkle a pinch of salt over the layered ingredients to balance the sweetness. This small step enhances flavors significantly, ensuring your Enchanted Magic Cookie Bars taste perfectly harmonious. It’s the secret to elevating the magic in these cookie bars!
Step 6: Bake to Perfection
Place the baking dish in the oven and bake for 25-30 minutes. Keep an eye on the edges—they should turn golden brown, while the center remains slightly soft. Baking them just right is crucial to achieving that chewy texture we love in Magic Cookie Bars.
Step 7: Cool and Cut
Once baked, remove the pan from the oven and let the bars cool completely in the pan on a wire rack. This cooling time is vital for setting the layers. After cooling, use a sharp knife to cut the magic cookie bars into squares or rectangles for sharing.
Step 8: Serve and Enjoy
Serve your freshly made Enchanted Magic Cookie Bars on a platter at room temperature, or warm them slightly for a gooey treat! Whether you enjoy them as dessert or a midday snack, these bars are sure to bring joy and comfort to your table.

Make Ahead Options
These Enchanted Magic Cookie Bars are perfect for busy cooks looking to save time without compromising on flavor! You can prepare the crust and layer the fillings up to 24 hours in advance by making the crust and adding the chocolate, coconut, and nuts, then covering the dish tightly with plastic wrap. When you’re ready to bake, simply pour the sweetened condensed milk on top and bake as directed. To maintain quality, store any unbaked layered bars in the refrigerator to prevent browning and drying out. Once baked, let them cool completely before cutting into squares or rectangles, ensuring they remain just as delicious for your gathering!
Magic Cookie Bars Variations & Substitutions
Ready to add your personal touch to these delicious Magic Cookie Bars? Explore these tempting variations to elevate your treat!
-
Gluten-Free: Substitute almond flour for graham cracker crumbs for a tasty, gluten-free option that doesn’t skimp on flavor.
-
Vegan Delight: Use dairy-free chocolate chips along with coconut oil instead of butter to create a completely vegan-friendly dessert. These substitutions ensure no one misses out on the magic!
-
Nutty Goodness: Add chopped almonds or hazelnuts for added crunch and flavor. The nuttiness complements the sweetness and creates a delightful texture contrast.
-
Fruit Infusion: Toss in a handful of dried cranberries or cherries for a fruity twist that cuts through the sweetness beautifully. This little addition can turn your bars into a delightful snack!
-
Spiced Up: Mix in 1 teaspoon of cinnamon or pumpkin spice to the crust for a warm, comforting flavor that dances on your palate, perfect for fall!
-
Cocoa Kick: Sprinkle cocoa powder into the graham cracker crumb mix for a double chocolate experience. More chocolate? Yes, please!
-
Caramel Drizzle: Drizzle some caramel sauce over the top after baking for an indulgent treat. It adds a luscious sweetness that’ll have everyone coming back for seconds.
-
Crunchy Top: For an extra layer of texture, sprinkle some crushed pretzels on top before baking. This salty-sweet combination creates a surprising burst of flavor with every bite.
Each of these variations allows you to make the recipe truly your own, so don’t hesitate to get creative! And if you’re looking for more inspiration, you might want to check out some fabulous serving suggestions or even storage tips to keep them fresh. Enjoy your baking adventure!
Expert Tips for Magic Cookie Bars
-
Even Distribution: Ensure the sweetened condensed milk is evenly distributed to bind the layers effectively, avoiding dry pockets in your Magic Cookie Bars.
-
Watch the Bake Time: Keep a close eye on your baking time; overbaking will result in a dry texture. Aim for golden-brown edges with a slightly soft center.
-
Use Quality Chocolate: High-quality chocolate chips enhance the overall flavor of the bars. Invest in good semi-sweet or dark chocolate for a richer taste.
-
Cooling is Key: Allow your Magic Cookie Bars to cool completely in the pan before cutting. This helps the layers set and makes it easier to cut neat squares.
-
Adapt with Add-Ons: Feel free to customize your bars! Consider adding crushed pretzels or dried fruit for additional texture and flavor, while keeping them mindful of dietary needs.
How to Store and Freeze Magic Cookie Bars
Room Temperature: Store your Magic Cookie Bars in an airtight container at room temperature for up to 1 week to maintain their delightful texture and flavors.
Fridge: For extended freshness, keep the bars in the fridge where they can last up to 2 weeks. Just remember to let them come to room temperature before serving for the best taste.
Freezer: You can freeze baked Magic Cookie Bars for up to 3 months. Wrap them tightly in plastic wrap and place them in a freezer-safe container—perfect for those moments when you crave a sweet treat!
Reheating: If you prefer your bars warm, gently reheat them in the microwave for about 15-20 seconds—just until they’re warm and gooey, ready to enjoy!
What to Serve with Enchanted Magic Cookie Bars?
Imagine a tabletop graced with treats that complement the rich, delightful layers of your bars, making every bite a shared joy.
-
Vanilla Ice Cream: The creamy, cold contrast pairs perfectly with the warm, gooey texture of the bars, creating a delightful balance of flavors. A scoop on the side adds an indulgent touch that elevates your dessert experience.
-
Fresh Berries: Juicy strawberries, raspberries, or blueberries provide a refreshing pop and acidity that cuts through the sweetness of the bars, keeping each bite light and vibrant. Their natural flavors create a charmingly sweet homemade experience.
-
Chocolate Drizzle: Drizzling a bit more melted chocolate over the bars enhances their chocolatey goodness, creating a luxurious looking treat that’s irresistible. It’s an easy way to elevate the visual appeal.
-
Coffee or Espresso: A warm cup of coffee or a shot of espresso brings out the chocolate notes, offering a cozy complement to the rich sweetness. The bitter notes harmonize beautifully with the dessert’s layers.
-
Toasted Coconut Flakes: Sprinkling some toasted coconut on top adds an extra layer of crunch and a subtle nuttiness that enhances the tropical flair of the bars. This small detail makes a huge flavor difference!
-
Chilled Lemonade: Serve a refreshing glass of lemonade alongside for a zesty contrast to the sweet bars, brightening the entire dessert experience with its crisp and revitalizing splash.

Magic Cookie Bars Recipe FAQs
What type of graham cracker crumbs should I use for the crust?
You can use regular graham cracker crumbs for a classic taste, or choose gluten-free graham crackers if you’re accommodating dietary restrictions. I often recommend checking the packaging to ensure they’re labeled gluten-free for any gluten sensitivities.
Can I make these Magic Cookie Bars ahead of time?
Absolutely! You can make these cookie bars a day or two in advance. Just ensure they’re stored in an airtight container at room temperature. For longer storage, refrigerating them can keep them fresh for up to 2 weeks.
How do I freeze the Magic Cookie Bars?
To freeze your Magic Cookie Bars, first allow them to cool completely. Cut them into squares, and then tightly wrap each piece in plastic wrap. Place the wrapped bars in a freezer-safe container, and they can last up to 3 months. When you’re ready to enjoy them, simply thaw overnight in the refrigerator or let them sit at room temperature for a couple of hours.
What should I do if my bars are too crumbly?
If your Magic Cookie Bars are too crumbly once baked, it could be due to not enough condensed milk binding the ingredients. To fix this in future batches, ensure you’re using the full can of sweetened condensed milk and distribute it evenly over the layers. You might also consider adding a bit more melted butter to help with binding.
Can I omit the coconut or nuts?
Yes! The beauty of these Magic Cookie Bars is their adaptability. You can definitely omit the coconut for a simpler treat, or leave out the nuts if you have allergies or preferences against them. Feel free to customize them to suit your taste!
Magic Cookie Bars: A Sweet Slice of Joy to Share
Ingredients
Equipment
Method
- Preheat the oven to 350°F (175°C) and grease a 9x13 inch baking dish.
- In a mixing bowl, combine ½ cup melted unsalted butter with 1 ½ cups graham cracker crumbs, mixing until well combined. Press this mixture into the bottom of the prepared baking dish.
- Sprinkle 1 cup sweetened shredded coconut evenly over the crust, followed by 1 cup semi-sweet chocolate chips and 1 cup butterscotch chips.
- If using nuts, sprinkle ½ cup chopped walnuts or pecans over the chocolate layers. Pour 1 can of sweetened condensed milk evenly over the entire mixture.
- Sprinkle a pinch of salt over the layers to balance the sweetness.
- Bake for 25-30 minutes or until edges are golden brown and center remains slightly soft.
- Remove from oven and let cool completely in the pan on a wire rack before cutting into squares.
- Serve at room temperature or warm them slightly for a gooey treat.
Leave a Reply