
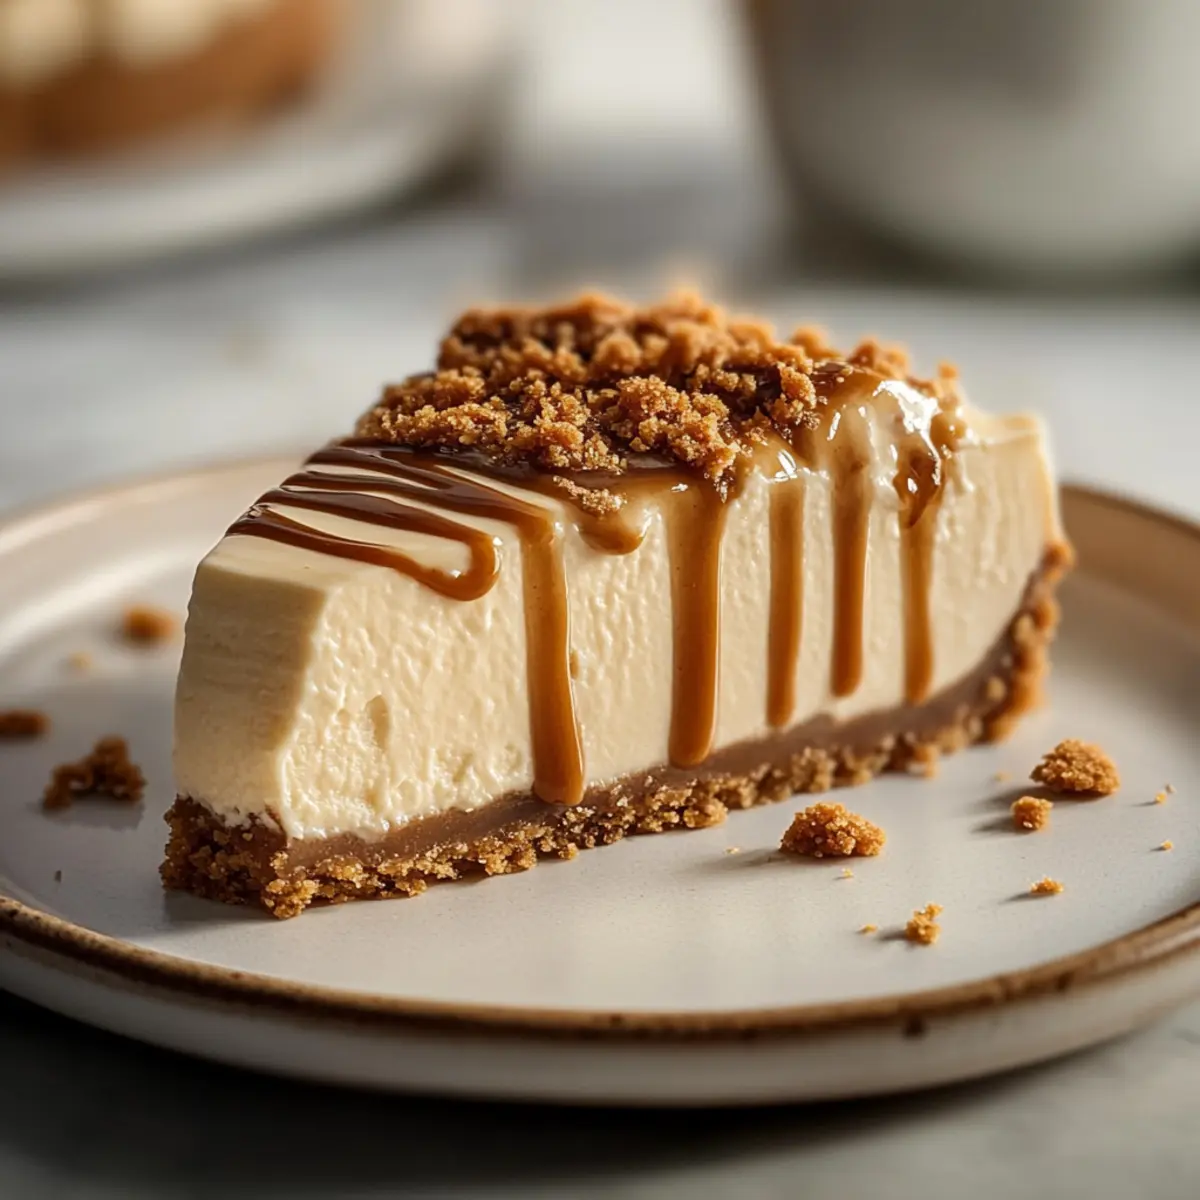
As the warm sun kisses your skin, I can almost hear the sound of laughter drifting through the air. Summer gatherings are all about easy, delightful desserts, and my No Bake Biscoff Cheesecake shines in this delicious role. Combining the tanginess of cream cheese with the sweet caramel notes of Biscoff cookie butter, each bite of this cheesecake transports you to a world of creamy bliss. Not only is this treat incredibly simple to whip up—with zero baking involved—but it also promises to impress at any occasion. It’s a decadent dessert that marries convenience and elegance, making it the perfect choice for those who crave homemade goodness without the fuss. Are you ready to dive into a slice of this blissful cheesecake?
Why Is This Cheesecake So Irresistible?
Simplicity at its finest: This No Bake Biscoff Cheesecake requires no oven whatsoever, making it a hassle-free dessert perfect for any skill level.
Creamy and Dreamy: The union of airy cream cheese and decadent Biscoff cookie butter creates a rich, velvety filling that’s simply divine.
Versatile Treat: Customize with your favorite toppings, like extra crushed cookies or a drizzle of chocolate; it’s easy to make this cheesecake your own.
Time-Saving: With a quick prep time and no baking required, you’ll have more time to enjoy with family and friends, just like with my Homemade Reuben Bake.
Crowd-Pleaser: Whether it’s a picnic or dinner party, this cheesecake is guaranteed to impress and satisfy guests of all ages, much like a classic Baked Brie Puff.
Delight your taste buds with this luxurious dessert that beautifully balances convenience and indulgence!
No Bake Biscoff Cheesecake Ingredients
-
For the Crust
-
Biscoff Cookies – Provides the primary flavor and base for the crust. Substitution: Can use graham crackers or Oreos for a different flavor.
-
Butter – Binds the cookie crumbs together, forming a cohesive crust. Note: Use unsalted butter for best results.
-
For the Filling
-
Cream Cheese – Base of the cheesecake filling, providing richness and creaminess. Note: Use full-fat cream cheese for optimal texture; low-fat versions will not achieve the same outcome.
-
Powdered Sugar – Sweetens the filling and adds to its smooth texture. Adjustment: Can be increased or decreased based on personal taste.
-
Vanilla Extract – Enhances the flavor profile unique to the cheesecake. Substitution: Can use almond extract for a different twist.
-
Heavy Whipping Cream – Adds lightness and airy texture to the cheesecake filling. Tip: Ensure it’s very cold before whipping for best results.
Indulge in this No Bake Biscoff Cheesecake and enjoy the luxurious flavors that come together effortlessly!
Step‑by‑Step Instructions for NO BAKE BISCOFF CHEESECAKE
Step 1: Crush Cookies
Start by placing Biscoff cookies into a food processor, and pulse them until they reach fine crumbs. If you don’t have a food processor, you can also place the cookies in a resealable bag and crush them with a rolling pin until sandy. This step is crucial for creating a smooth base for your No Bake Biscoff Cheesecake.
Step 2: Combine with Butter
Melt unsalted butter in a microwave-safe bowl for about 30 seconds until fully liquid. Pour the melted butter over the crushed cookie crumbs in a large mixing bowl and stir until the mixture is well combined and has a moist, sand-like texture. This will help bind the crust together beautifully.
Step 3: Press into Pan
Take a 9-inch springform pan and firmly press the crumb mixture into the bottom and slightly up the sides, using the back of a measuring cup or your fingers. Aim for an even layer that’s compact so it holds together. This crust will now be the perfect foundation for your No Bake Biscoff Cheesecake filling.
Step 4: Chill Crust
Place the crust in the refrigerator for 15–20 minutes, allowing it to set and firm up. The cooling period ensures that your crust will hold its shape when you add the luscious filling later, providing a delightful crunch with every bite of the cheesecake.
Step 5: Beat Cream Cheese
In a medium mixing bowl, beat softened cream cheese using an electric mixer at medium speed for about 1–2 minutes until smooth and fluffy. This process will create a creamy base for the filling, enhancing the overall texture of your No Bake Biscoff Cheesecake.
Step 6: Add Cookie Butter
Add in the Biscoff cookie butter, along with powdered sugar and vanilla extract. Mix everything together on low speed until silky and completely combined, scraping down the sides of the bowl as needed. The cookie butter introduces a rich flavor that complements the cream cheese perfectly.
Step 7: Whip Cream
In a separate chilled bowl, use an electric mixer to whip cold heavy cream on high speed until stiff peaks form—this should take about 3-5 minutes. Ensure your cream is very cold for best results; this will ensure a light and airy texture for your cheesecake filling.
Step 8: Fold Together
Gently fold the whipped cream into the cream cheese mixture using a spatula. Be careful to maintain the airiness of the whipped cream to keep your filling light and fluffy. This step creates the airy texture that makes your No Bake Biscoff Cheesecake irresistible.
Step 9: Spoon Filling
Pour the delicious filling over the chilled crust, spreading it evenly with a spatula. Make sure to create a smooth, even layer that fills the crust completely to the edges for a beautiful presentation. This will be the rich, creamy centerpiece of your cheesecake.
Step 10: Smooth the Top
Once your filling is spread out evenly, use the spatula to smooth the top surface of the cheesecake gently. Cover the cheesecake with plastic wrap, and then refrigerate for at least 6 hours, or preferably overnight, to allow it to set properly before serving.
Step 11: Prepare Toppings
If you’d like to garnish your cheesecake, microwave any extra Biscoff cookie butter for about 10-15 seconds until it’s easily drizzled. Set aside to cool slightly while your cheesecake firms up in the refrigerator, enhancing the flavor and presentation of your No Bake Biscoff Cheesecake.
Step 12: Garnish and Serve
Remove the cheesecake from the springform pan and drizzle the melted cookie butter on top before slicing. You can also sprinkle additional crushed Biscoff cookies for a stylish finish. Serve chilled, and relish the delightful combination of flavors and textures in each bite of your No Bake Biscoff Cheesecake!
Make Ahead Options
These No Bake Biscoff Cheesecakes are perfect for meal prep enthusiasts! You can easily prepare the crust up to 24 hours in advance by crushing the Biscoff cookies and mixing them with melted butter, then pressing the mixture into the springform pan. Simply cover and refrigerate the crust until you’re ready to add the filling. Additionally, the cheesecake filling can be made up to 3 days ahead; just store it in the fridge after preparing it and before pouring it over the crust. When you’re ready to serve, let the cheesecake chill for at least 6 hours or overnight to set properly. This way, you’ll enjoy a deliciously creamy dessert with minimal last-minute effort!
What to Serve with No Bake Biscoff Cheesecake?
Elevate your dessert experience by pairing this indulgent cheesecake with delightful sides that enhance its luxurious flavors.
-
Creamy Whipped Cream:
A dollop of freshly whipped cream adds a dreamy contrast, balancing the richness of the cheesecake and making each bite extra special. -
Fresh Berries:
Ripe strawberries or blueberries offer a vibrant pop of color and a tartness that beautifully complements the sweet cookie flavors. -
Espresso or Coffee:
A warm cup of espresso or brewed coffee adds a warm, robust note that contrasts the cool cheesecake, creating a perfect after-dinner treat. -
Chocolate Ganache:
Drizzling rich chocolate ganache on top adds depth and decadence, enhancing the overall flavor and taking indulgence to new heights. -
Mint Leaves:
Garnishing with fresh mint leaves adds a refreshing touch that contrasts beautifully with the creamy filling, invigorating your palate. -
Dessert Wine:
A glass of dessert wine, like a Late Harvest Riesling, brings out the sweetness of both the cheesecake and the cookie crust, making it a lovely pairing. -
Spiced Chai Tea:
The warmth of spiced chai tea provides a soothing complement to the cool cheesecake, perfect for cozy evenings with loved ones.
These pairings will transform your No Bake Biscoff Cheesecake into a delightful feast, leaving your guests reminiscing long after the final slice!
How to Store and Freeze No Bake Biscoff Cheesecake
Fridge: Keep your cheesecake covered in the refrigerator for up to 4 days. This will maintain its creamy texture and delicious flavor.
Freezer: For longer storage, this cheesecake freezes well for up to 2 months. Wrap it tightly in plastic wrap and then in foil to prevent freezer burn.
Thawing: When ready to enjoy, simply transfer the cheesecake to the refrigerator overnight to thaw gently and evenly.
Reheating: There’s no need to reheat; serve chilled for the best taste. Drizzle with warmed Biscoff cookie butter just before serving to enhance the flavor of your No Bake Biscoff Cheesecake!
Expert Tips for No Bake Biscoff Cheesecake
-
Softened Cream Cheese: Ensure your cream cheese is at room temperature for at least 2 hours to prevent lumps in the filling.
-
Chill Tools: Chill your mixing bowl and beaters before whipping the cream; this helps achieve stiff peaks and a light texture in your cheesecake.
-
Taste Test: Always sample the filling before adding it to the crust; adjust the sweetness of the powdered sugar to suit your personal preference.
-
No Oven Stress: Embrace the no bake aspect; if you’re short on time, prepare the cheesecake ahead and let it set overnight for best results!
-
Layer with Care: Pour the filling gently to avoid disturbing the crust; a smooth top makes for a polished final presentation of your No Bake Biscoff Cheesecake.
NO BAKE BISCOFF CHEESECAKE Variations
Feel free to get creative with this No Bake Biscoff Cheesecake—there are so many ways to make it your own!
-
Graham Cracker Crust: Substitute half the Biscoff cookies with graham crackers for a classic flavor twist. The honey notes in graham crackers pair beautifully with the cheesecake filling.
-
Oreo Surprise: Incorporate crushed Oreos into the filling for an irresistible cookies-and-cream version. Imagine the delightful surprise when your taste buds discover that chocolatey richness!
-
Nutty Bliss: Swirl in peanut butter to the cheesecake mixture for an added nutty flavor. This creamy swirl takes indulgence to a whole new level, creating harmony with the sweet Biscoff cookie butter.
-
Mini Cheesecakes: Use a muffin tin lined with cupcake liners to create individual cheesecakes for easy serving. These adorable bites are perfect for parties or something sweet after a family dinner.
-
Fruit Topping: Top your cheesecake with fresh strawberries or blueberries for a refreshing contrast. This burst of fruity flavor enhances the overall dessert experience beautifully.
-
Chocolate Drizzle: Add a decadent drizzle of melted chocolate on top of the cheesecake before serving. The chocolate’s rich flavor will elevate the existing sweetness while visually appealing.
-
Dairy-Free Option: Swap the cream cheese and heavy cream for dairy-free alternatives to make a delicious vegan version. Silken tofu blended with a bit of coconut cream creates an equally creamy texture.
-
Spiced Up Bliss: Add a pinch of cinnamon or nutmeg to the filling for an interesting warmth and depth of flavor. These spices complement the caramel notes of Biscoff beautifully.
With these delightful variations, your No Bake Biscoff Cheesecake will keep everyone guessing and coming back for more! Enjoy the journey of flavor exploration, just as you would with my Brown Butter Biscoff or Velvet Oreo Cheesecake.
No Bake Biscoff Cheesecake Recipe FAQs
What type of Biscoff cookies should I use?
I recommend using the classic Biscoff cookies for this recipe, as they provide the quintessential flavor and texture for the crust. If you prefer a different taste, feel free to substitute them with graham crackers or Oreos. Each option brings its unique twist to the dessert!
How should I store leftover No Bake Biscoff Cheesecake?
Absolutely! Store your cheesecake covered in the fridge for up to 4 days. This will keep it fresh and maintain its creamy texture. Just make sure to wrap it well to prevent any fridge odors from affecting the flavor.
Can I freeze No Bake Biscoff Cheesecake?
Yes, you can! Wrap the cheesecake tightly in plastic wrap and then in foil to prevent freezer burn. It can be frozen for up to 2 months. When you’re ready to enjoy, simply transfer it to the fridge overnight to thaw gently. No reheating is needed—serve it chilled!
What should I do if my whipped cream isn’t forming stiff peaks?
Very! Make sure your heavy cream is very cold before whipping, and also chill your mixing bowl and beaters for about 10 minutes in the freezer. Whip the cream on high speed until fluffy, and if you still have trouble, keep beating for another minute or two. For even smoother texture, you can add a tablespoon of powdered sugar while whipping.
Is this cheesecake suitable for people with allergies?
This No Bake Biscoff Cheesecake does contain dairy and gluten, which may not be suitable for everyone. If you have dietary restrictions, you could try using gluten-free Biscoff cookies and dairy-free cream cheese, altering the recipe according to your preferences. Always double-check ingredient labels to avoid allergens!
How can I adjust the sweetness of the filling?
You absolutely can! Taste the cheesecake filling after combining the cream cheese, cookie butter, and powdered sugar. If it’s not sweet enough for your liking, gradually increase the powdered sugar until it reaches your desired sweetness. Remember, a little goes a long way, so start small!
Irresistible No Bake Biscoff Cheesecake for Effortless Indulgence
Ingredients
Equipment
Method
- Crush Biscoff cookies in a food processor until fine crumbs or crush in a resealable bag with a rolling pin.
- Melt unsalted butter in a microwave-safe bowl and combine with crushed cookie crumbs.
- Press the mixture into the bottom and sides of a 9-inch springform pan.
- Chill the crust in the refrigerator for 15-20 minutes.
- Beat softened cream cheese until smooth and fluffy.
- Mix in Biscoff cookie butter, powdered sugar, and vanilla extract.
- Whip cold heavy cream until stiff peaks form.
- Gently fold the whipped cream into the cream cheese mixture.
- Pour the filling over the chilled crust, smoothing it out.
- Cover with plastic wrap and refrigerate for at least 6 hours or overnight.
- Microwave extra Biscoff cookie butter to drizzle on top if desired.
- Garnish with melted cookie butter and crushed Biscoff cookies before serving.
Leave a Reply