
In a world where dessert options can sometimes be overwhelming, the simple elegance of a Fail-Proof Egg Custard resounds like a familiar melody. I love how this recipe transforms just a few everyday ingredients into a soothing treat that’s both easy to whip up and impressive enough to share at gatherings. With a creamy texture that melts in your mouth and the delightful aroma of vanilla wafting through your kitchen, this custard is the ultimate comfort food. Not only is it wonderfully versatile—whether you’re opting for traditional dairy or experimenting with vegan alternatives—but it also makes for a brilliant make-ahead dessert. Trust me, once you try this custard, you’ll be inspired to customize it with your favorite flavors. What unique twists will you add to make it your own?
Why is this Egg Custard a Must-Make?
Simplicity reigns supreme in this recipe, requiring just a few basic ingredients readily available in your pantry. Creamy texture guarantees a melt-in-your-mouth experience, perfect for satisfying your dessert cravings. Versatility is key, as you can easily swap in non-dairy or low-calorie substitutes without sacrificing flavor. Impressive presentation makes it perfect for gatherings, wowing guests at any occasion. Plus, make-ahead friendly, you can prepare it in advance, leaving you stress-free during dinner parties. If you enjoy cozy desserts, you might also like my Baked Eggs with Sautéed Mushrooms or the delightful Sausage Egg Breakfast.
Fail-Proof Egg Custard Ingredients
• Get ready to create a delightful dessert!
For the Custard
- Eggs – Essential for richness and smooth texture; for a vegan option, experiment with commercial egg replacers.
- Milk – Adds delightful creaminess; whole milk provides the richest flavor, or switch to almond or coconut milk for a lighter touch.
- Sugar – Sweetens the custard to perfection; granulated sugar is traditional, but brown sugar adds a deeper flavor, while stevia offers a lower-calorie choice.
- Vanilla Extract – Infuses the custard with classic flavor; you can use vanilla essence as a substitute if necessary.
- Salt – Enhances sweetness and balances the overall flavors.
Optional Garnishes
- Ground Nutmeg – A sprinkle on top adds a cozy aroma and flavor; consider optional whipped cream for extra indulgence.
- Citrus Zest – A hint of lemon or orange zest can brighten the flavors if you prefer a twist in taste.
This Fail-Proof Egg Custard will be a go-to recipe in your home, warming hearts and satisfying sweet cravings effortlessly!
Step-by-Step Instructions for Easy Fail-Proof Egg Custard
Step 1: Preheat the Oven
Begin by preheating your oven to 325°F (165°C). This sets the perfect stage for your Fail-Proof Egg Custard to achieve that silky texture. Ensure your oven is fully heated before moving on to the next steps for consistent results.
Step 2: Whisk the Eggs
In a medium bowl, gently whisk the eggs until they are just combined, avoiding over-whisking to keep them smooth. This step is crucial to achieving a creamy custard. A total of about 30 seconds should suffice, so you can move on quickly to the next step.
Step 3: Warm the Milk
Pour the milk into a saucepan and warm it over medium heat. Stir it occasionally, being careful not to let it reach a boil; small bubbles should form around the edges after about 5–7 minutes. This gradual warming helps create the perfect creamy base for your custard.
Step 4: Temper the Eggs
Slowly whisk the warm milk into the eggs, a little at a time, to temper them. This step is vital as it prevents the eggs from scrambling. Continue whisking gently for about 1–2 minutes until the mixture is well blended and smooth.
Step 5: Add Sweeteners and Flavorings
Stir in the sugar, vanilla extract, and a pinch of salt until everything is dissolved, taking about another minute. The sweet smell of vanilla should fill your kitchen, hinting at the delightful Fail-Proof Egg Custard that is about to come together.
Step 6: Strain the Mixture
To ensure your custard is exceptionally silky, strain the mixture through a fine sieve into a large measuring cup or bowl. This process takes about 2–3 minutes and will help eliminate any lumps, giving you that perfect creamy texture.
Step 7: Prepare Ramekins
Pour the custard mixture into ramekins, filling each one about 3/4 full to allow space for expansion. Place the filled ramekins on a baking tray for ease of transfer to the oven, keeping them together for a more manageable process.
Step 8: Create a Water Bath
Fill a deep baking dish with hot water, then carefully place the ramekins inside, ensuring the water reaches halfway up the sides. This water bath will help the custard cook evenly and gently, yielding a perfectly creamy Fail-Proof Egg Custard.
Step 9: Bake the Custard
Bake the custard in the preheated oven for 35–40 minutes. The custard should be set but still slightly jiggly in the center when done. Keep an eye on it, as baking times may vary slightly based on your oven.
Step 10: Cool and Refrigerate
Once baked, remove the ramekins from the water bath and let them cool for about 10 minutes. Then, refrigerate the ramekins for at least 2 hours to help the custard firm up and develop its wonderful flavors.
Step 11: Garnish and Serve
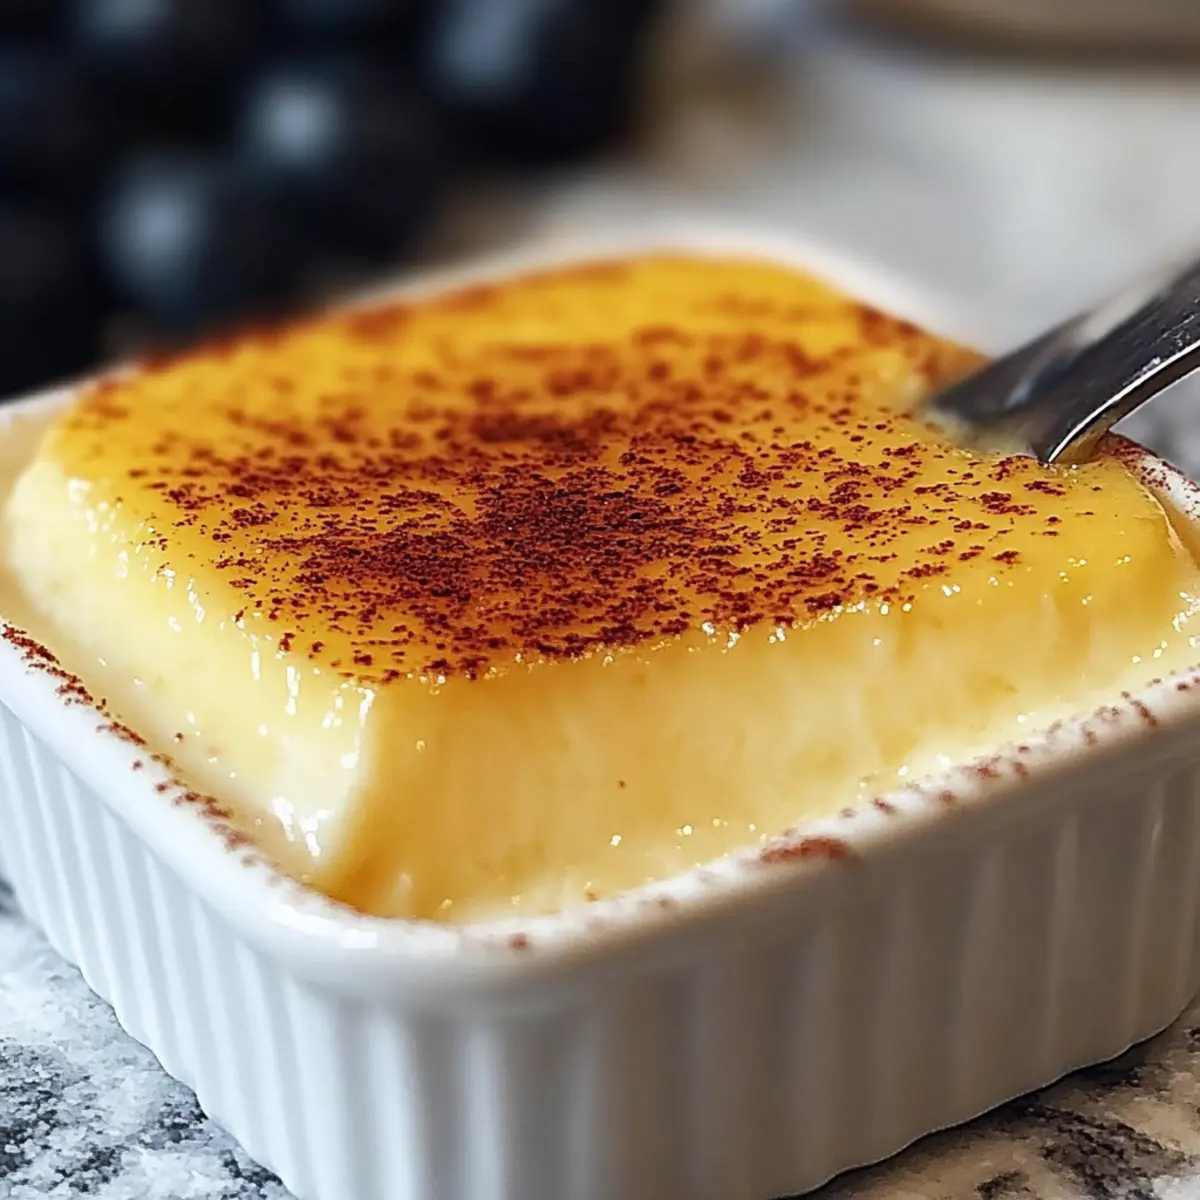
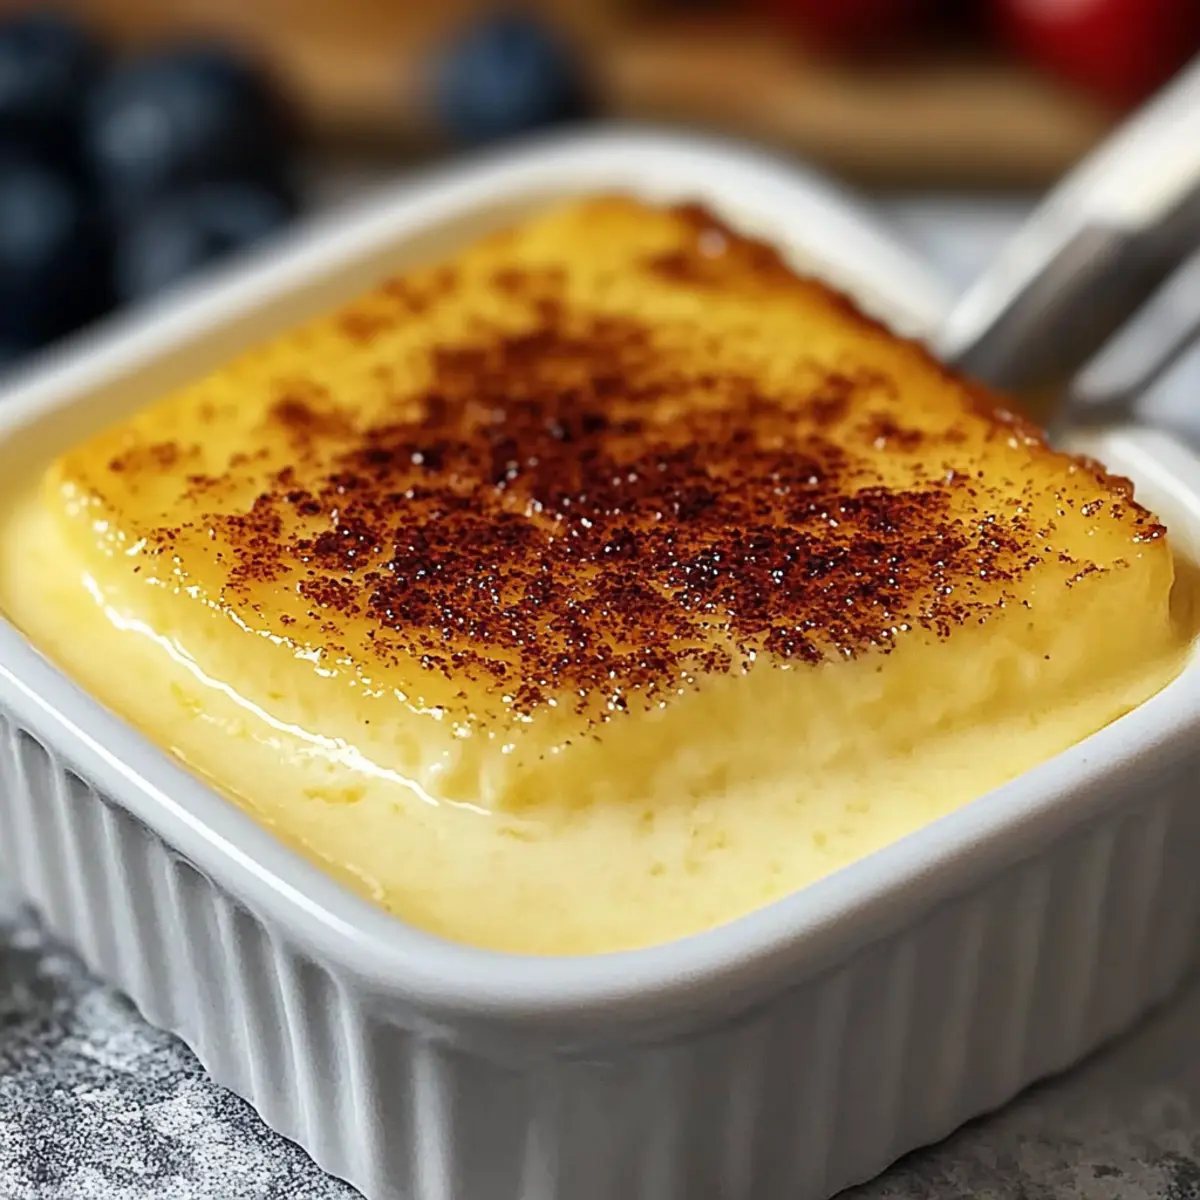
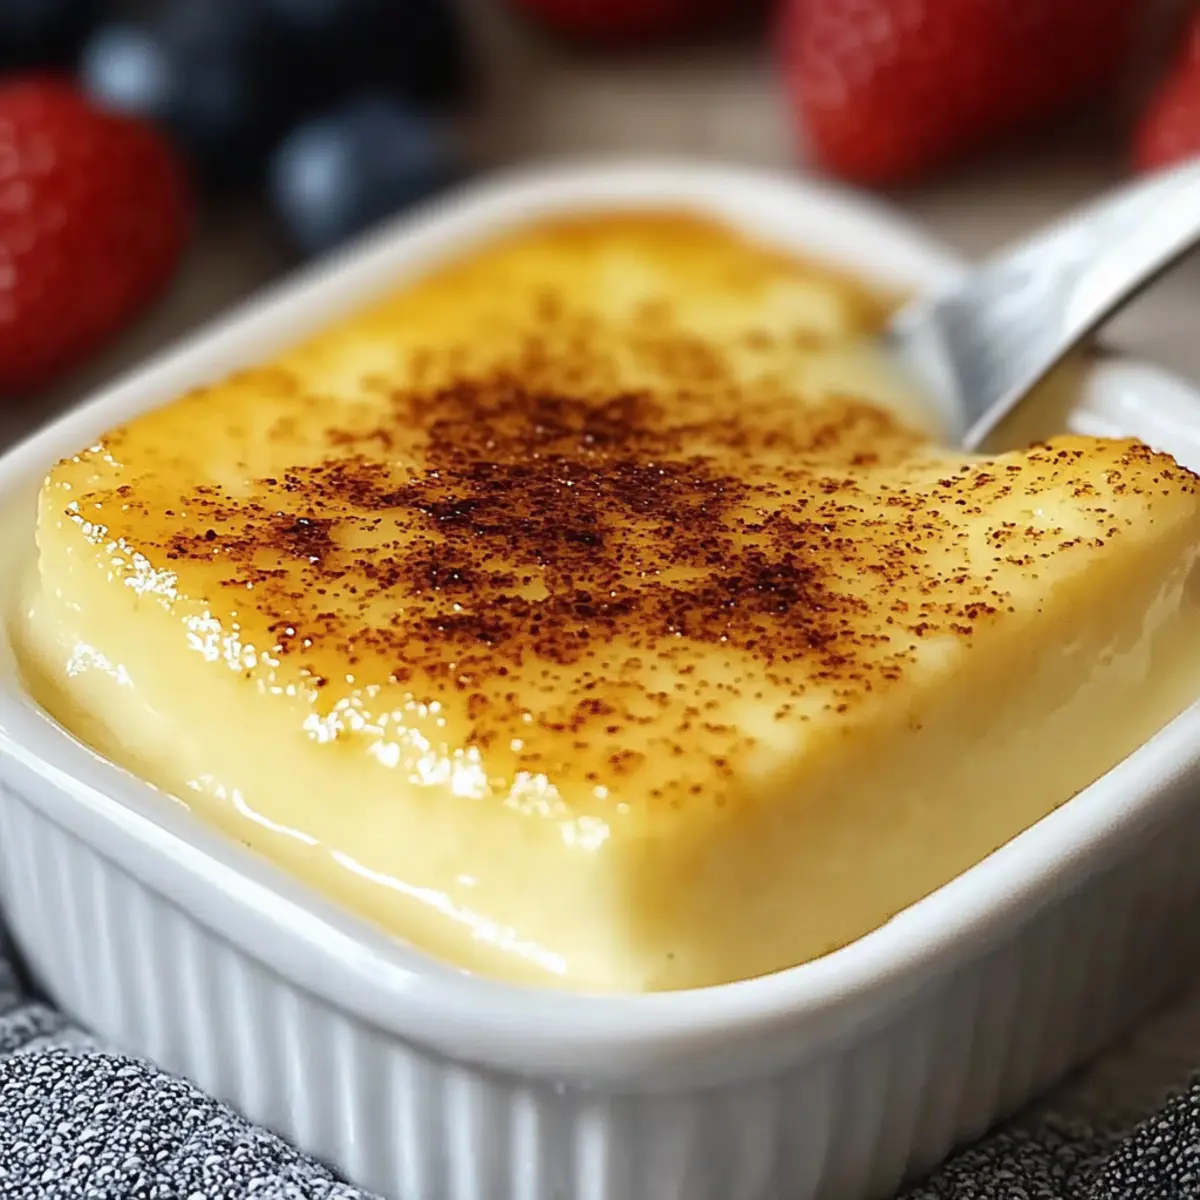
When ready to serve, garnish your Fail-Proof Egg Custard with a sprinkle of ground nutmeg or a dollop of whipped cream. The chilled custard will have a delightful creamy texture, making it a perfect treat for any occasion.
Expert Tips for Fail-Proof Egg Custard
- Tempering Technique: Always temper the eggs slowly with warm milk to prevent scrambling. This step is crucial for a creamy Fail-Proof Egg Custard.
- Keep an Eye on Baking: Monitor the custard closely while it bakes; it should remain slightly jiggly in the center. Overcooking can lead to a grainy texture.
- Strain for Smoothness: Don’t skip the straining step. It ensures that any lumps are removed, providing that silky-smooth custard experience.
- Flavor Infusions: Try infusing the milk with hints of caramel or citrus zest before mixing for an exciting flavor twist.
- Proper Storage: Store any leftovers in an airtight container in the fridge, where they’ll stay fresh for up to 3 days.
Storage Tips for Fail-Proof Egg Custard
- Fridge: Keep your baked Fail-Proof Egg Custard covered in an airtight container in the refrigerator for up to 3 days to maintain its creamy texture and freshness.
- Freezer: For longer storage, you can freeze the custard in individual portions. Wrap tightly in plastic wrap or transfer to freezer-safe containers, and it can last up to 2 months.
- Thawing: To enjoy frozen custard, transfer it to the fridge for several hours or overnight to thaw. Reheat gently in a microwave at low power, stirring occasionally to regain creaminess.
- Serving Tips: Always serve the custard chilled. Prior to serving, give it a gentle stir and garnish with nutmeg or your preferred toppings for the best experience.
Variations & Substitutions for Fail-Proof Egg Custard
Feel free to explore these delightful twists that allow your custard to shine in new ways!
-
Vegan Twist: Use a commercial egg replacer instead of eggs for a dairy-free version. The texture will be different but still enjoyable!
-
Non-Dairy Milk: Swap whole milk for almond milk or coconut milk to lighten the custard. Each option will bring unique flavors to the dish, making it your own.
-
Sweetener Alternatives: Try brown sugar for a richer taste or stevia for a low-calorie option. This simple change can add depth to your custard without compromising its creaminess.
-
Flavor Boost: Add a splash of almond extract to elevate the classic flavor. The nutty aroma will enhance the entire experience and bring something special to your dessert.
-
Citrus Zest: Incorporate lemon or orange zest into your milk warming step for a refreshing twist. The citrus notes will brighten the custard and make your taste buds dance!
-
Spicy Kick: Sense of adventure? Add a pinch of cinnamon or nutmeg to the egg mixture. These warm spices will provide a comforting depth that elevates your custard experience.
-
Chocolate Delight: For chocoholics, mix in a few tablespoons of cocoa powder into the milk before whisking with the eggs. A rich chocolate custard will delight everyone and give a fun twist!
-
Infused Milk: Experiment by steeping the milk with flavorings like chai tea or coffee before adding it to the eggs. This will create a wonderfully aromatic custard that’s perfect for coffee lovers.
Explore these adaptations, and let me know how you customize your custard! If you’re also craving egg-based goodness in other forms, you might enjoy the delicious Baked Eggs with Sautéed Mushrooms or a hearty Sausage Egg Breakfast. Each variation is an opportunity to spark creativity in your kitchen!
What to Serve with Easy and Creamy Egg Custard
With a touch of sweetness and a creamy texture that melts in your mouth, this delightful custard can be the star of your dessert spread.
- Fresh Berries: The tartness of strawberries or blueberries complements the sweetness of the custard, adding a vibrant color and a burst of juiciness.
- Shortbread Cookies: Their buttery crunch pairs perfectly with the silky smoothness of the custard, enhancing your dessert experience in every bite.
- Whipped Cream: A dollop of fluffy whipped cream brings extra creaminess while balancing the rich flavors of the custard, making it undeniably indulgent.
- Chocolate Sauce: Drizzle warm chocolate over the custard for a luxurious touch that contrasts beautifully with its delicate texture.
- Caramel Sauce: Adding a sticky layer of caramel provides a sweet, buttery flavor that elevates the dessert to new heights of decadence.
- Espresso or Coffee: The bold flavors of a warm espresso or coffee create a wonderful pairing, cutting through the creaminess of the egg custard beautifully.
- Vanilla Ice Cream: A scoop of vanilla ice cream offers a delightful temperature and texture contrast, making every spoonful utterly satisfying.
- Citrus Zest Garnish: Lightly sprinkle with lemon or orange zest to enhance flavor, bringing a refreshing brightness that balances the rich custard.
- Nutmeg Sprinkle: A classic pairing, additional nutmeg on top can heighten the warm and inviting aroma, tying the whole dessert together.
Make Ahead Options
These Fail-Proof Egg Custards are perfect for meal prep, allowing you to enjoy a delightful dessert with minimal kitchen fuss! You can prepare the custard mix up to 24 hours in advance. Simply follow the recipe instructions through Step 6—straining the mixture—and then cover the ramekins tightly with plastic wrap to refrigerate. This prevents the custard from absorbing any fridge odors and maintains its silky texture. When you’re ready to serve, simply return the custards to the oven and bake, as directed, after the chilling period. You’ll be rewarded with just as delicious a creamy treat, ready to impress your family or guests with thoughtful meal planning.

Easy and Creamy Egg Custard Recipe FAQs
What kind of eggs should I use for the custard?
Absolutely! Fresh, large eggs are the best choice for this Fail-Proof Egg Custard to ensure richness and smooth texture. If you’re looking for an alternative, you can experiment with commercial egg replacers suitable for vegans or those with allergies. However, keep in mind that the texture may vary slightly with substitutes.
How do I store leftover egg custard?
Very simply! Store your baked Fail-Proof Egg Custard in an airtight container in the refrigerator for up to 3 days. Make sure it’s well-covered to maintain its creamy texture and flavor. If you’d like to keep it longer, freezing is also an option!
Can I freeze the custard?
Yes, you can! To freeze your Fail-Proof Egg Custard, wrap it carefully in plastic wrap or transfer it to freezer-safe containers. It can last up to 2 months in the freezer. When you’re ready to enjoy it, simply thaw it in the refrigerator for several hours or overnight. To restore some of that creamy texture, reheat it gently in the microwave at low power, stirring occasionally.
What if my custard turns grainy?
No worries! If your custard becomes grainy, this often means it has been overcooked or the eggs scrambled during the process. To prevent this, be sure to temper the eggs slowly with warm milk, whisking gently. When baking, remember the custard should be set but slightly jiggly in the center to indicate it’s perfectly cooked. If you find your custard has already set too hard, it might be best to use it as a filling for pastries or as a base for a trifle rather than serving it alone.
Is there a dairy-free version of this recipe?
Definitely! For a vegan or dairy-free version of the Fail-Proof Egg Custard, swap regular milk for almond, coconut, or soy milk, and use a commercial egg replacer. Just be aware that the flavors and texture will differ slightly, but it’s a fantastic way to enjoy a creamy dessert without dairy. Some people love to add a bit of coconut sugar for a unique taste!
Can I add flavors or spices to the custard?
Absolutely! This custard is wonderfully versatile. You can add a variety of flavors, such as vanilla bean, almond extract, or even citrus zests like lemon or orange for a refreshing twist. You can also subtly incorporate spices like cinnamon or nutmeg. Just ensure you don’t overpower the delicate flavor of the custard, and enjoy experimenting!
Easy Fail-Proof Egg Custard for a Silky-Smooth Treat
Ingredients
Equipment
Method
- Preheat your oven to 325°F (165°C).
- In a medium bowl, gently whisk the eggs until just combined.
- Pour the milk into a saucepan and warm it over medium heat.
- Slowly whisk the warm milk into the eggs to temper them.
- Stir in the sugar, vanilla extract, and a pinch of salt until dissolved.
- Strain the mixture through a fine sieve into a measuring cup or bowl.
- Pour the custard mixture into ramekins, filling each about 3/4 full.
- Fill a deep baking dish with hot water and place the ramekins inside.
- Bake the custard for 35–40 minutes until set but slightly jiggly.
- Let the ramekins cool for about 10 minutes, then refrigerate for at least 2 hours.
- Garnish with ground nutmeg or a dollop of whipped cream before serving.
Leave a Reply