
The aroma of warm, savory goodness wafting through the kitchen instantly brings me back to cozy nights with friends around the table. This Spicy Salmon Sushi Bake combines the comfort of a casserole with the delightful flavors of sushi, creating a dish that’s as inviting as it is easy to whip up. Packed with flaked salmon, creamy layers, and a hint of spice, it’s an effortless meal that’s perfect whether you’re hosting a casual gathering or enjoying a chill weeknight dinner. The beauty of this recipe lies not only in its adaptability—where you can easily switch up ingredients like using tamari for a gluten-free option—but also in its low-effort preparation. Curious about how a simple bake can transform into a sushi lover’s dream? Let’s dive in!
Why Is This Recipe a Must-Try?
Delicious Comfort: This Spicy Salmon Sushi Bake is the ultimate comfort food that combines the best aspects of sushi with the warmth of a baked casserole, perfect for any occasion.
Ease of Preparation: With minimal prep and cooking time, you can have this flavorful dish ready in under an hour, making it ideal for busy weeknights or last-minute gatherings.
Versatile Toppings: Switch up the toppings to suit your taste! Try adding pickled vegetables or even go for a twist with Baked Brie Puff for extra creaminess.
Crowd-Pleasing Flavor: Your friends and family will be raving about the delightful blend of savory salmon, creamy cheese, and a touch of spice, ensuring everyone leaves the table satisfied.
Nutrient-Packed Option: Light and nutritious, this dish maintains a balance of protein and healthy fats while being adaptable for various dietary needs. Enjoy guilt-free!
Spicy Salmon Sushi Bake Ingredients
For the Sushi Base
• Sushi Rice – Rinse thoroughly to achieve the ideal fluffy texture, making it the perfect base for your dish.
• Rice Wine Vinegar – Adds a tangy flavor; use apple cider vinegar if needed.
• Sugar – Balances the acidity of vinegar for a rounded taste.
• Salt – Essential for enhancing the flavor of the sushi rice.
• Furikake Seasoning – This traditional Japanese seasoning imparts an umami punch; you can make your own with toasted sesame seeds and crushed nori.
For the Salmon Mixture
• Salmon Fillets – The star of the show, providing rich flavor; canned salmon works in a pinch if you’re short on time.
• Soy Sauce/Tamari – Adds depth and saltiness; opt for tamari for a gluten-free version.
• Cream Cheese – Ensures a creamy texture in the salmon mixture, enhancing its richness.
• Mayonnaise – A creamy component that ties the mixture together; Kewpie mayo offers a unique flavor boost.
• Sriracha Sauce – Adds heat; feel free to swap for sambal oelek for variety.
For the Toppings
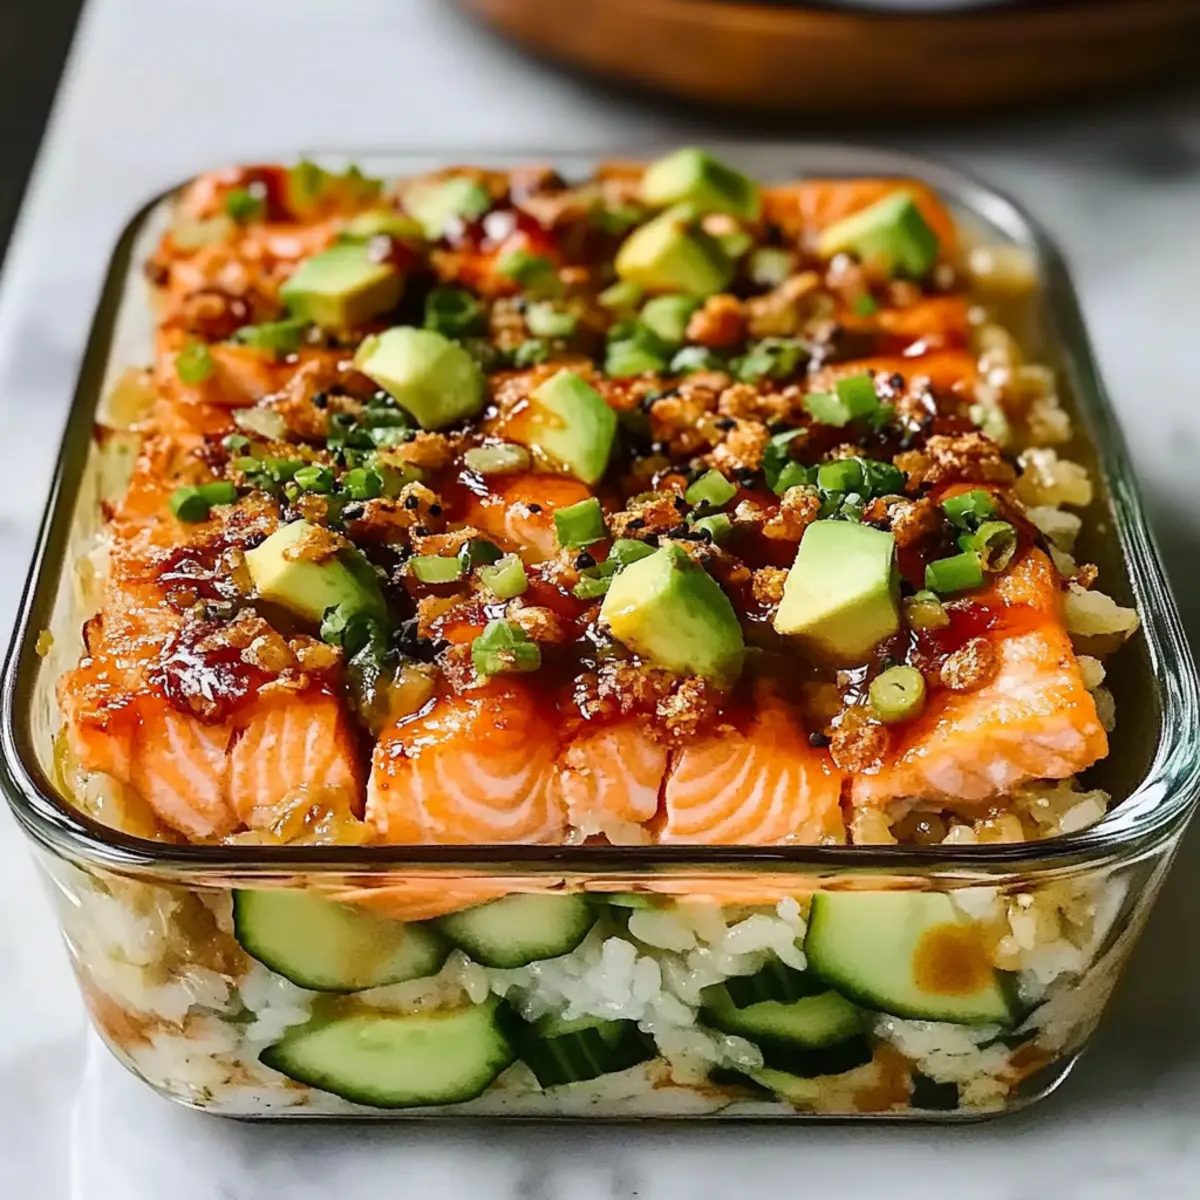
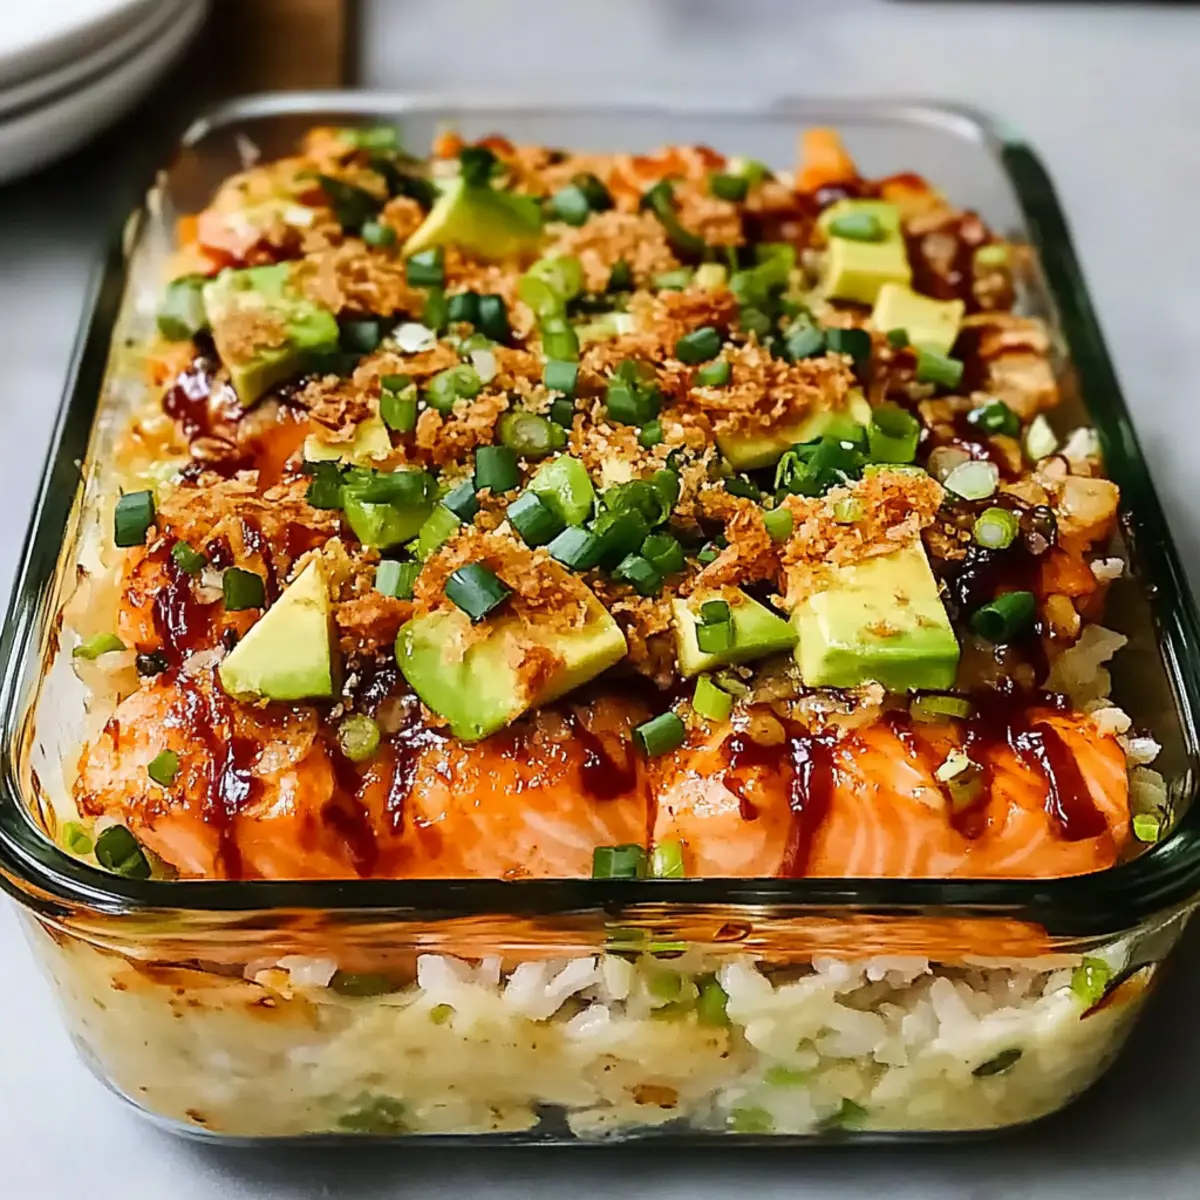
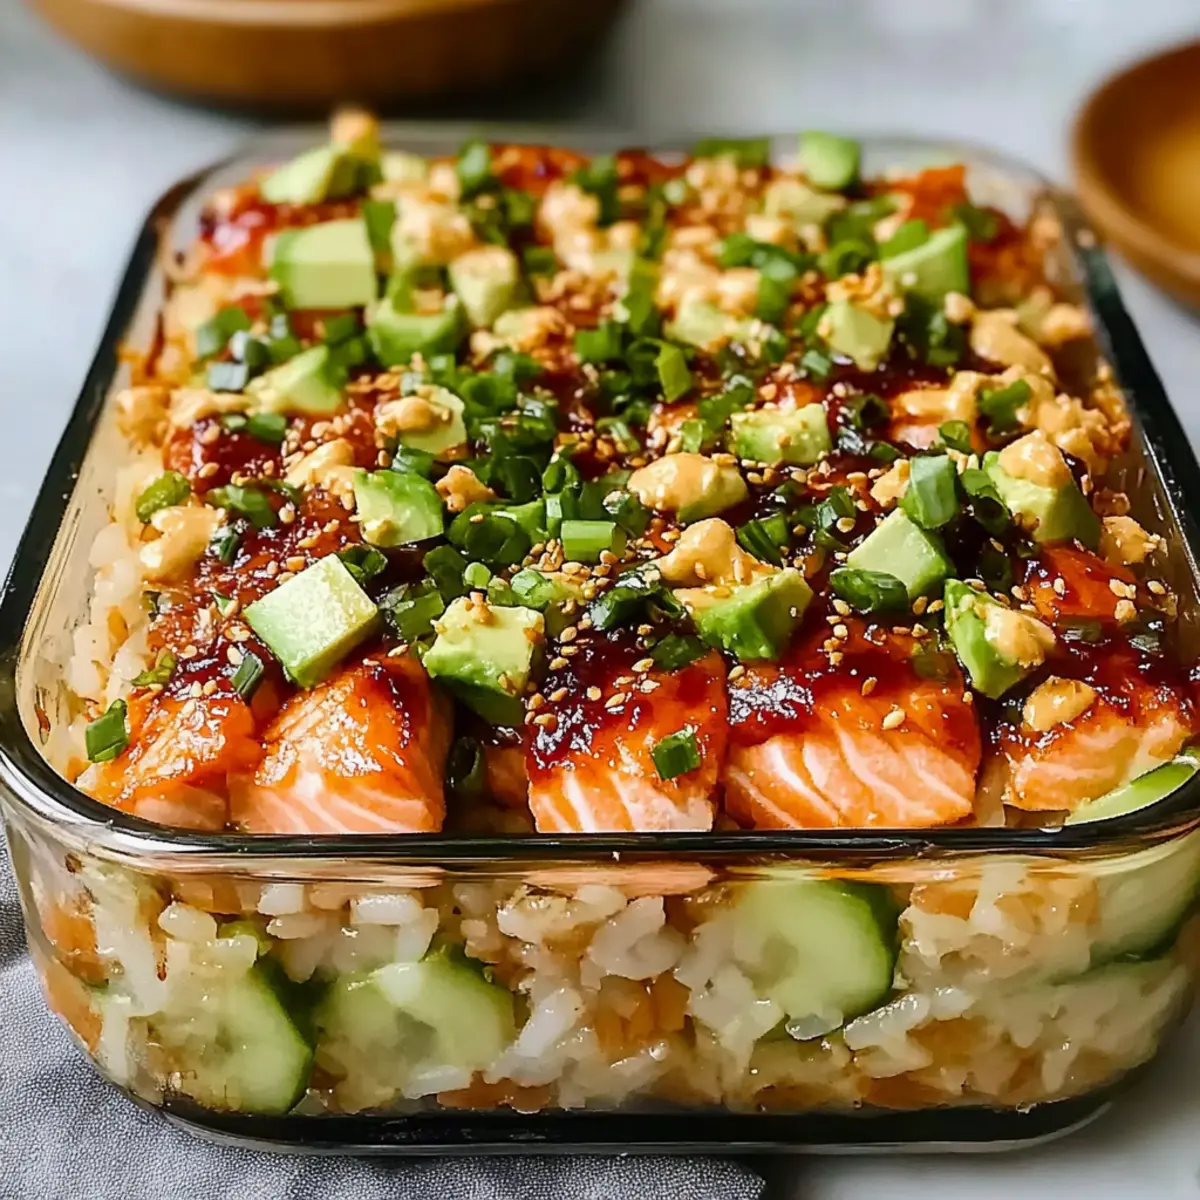
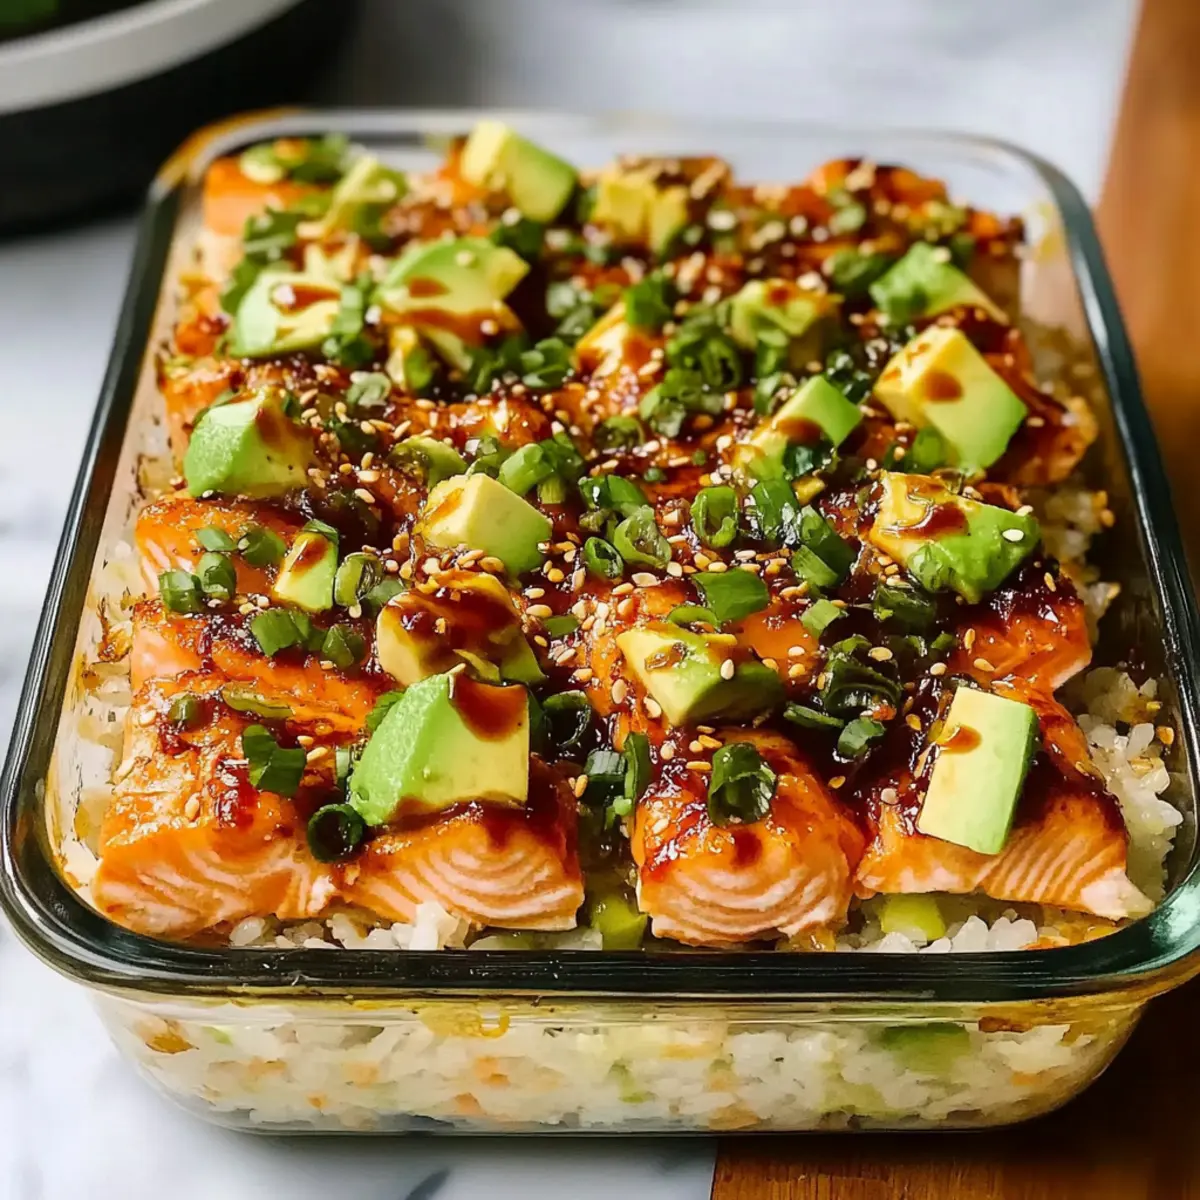
• Avocado – Fresh and creamy topping that enhances visual appeal.
• Cucumber – Provides a lovely crunch and freshness that balances the dish.
• Green Onions – Offers a fresh bite; can be omitted if you prefer a milder flavor.
• Nori Sheets – Serves as a fun way to scoop the dish and elevates the sushi experience.
Let this Spicy Salmon Sushi Bake become your new favorite comfort dish, perfect for a cozy night in or a gathering with friends!
Step‑by‑Step Instructions for Spicy Salmon Sushi Bake
Step 1: Rinse and Cook Sushi Rice
Begin by rinsing the sushi rice under cold water until the water runs clear, ensuring the perfect fluffy texture. In a rice cooker or on the stovetop, cook the rice according to the package instructions, which usually takes about 20 minutes. Once cooked, let the rice sit covered for 10 minutes to steam and settle.
Step 2: Season the Rice
After the rice has rested, transfer it to a large bowl and gently mix in rice wine vinegar, sugar, and salt. Stir well until the sugar dissolves completely and the rice is evenly coated. Let the rice cool to room temperature; this will help it set nicely in the baking dish for your Spicy Salmon Sushi Bake.
Step 3: Prepare the Salmon
While the rice cools, preheat your air fryer to 400°F (or your oven to 425°F). Season the salmon fillets with soy sauce or tamari for a gluten-free option. Cook the salmon in the air fryer for about 10 minutes or in the oven for 15-20 minutes, until it flakes easily with a fork and is fully cooked through.
Step 4: Flake the Salmon
Once fully cooked, remove the salmon from the heat and let it cool slightly. Using a fork, flake the salmon into a large mixing bowl. This will allow you to easily combine it with the other ingredients for a creamy salmon mixture in your Spicy Salmon Sushi Bake.
Step 5: Mix the Salmon Ingredients
To the flaked salmon, add cream cheese, mayonnaise, and sriracha sauce. Using a spatula or fork, mix until everything is well combined and creamy. This rich mixture gives your Spicy Salmon Sushi Bake its delightful texture and flavor, making it comforting and irresistible.
Step 6: Prepare the Baking Dish
Next, prepare your baking dish (a 9×9-inch dish works perfectly) by lining it with parchment paper or spraying it with cooking spray. This will prevent sticking and make cleanup easier. Press the seasoned sushi rice evenly into the bottom of the prepared dish, creating a solid base for your bake.
Step 7: Add Furikake
Once the rice is pressed down, generously sprinkle furikake seasoning over the rice layer. This traditional Japanese seasoning adds umami flavors that perfectly complement the salmon mixture. Gently press the seasoning into the rice to help it stick, ensuring a flavorful bite in every scoop of your Spicy Salmon Sushi Bake.
Step 8: Layer the Salmon Mixture
Spread the creamy salmon mixture evenly over the rice, ensuring it covers every inch. This layering will create a luscious, savory topping that bonds beautifully with the seasoned sushi rice. The combination of flavors in this Spicy Salmon Sushi Bake will leave everyone craving more.
Step 9: Bake the Dish
Place the baking dish in your preheated oven and bake for about 15 minutes. Watch closely as it heats through; you’ll want to see the edges bubbling and the top slightly golden. This baking step melds the flavors together and gives a delicious finish to your Spicy Salmon Sushi Bake.
Step 10: Prepare Fresh Toppings
While the bake is cooling, slice the avocado, cucumber, and green onions. These fresh toppings will add vibrant colors and textures to your dish. Once your Spicy Salmon Sushi Bake has cooled for about 5-10 minutes, layer these fresh ingredients on top just before serving.
Step 11: Serve with Nori Sheets
Lastly, serve your warm Spicy Salmon Sushi Bake with sheets of nori for scooping. This adds a delightful sushi-like experience that elevates every bite. Your family and friends will love this fun twist on sushi, perfect for a cozy gathering or weeknight dinner together!
Variations & Substitutions for Spicy Salmon Sushi Bake
Feel free to get creative with your Spicy Salmon Sushi Bake, making it truly your own with these tasty alternatives!
-
Quick Salmon: Swap cooked salmon for canned salmon for an even faster prep. This makes it a great option for weeknight dinners when time is tight!
-
Alternative Protein: Try using cooked shrimp or crab instead of salmon for a different seafood experience. Both options add a delightful twist and pair beautifully with the creamy layers.
-
Cream Cheese Substitute: Use Greek yogurt instead of cream cheese for a lighter version. It will still deliver creaminess while adding a protein boost.
-
Vegan Option: Replace salmon with marinated tofu or tempeh, and use vegan cream cheese to create a plant-based delight. Your guests won’t even miss the fish in this comforting dish!
-
Spice It Up: Adjust the heat level by adding diced jalapeños or a sprinkle of crushed red pepper on top. Perfect for those who love a spicy kick to their meals!
-
Flavorful Toppings: Experiment with topping options like pickled vegetables or spicy edamame to add texture and unique flavors. Try using Baked Crunchy Hot chicken pieces for a new twist!
-
Extra Crunch: Add a layer of crispy panko breadcrumbs on top before baking for a satisfying crunch. This texture contrast enhances the overall enjoyment of your Spicy Salmon Sushi Bake.
-
Different Sauces: Switch the sriracha with your favorite hot sauce or even a sweet chili sauce for a different flavor profile. It’s all about what you love!
No matter what variations you choose, your Spicy Salmon Sushi Bake will shine with warmth and satisfaction that everyone will enjoy!
How to Store and Freeze Spicy Salmon Sushi Bake
Fridge: Store leftovers in an airtight container for up to 2 days. Reheat in the microwave or oven to maintain texture and flavor.
Freezer: For longer storage, freeze portions of the Spicy Salmon Sushi Bake for up to 1 month. Wrap tightly in plastic wrap and then foil for best results.
Thawing: To enjoy, transfer the frozen bake to the fridge overnight to thaw. Reheat in the oven until heated through.
Serving Fresh: Avoid adding toppings like avocado and cucumber until serving time to maintain their freshness and crunch.
Expert Tips for Spicy Salmon Sushi Bake
• Rinse Carefully: Thoroughly rinse the sushi rice until the water runs clear to avoid mushiness and achieve the perfect texture for your Spicy Salmon Sushi Bake.
• Damp Hands: Use damp hands when pressing the rice into the baking dish to prevent it from sticking to your fingers, ensuring a smooth base.
• Prepping Ahead: You can prep the salmon and rice separately ahead of time. Store them in the refrigerator until you’re ready to bake for easy weeknight meals.
• Fresh Toppings: Always add fresh toppings like avocado and cucumber just before serving. This keeps them vibrant and crunchy, enhancing the overall experience.
• Monitor Baking Time: Keep an eye on the bake while it’s in the oven. You’ll want it to be golden and bubbling, which adds a delightful finish to your Spicy Salmon Sushi Bake.
What to Serve with Spicy Salmon Sushi Bake?
The perfect meal is about harmony, and pairing this delightful dish with the right sides enhances the dining experience.
-
Miso Soup: A warm, savory counterpart that complements the umami flavors while bringing a comforting warmth to your meal.
-
Steamed Edamame: Lightly salted, these provide a satisfying crunch and boost protein, making it a great appetizer or side dish.
-
Crisp Green Salad: For a refreshing contrast, a salad with a light vinaigrette adds brightness and a crunchy texture to balance the creamy bake.
-
Pickled Vegetables: Bring a zing and vibrant color to your plate with tangy pickles that enhance the flavor profile of the sushi bake.
-
Sake or Green Tea: Pairing your meal with a chilled glass of sake or refreshing green tea enhances the flavors and adds a touch of elegance.
-
Coconut Sticky Rice: This sweet side beautifully balances the savory notes of the sushi bake, offering a unique and delightful twist to your dining experience.
-
Fruit Chaat: A colorful mix of fresh fruits can cleanse the palate and provide a light, sweet finish to your savory meal.
By thoughtfully selecting these complementary sides, you can elevate your Spicy Salmon Sushi Bake into a truly memorable feast!
Make Ahead Options
These Spicy Salmon Sushi Bake ingredients are perfect for busy meal prep, allowing you to enjoy this comforting dish without the last-minute rush! You can prepare the sushi rice and salmon mixture up to 24 hours ahead of time. Simply cook and season the sushi rice, then store it in an airtight container in the refrigerator. For the salmon, flake and mix it with cream cheese, mayonnaise, and sriracha, and keep it separate until you’re ready to bake. This not only preserves the freshness but also ensures the toppings remain crunchy when served. When ready to enjoy, just layer the ingredients and bake as instructed for restaurant-quality results with minimal effort!
Spicy Salmon Sushi Bake Recipe FAQs
How should I choose my salmon fillets for the Spicy Salmon Sushi Bake?
Absolutely! When selecting salmon fillets, look for bright, vibrant color and firm texture. Fresh salmon should have a mild smell, not a strong fishy odor. If using frozen, ensure it’s properly thawed and looks moist, not dry or freezer burned.
What is the best way to store leftovers of Spicy Salmon Sushi Bake?
Very easy! Store your leftovers in an airtight container in the refrigerator for up to 2 days. Reheat in the microwave for quick meals or in the oven at a low temperature to keep the textures intact.
Can I freeze the Spicy Salmon Sushi Bake?
Yes, you can! For longer storage, wrap individual portions tightly in plastic wrap followed by aluminum foil, and freeze for up to 1 month. When you’re ready to enjoy it, thaw in the refrigerator overnight and then reheat in the oven until heated through.
What if my sushi rice turns out mushy?
If you find your sushi rice mushy, it’s likely due to not rinsing it enough. Make sure to rinse your rice under cold water until the water runs clear. If you happen to make mushy rice, you can spread it on a baking sheet to cool and dry out a bit before using.
Are there any dietary considerations with this Spicy Salmon Sushi Bake?
Certainly! This dish can easily accommodate gluten-free diets by simply using tamari instead of soy sauce. For those with seafood allergies, you can substitute the salmon with cooked shrimp or even a plant-based option, depending on your preference. Always check with guests for specific allergies before serving!
How can I ensure the toppings for the Spicy Salmon Sushi Bake stay fresh?
To keep your toppings crisp and vibrant, add fresh ingredients like avocado and cucumber only just before serving. This way, they’ll retain their freshness and provide a delightful contrast to the warm, creamy flavors of the bake!
Spicy Salmon Sushi Bake
Ingredients
Equipment
Method
- Rinse sushi rice under cold water until water runs clear. Cook according to package instructions, let sit covered for 10 minutes.
- Transfer rice to a bowl and mix in rice wine vinegar, sugar, and salt. Let it cool to room temperature.
- Preheat air fryer to 400°F (or oven to 425°F). Season and cook salmon until flakes easily.
- Cool salmon slightly, then flake it into a bowl.
- Mix in cream cheese, mayonnaise, and sriracha until creamy.
- Prepare baking dish, press sushi rice into bottom evenly.
- Sprinkle furikake seasoning over rice, gently press into the rice.
- Spread salmon mixture over rice evenly.
- Bake in oven for 15 minutes until edges are bubbling and top is golden.
- Slice avocado, cucumber, and green onions for topping.
- Serve warm with nori sheets for scooping.
Leave a Reply