
As I stood in my kitchen, the sweet and nutty aroma of freshly made peanut sauce wafted up like a warm hug on a chilly evening. With just 30 minutes to whip up dinner, I turned to my trusty Thai Peanut Chicken Wraps. This quick meal is not only a family-friendly favorite, but its customizable nature makes it a perfect canvas for leftover veggies or whatever protein you have on hand. With tender chicken enveloped in a creamy, savory sauce paired with crunchy coleslaw, these wraps effortlessly elevate any weeknight meal. Ready to impress your loved ones with a dish that combines exotic flavors without taking hours? Let’s dive into this delicious journey!
Why are Thai Peanut Chicken Wraps so special?
Quick and Easy: Whip up these delightful wraps in just 30 minutes, making weeknight dinners a breeze.
Customizable Ingredients: Use up leftover veggies or protein, creating a dish tailored to your family’s tastes.
Flavor Explosion: With rich peanut sauce and crunchy coleslaw, each bite delivers a satisfying mix of textures and tastes.
Family-Friendly: Great for picky eaters, these wraps are a surefire way to please everyone at the table.
Healthy Option: Packed with protein and fresh vegetables, they offer a nutritious alternative to fast food. Check out my Lemon Garlic Chicken for another quick meal idea that your family will love!
Thai Peanut Chicken Wraps Ingredients
For the Peanut Dressing
- Peanut Butter – Use natural, creamy peanut butter for the best texture and rich flavor.
- Low Sodium Soy Sauce – Opt for tamari for a gluten-free option while adding umami.
- Brown Sugar or Honey – Sweeten the dressing; maple syrup works well for a vegan alternative.
- Rice Wine Vinegar – Adds acidity; white vinegar or apple cider vinegar can be good substitutes.
- Garlic (minced) – Enhances flavor; fresh garlic gives the best result, but garlic powder can be used.
- Fresh Ginger (minced) – Adds warmth; ground ginger makes for a quick substitute if fresh is unavailable.
- Sriracha Sauce – Adjust to taste for the desired spice level in your peanut sauce.
For the Filling
- Cooked Chicken Breast (chopped) – Serve as the main protein; rotisserie chicken can save preparation time.
- Coleslaw Mix – Provides crunch and freshness; a mix of shredded cabbage and carrots works well as an alternative.
- Grated Carrots – Adds sweetness and color; can be omitted if not preferred.
- Fresh Cilantro (chopped) – Brings brightness; substitute with green onions for a different flavor profile.
- Roasted Peanuts (chopped) – Offers texture and enhances the nutty taste; almonds can be a substitute if allergic to peanuts.
For the Wraps
- Flour Tortillas – Serves as the wrap; for a low-carb option, use large lettuce leaves.
These Thai Peanut Chicken Wraps are not only delicious; they offer a customizable experience that lets you use what you have on hand!
Step‑by‑Step Instructions for Thai Peanut Chicken Wraps
Step 1: Make the Peanut Dressing
In a medium bowl, whisk together creamy peanut butter, low sodium soy sauce, brown sugar (or honey), rice wine vinegar, minced garlic, and fresh ginger until smooth. For a thinner consistency, add a splash of water gradually while mixing. This rich and savory dressing is essential for your Thai Peanut Chicken Wraps, so achieve a velvety texture before moving on.
Step 2: Prepare the Filling
In a large mixing bowl, combine your chopped cooked chicken breast, coleslaw mix, grated carrots, and fresh cilantro. Toss everything together gently until it’s well mixed, creating a vibrant filling. This is where flavors begin to shine, so be sure to incorporate all the ingredients evenly for your delicious Thai Peanut Chicken Wraps.
Step 3: Dress the Filling
Pour the prepared peanut dressing over the chicken and vegetable mixture. Toss it well with clean hands or tongs until everything is evenly coated in the dressing. Let the mixture sit for 3-5 minutes to allow the flavors to meld beautifully together, making every bite of your Thai Peanut Chicken Wraps a flavor-packed experience.
Step 4: Warm Tortillas
Place a stack of flour tortillas on a microwave-safe plate and cover them with a damp paper towel. Microwave them on high for about 30 seconds, or until they are warm and pliable. Warming the tortillas is key to ensuring that your Thai Peanut Chicken Wraps fold easily without cracking.
Step 5: Assemble the Wraps
On each warm tortilla, add a generous scoop of the chicken filling in the center. Fold the sides inward, then roll the tortilla tightly from the bottom to secure the filling. Repeat the process for the remaining tortillas. This assembly creates a hearty wrap that holds together well, perfect for serving your family.
Step 6: Serve with Flair
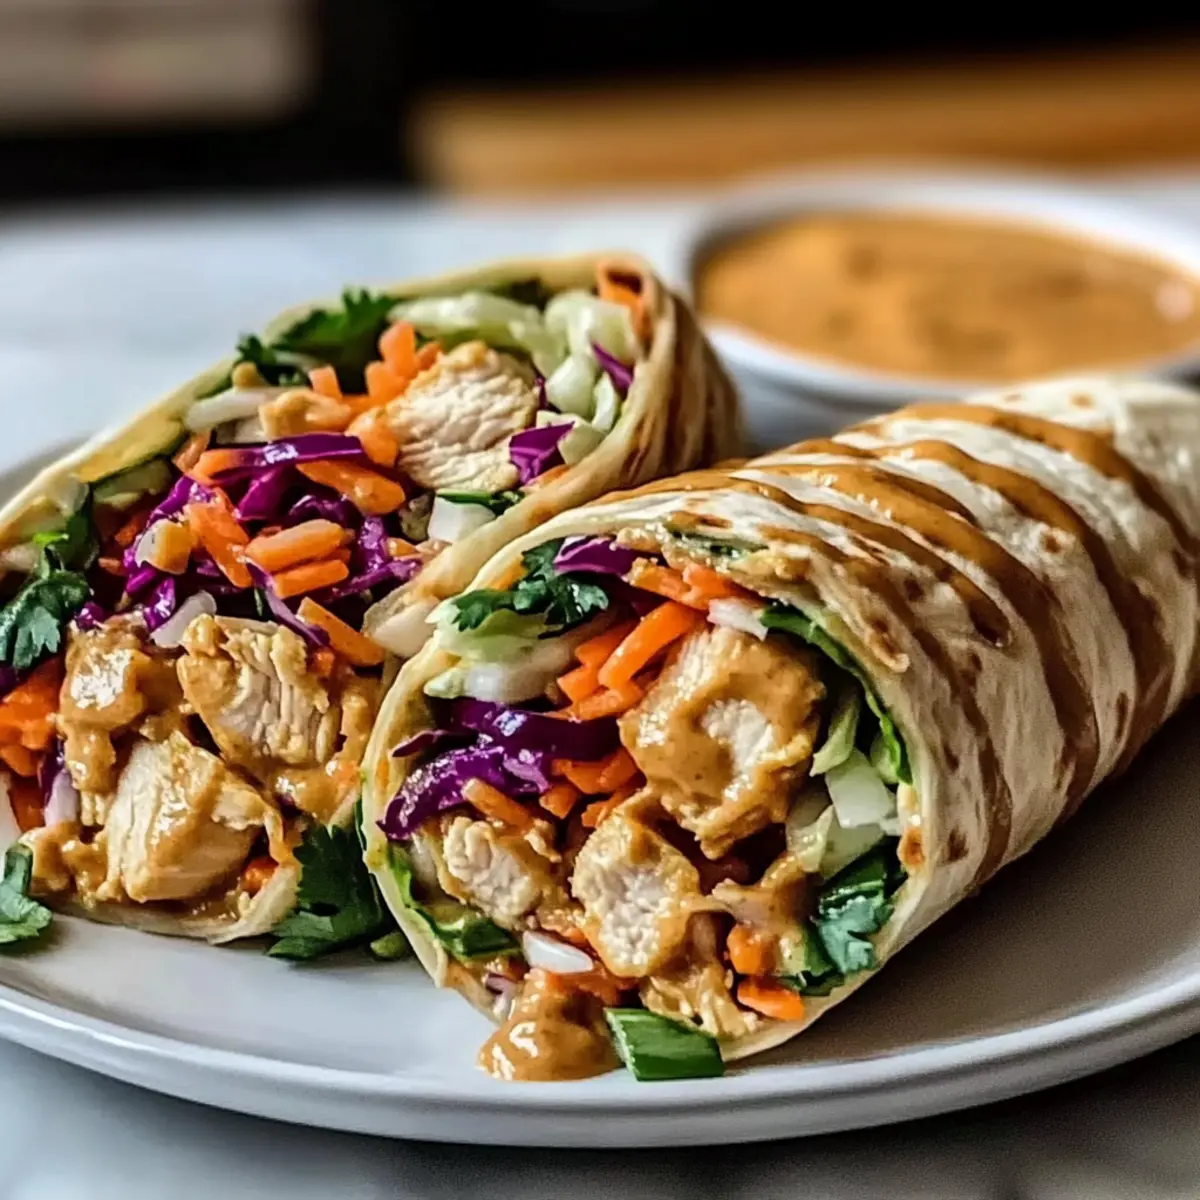
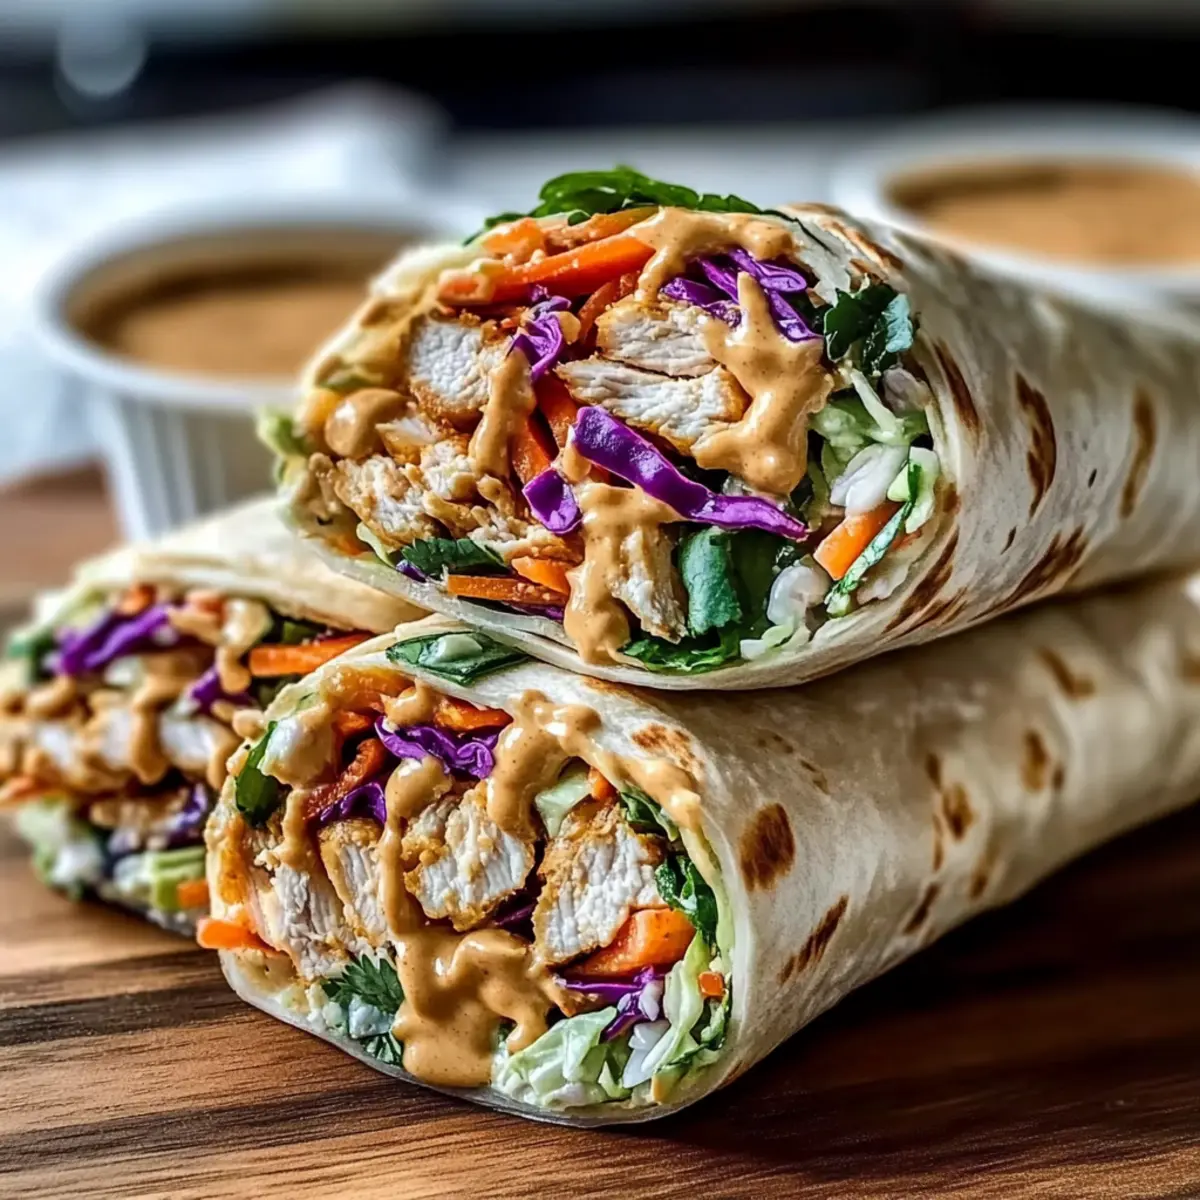
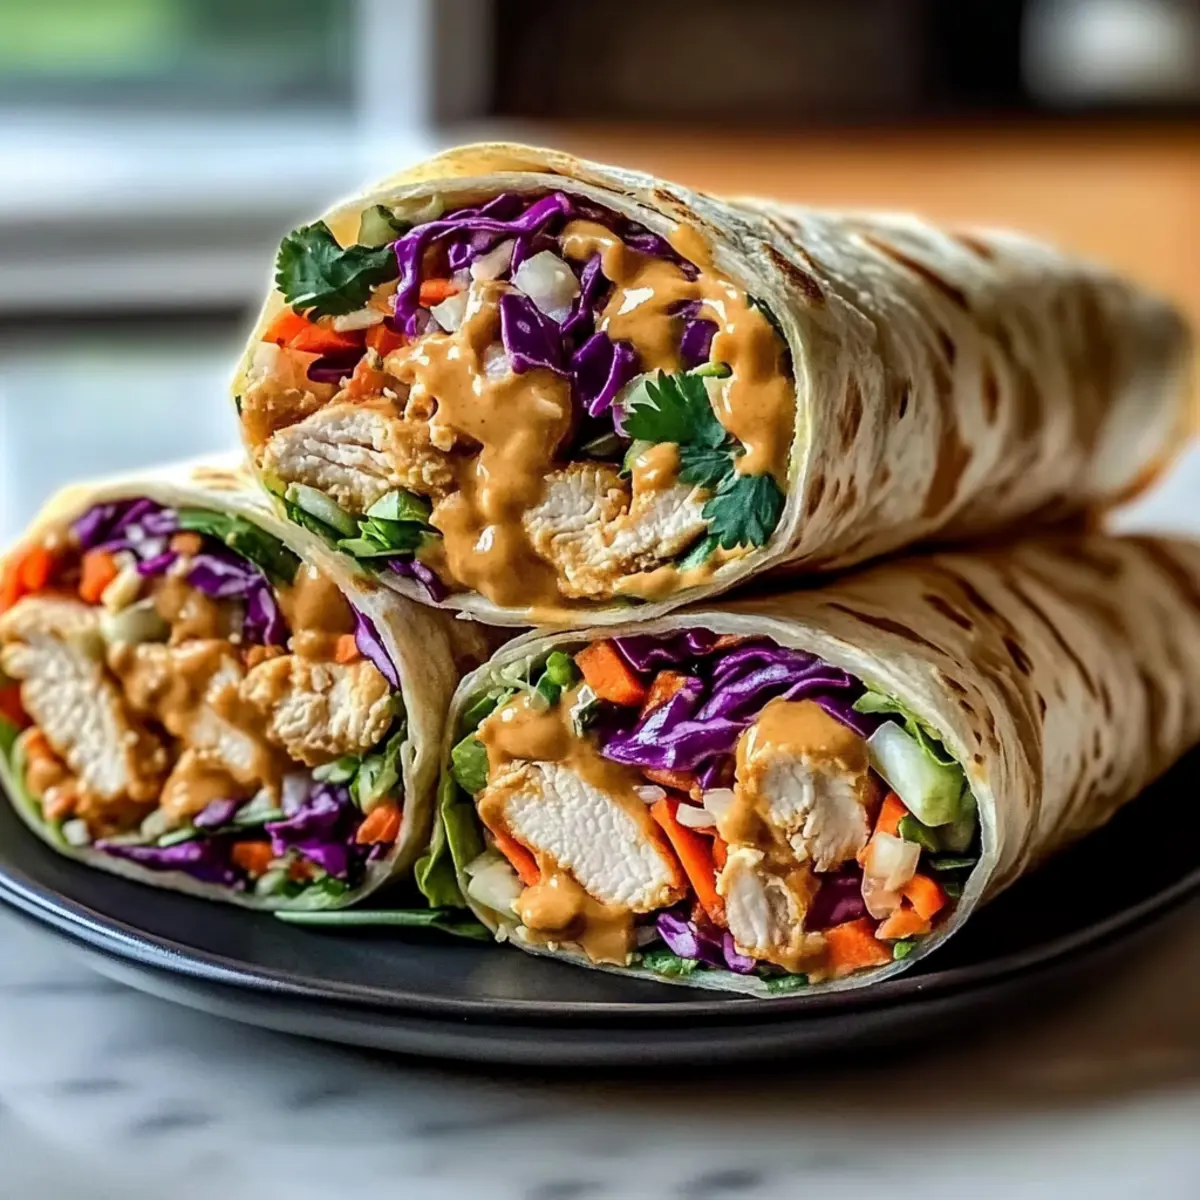
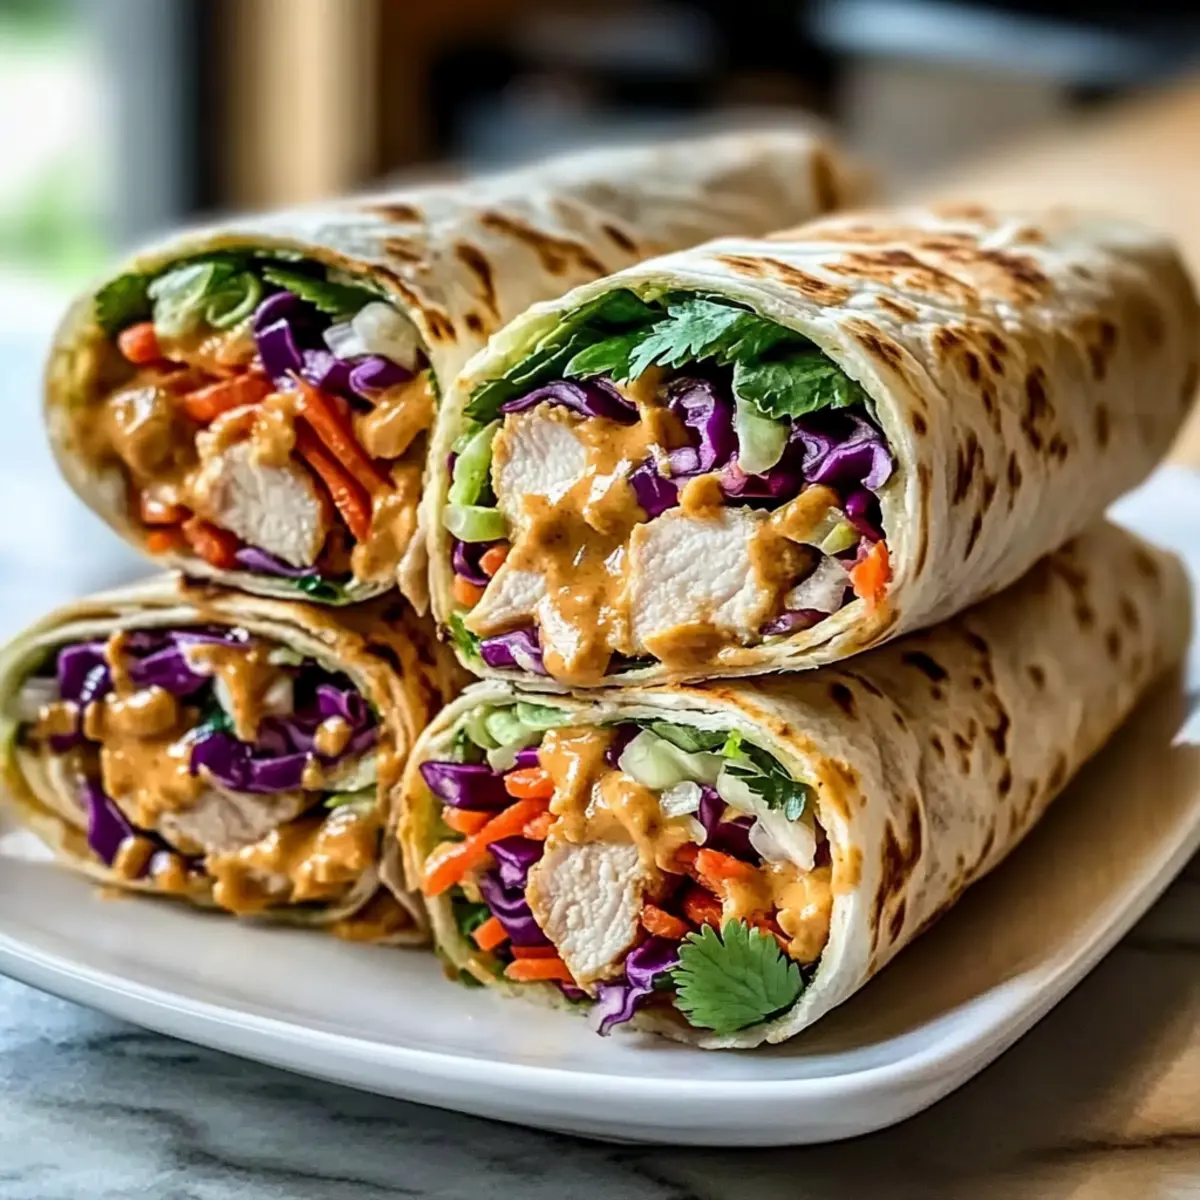
Cut each wrap diagonally in half to showcase the colorful filling, and arrange them on a platter for an inviting presentation. If desired, serve the Thai Peanut Chicken Wraps with extra peanut sauce on the side for dipping to enhance the experience. They’re ready to enjoy with loved ones!
Storage Tips for Thai Peanut Chicken Wraps
- Fridge: Store the filling and tortillas separately in airtight containers for up to 3 days to maintain freshness and prevent sogginess.
- Freezer: Wrap the fillings tightly in plastic wrap or a freezer-safe container for up to 2 months. Thaw in the refrigerator overnight before use.
- Reheating: Reheat the filling gently on the stove or microwave. Warm tortillas just before assembling to ensure a delightful texture in your Thai Peanut Chicken Wraps.
- Assembly Tip: For the best taste, assemble the wraps just before serving, allowing for a crisp tortilla and fresh, flavorful filling.
Expert Tips for Thai Peanut Chicken Wraps
- Peanut Butter Choice: Use natural peanut butter for a smoother texture and richer flavor, avoiding brands with added sugars or oils.
- Customize Fillings: Don’t hesitate to mix in leftover proteins or whatever veggies you have at home; this flexibility makes these wraps even more enjoyable.
- Wrap Smartly: Warm tortillas before assembling to prevent tearing; it makes wrapping easier and ensures everything stays together beautifully.
- Flavor Intensifier: Allow the dressed filling to sit for a few minutes to enhance flavors; this step is crucial for maximizing taste in your Thai Peanut Chicken Wraps.
- Spice Control: Adjust the amount of sriracha based on your family’s spice tolerance; it’s an easy way to cater to different palates.
- Storage Tip: If you plan to make ahead, keep the filling and tortillas separate in the fridge; assemble just before serving to maintain freshness.
Variations & Substitutions for Thai Peanut Chicken Wraps
Feel free to let your creativity shine as you customize these wraps to suit your delicious cravings and pantry staples.
- Nut-Free: Swap peanut butter with sunflower seed butter for the same creamy texture without the nuts.
- Veggie-Packed: Add sliced cucumbers, bell peppers, or avocado for extra crunch and color, bringing freshness to each bite.
- Spicy Kick: Incorporate jalapeños or chopped Thai chili for added heat, transforming your wraps into a flavor-packed explosion.
- Vegan Delight: Replace chicken with marinated tofu and use maple syrup instead of honey to create a plant-based version everyone can enjoy.
- Low-Carb Option: Ditch the tortillas and wrap your filling in large collard greens or lettuces for a satisfying, guilt-free meal.
- Add Fresh Herbs: Garnish with fresh mint or basil for a vibrant flavor lift that complements the peanut sauce beautifully.
- Make it Crunchy: Sprinkle crispy fried onions on top before wrapping for an unexpected texture that elevates the experience.
- Asian Fusion: Pair with a side of my Crockpot Coconut Chicken for a complete, flavorful meal that brings a touch of comfort to your dinner table.
These variations not only add creativity to your Thai Peanut Chicken Wraps but also enhance the flavor profile, ensuring every bite remains exciting and fulfilling!
Make Ahead Options
These Thai Peanut Chicken Wraps are perfect for meal prep enthusiasts! You can prepare the peanut dressing and filling up to 3 days in advance, storing them in separate airtight containers in the refrigerator to maintain freshness and prevent sogginess. Simply mix the dressing and toss it with the filling before serving to ensure the flavors are vibrant. For best results, warm the tortillas just before assembling, as this prevents cracking and keeps them soft. When you’re ready to enjoy your wraps, it takes just a few minutes to put everything together, providing you with delicious, homemade meals with minimal effort on busy weeknights!
What to Serve with Thai Peanut Chicken Wraps
Elevate your meal by pairing these delightful wraps with sides that accentuate their vibrant flavors and textures.
- Crispy Sweet Potato Fries: The sweetness and crunch perfectly balance the savory and spicy flavors of the wraps.
- Fresh Cucumber Salad: This light and refreshing salad adds a cool contrast and a delightful crunch alongside the wraps.
- Sesame Noodle Salad: Tossed with a zesty dressing, this dish complements the peanut sauce and rounds out your meal beautifully.
- Steamed Edamame: Simple and nutritious, the light saltiness of edamame makes for an excellent protein-rich snack to enjoy with the wraps.
- Mango Sticky Rice: For a touch of sweetness, this classic Thai dessert adds a warm, comforting finish to your meal.
- Thai Iced Tea: The rich, creamy flavors of this beverage balance the spicy elements of the wraps, making it a perfect drink choice.
Each pairing enhances the Thai Peanut Chicken Wraps, delivering a vibrant dining experience that will leave everyone satisfied!
Thai Peanut Chicken Wraps Recipe FAQs
What type of peanut butter should I use?
Absolutely! For the best texture and flavor, I recommend using natural, creamy peanut butter. Avoid brands with added sugars or oils, as they can affect the outcome of the peanut dressing.
How should I store leftover Thai Peanut Chicken Wraps?
You should store the filling and tortillas separately in airtight containers in the fridge for up to 3 days. This method ensures the tortillas don’t get soggy and the flavors of the filling remain fresh. When you’re ready to enjoy them again, just reheat the filling gently and warm the tortillas before assembling.
Can I freeze the filling for later use?
Yes, you can! Wrap the filled mixture tightly in plastic wrap or store it in a freezer-safe container and freeze for up to 2 months. To use, thaw it in the refrigerator overnight. When ready, gently reheat on the stove or in the microwave, then warm your tortillas for the best texture.
What if I don’t have fresh ginger? Can I use ground ginger instead?
Very! If you’re out of fresh ginger, you can substitute with ground ginger. Use about 1/4 teaspoon of ground ginger for every teaspoon of fresh ginger. Just remember that the flavor will be more concentrated, so you might want to adjust it to your taste.
Are Thai Peanut Chicken Wraps suitable for those with nut allergies?
Although delicious, these wraps do contain peanuts, which could be problematic for those with nut allergies. If you need a nut-free alternative, consider using sunflower seed butter or tahini to create a similarly rich dressing.
How can I make these wraps lower in carbohydrates?
The more the merrier! For a lower-carb option, simply swap the flour tortillas for large lettuce leaves. This keeps the wrap fresh and crunchy while significantly decreasing the carbohydrate count, making it a great choice for a light meal!
Delicious Thai Peanut Chicken Wraps Ready in 30 Minutes
Ingredients
Equipment
Method
- Whisk together peanut butter, soy sauce, brown sugar, rice wine vinegar, minced garlic, and fresh ginger until smooth.
- For a thinner consistency, add a splash of water gradually while mixing.
- In a large bowl, combine chopped chicken, coleslaw mix, grated carrots, and fresh cilantro. Toss gently until well mixed.
- Pour the peanut dressing over the filling mixture and toss until evenly coated. Let it sit for 3-5 minutes.
- Place tortillas on a plate, cover with a damp paper towel, and microwave for about 30 seconds.
- On each warm tortilla, place a scoop of filling in the center, fold sides in, and roll tightly.
- Cut each wrap diagonally, arrange on a platter, and serve with extra peanut sauce.
Leave a Reply